

ADVENT CALENDAR WITH DRIFTWOOD
Give this driftwood advent calendar your personal style, paint it or whitewash it with some chalk paint for a more shabby-chic look. You can use whatever small bags or pouches, ornaments and lights you already have or decorate it in the theme you are going with this year! Just roll it up after the holidays and reuse it with different decorations for years to come!
There’s something about collecting driftwood on the beach, especially when I’m barefoot and the waves gently tickle my toes here and there and I absolutely love it. It brings me totally into the moment and I get to connect to some very old hunter gatherer part of myself losing all sense of time and worries.
Bringing these driftwood treasures into my home and working with them also means bringing a part of nature and a reminder of some time spent on the beach, into my house. That makes me cherish pieces like this Christmas tree advent calendar I made with the gathered driftwood even more.
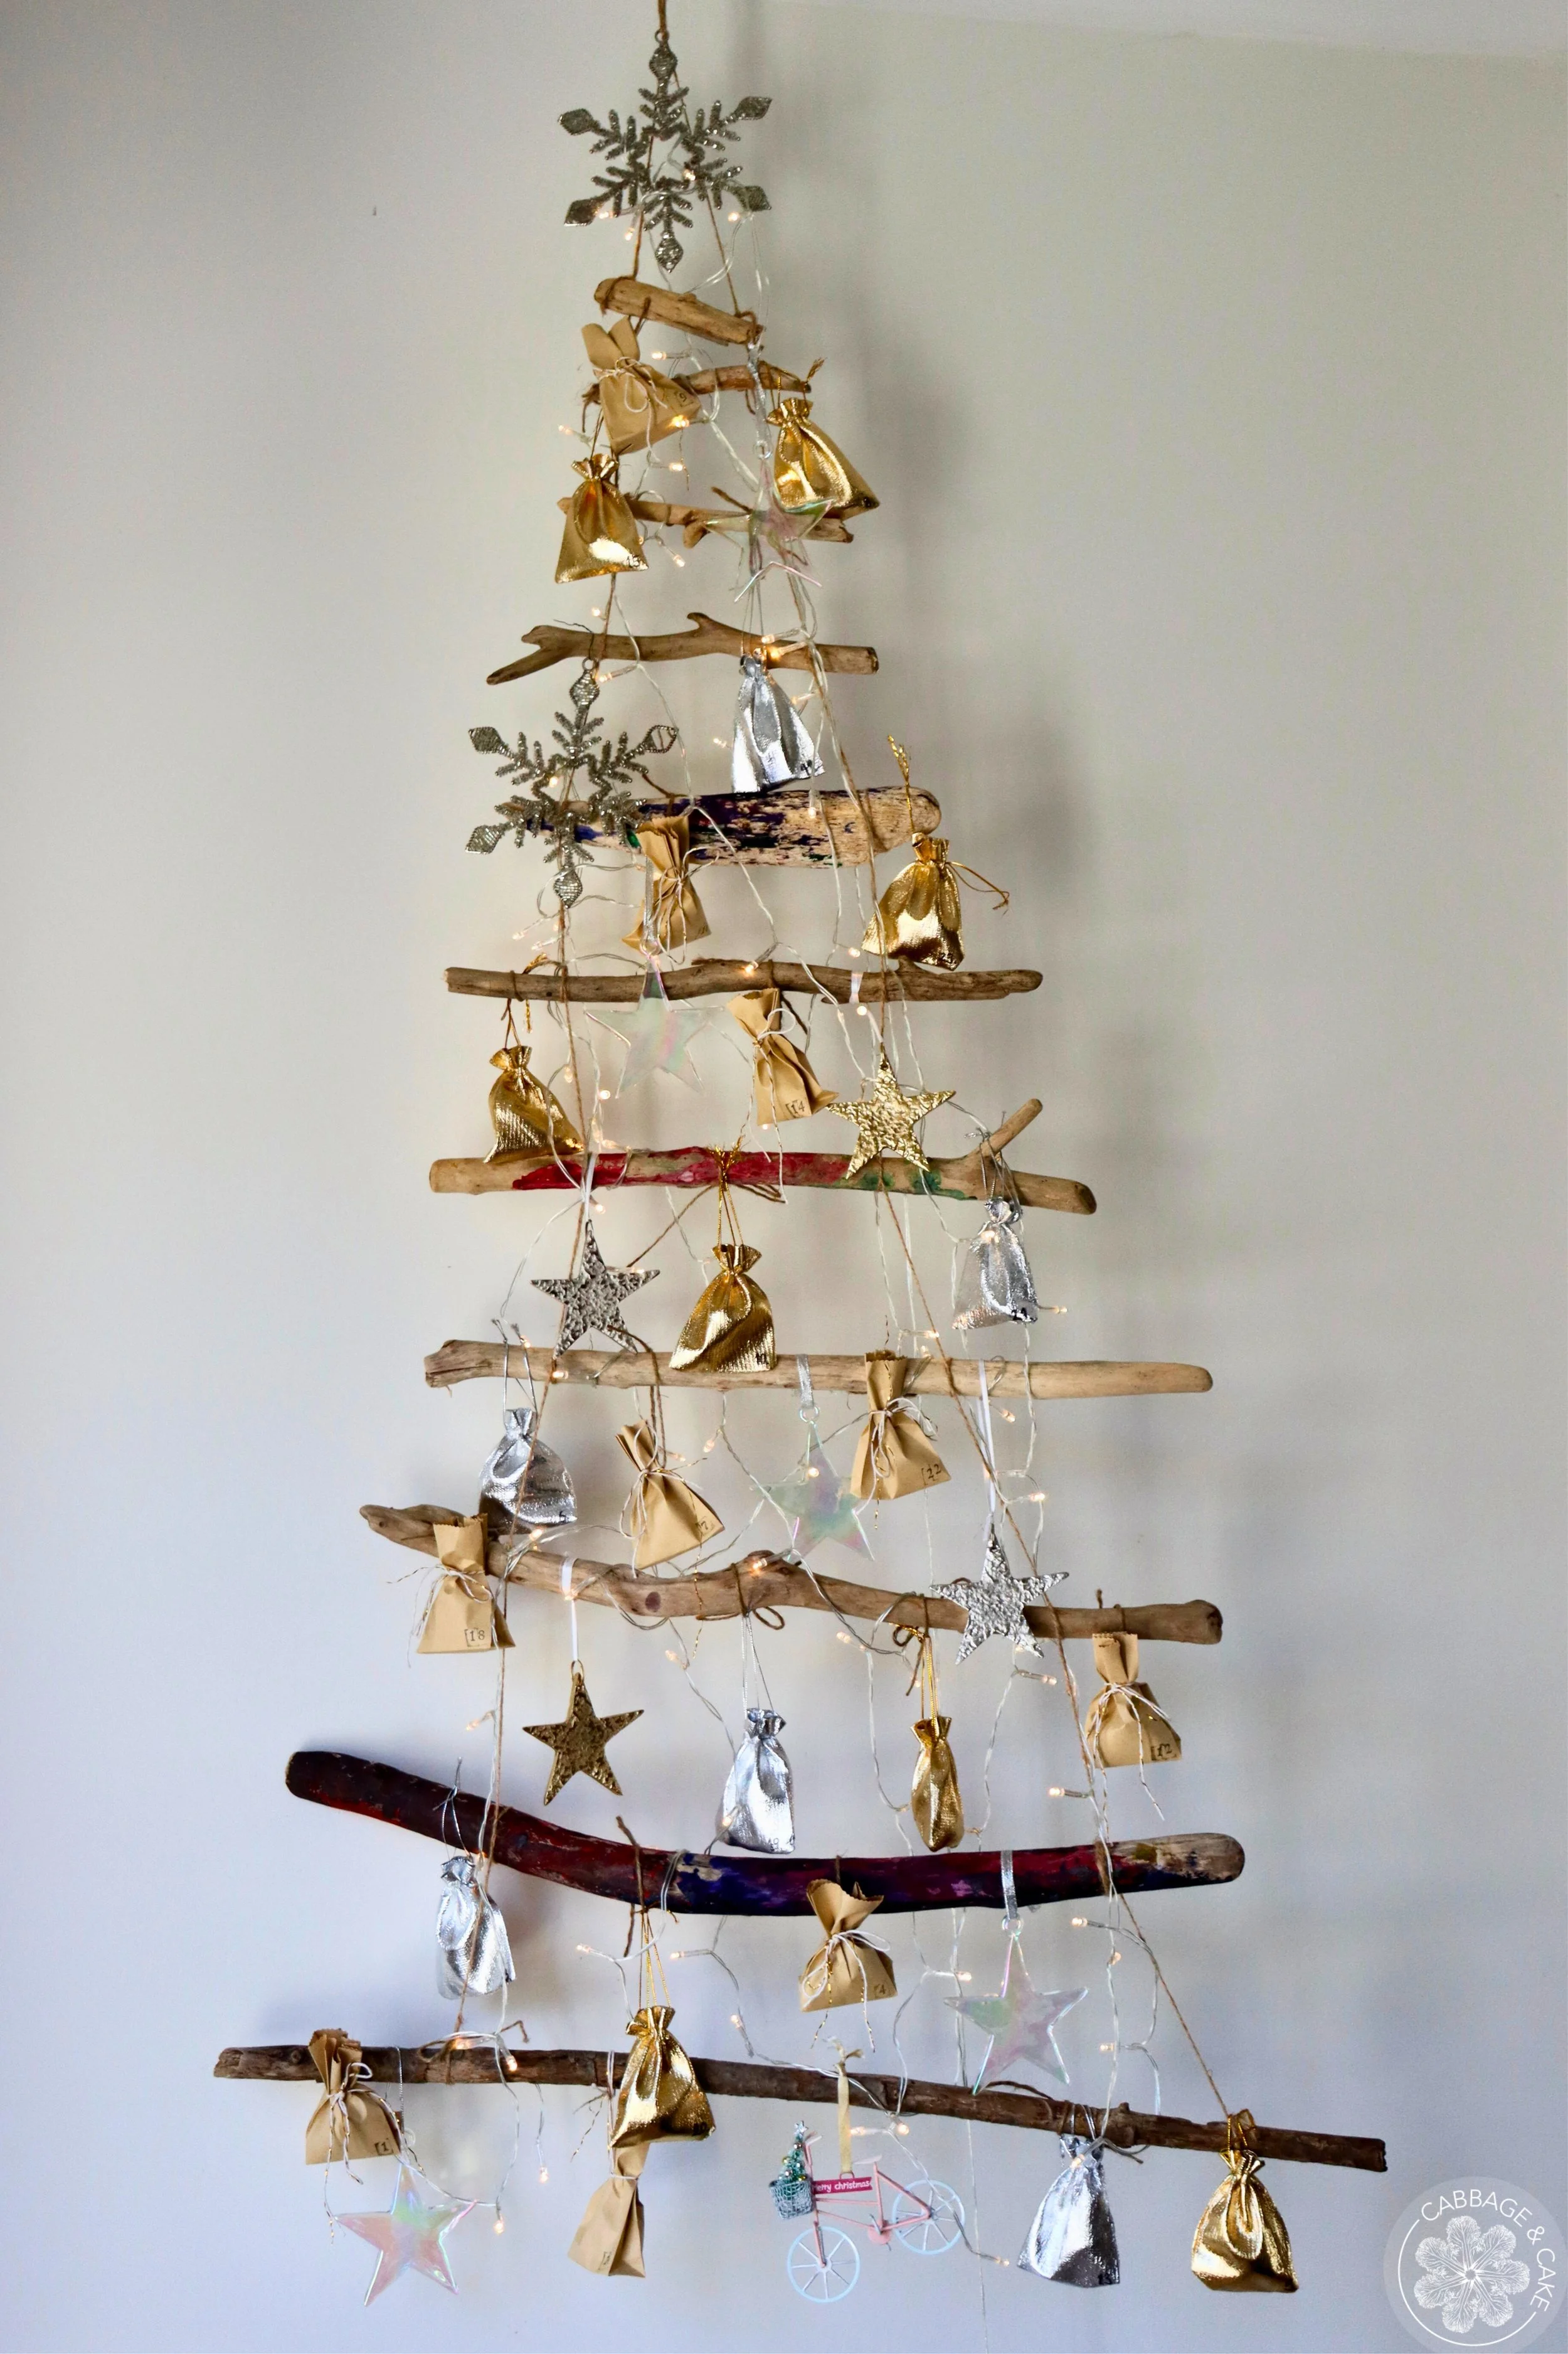
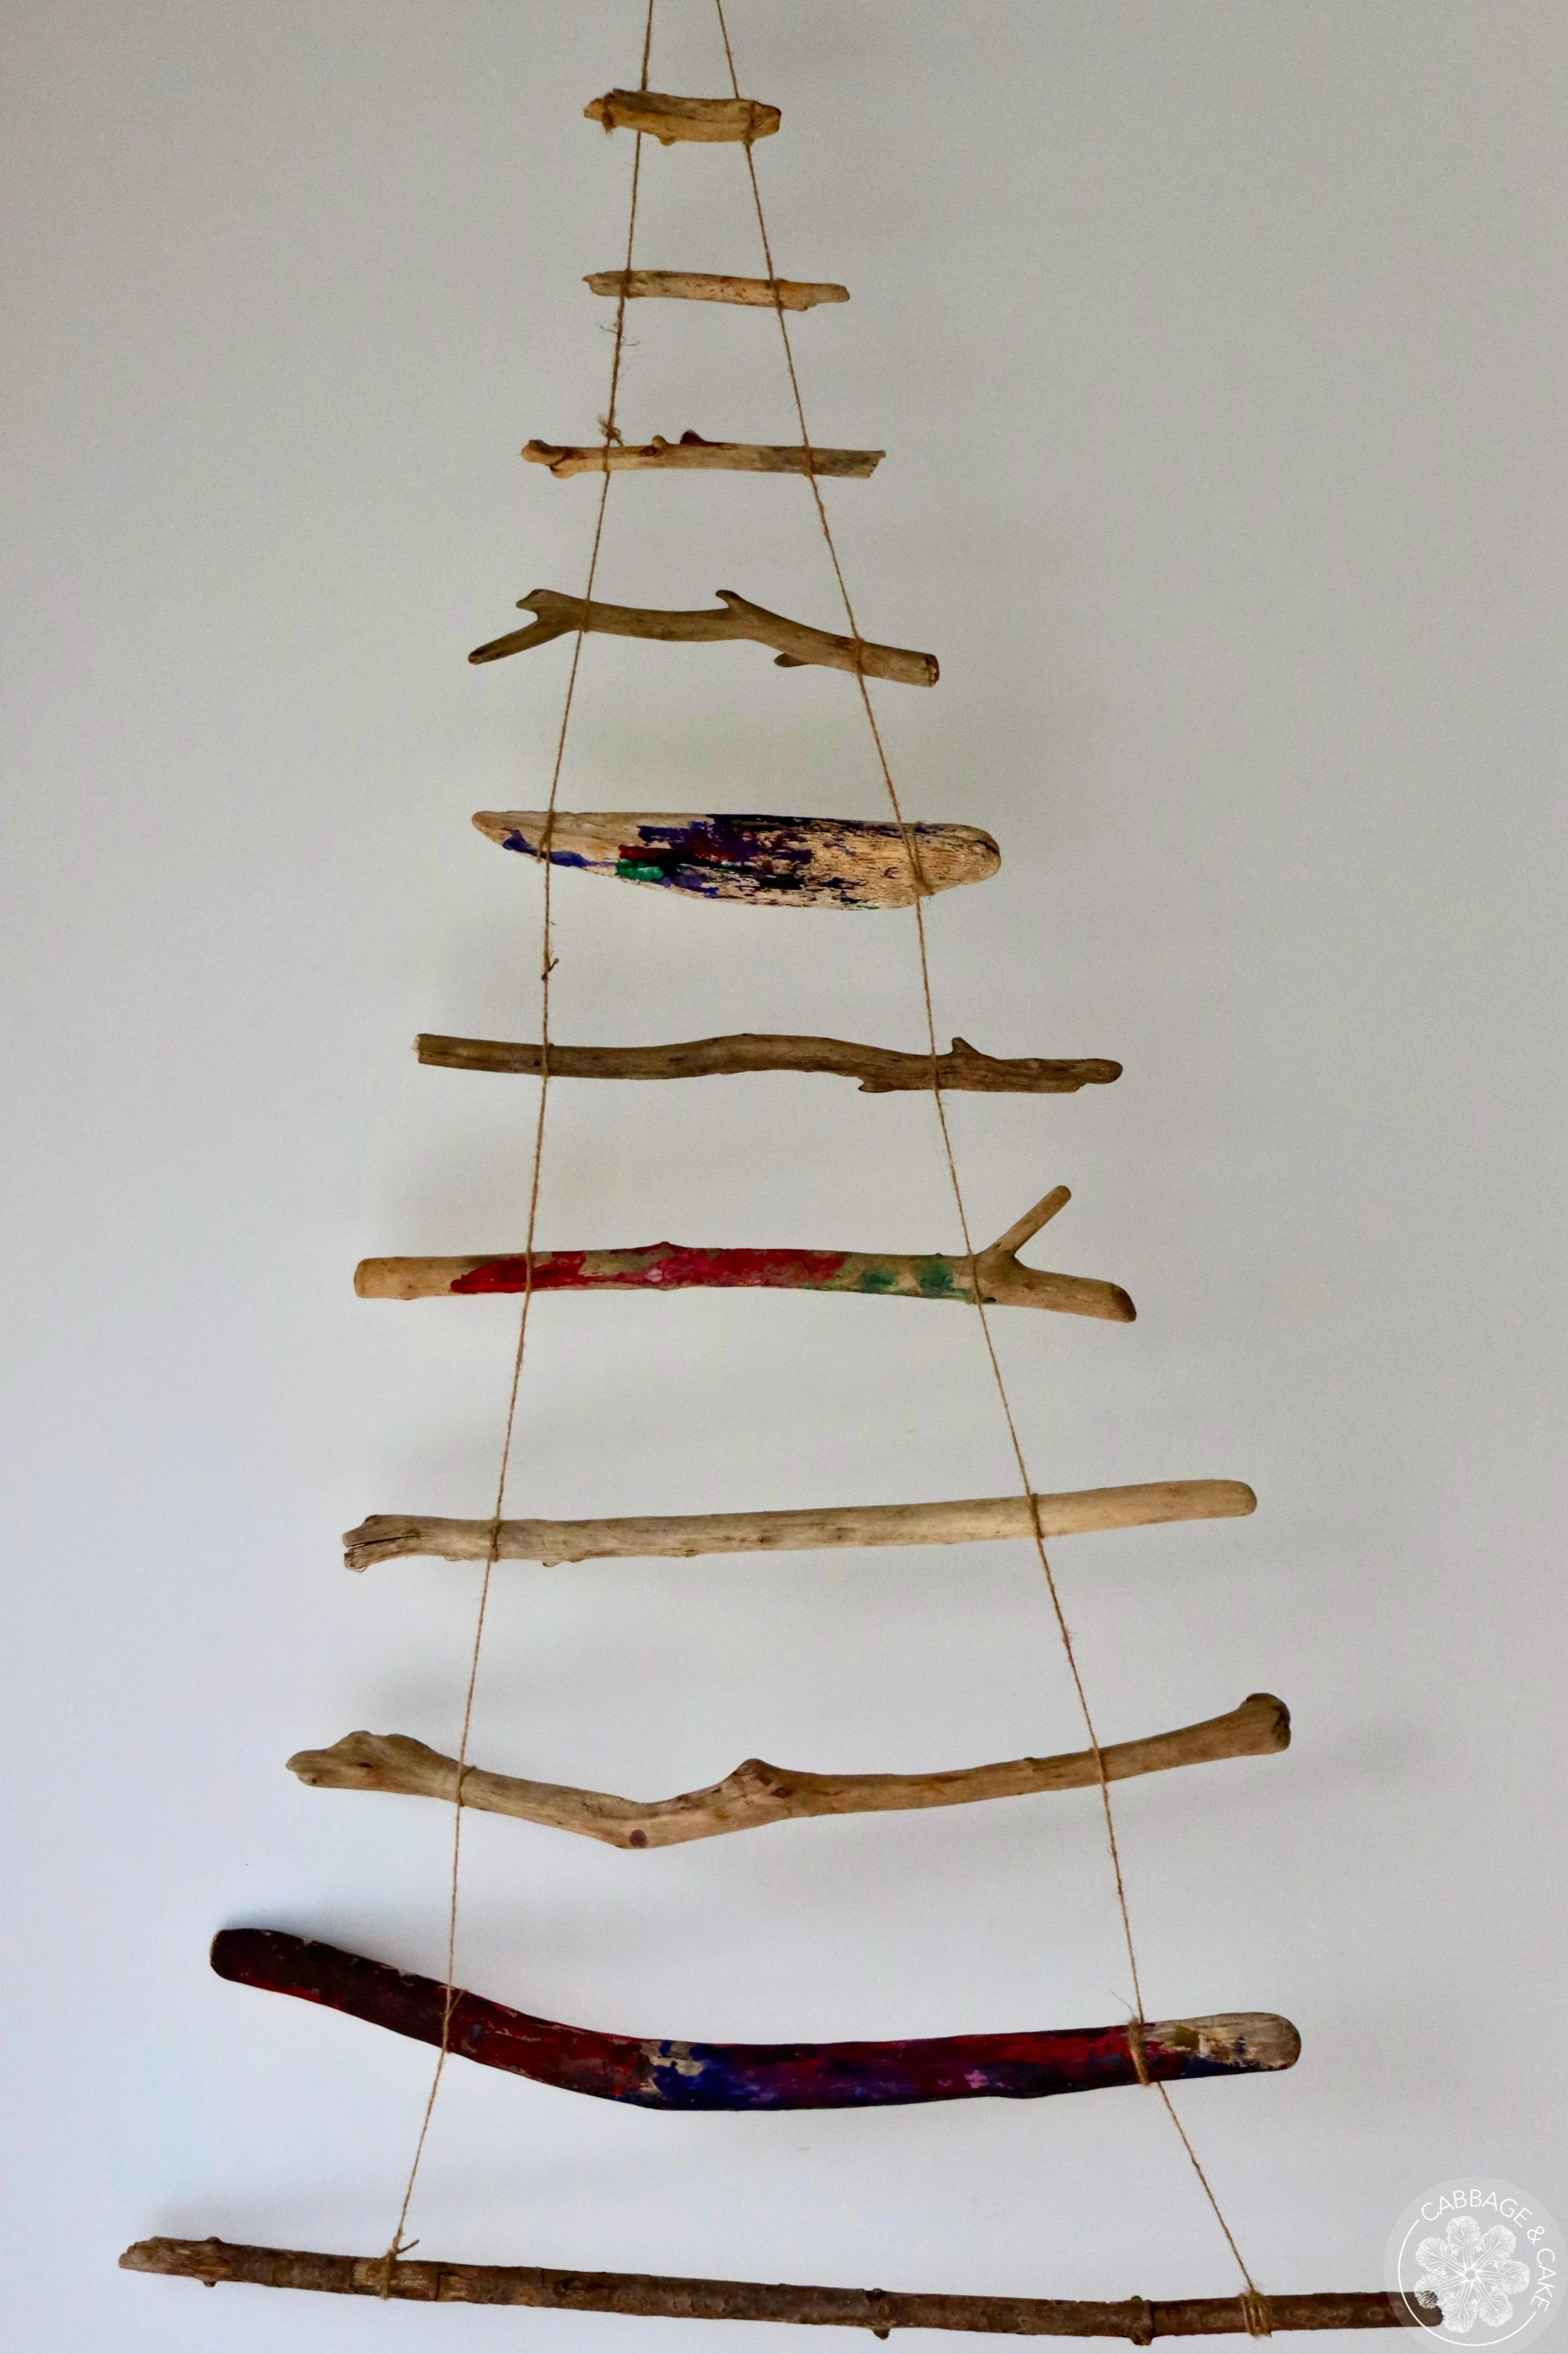
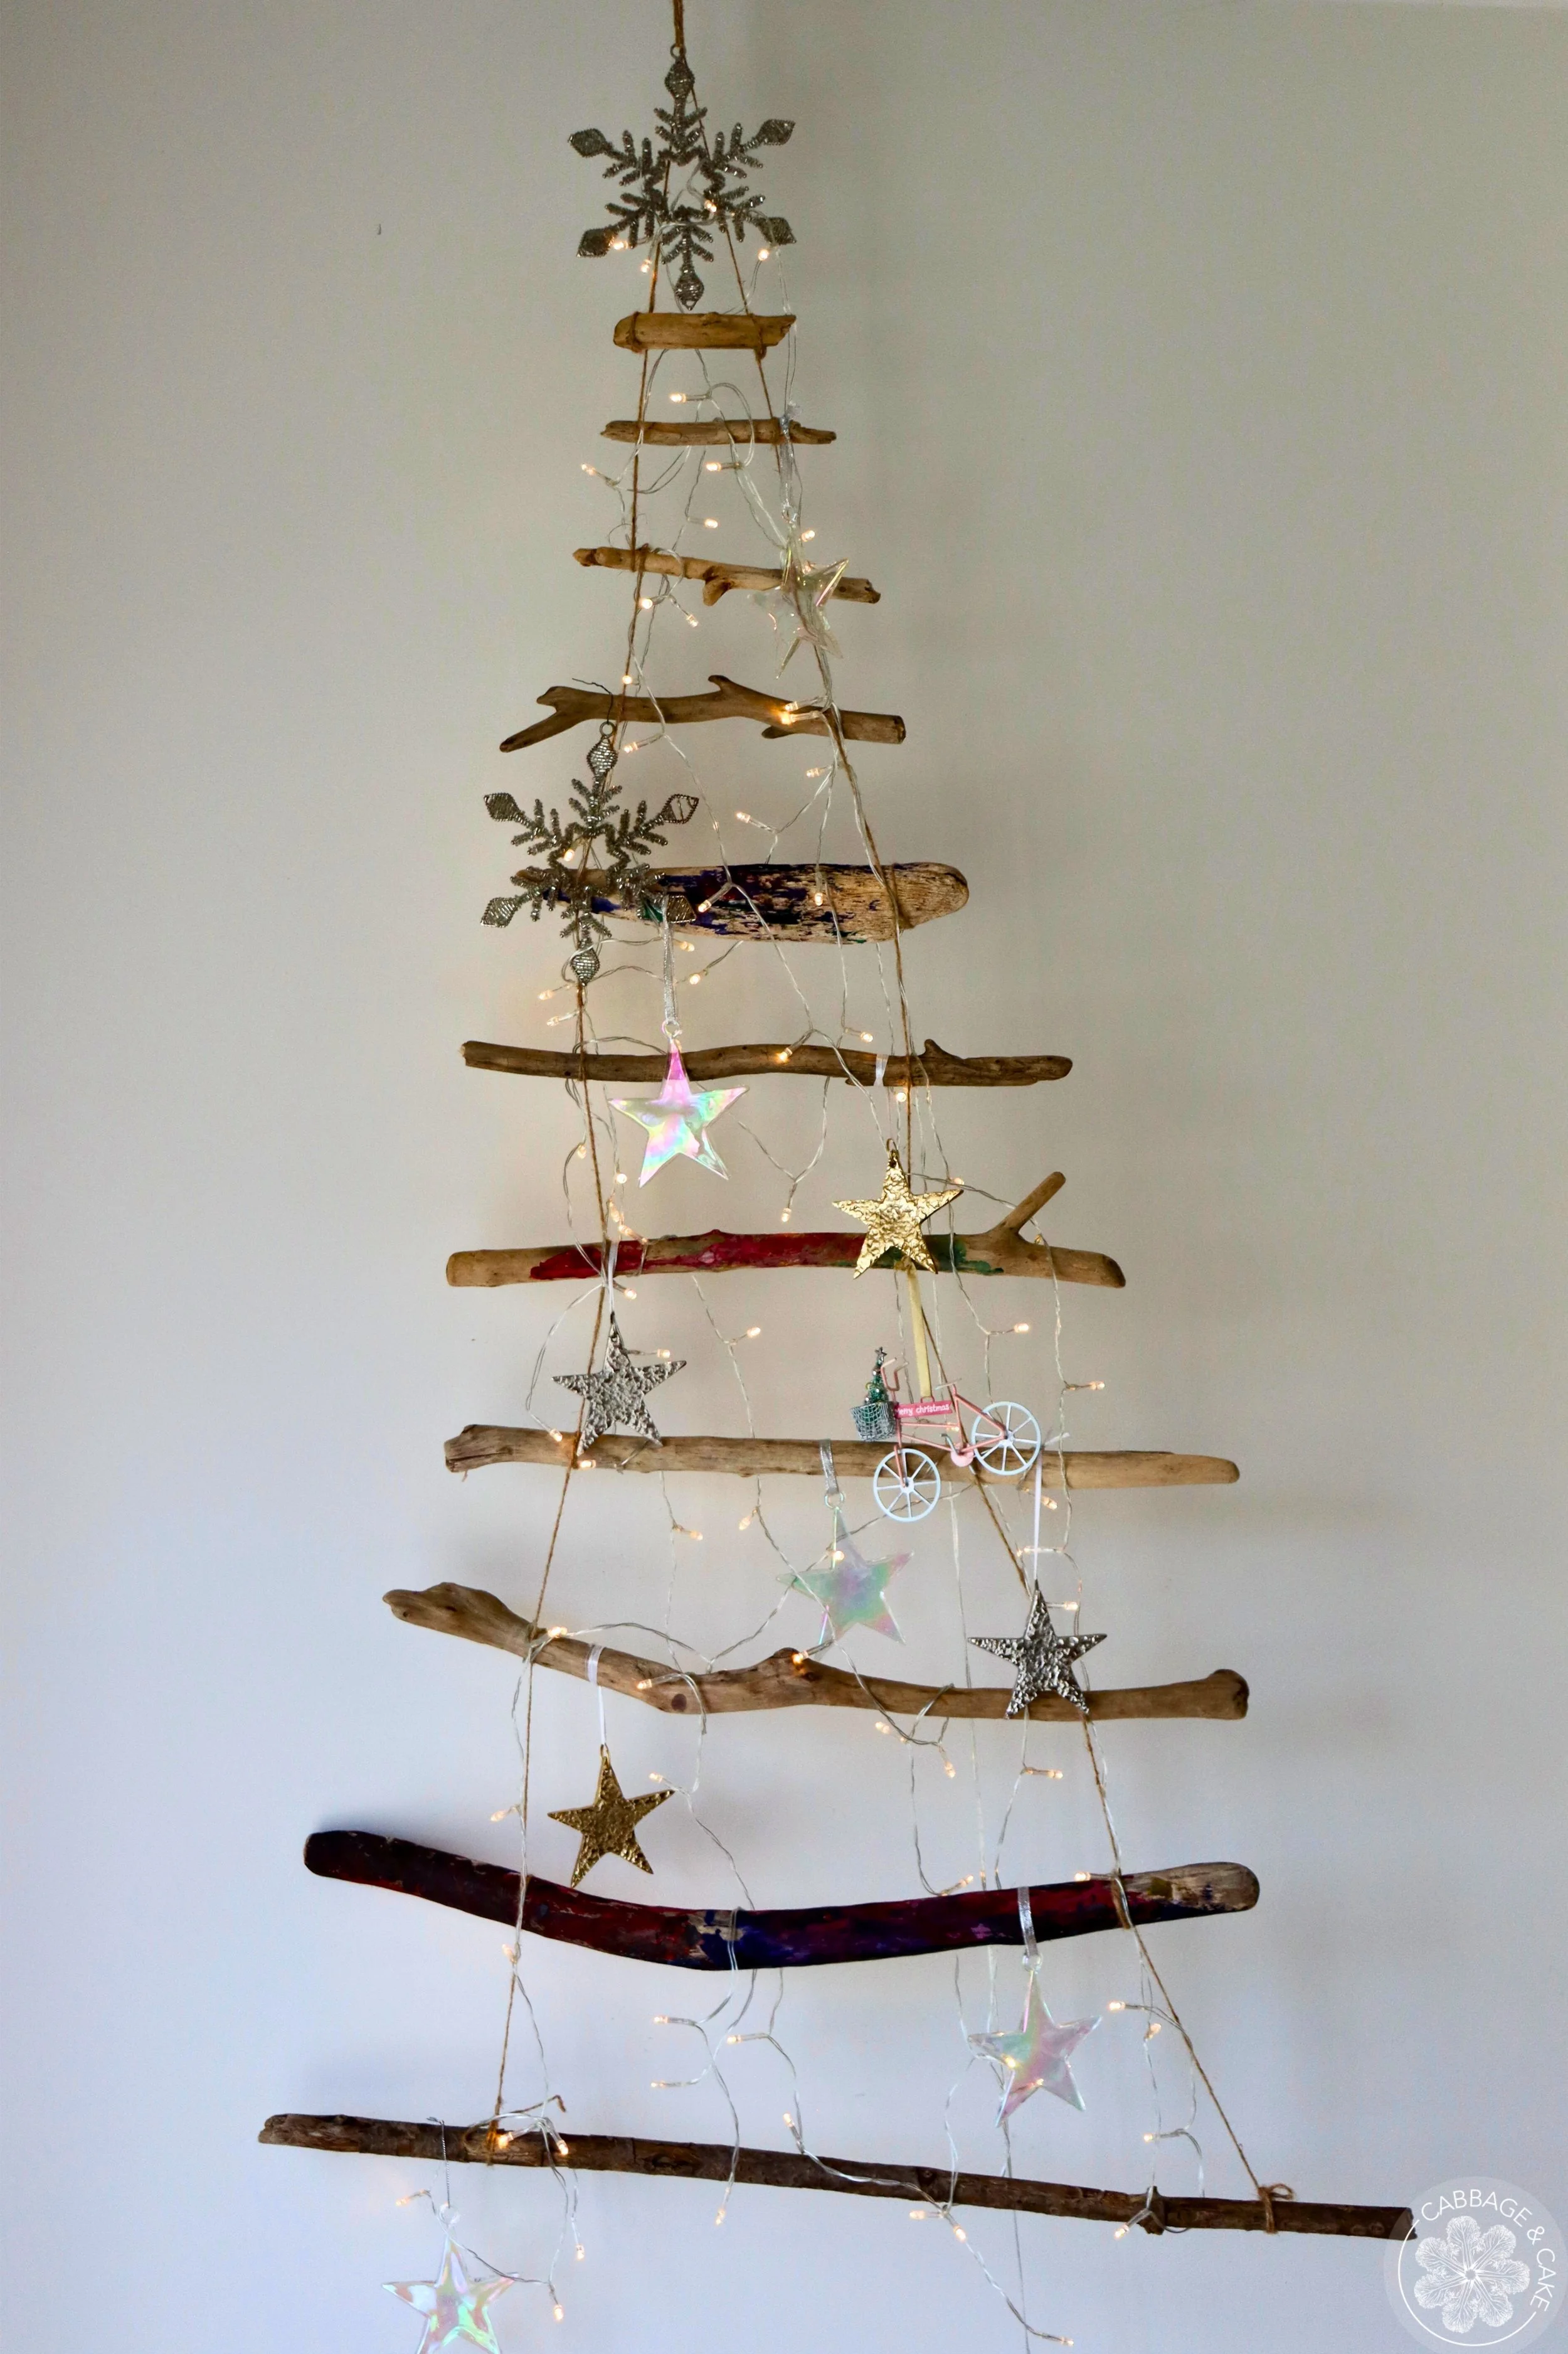
The advent calendar is made from 11 pieces of driftwood of different lengths in the shape of a Christmas tree, connected by twine and decorated with small, numbered pouches and paper bags, lights and some Christmas ornaments which I usually change every year.
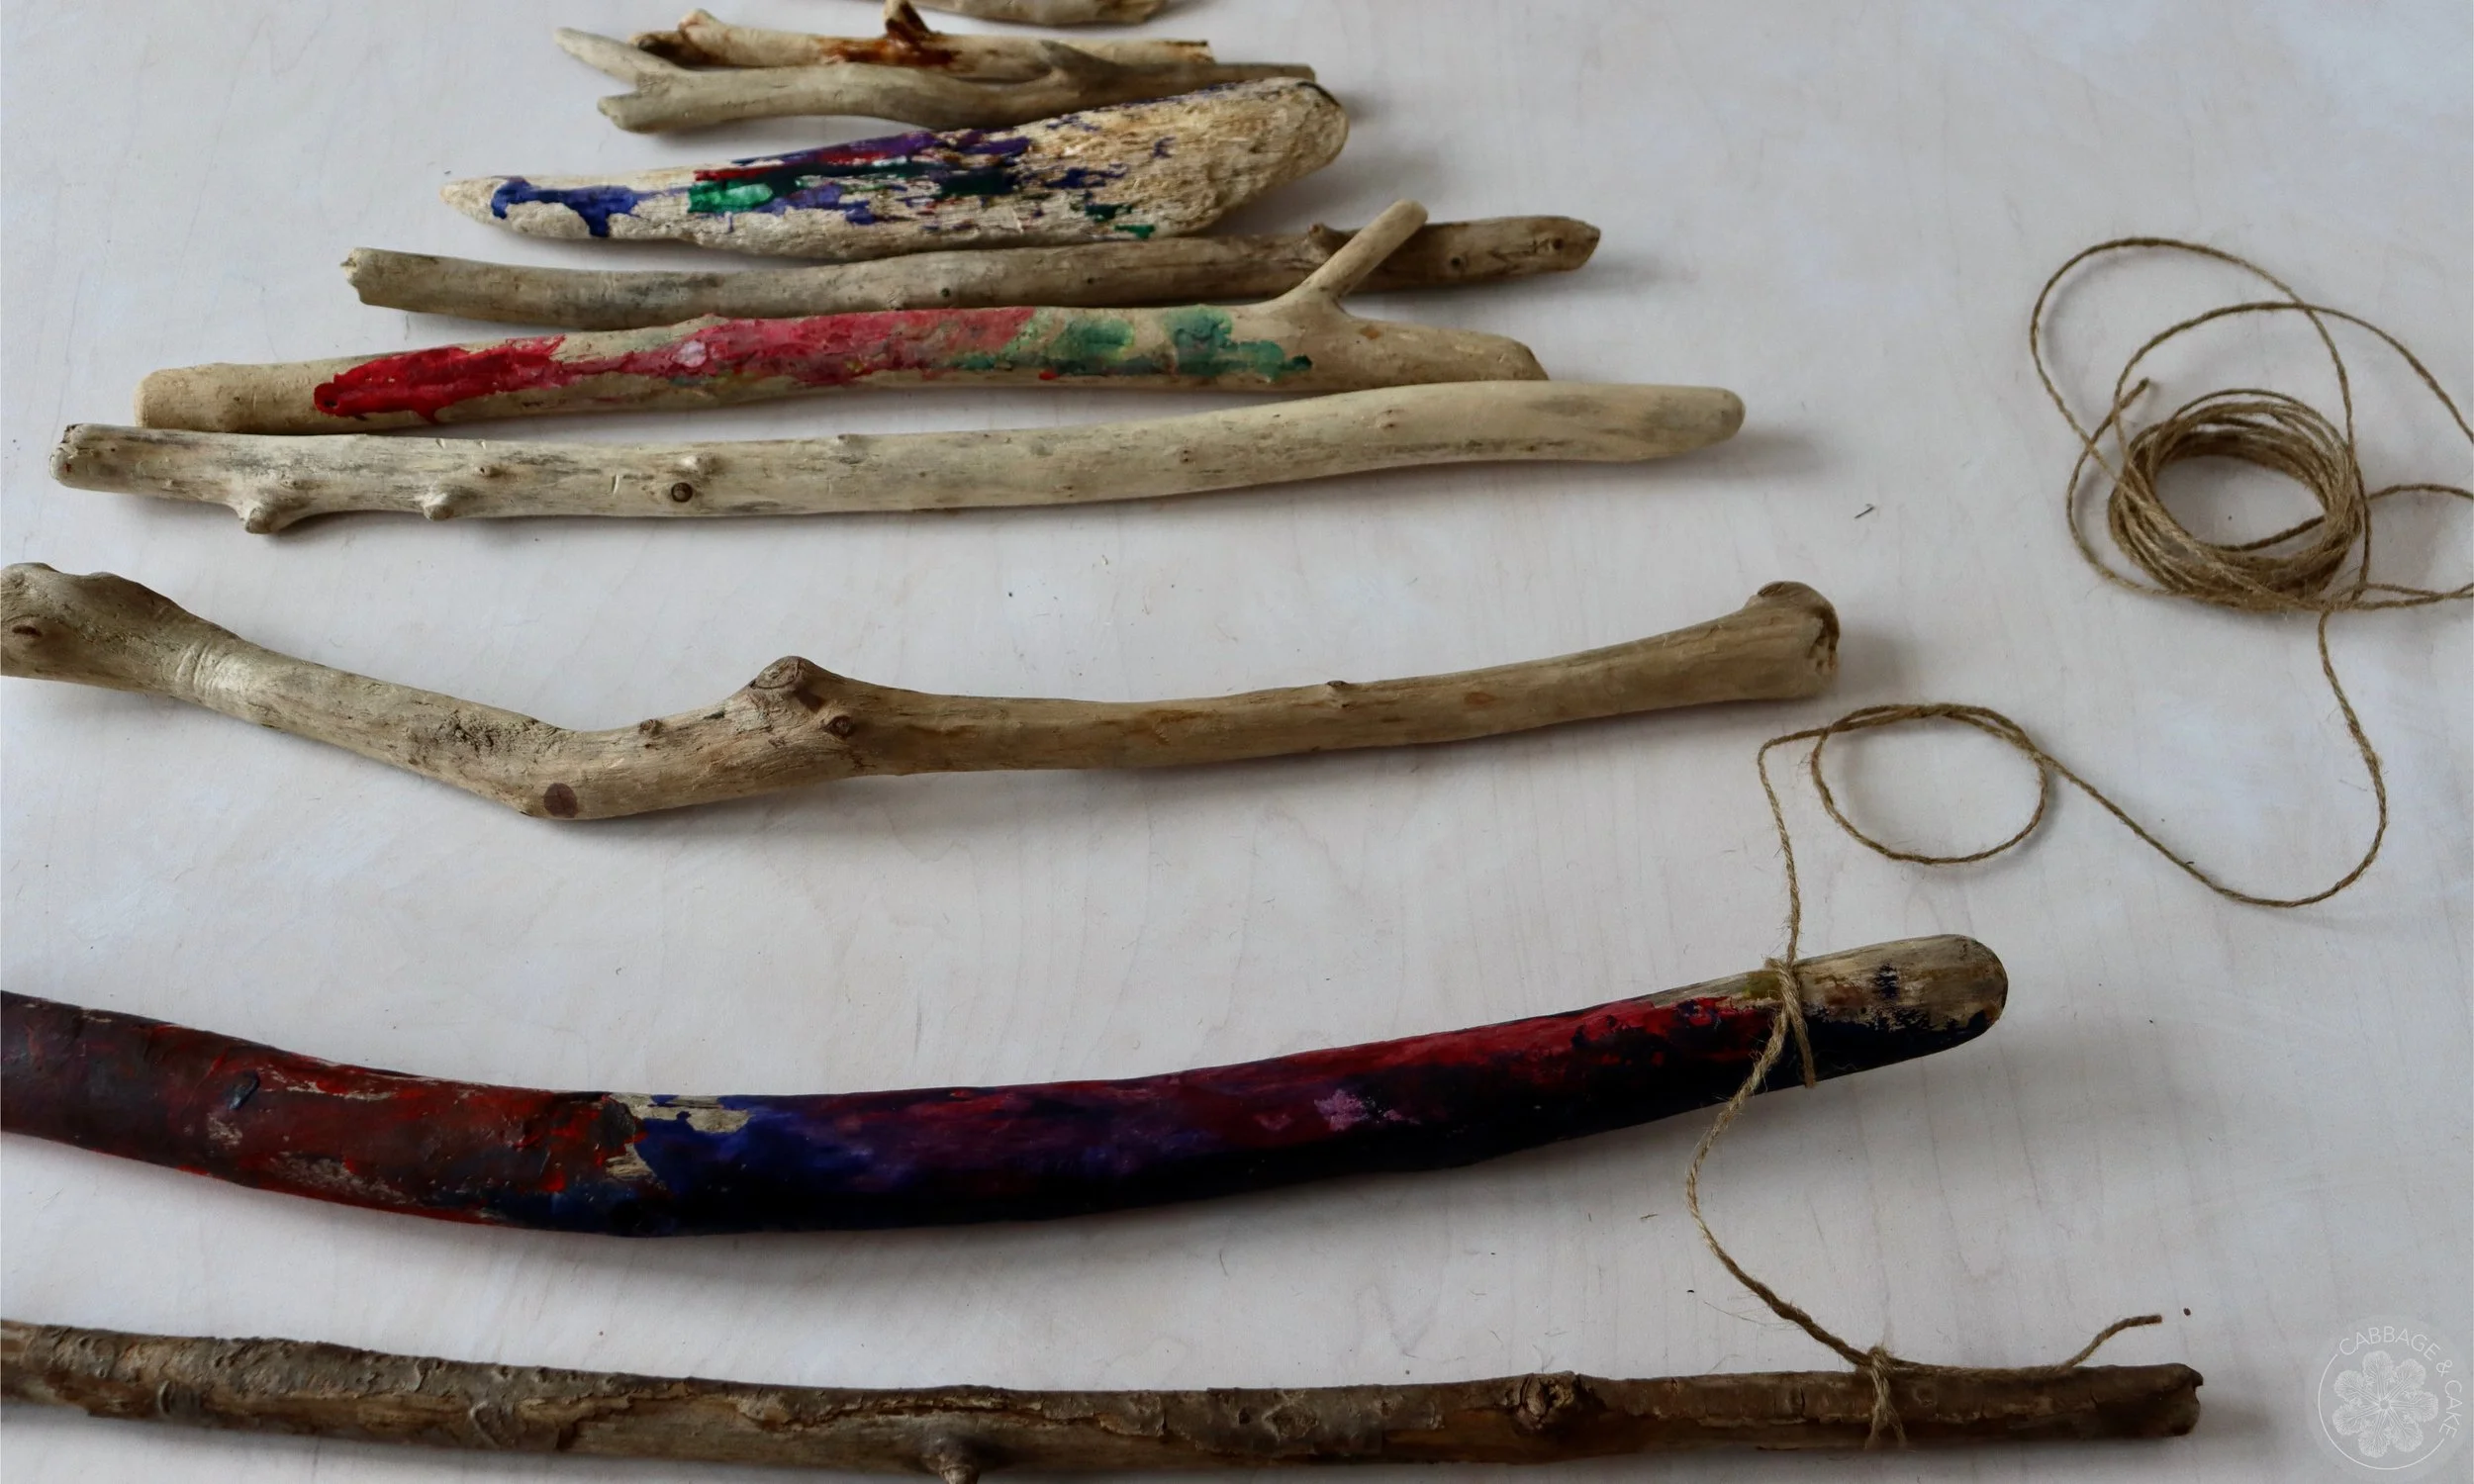
This is a great DIY project to do with and for kids- my toddler decided to paint some of the driftwood halfway through the project and I really like the added pop of colour and the way it turned out.
TIPS TO MAKE THE PERFECT
ADVENT CALENDAR WITH DRIFTWOOD
Follow your artistic instincts and enjoy the creative process. There are a million ways to design and decorate your advent calendar. Go with the flow and reuse paint, lights, pouches, and ornaments you already own.
Clean driftwood for indoor use by rubbing off any debris, boil in water or soak overnight in a bleach solution (1:10 one part bleach, ten parts water), rinse and dry completely,
Lay out your design before you fasten the sticks together to get an idea about its size and shape.
Step back once in a while to examine your project, since it’s easy to get lost in small details and miss the bigger picture.
Keep in mind the tree will get emptier over time when decorating it. I put the ornaments first and add in the small bags later to make sure it will still look decorative on Christmas when all the numbered bags are gone.
MATERIALS YOU WILL NEED
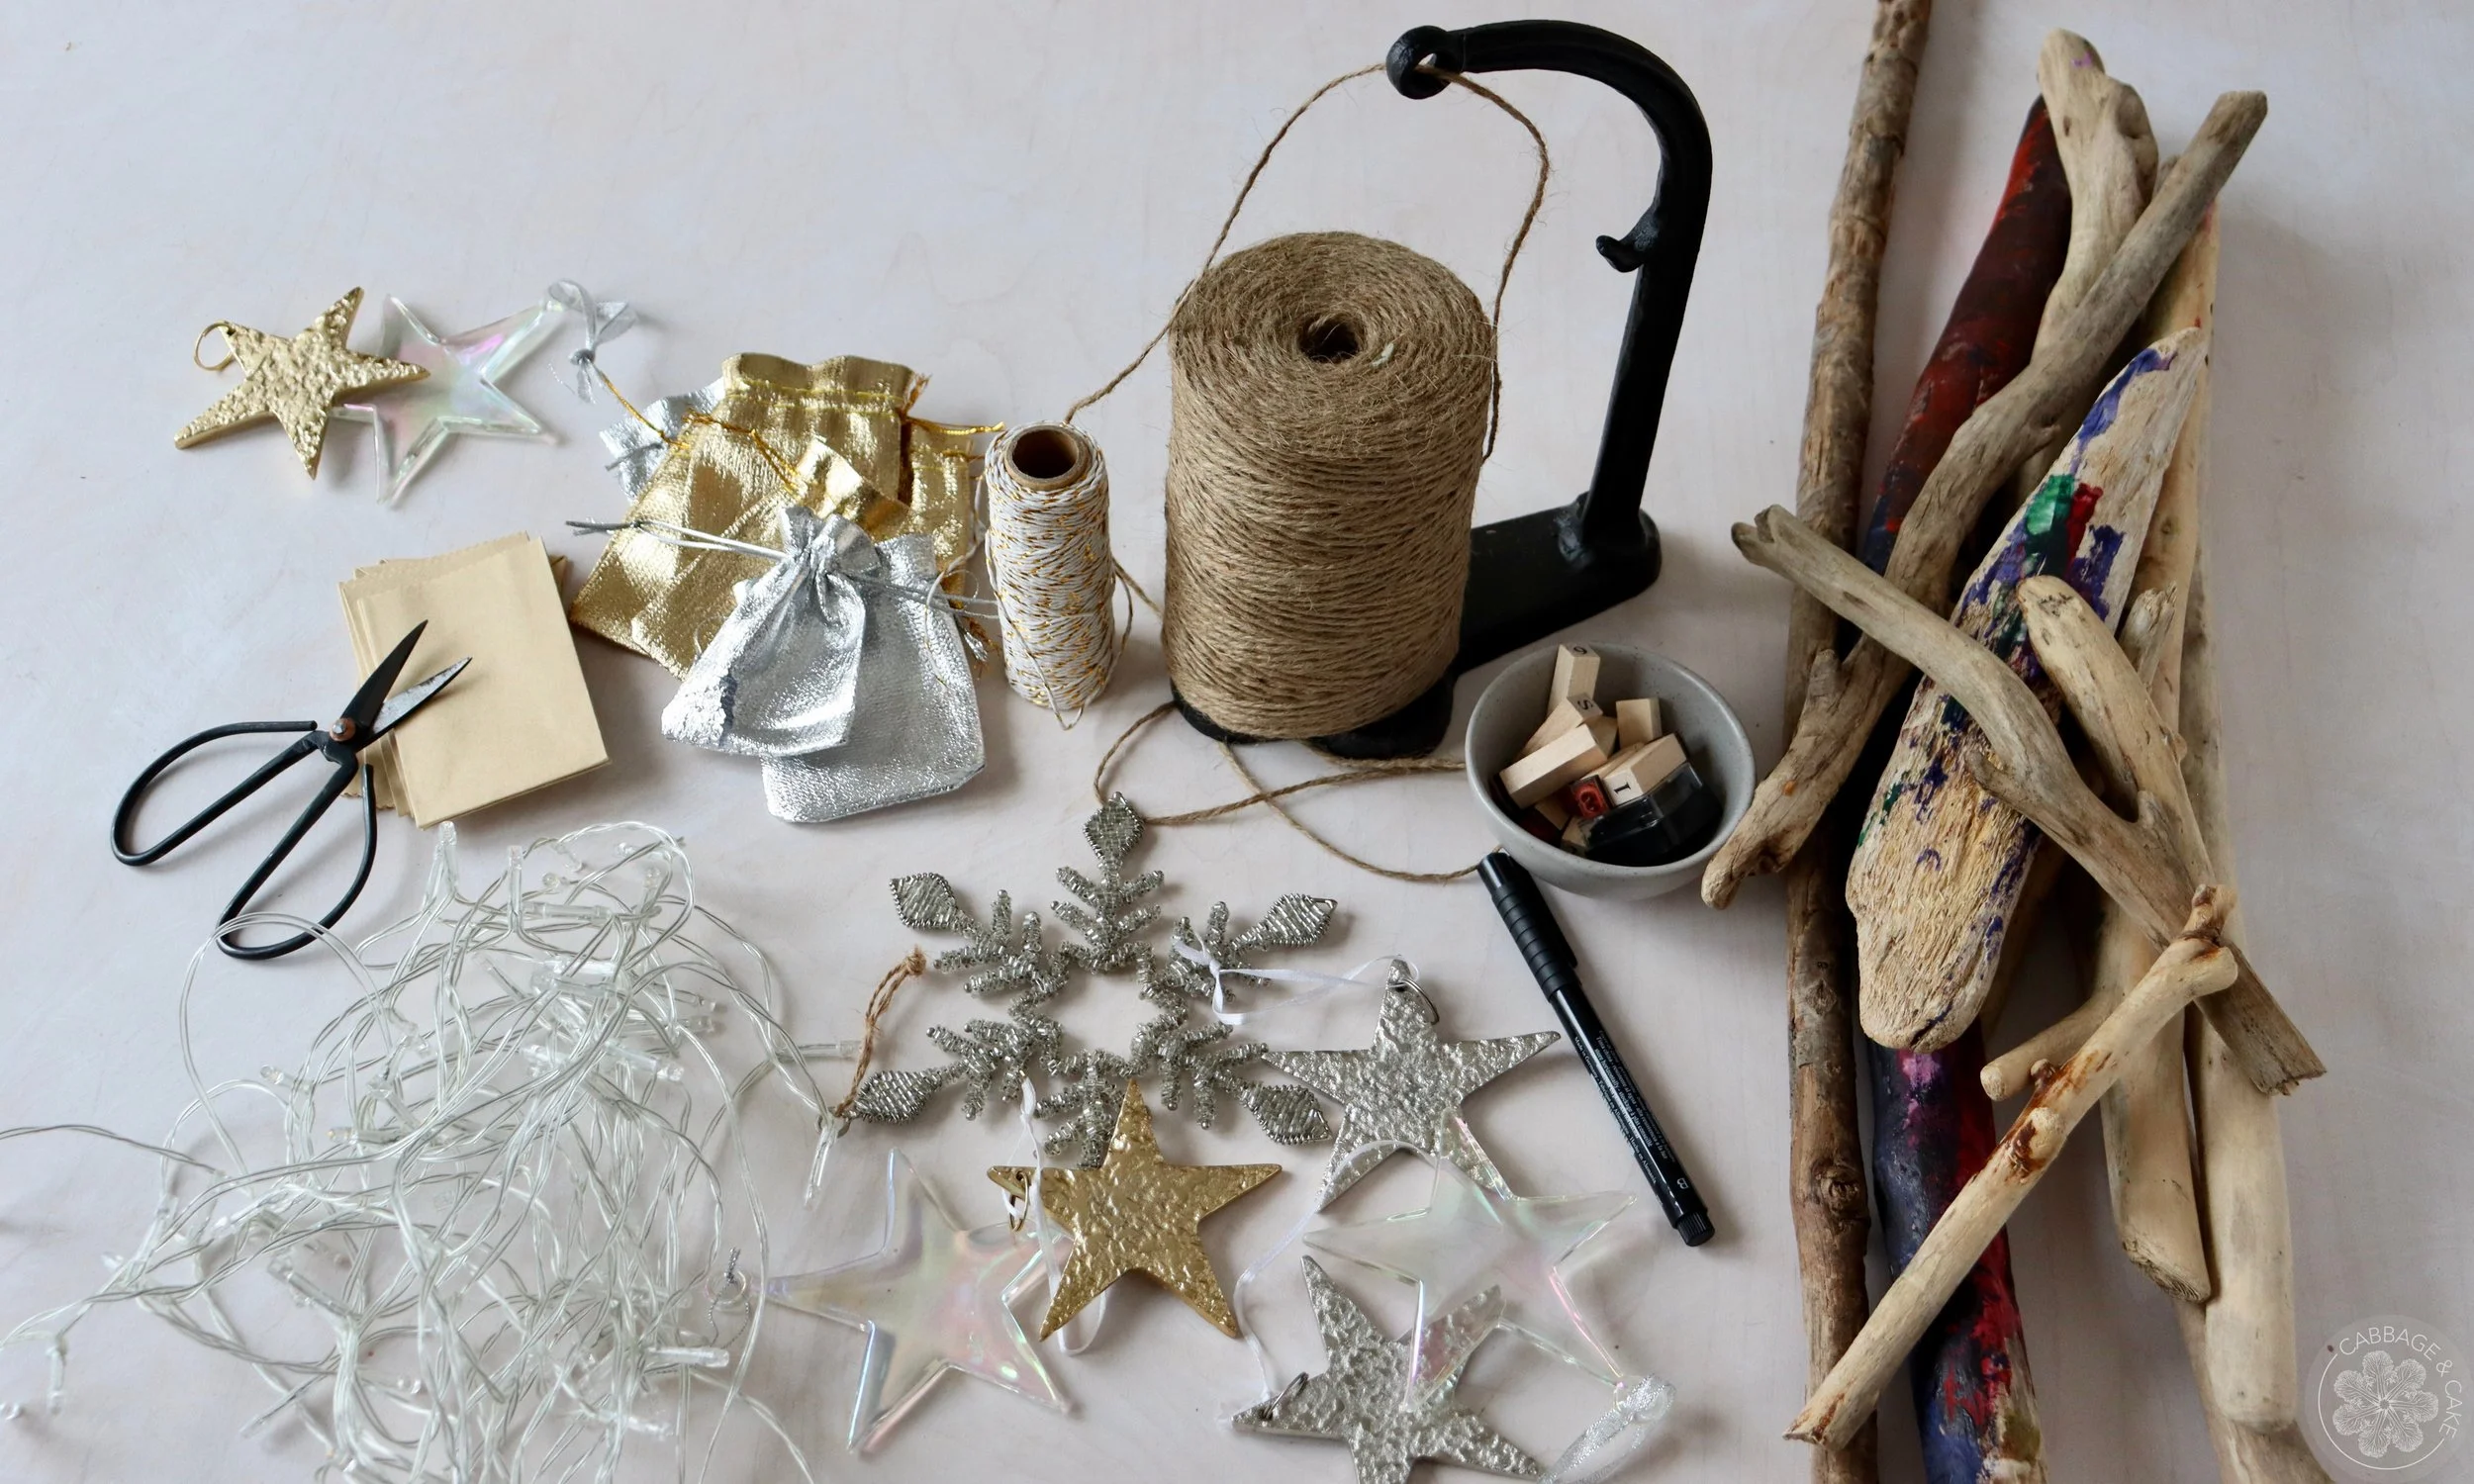
driftwood sticks or branches in different lengths
twine
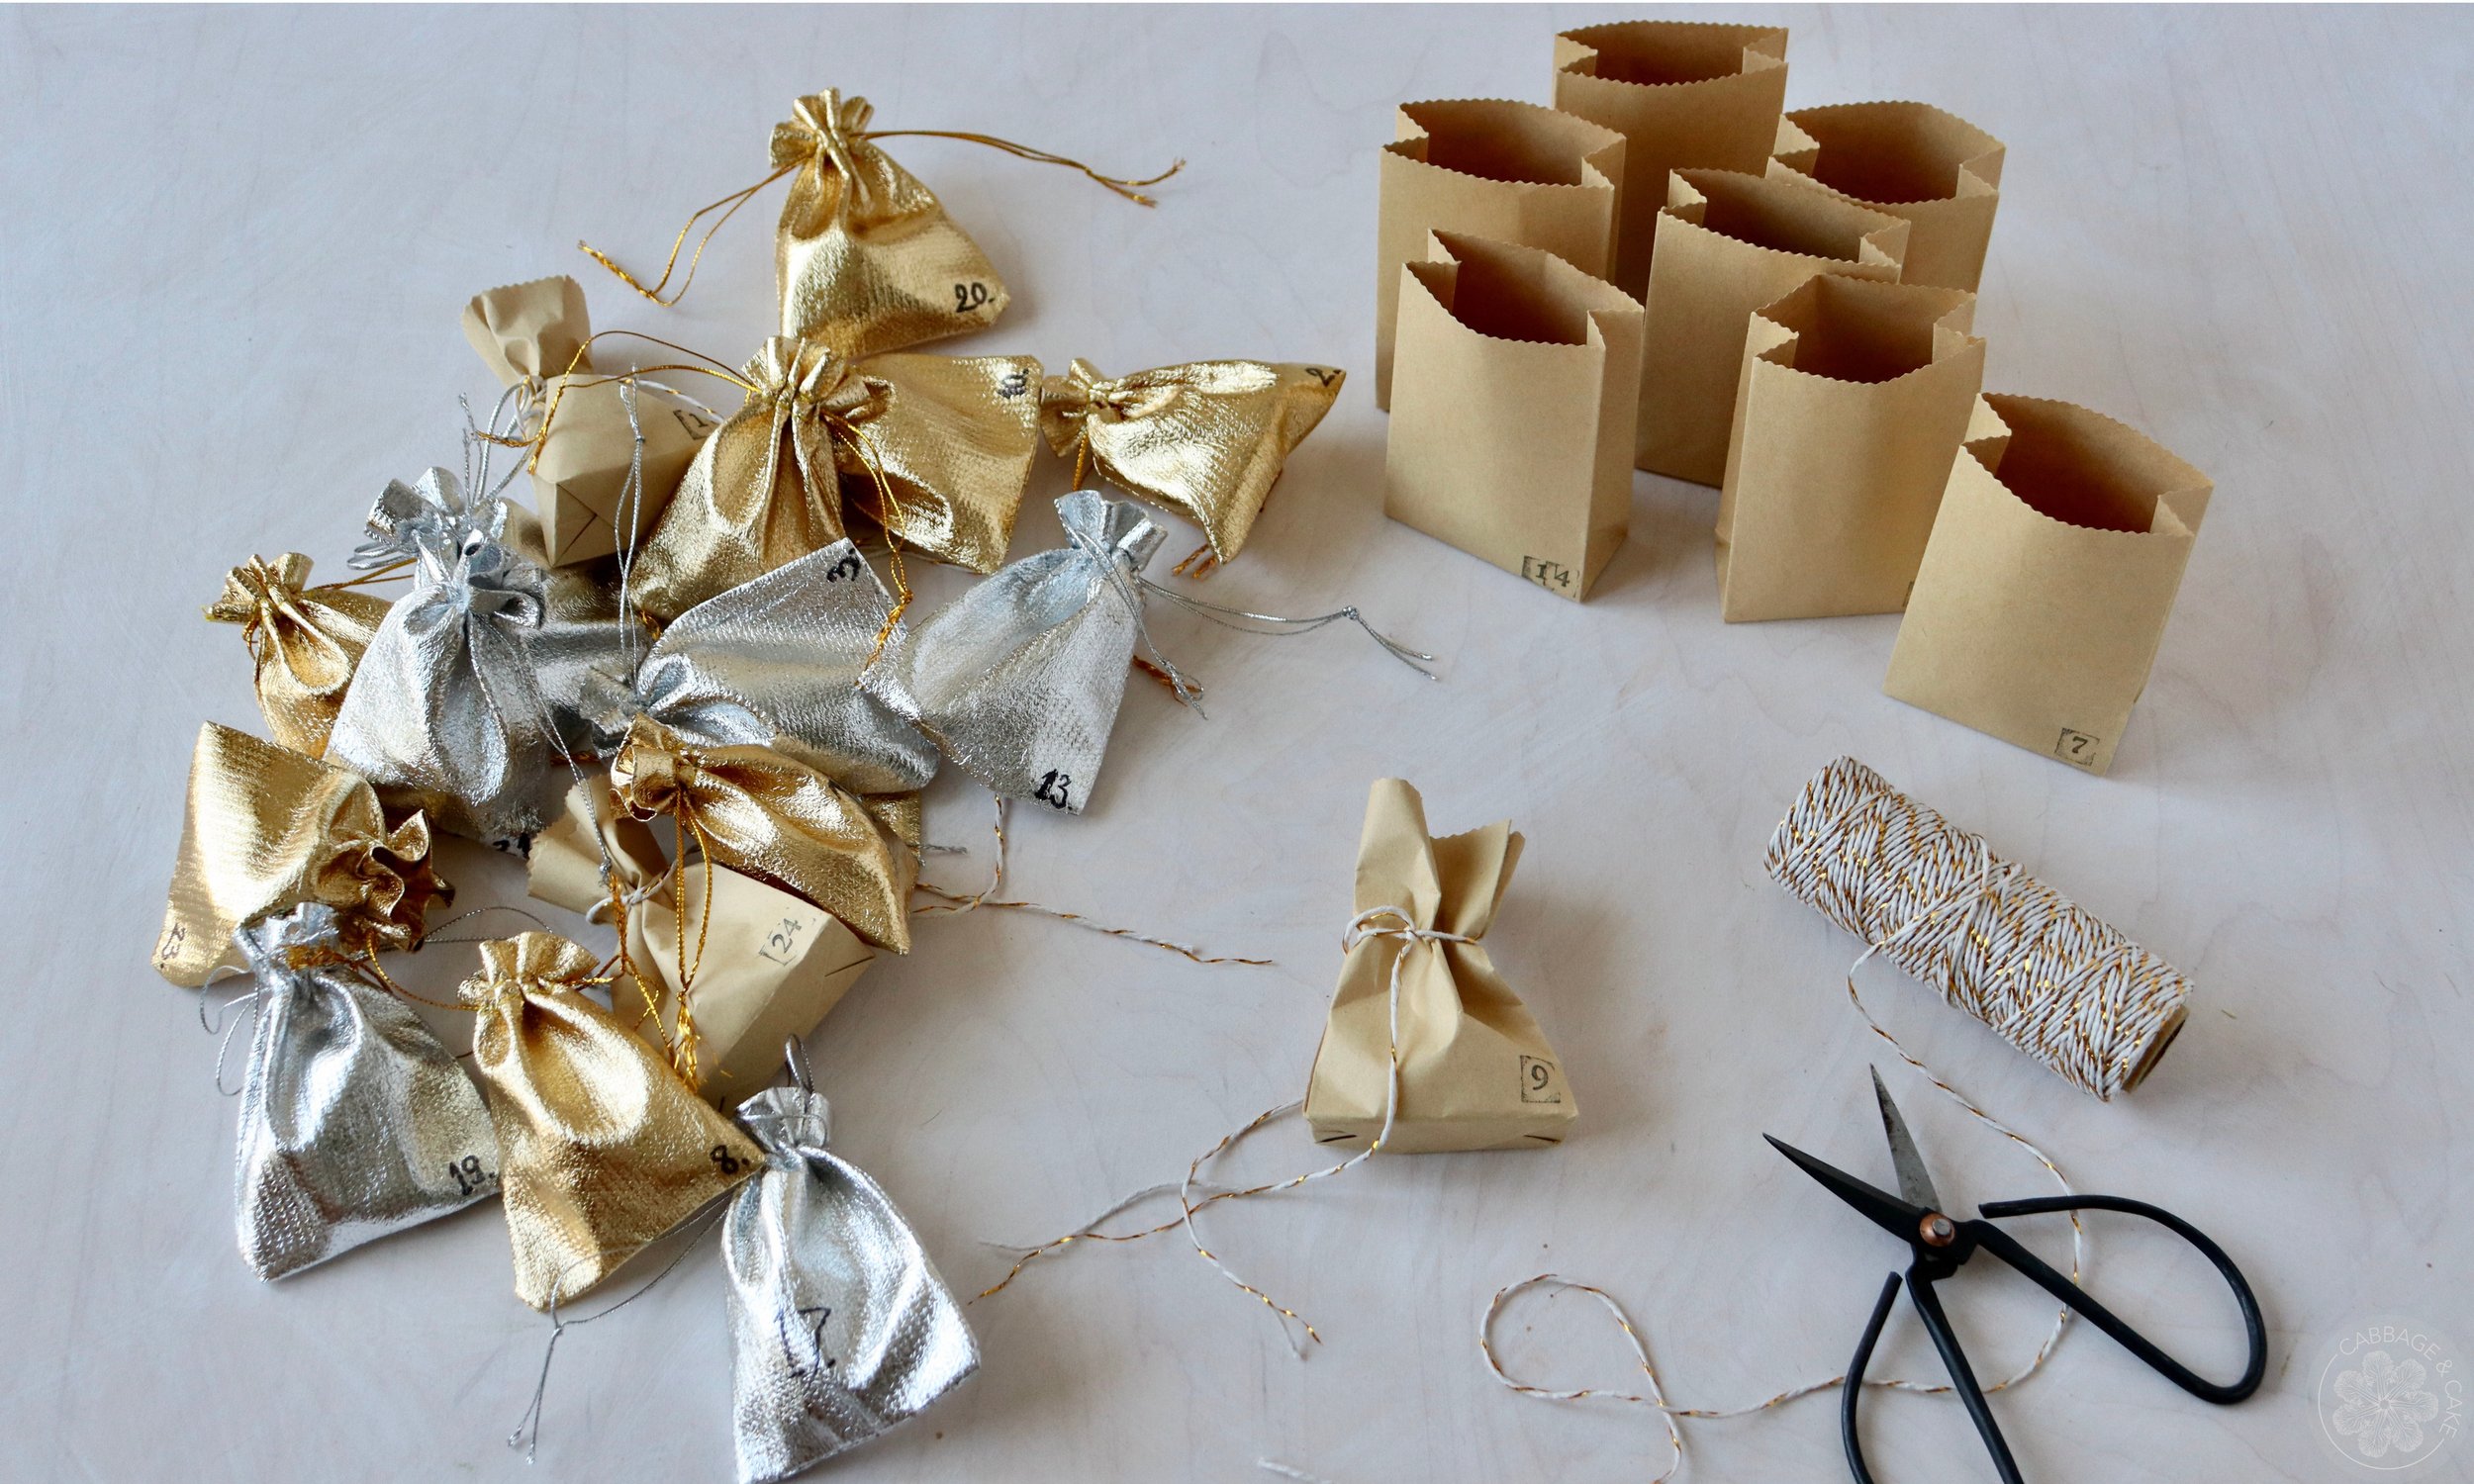
24 small paper bags, muslin bags or pouches
pen, number stickers or stamps
scissors
paint (optional)
Christmas lights (optional)
Christmas ornaments (optional)
INSTRUCTIONS
Gather all your materials for this project and cover your work surface for an easier cleanup afterwards.
Number your 24 paper bags with a pen, stamp or stickers and decide how to fasten them to your Christmas tree later. I used a piece of twine or hung the pouches directly on the sticks.
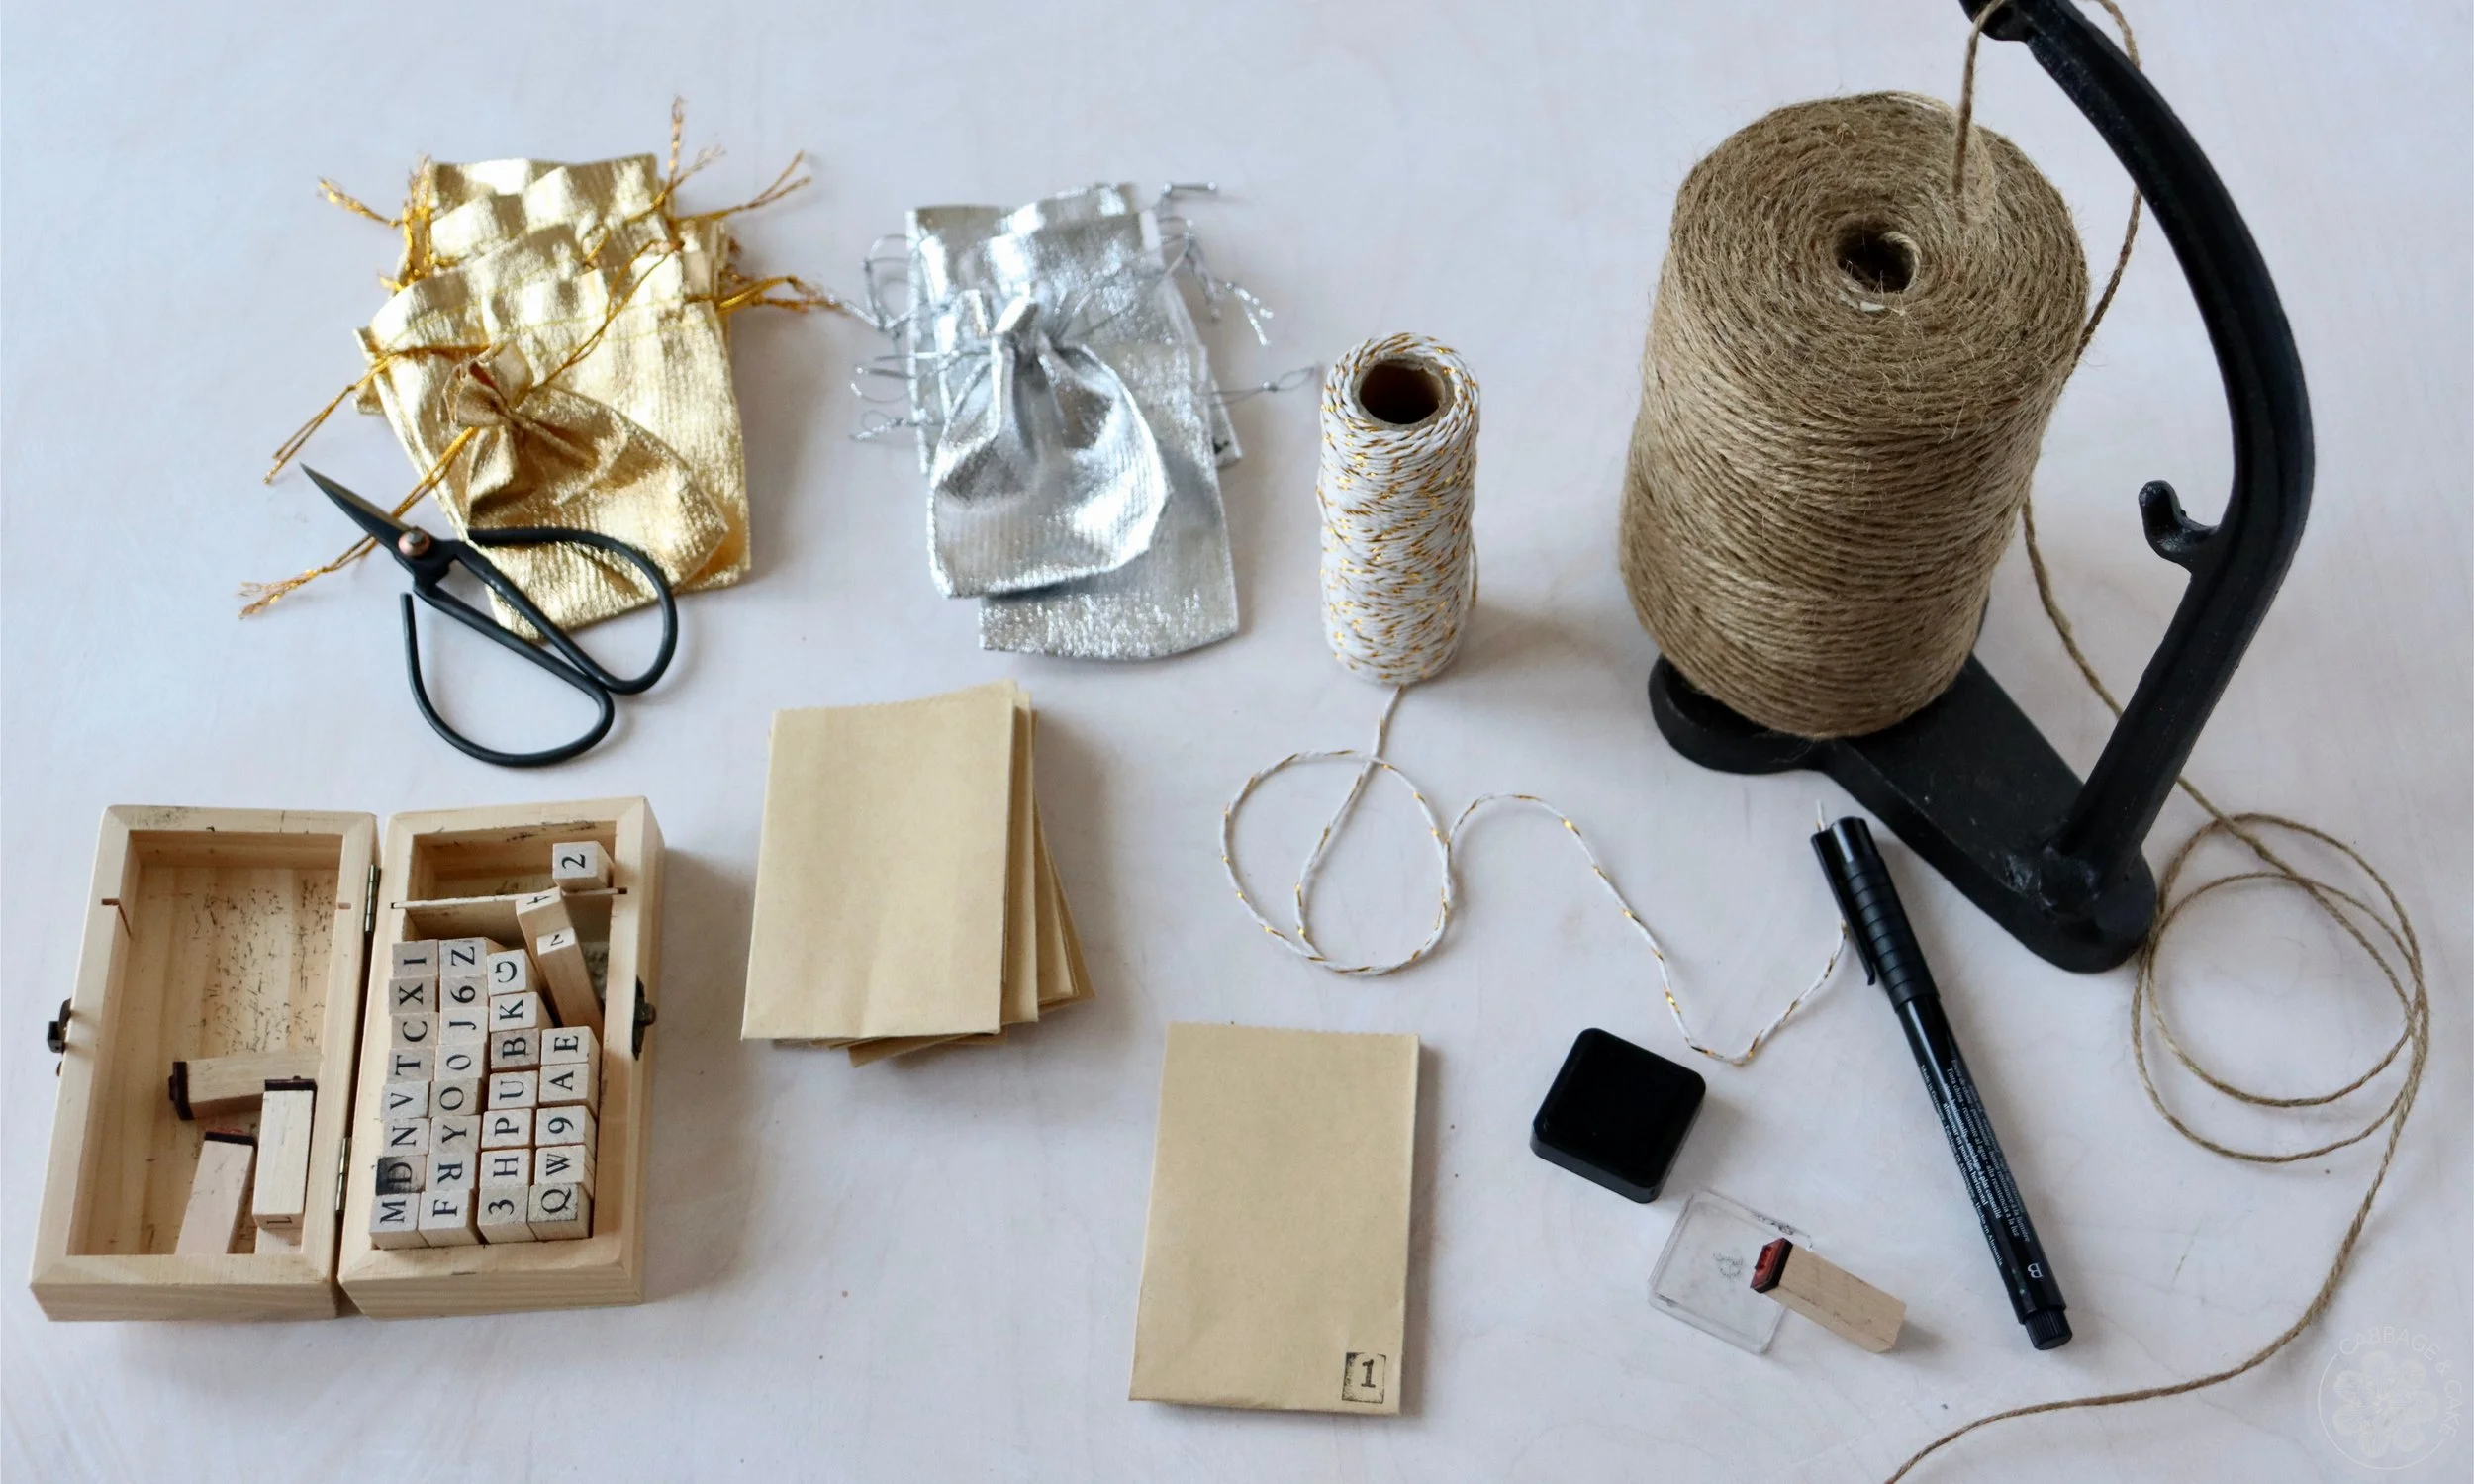
Fill your bags or pouches with desired treats and chocolates and close them with some twine or stickers.
Lay out your Christmas tree design by starting with the shortest driftwood stick going down to the longest one, aim for leaving approx. 2- 3 inches in between each driftwood depending on the size of your sticks and design.
Cut a long piece of twine. I measured 6 times of one side of the tree with the sticks lying close to each other. You can double it up for more stability (this is optional and depends on the heaviness and size of your driftwood and how strong your twine is).
Start connecting your Christmas tree by fastening the twine on the bottom side on the biggest stick, approx. 3-5 inches inwards to the side.
Keep connecting the driftwood sticks on one side of your tree shape going up towards the smallest stick with twine by knotting it around each piece and fastening it tightly.
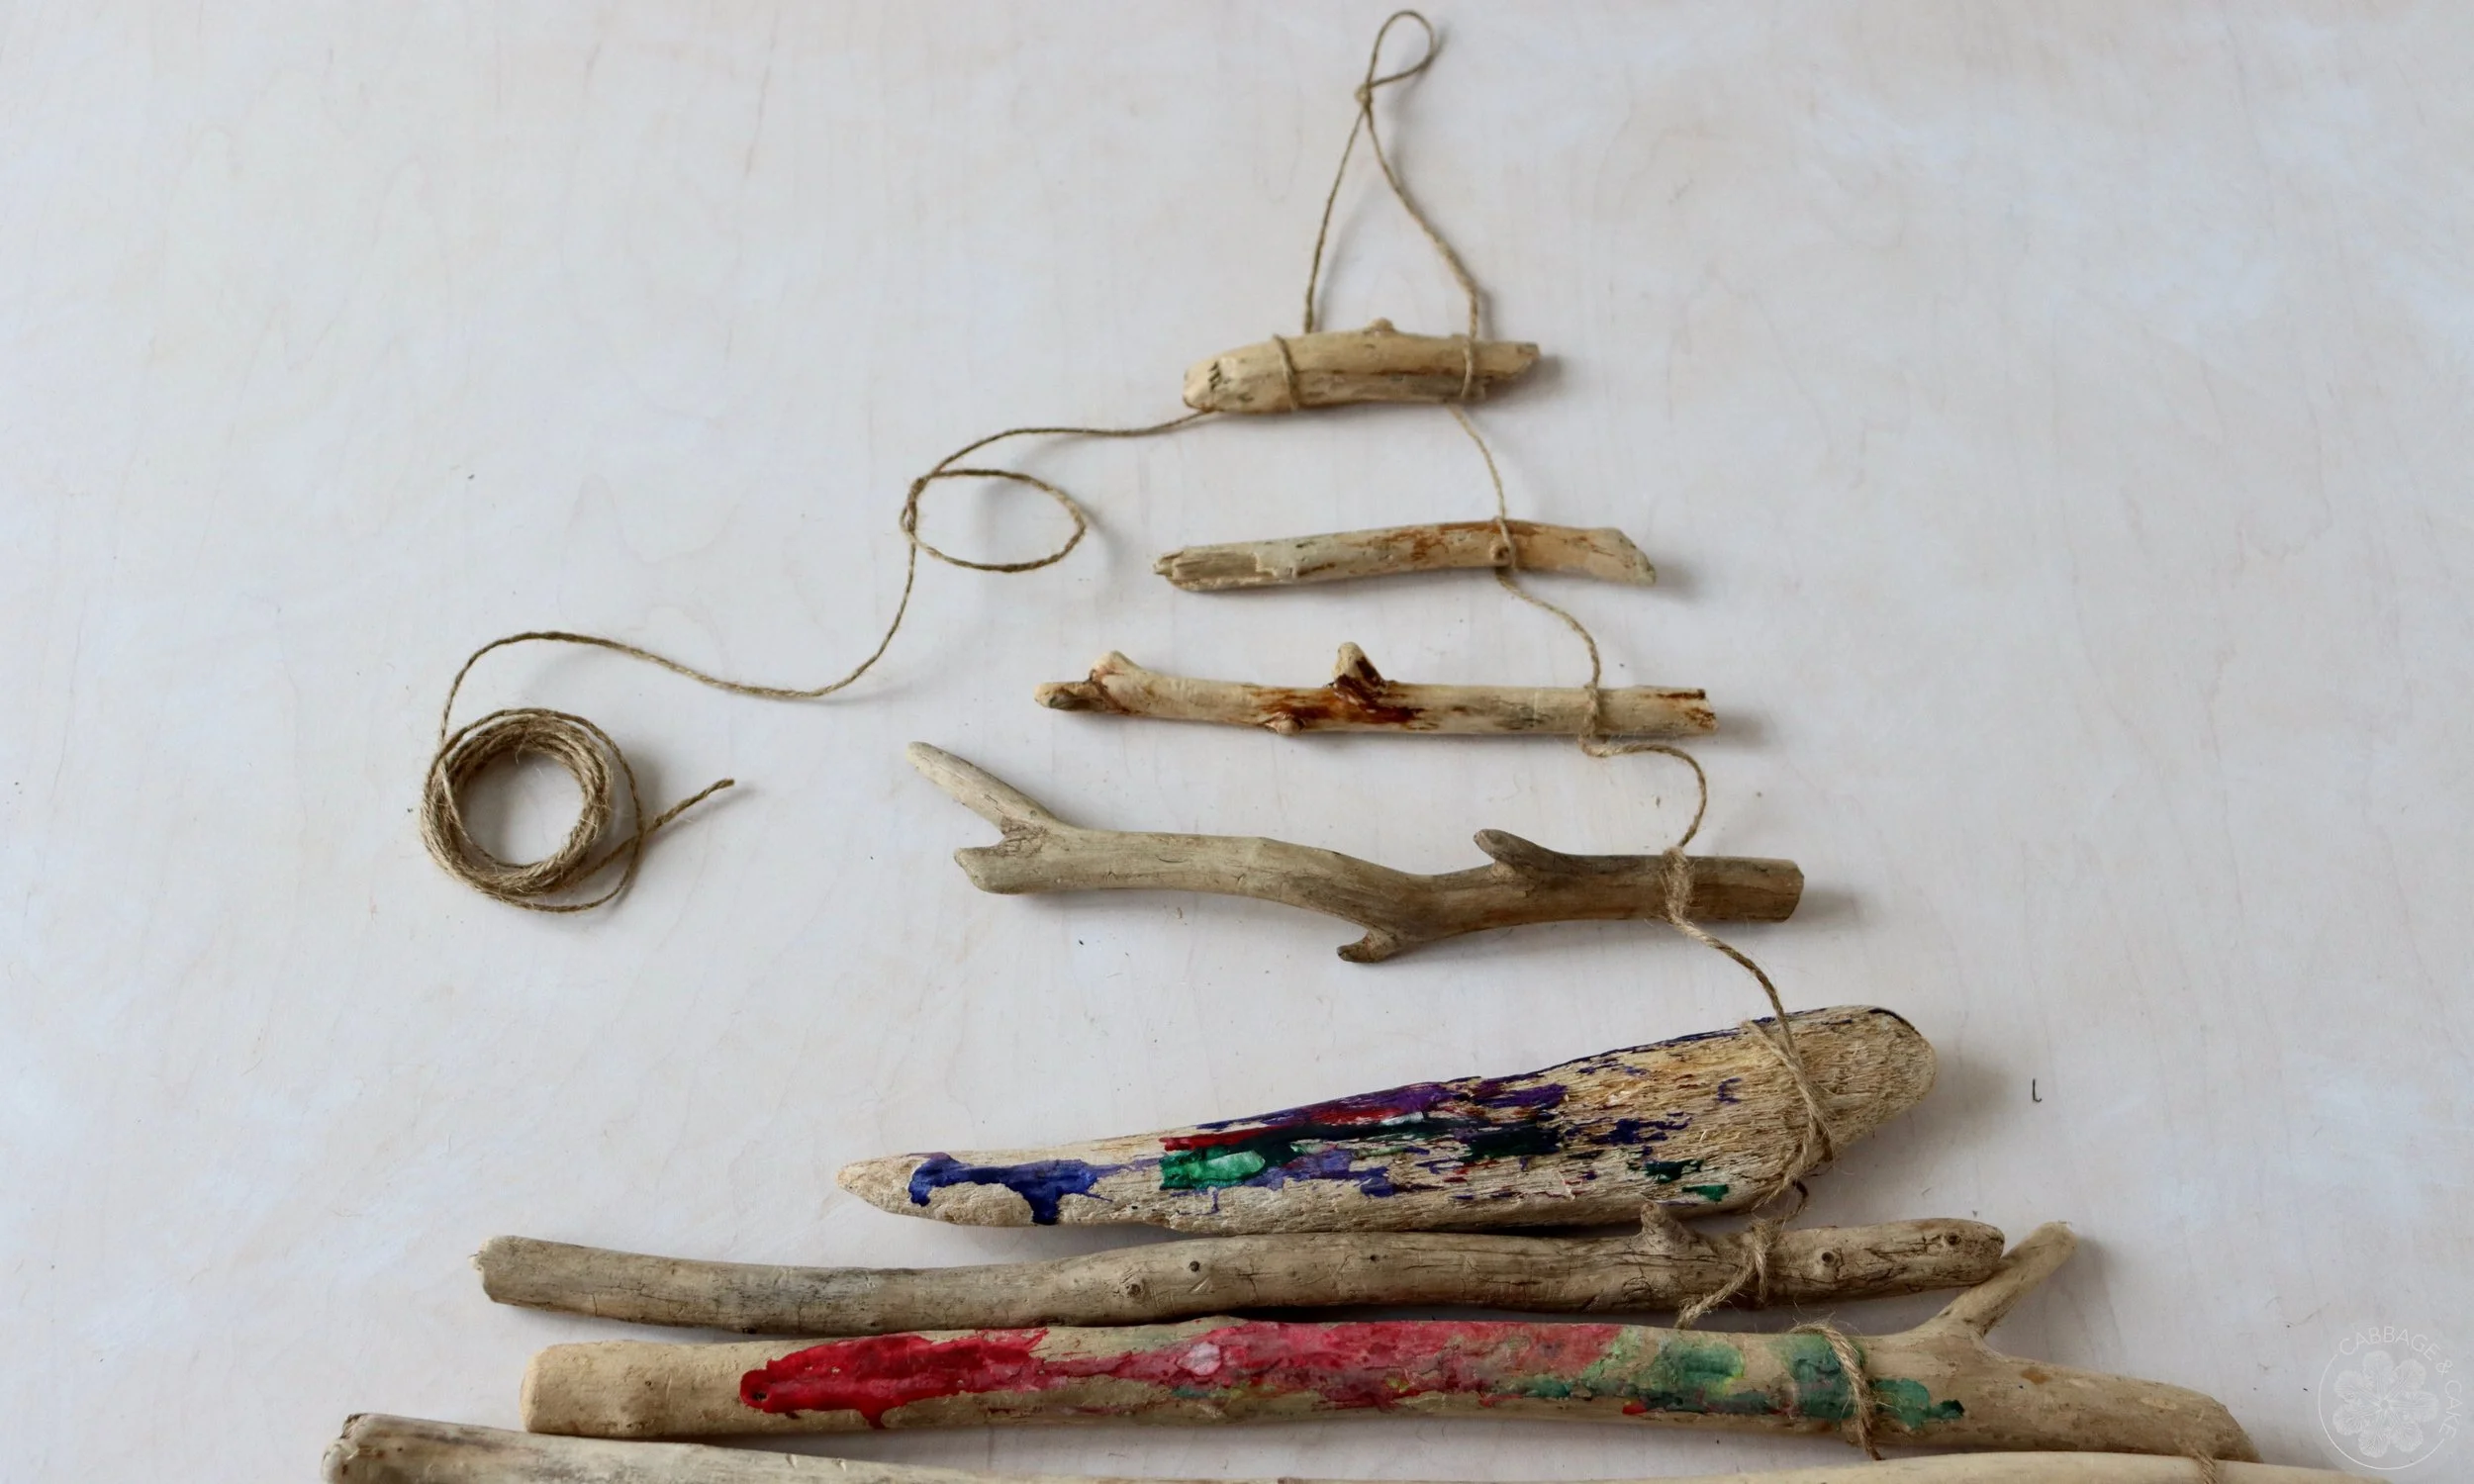
When you get to the top leave enough twine to form a loop to be able to hang your advent calendar Christmas tree on a hook later.
Continue knotting the driftwood together going down on the other side of your tree, again leaving 3-5 inches on the side.
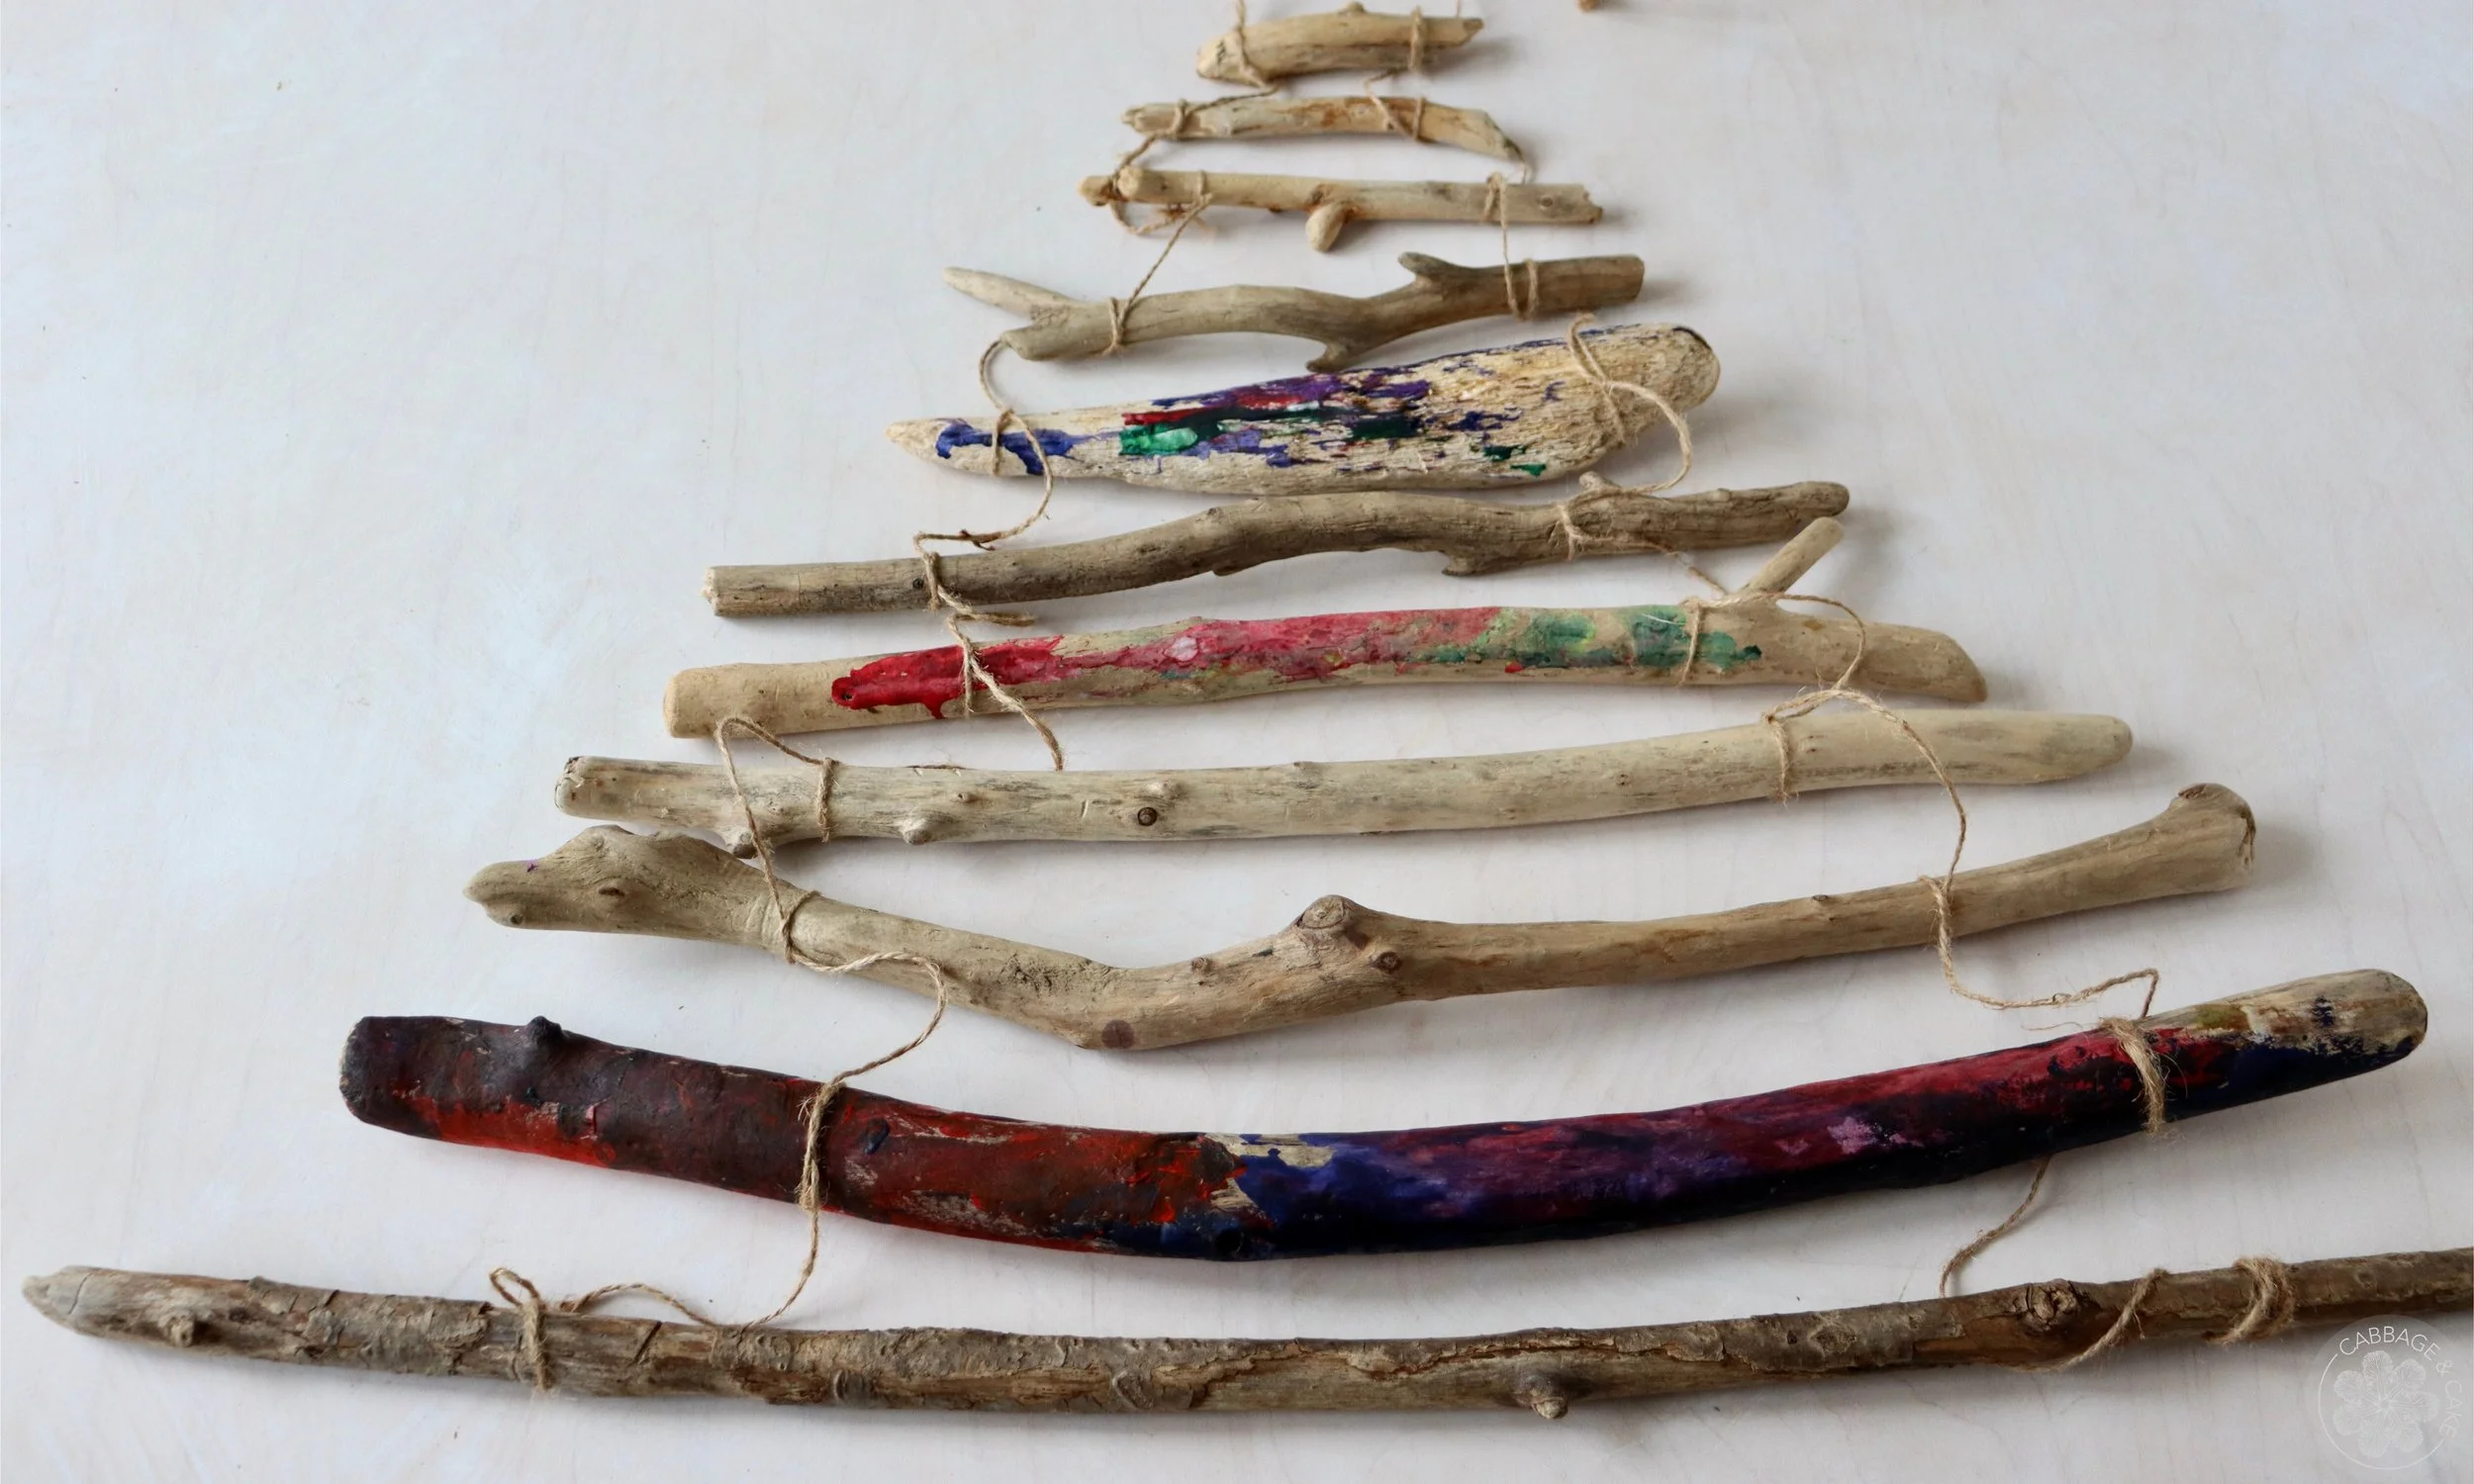
Once you get to the bottom make sure to knot the twine tightly off and cut any leftover twine.
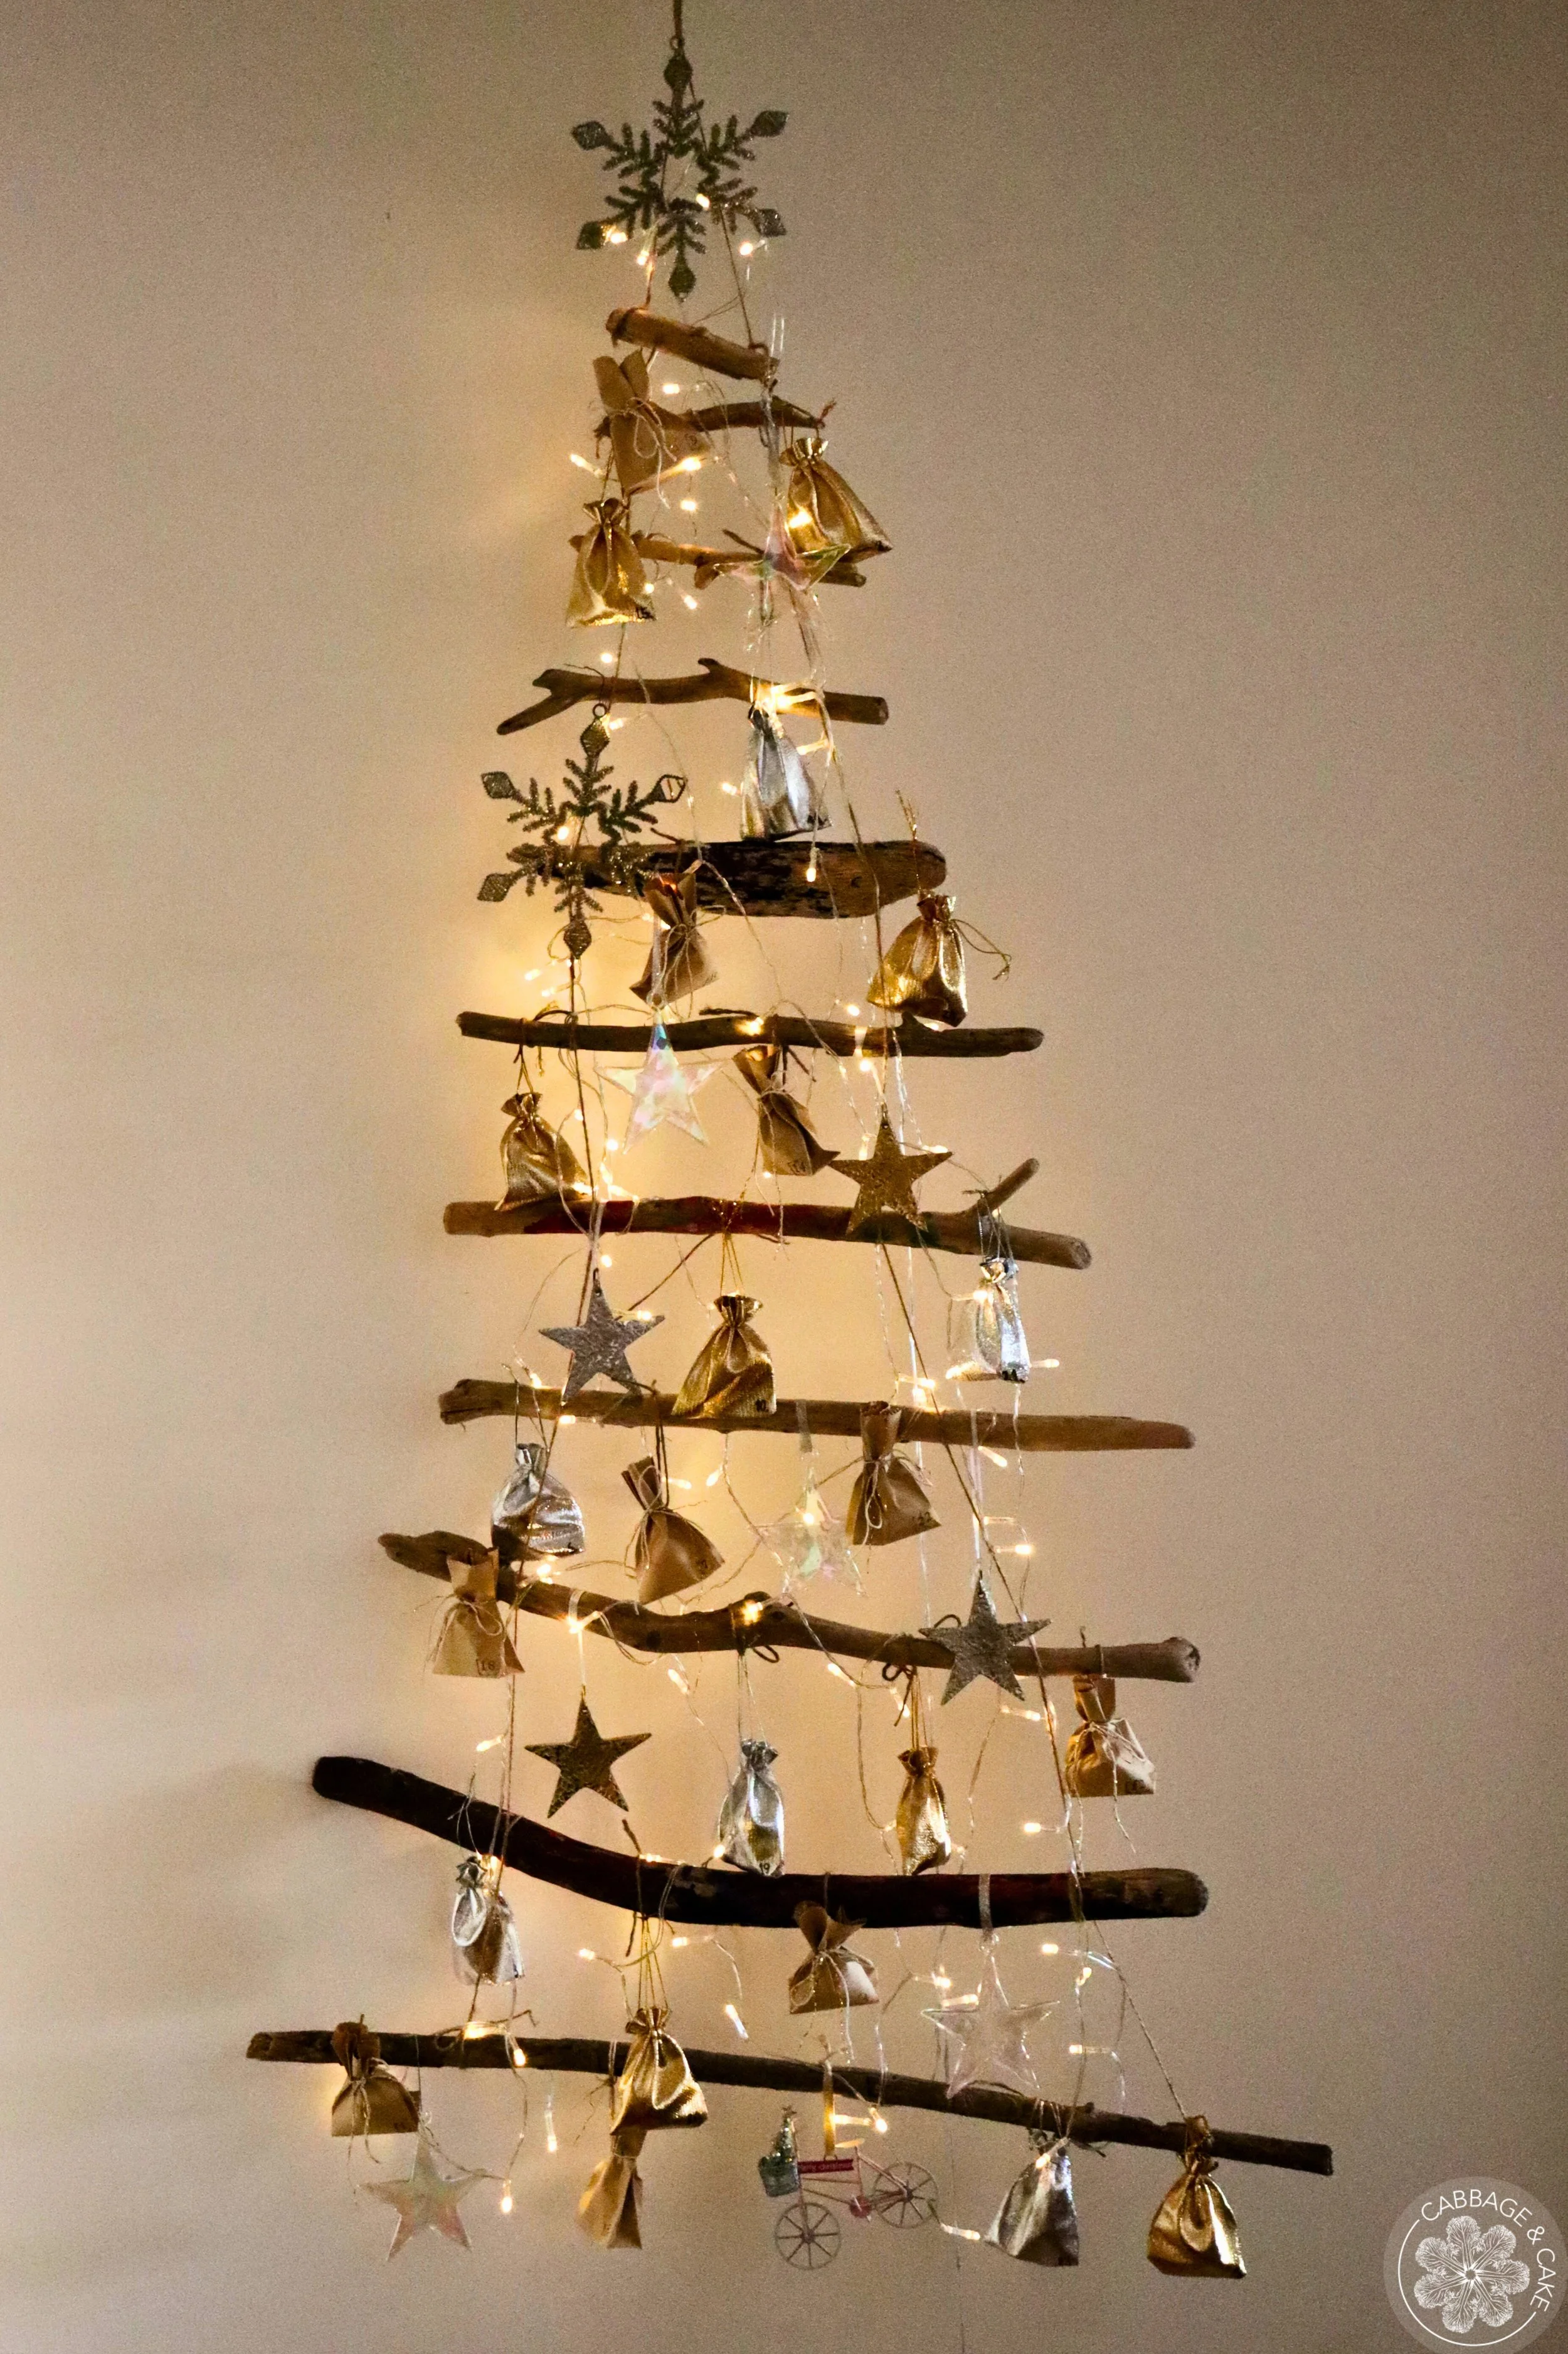
I like to hang my Christmas tree at this point to further decorate it with some lights, the numbered pouches and ornaments.
Step back once in a while to see the big picture and adjust if you need to. I like to have a good balance of little bags, lights and ornaments.
Keep in mind the tree will get emptier over time! I usually put lights and ornaments first and add in the small pouches later to make sure it will still look decorative on Christmas when all the treats are gone.
Have fun decorating your handmade drift wood advent calendar and enjoy happy faces every morning all the way until Christmas!
ADVENT CALENDAR WITH DRIFTWOOD
by Julia
Turn your drift wood treasures into a reusable advent calendar! Make a hanging advent calendar in shape of a Christmas tree with driftwood, twine, small pouches, ornaments and string lights you already own or decorate it in the theme you are going with this year. Just roll it up after the holidays and reuse it with different decorations for years to come!
MATERIALS YOU WILL NEED
driftwood sticks or branches in different lengths
twine
24 small paper bags, muslin bags or pouches
pen, number stickers or stamps
scissors
paint (optional)
Christmas lights (optional)
Christmas ornaments (optional)
INSTRUCTIONS
Gather all your materials for this project and cover your work surface for an easier cleanup afterwards.
Number your 24 paper bags with a pen, stamp or stickers and decide how to fasten them to your Christmas tree later. I used a piece of twine or hung the pouches directly on the sticks.
Fill your bags or pouches with desired treats and chocolates and close them with some twine or stickers.
Lay out your Christmas tree design by starting with the shortest driftwood stick going down to the longest one, aim for leaving approx. 2- 3 inches in between each driftwood depending on the size of your sticks and design.
Cut a long piece of twine. I measured 6 times of one side of the tree with the sticks lying close to each other. You can double it up for more stability (this is optional and depends on the heaviness and size of your driftwood and how strong your twine is).
Start connecting your Christmas tree by fastening the twine on the bottom side on the biggest stick, approx. 3-5 inches inwards to the side.
Keep connecting the driftwood sticks on one side of your tree shape going up towards the smallest stick with twine by knotting it around each piece and fastening it tightly.
When you get to the top leave enough twine to form a loop to be able to hang your advent calendar Christmas tree on a hook later.
Continue knotting the driftwood together going down on the other side of your tree, again leaving 3-5 inches on the side.
Once you get to the bottom make sure to knot the twine tightly off and cut any leftover twine.
I like to hang my Christmas tree at this point to further decorate it with some lights, the numbered pouches and ornaments.
Step back once in a while to see the big picture and adjust if you need to. I like to have a good balance of little bags, lights and ornaments.
Keep in mind the tree will get emptier over time! I usually put lights and ornaments first and add in the small pouches later to make sure it will still look decorative on Christmas when all the treats are gone.
Have fun decorating your handmade drift wood advent calendar and enjoy happy faces every morning all the way until Christmas!