

DIY ICE LANTERN
Winter in Canada can be long and, especially in January, very cold. The last couple of weeks have been mostly below zero and playing with ice has been a hit in my house this season.
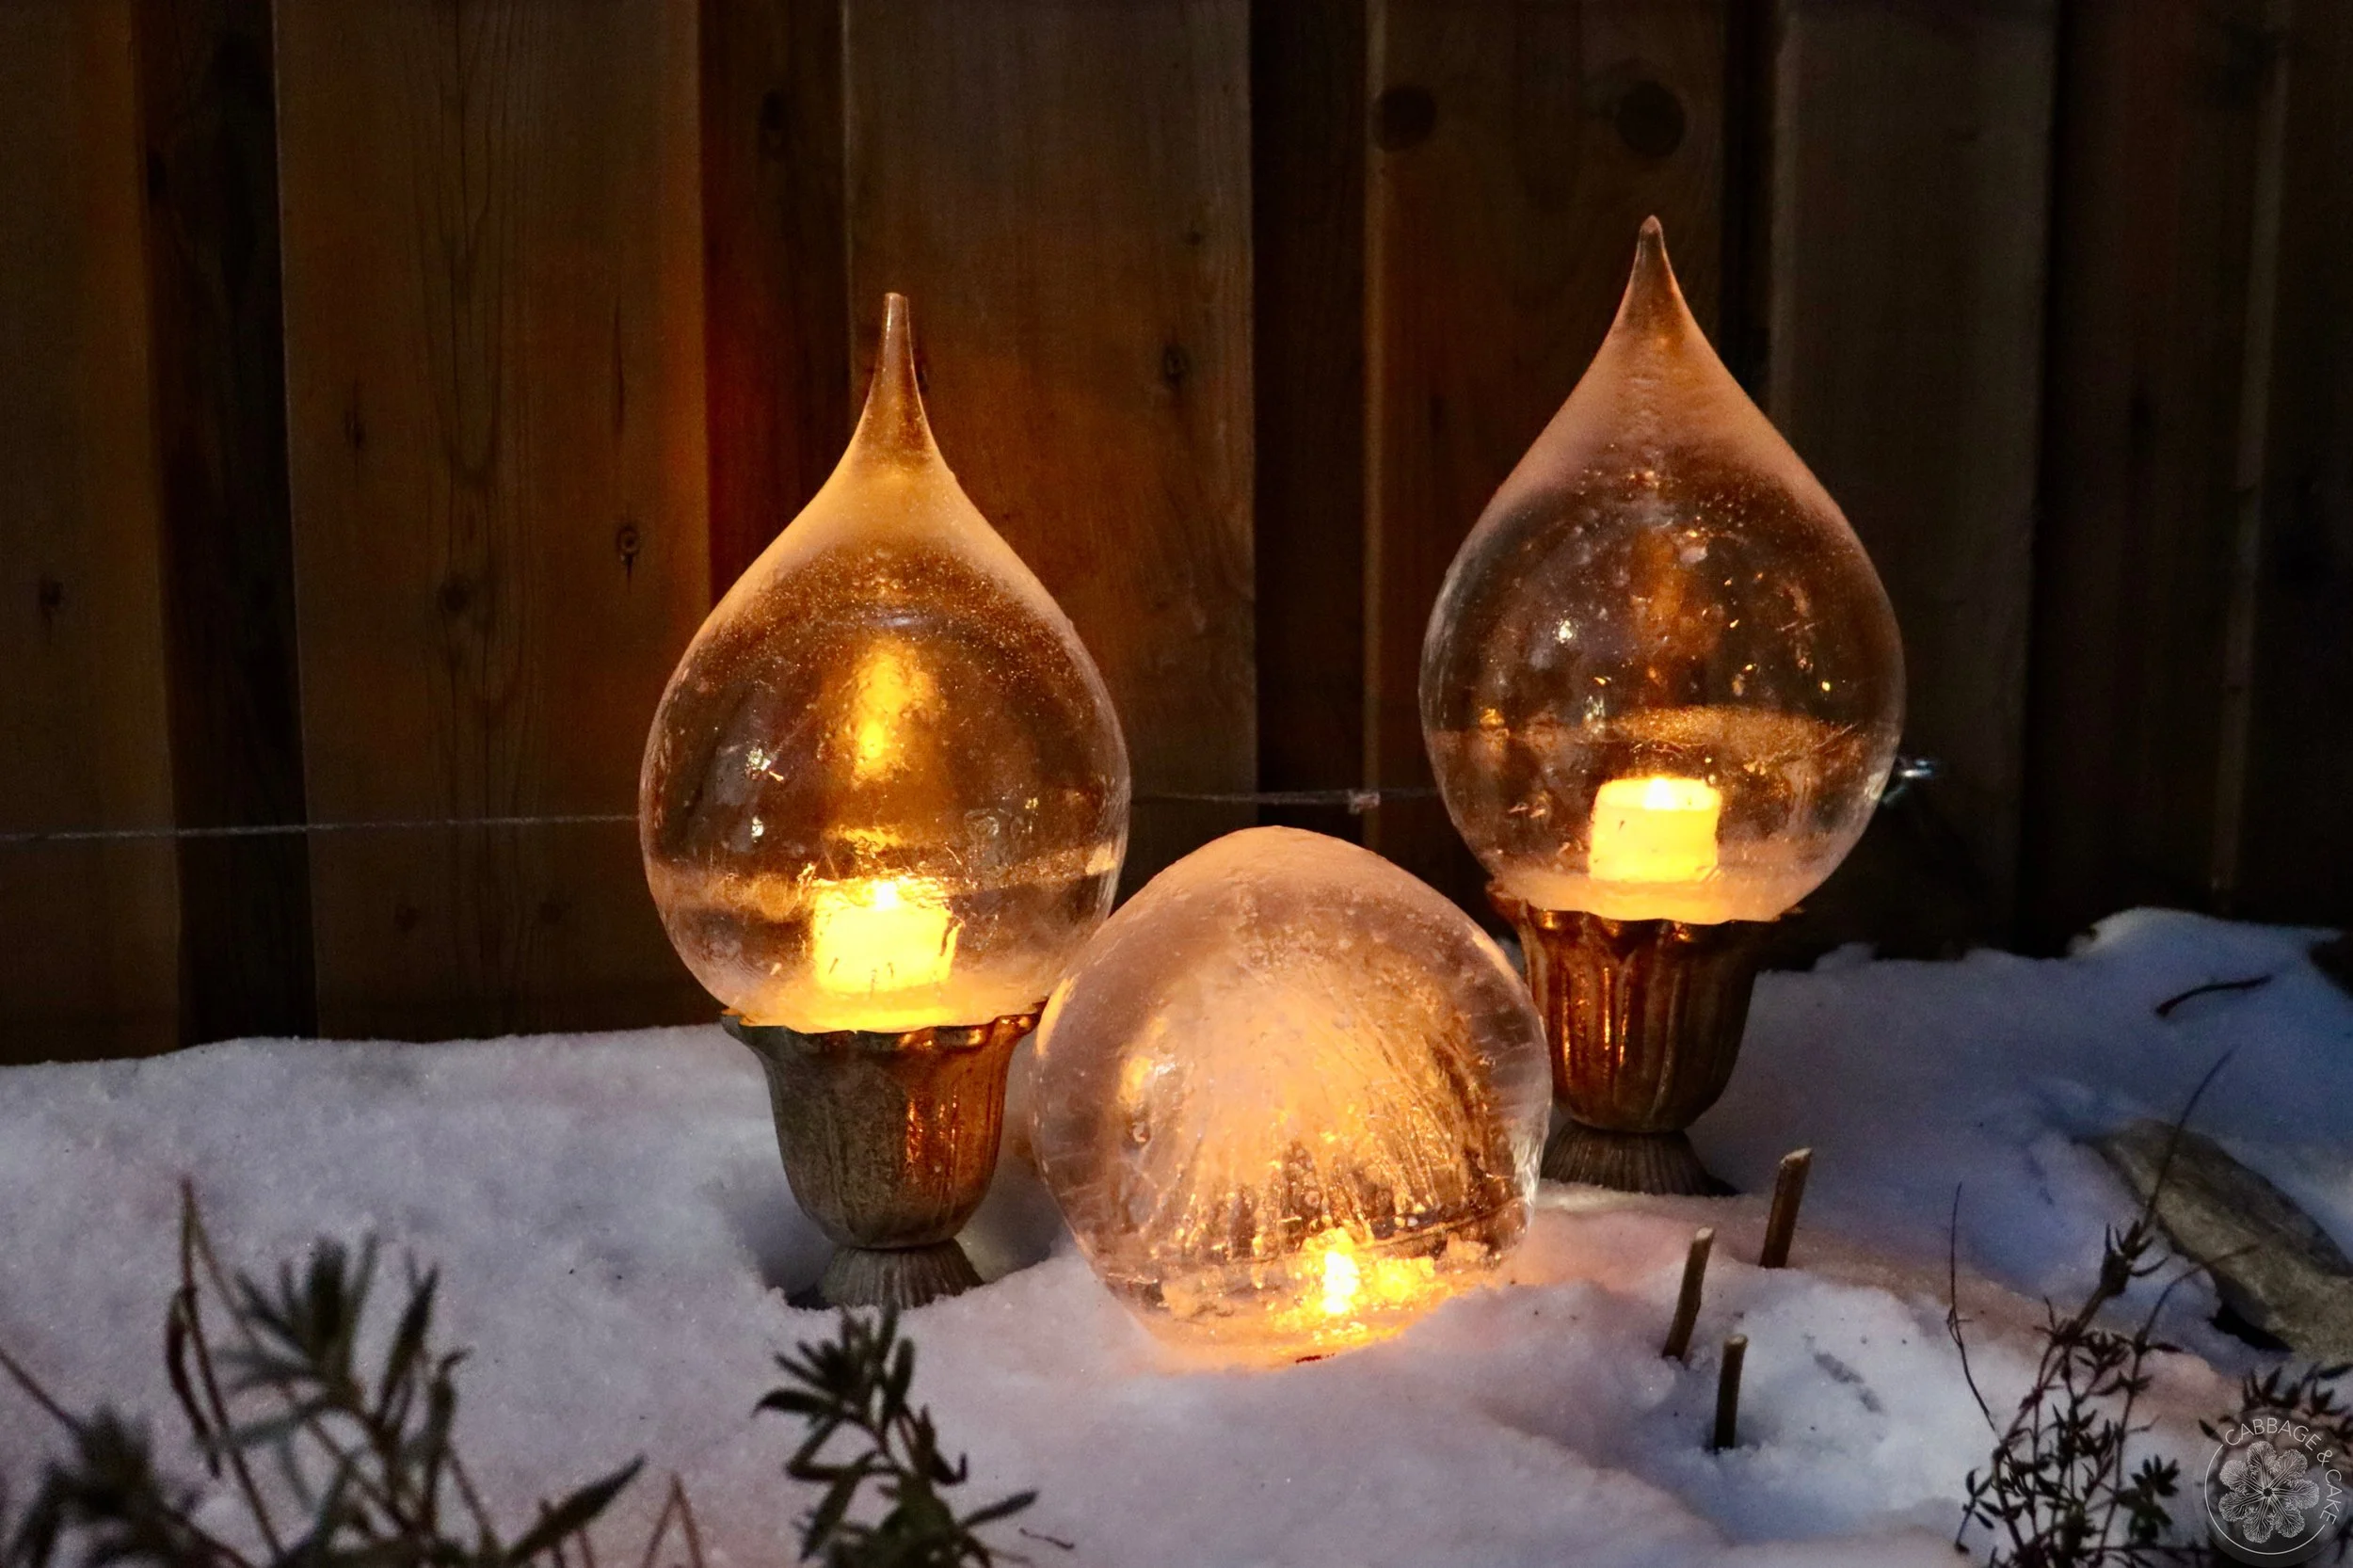
My kids and I have been making DIY ice lanterns, also called globe luminaries. We got very excited about the process and the beauty of the illuminated ice globes in our backyard that I wanted to share some tips on how to make these easy and beautiful lanterns.
All you really need to make your own ice lanterns is water, some balloons, candles or lights and time- and freezing temperatures of course!
You can make your stunning globe luminaries in different sizes and shapes and fill them with candles or string lights in different colours to give them a magical glow that will brighten your cold and dark winter nights.
Your DIY ice lanterns will decorate your front door, porch or backyard and add some extra icy winter wonderland beauty to your life.
TIPS TO MAKE THE PERFECT DIY ICE LANTERN
Check the weather and ensure it will be below zero for several days to enjoy your homemade ice lanterns to the fullest. You don’t want them to melt the next day.
Wear gloves to protect your hands from the icy water and freezing temperatures.
Release some water before tying the balloons off, to avoid air bubbles which can cause flat spots. If on the other hand you’d like to experiment with some different and more organic shapes, you can skip this step.
When you open your frozen balloons, the middle should still be unfrozen. Make sure to pour the water into a dish or into a spot where it won’t cause a slippery surface later.
If you want to light your ice lanterns with real candles you have to drill a small hole into the top to allow enough oxygen into the globe for the candle to burn.
Have fun experimenting with different sizes, shapes and lights and enjoy the creative process.
MATERIALS AND TOOLS YOU WILL NEED
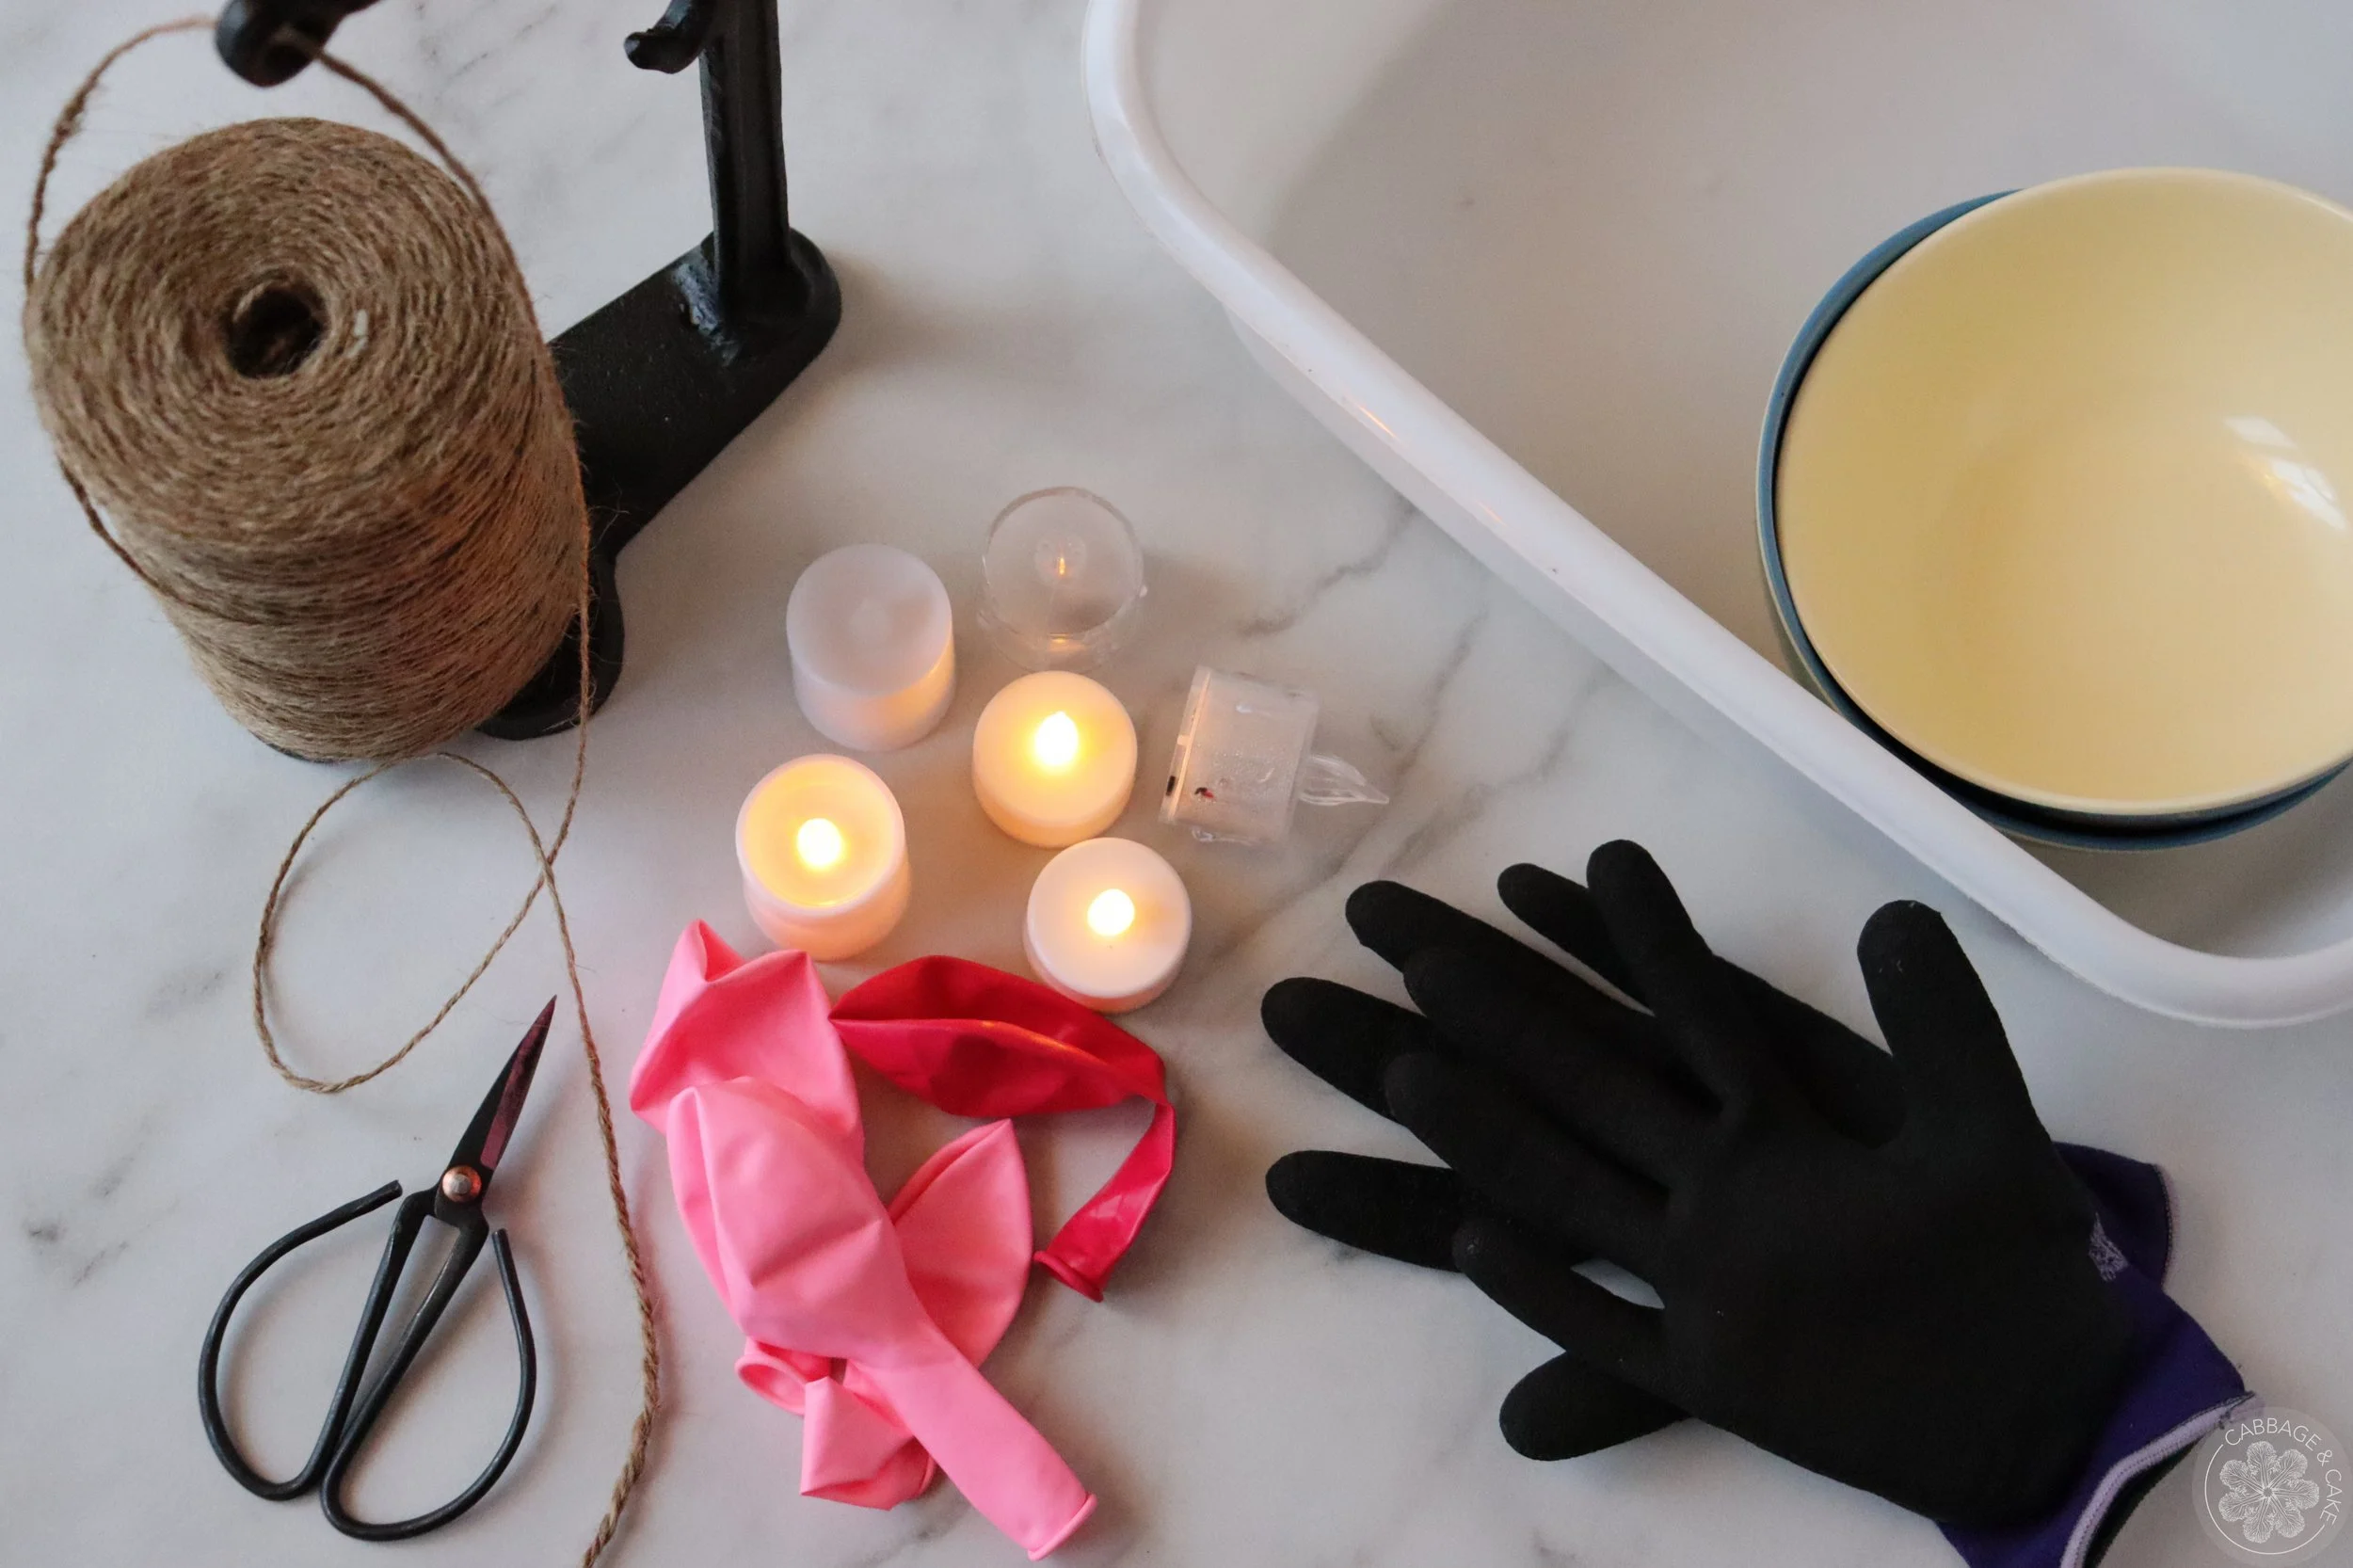
water
balloons
shallow bowl/ container
scissors or knife
battery operated candles or string lights for outdoors or real candles
big container
string
gloves
drill, when using real candles
INSTRUCTIONS
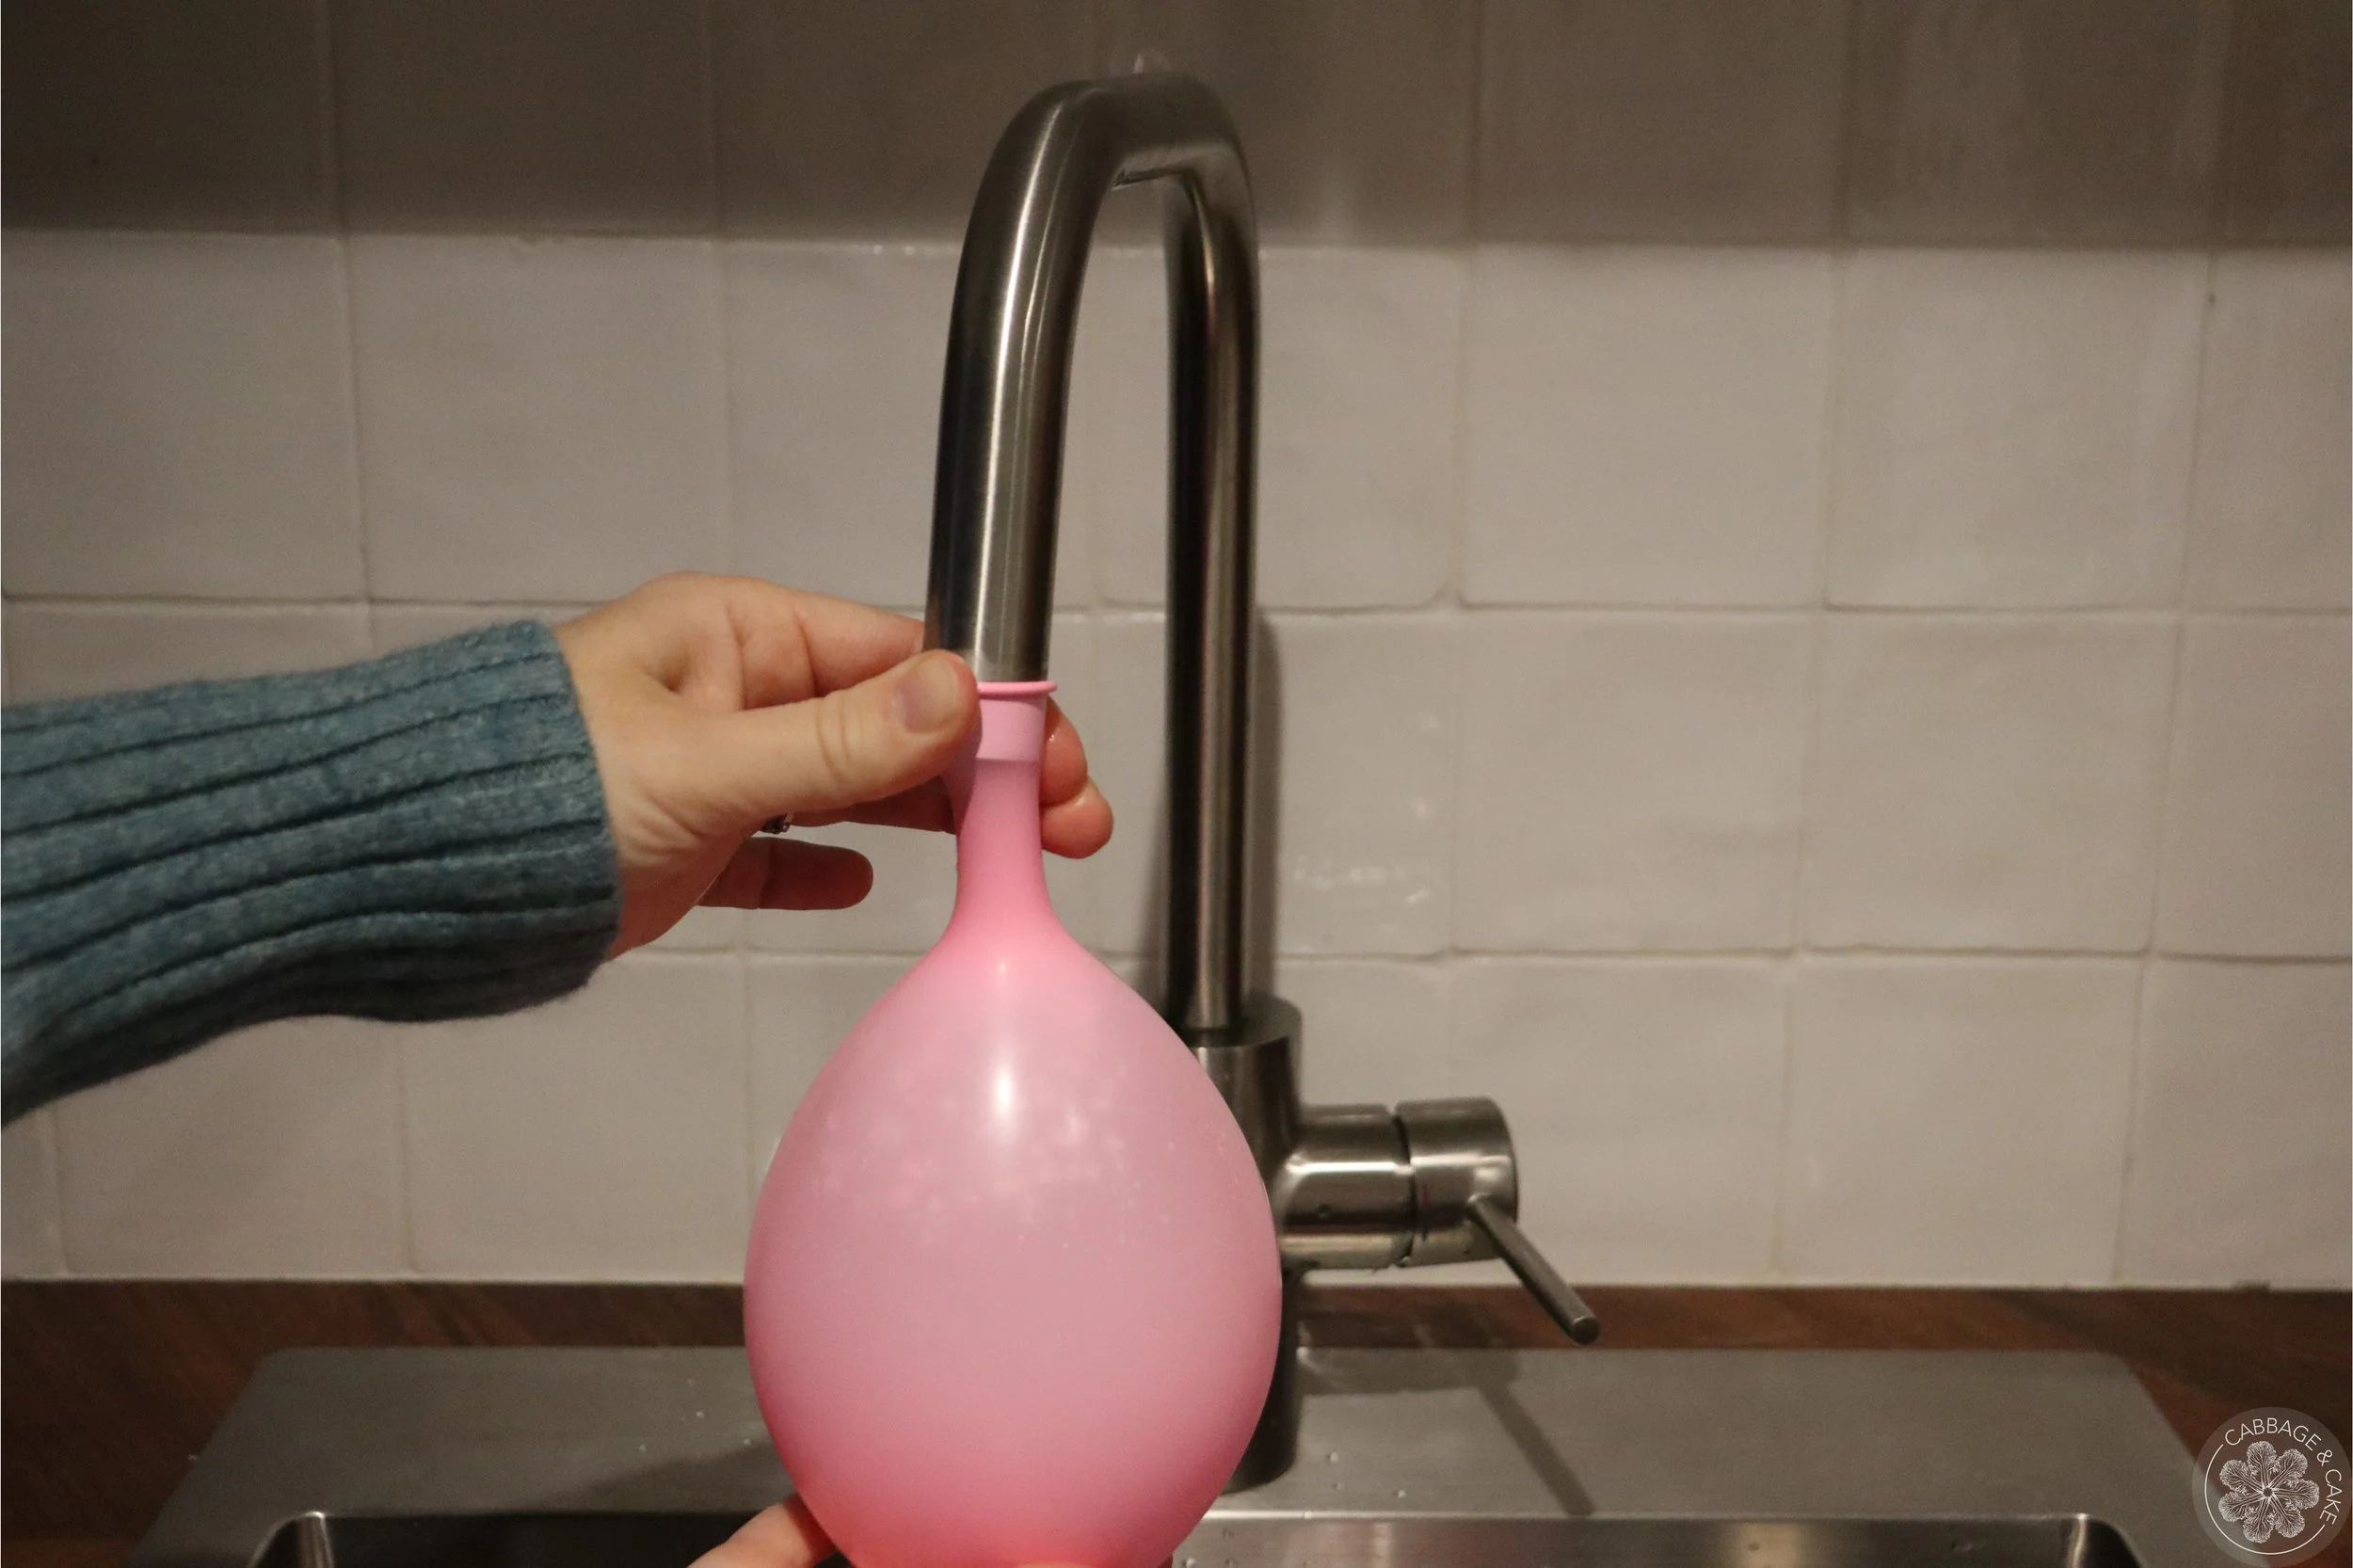
Slip a balloon over a faucet and fill it about a third with water, depending on the size of lantern you would like to make.
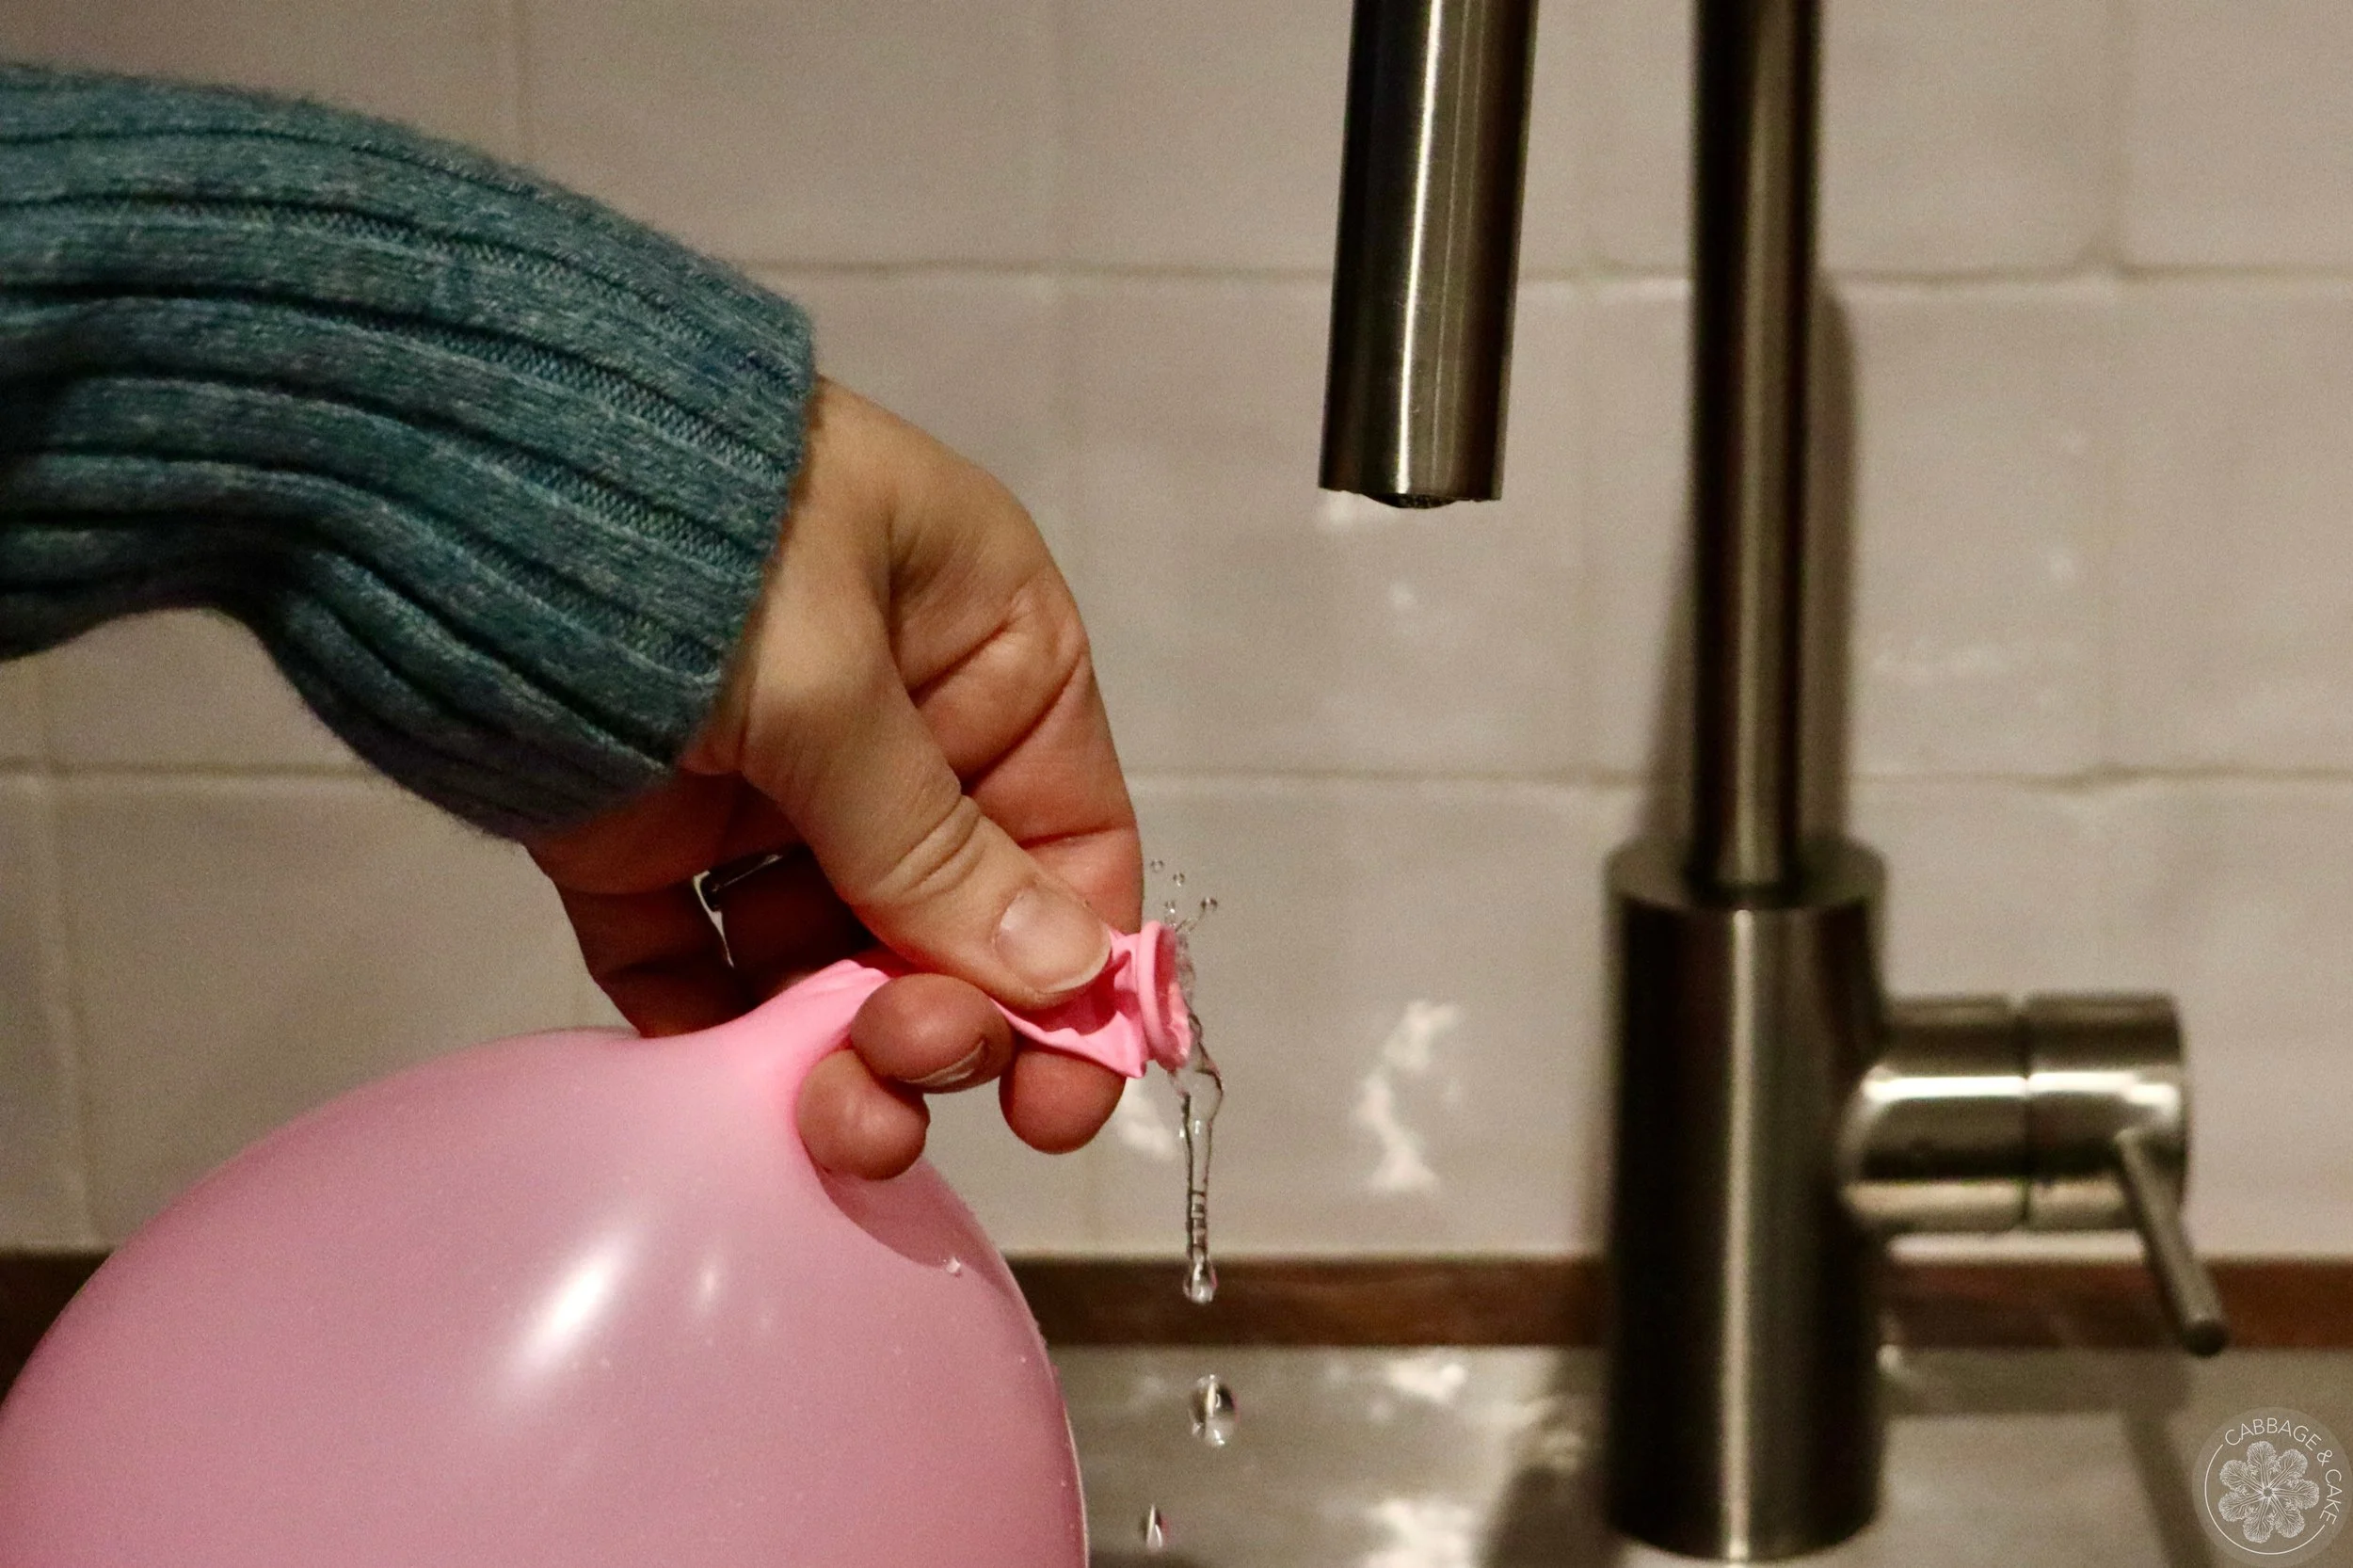
Release a little bit of water before tying it. This will avoid air bubbles being trapped inside that can cause flat spots on top of your luminaries.
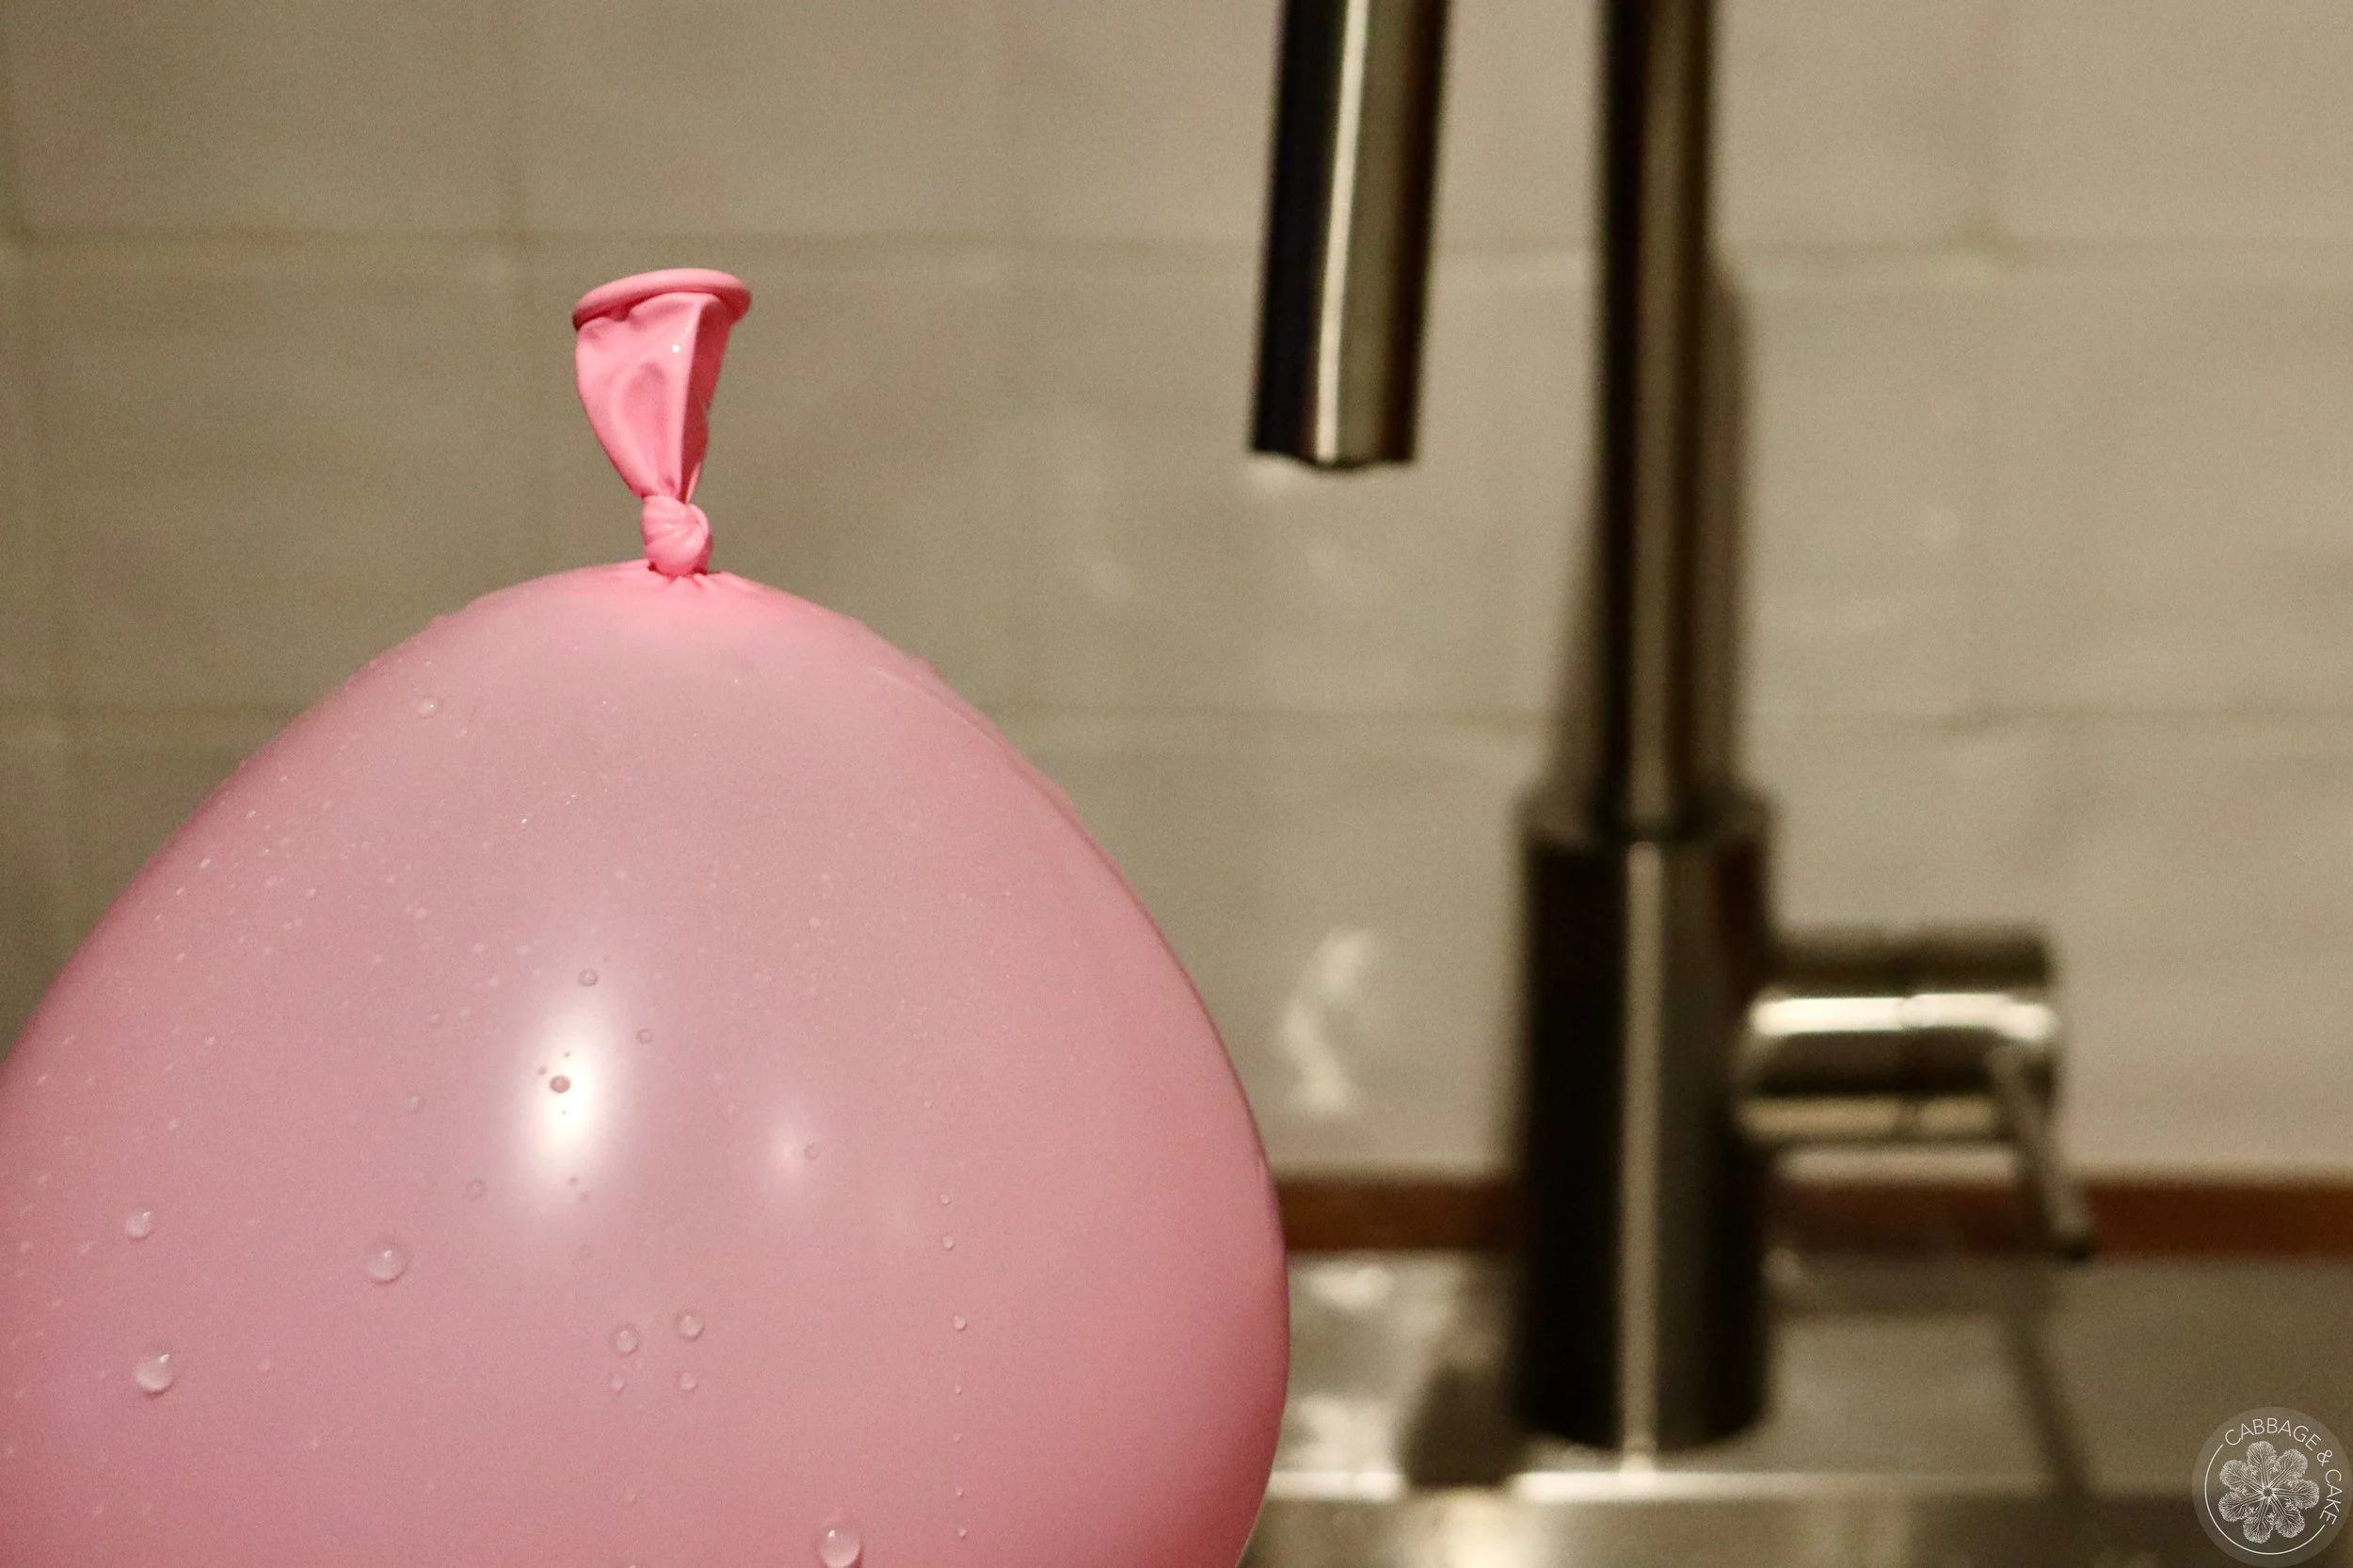
Tie off your balloon and set it in a bowl or shallow round dish with the knot on the bottom for a globe shape.
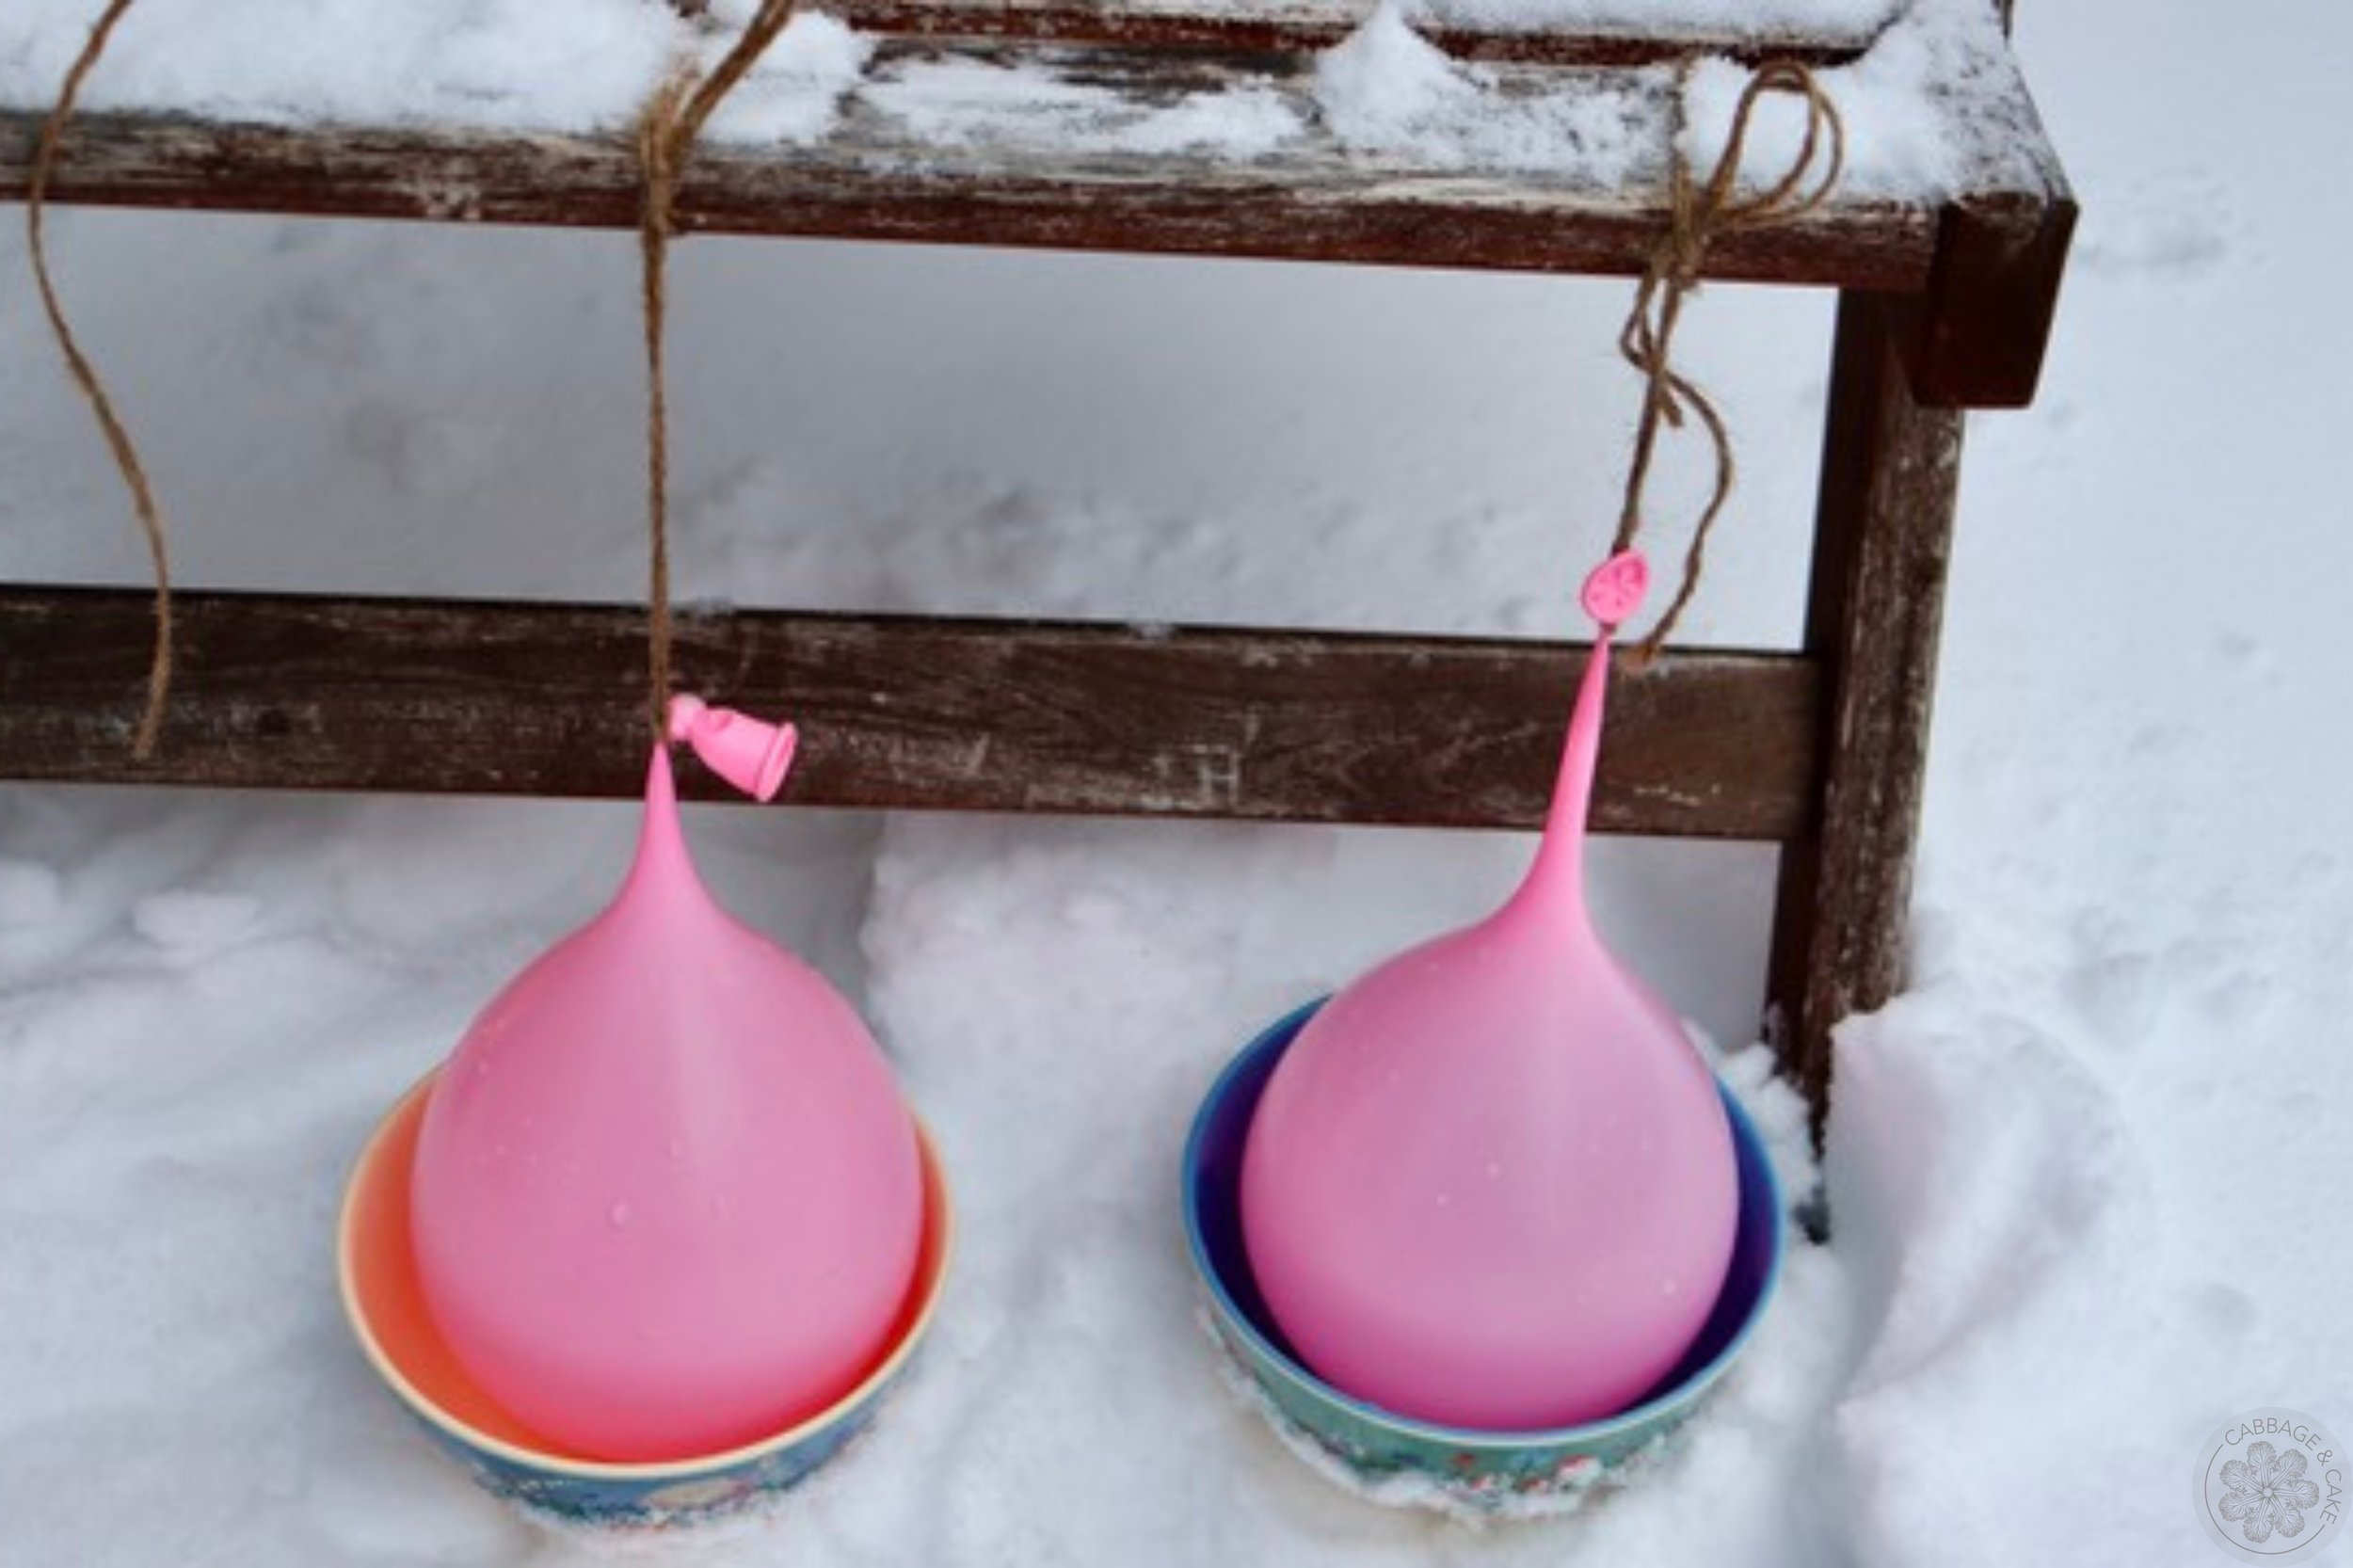
Place it on the ground in snow or a mat to avoid the bottom from freezing. You can also tie the knots of the balloons upwards, to give some of them a more pointed shape. I used the bottom of a chair and some twine to do that.
Wait for 12-15 hours below zero until the balloons feel solid on the outside but still unfrozen in the middle and on the bottom.
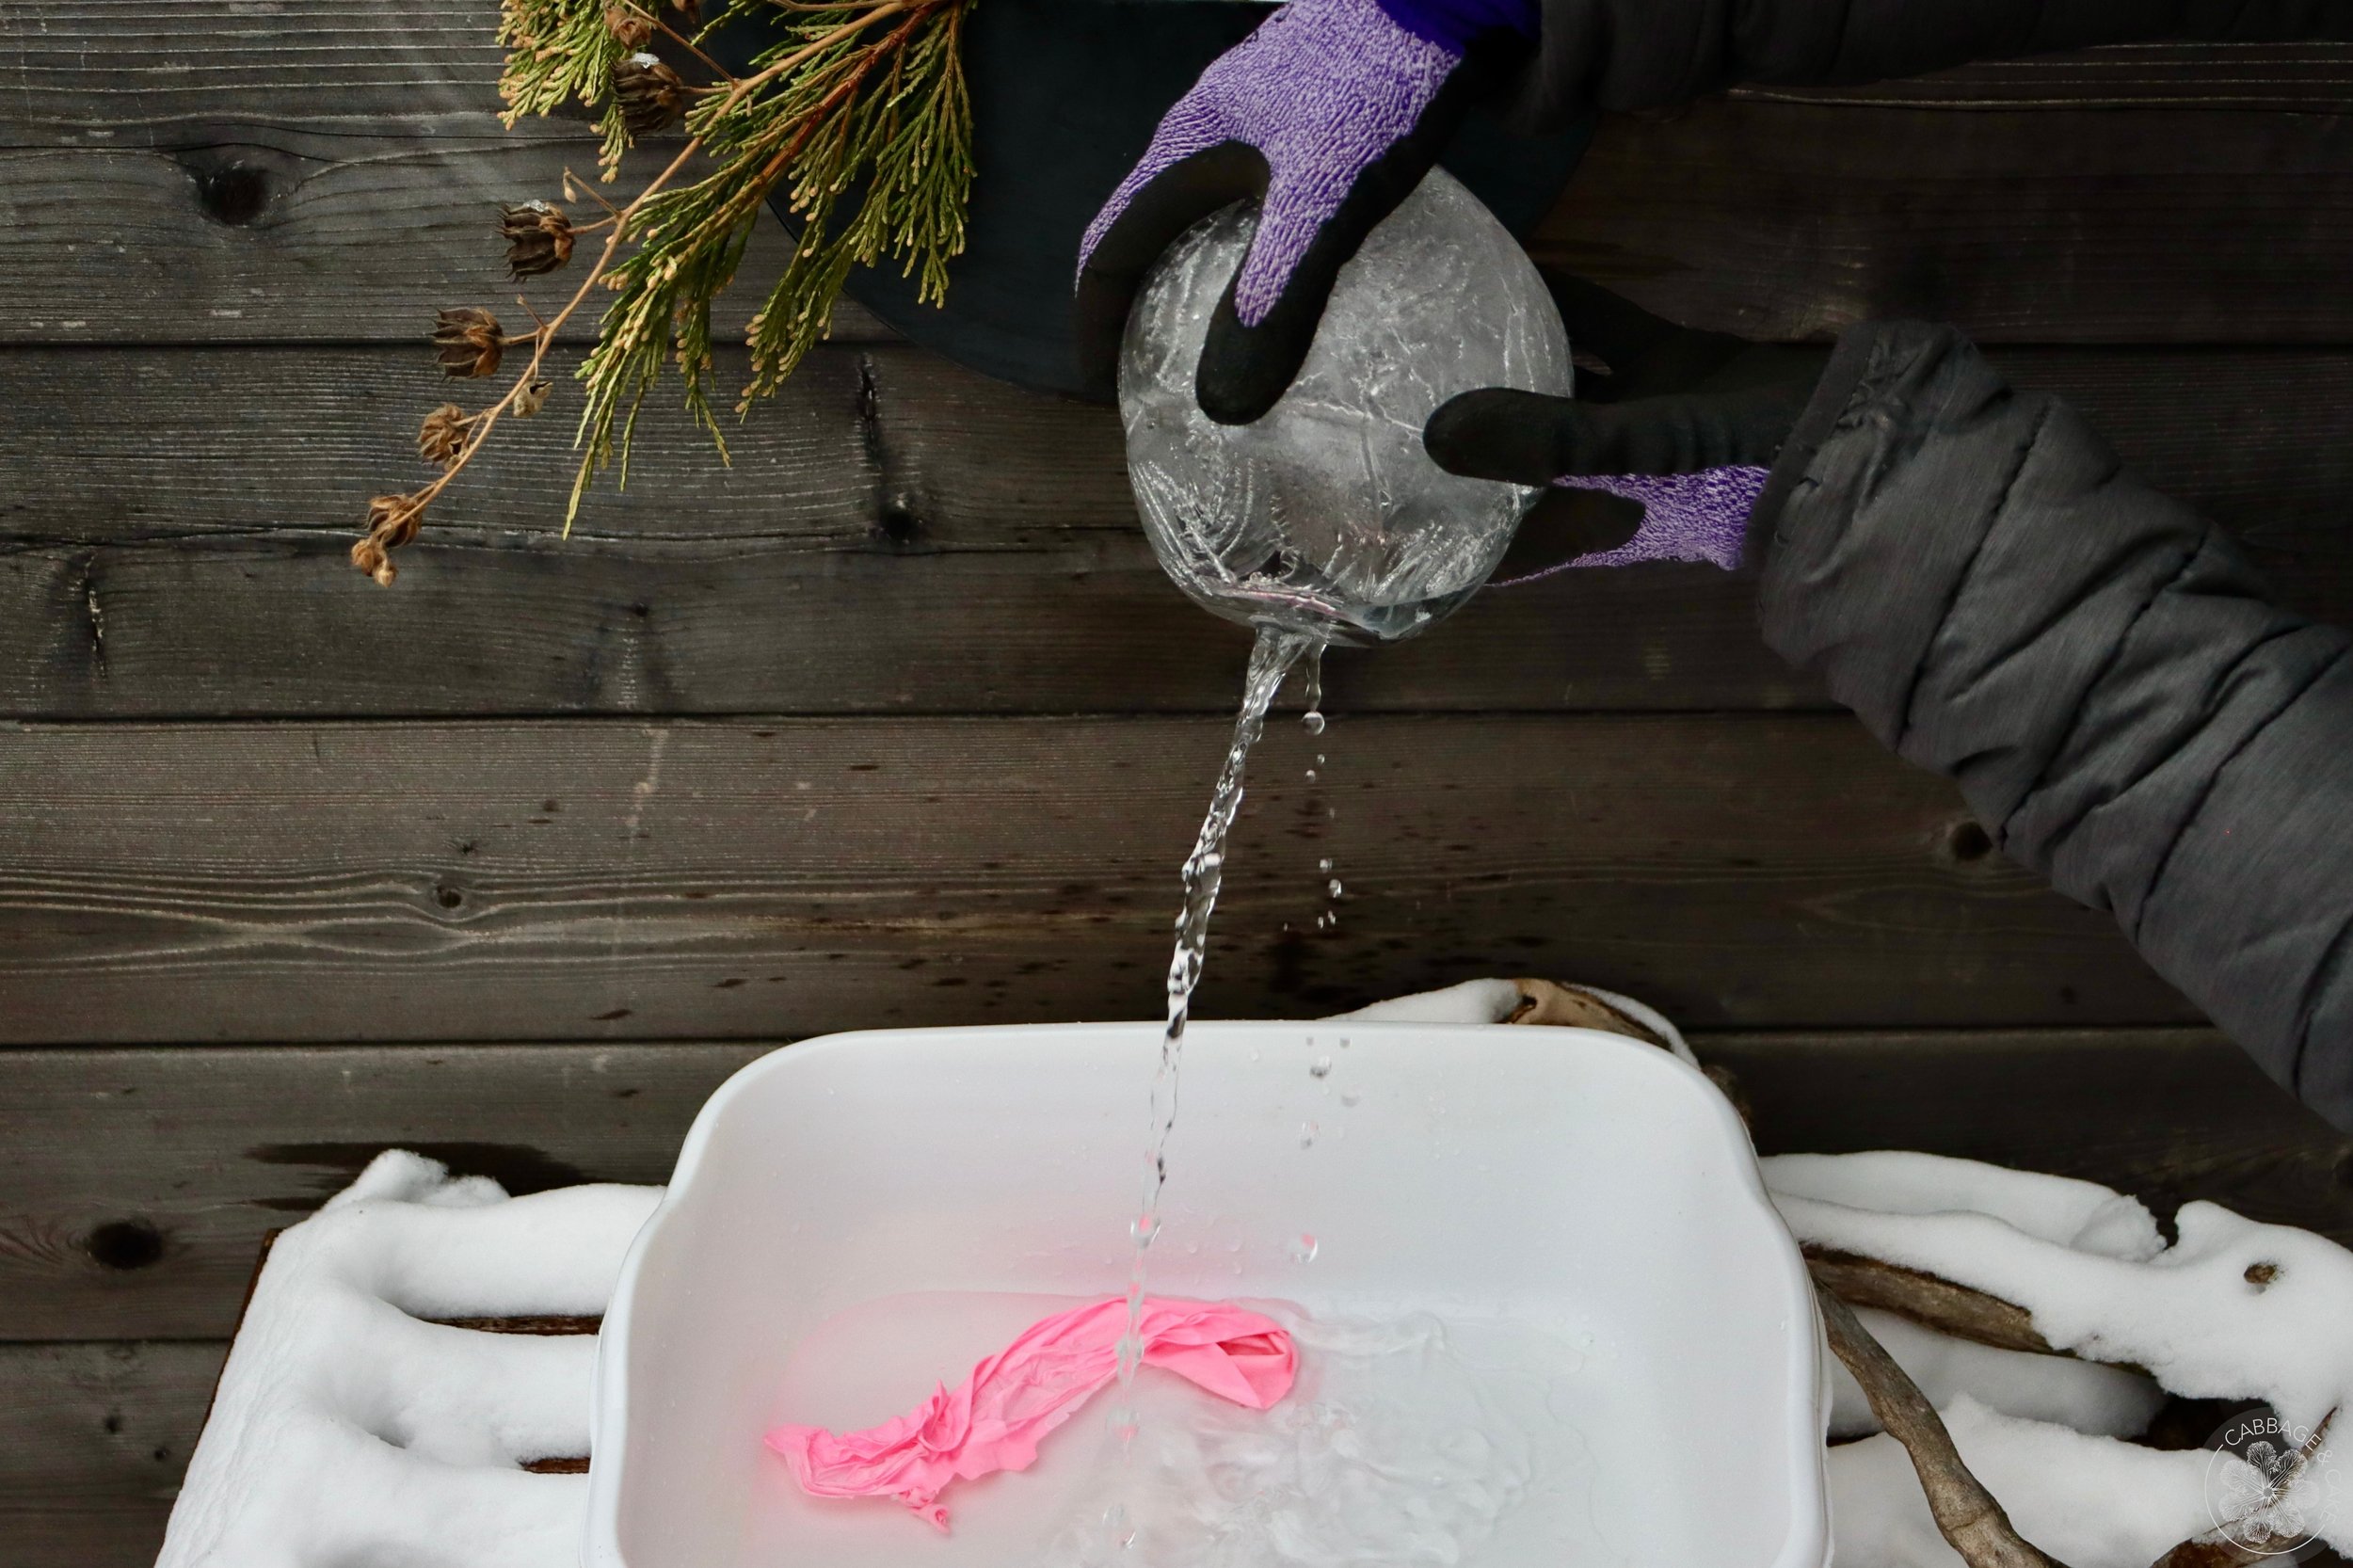
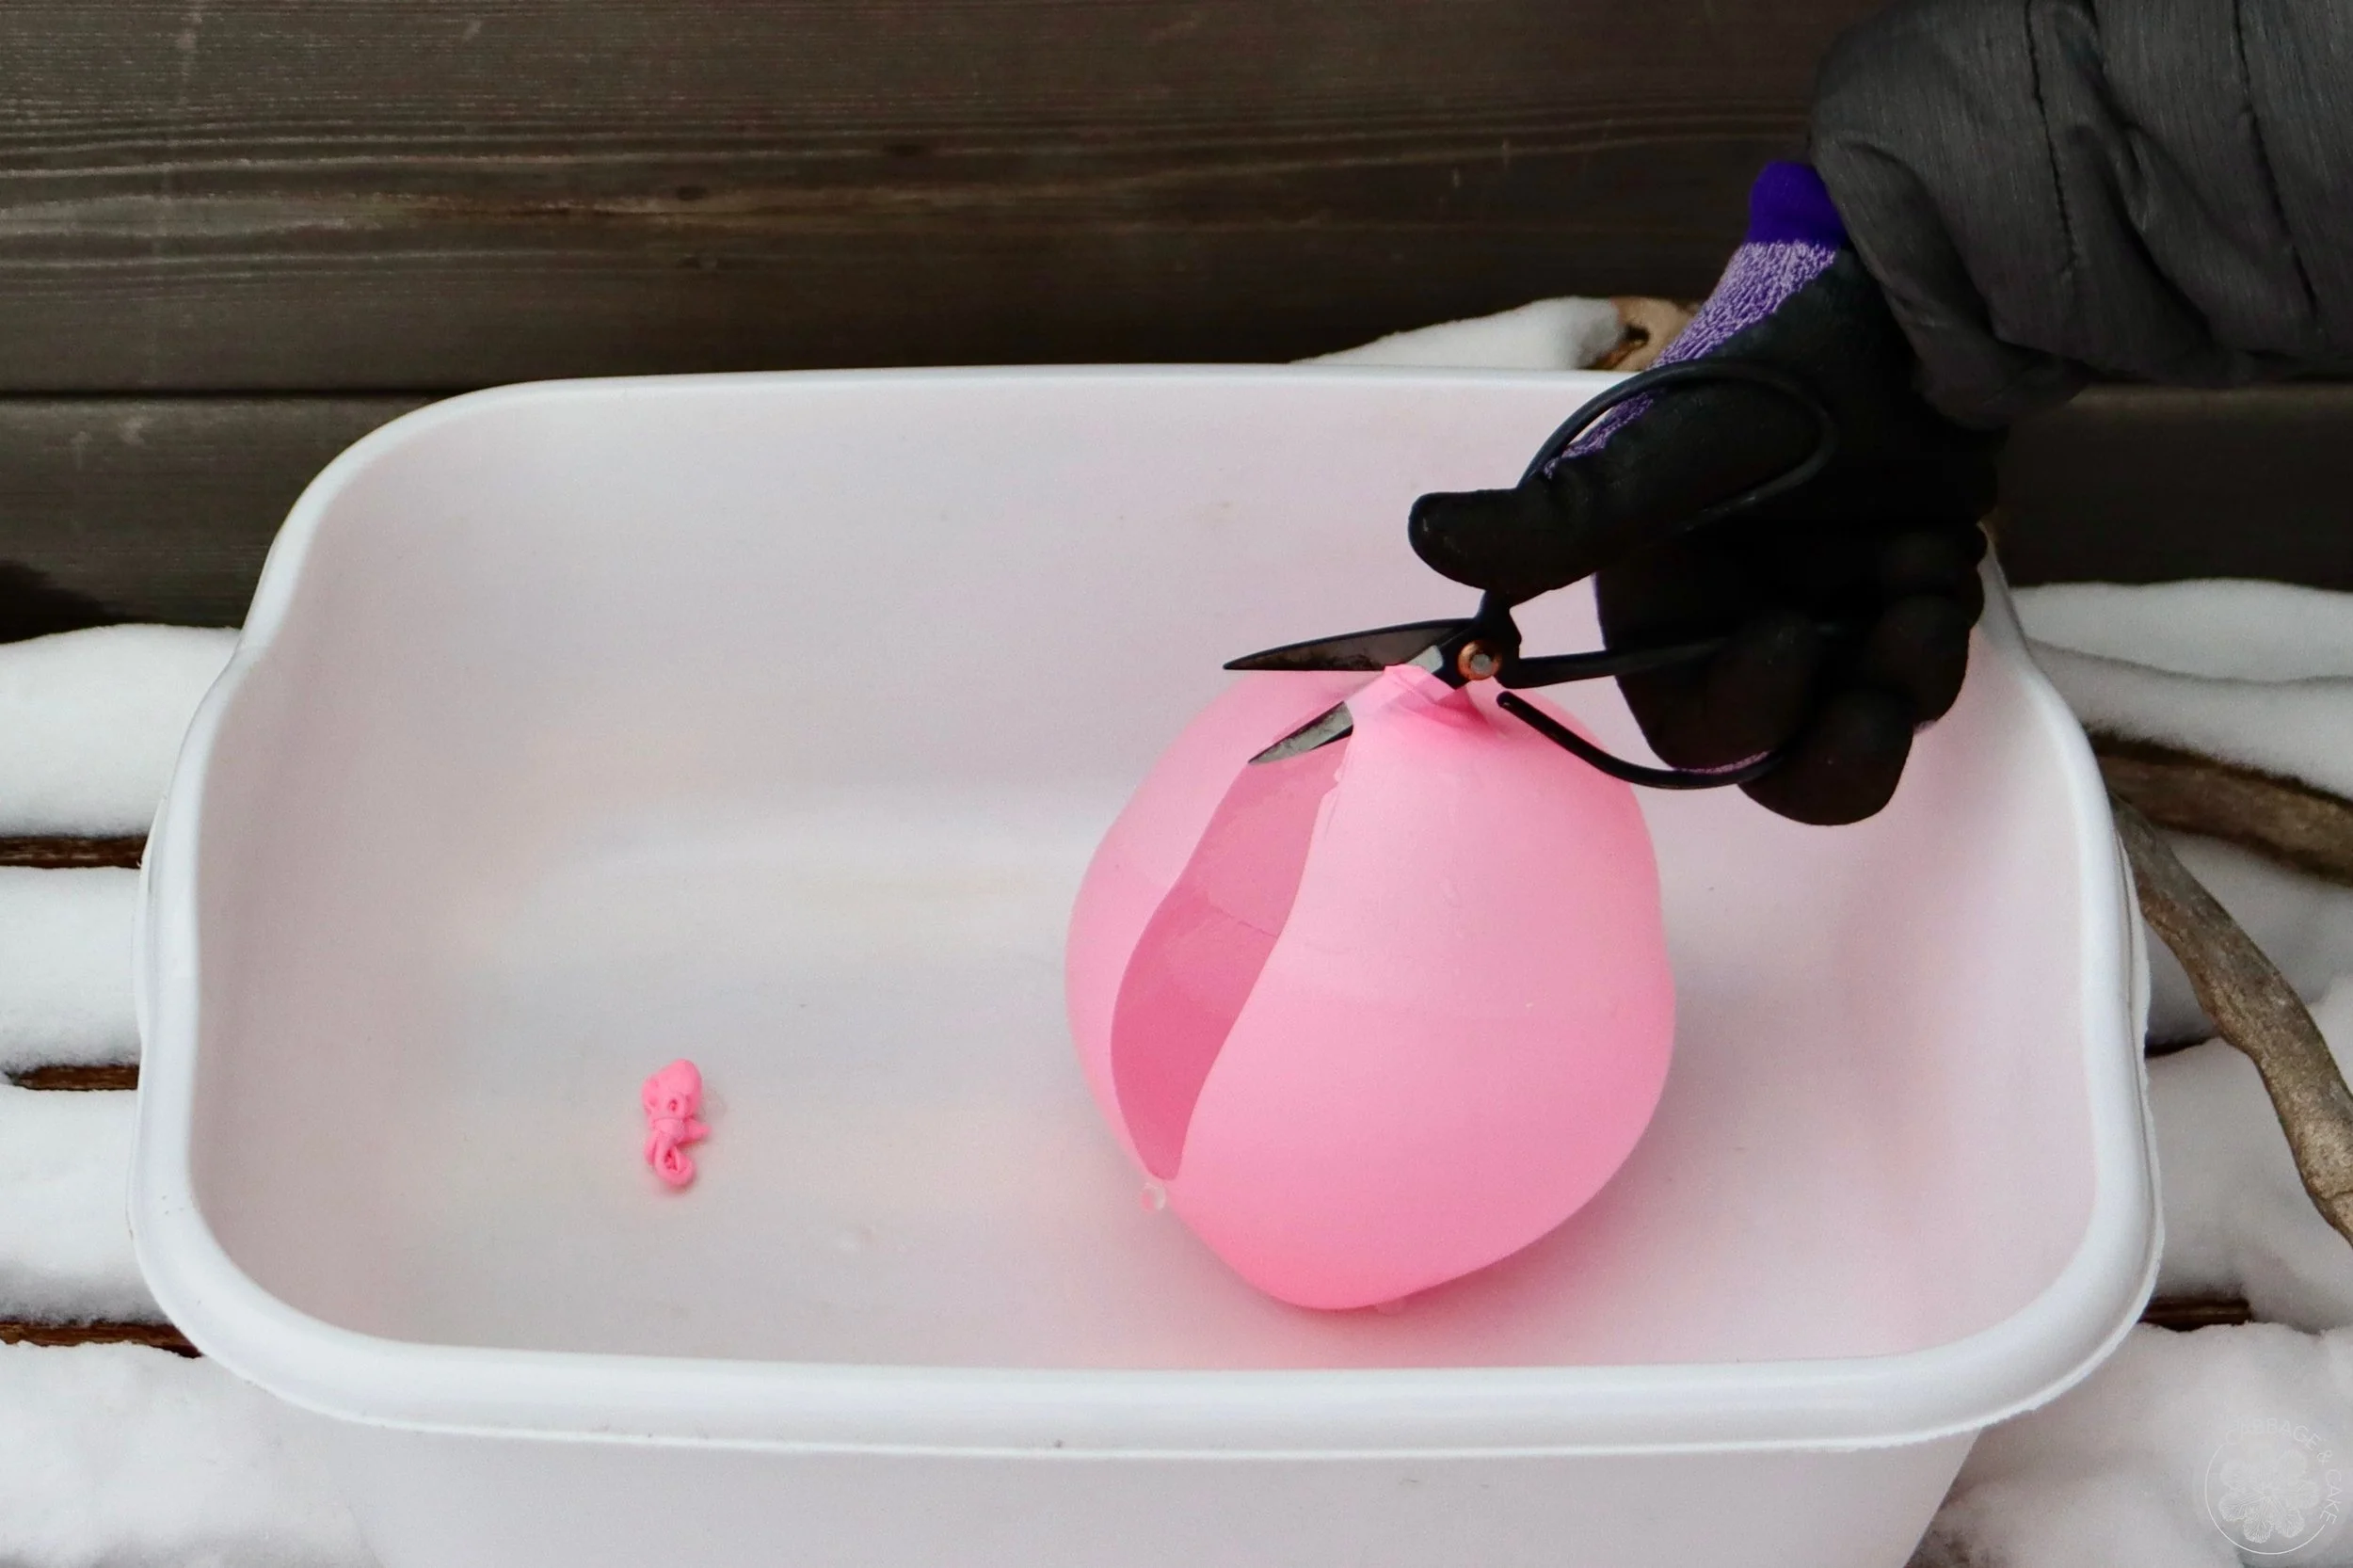
Over a container- to catch the water- cut the balloons and remove them from the ice.
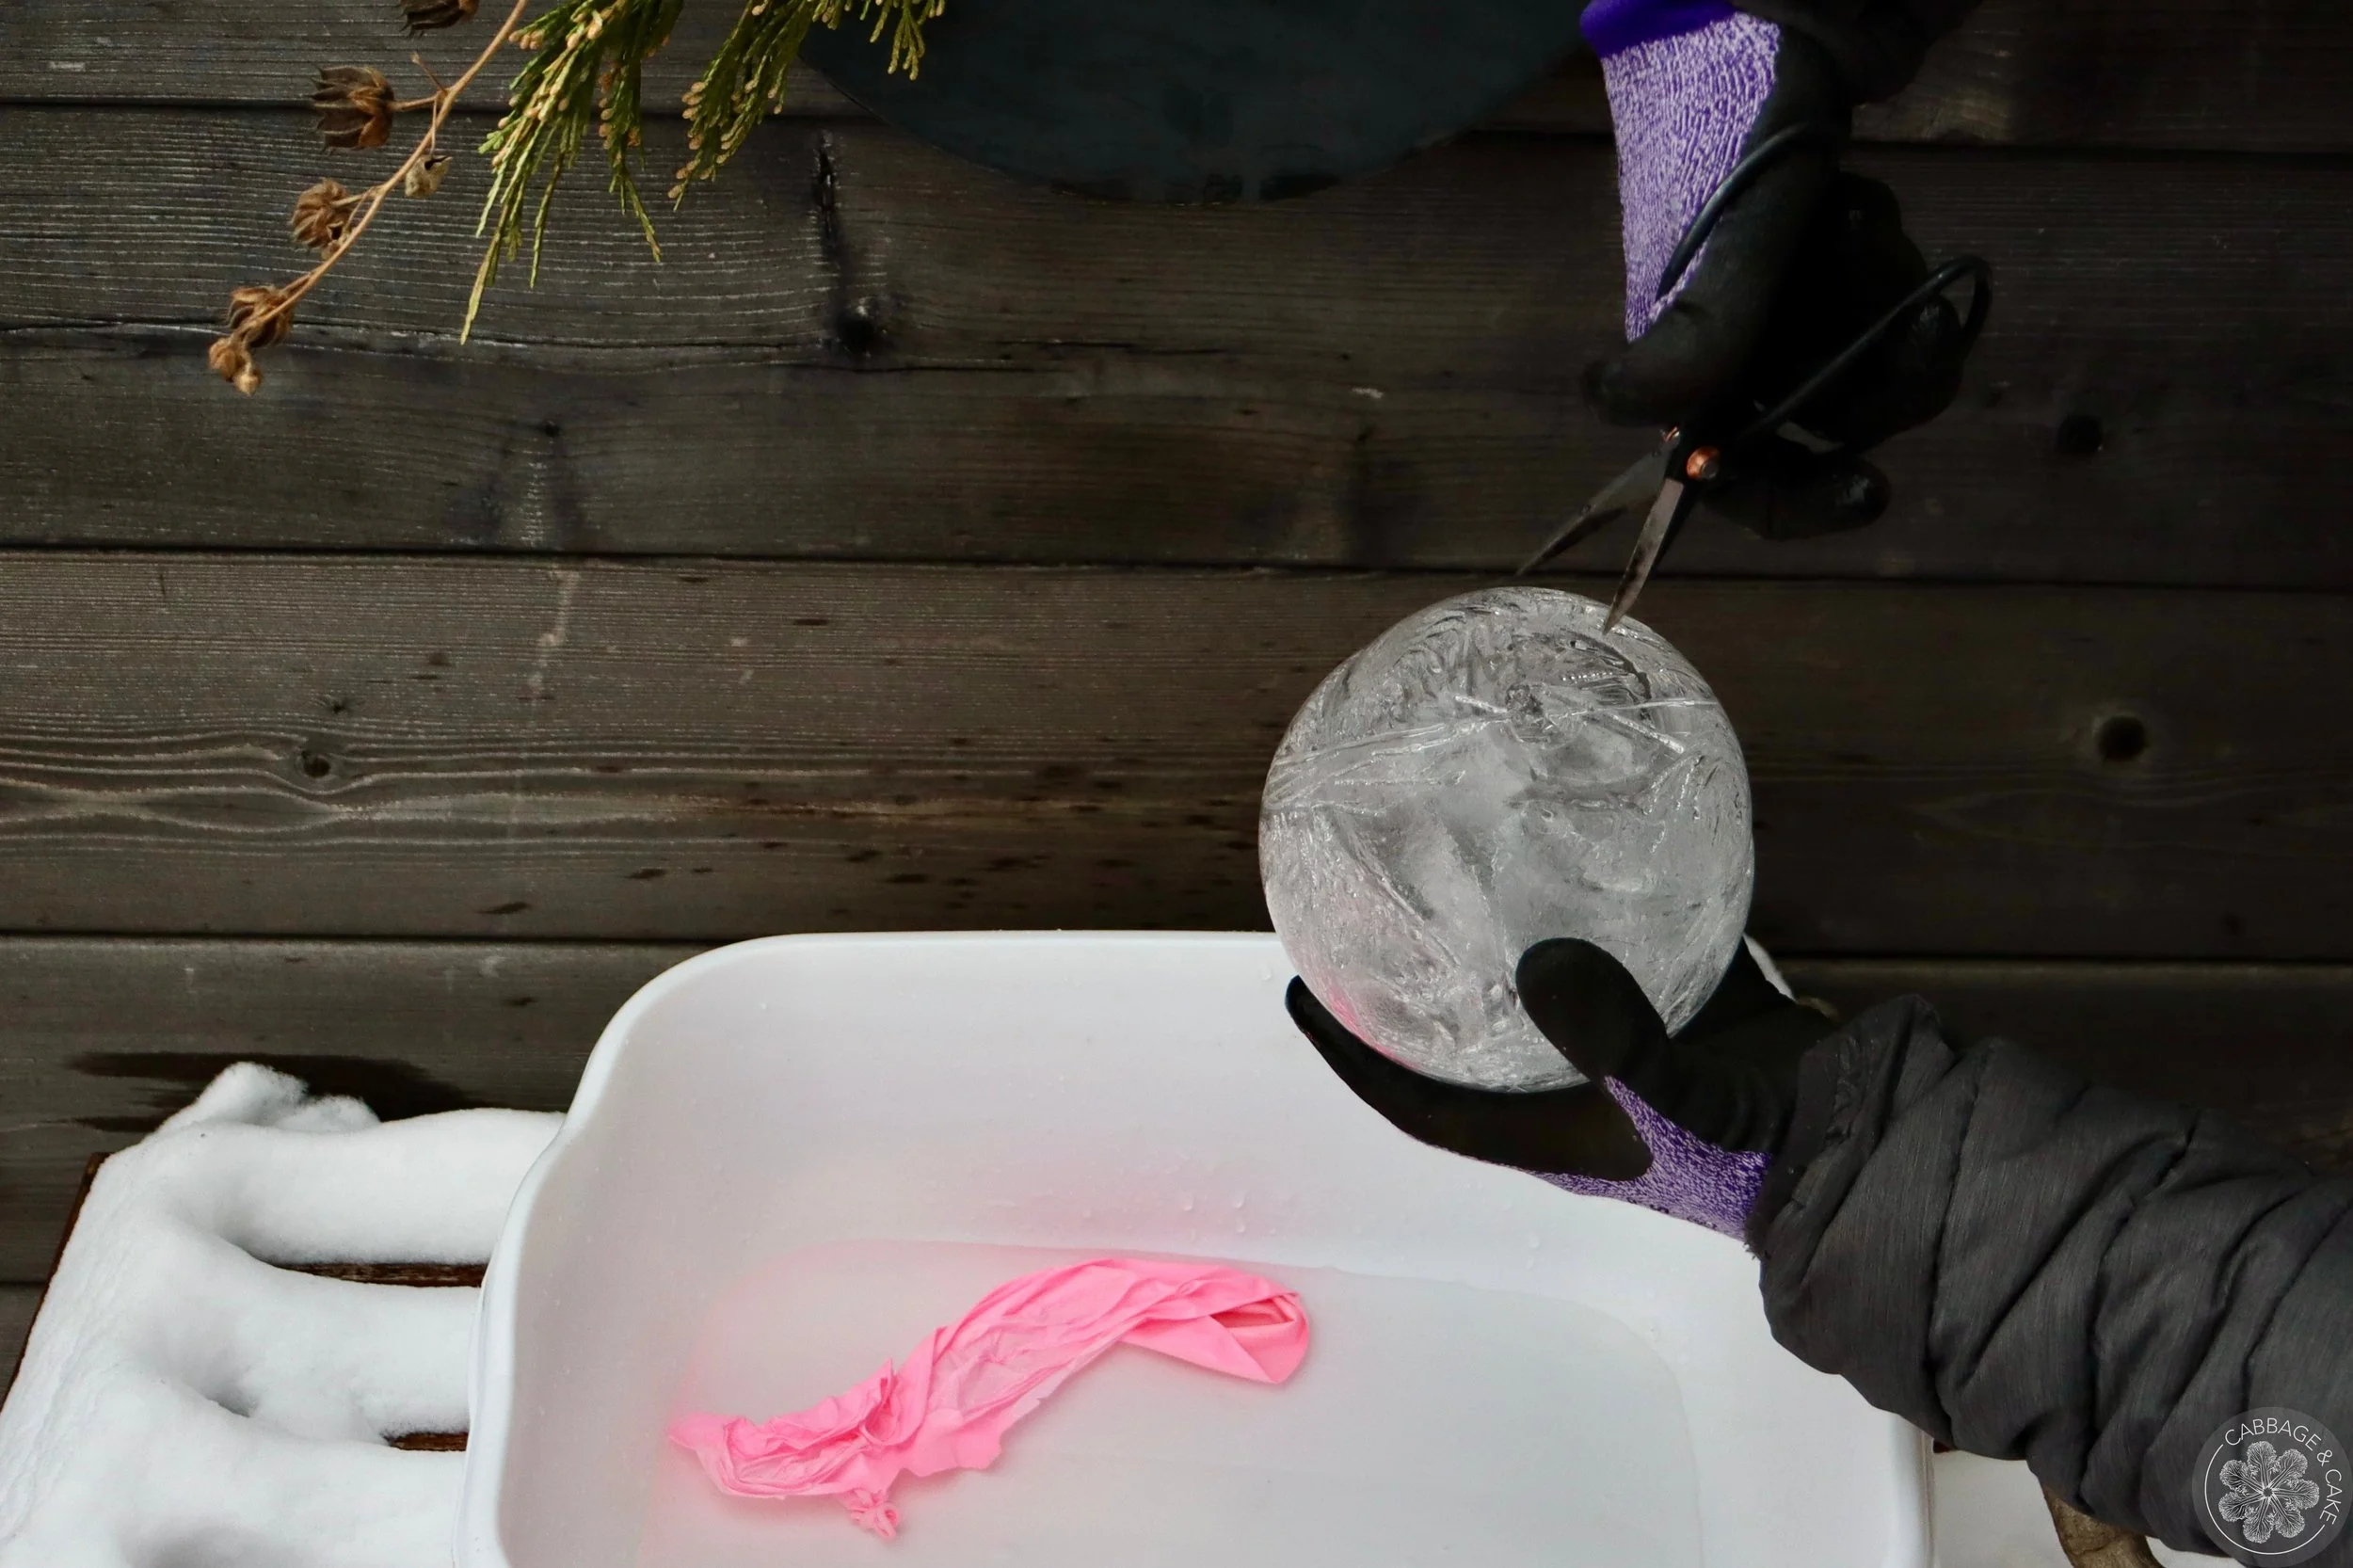
The water should splash out, and the bottom should be open. If it froze a bit too much you can carefully make an opening with your scissors or a hammer.
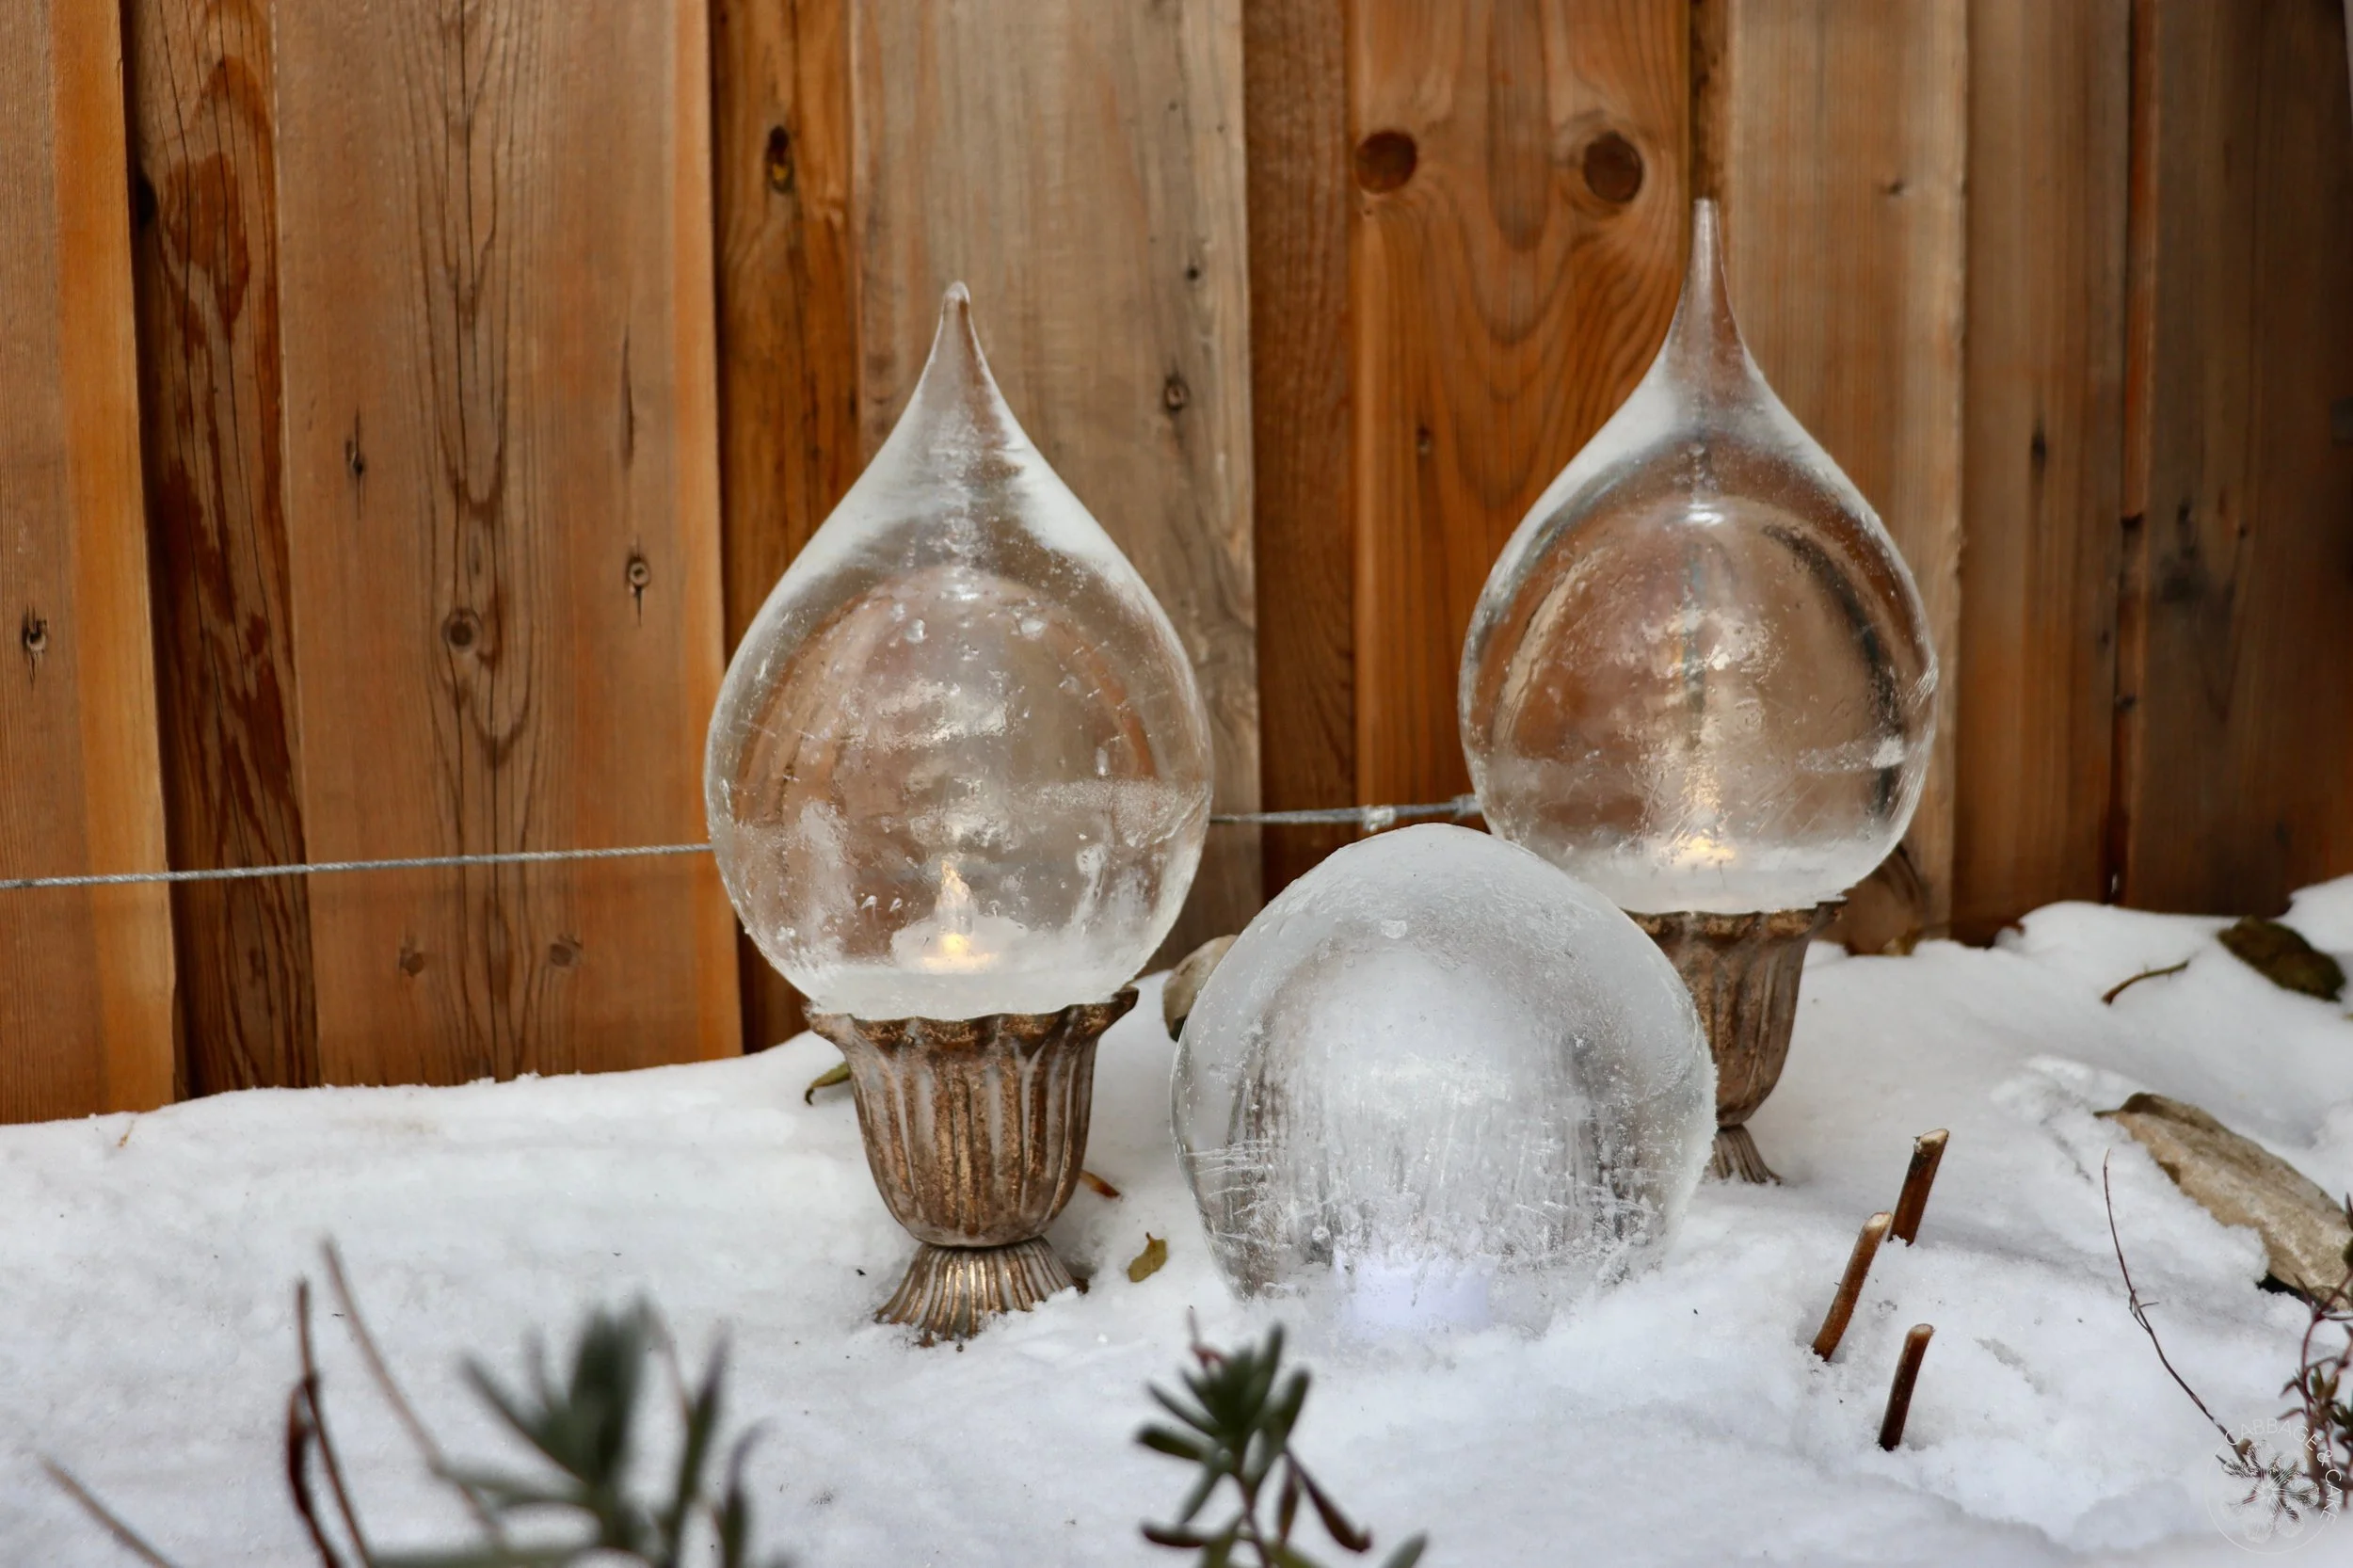
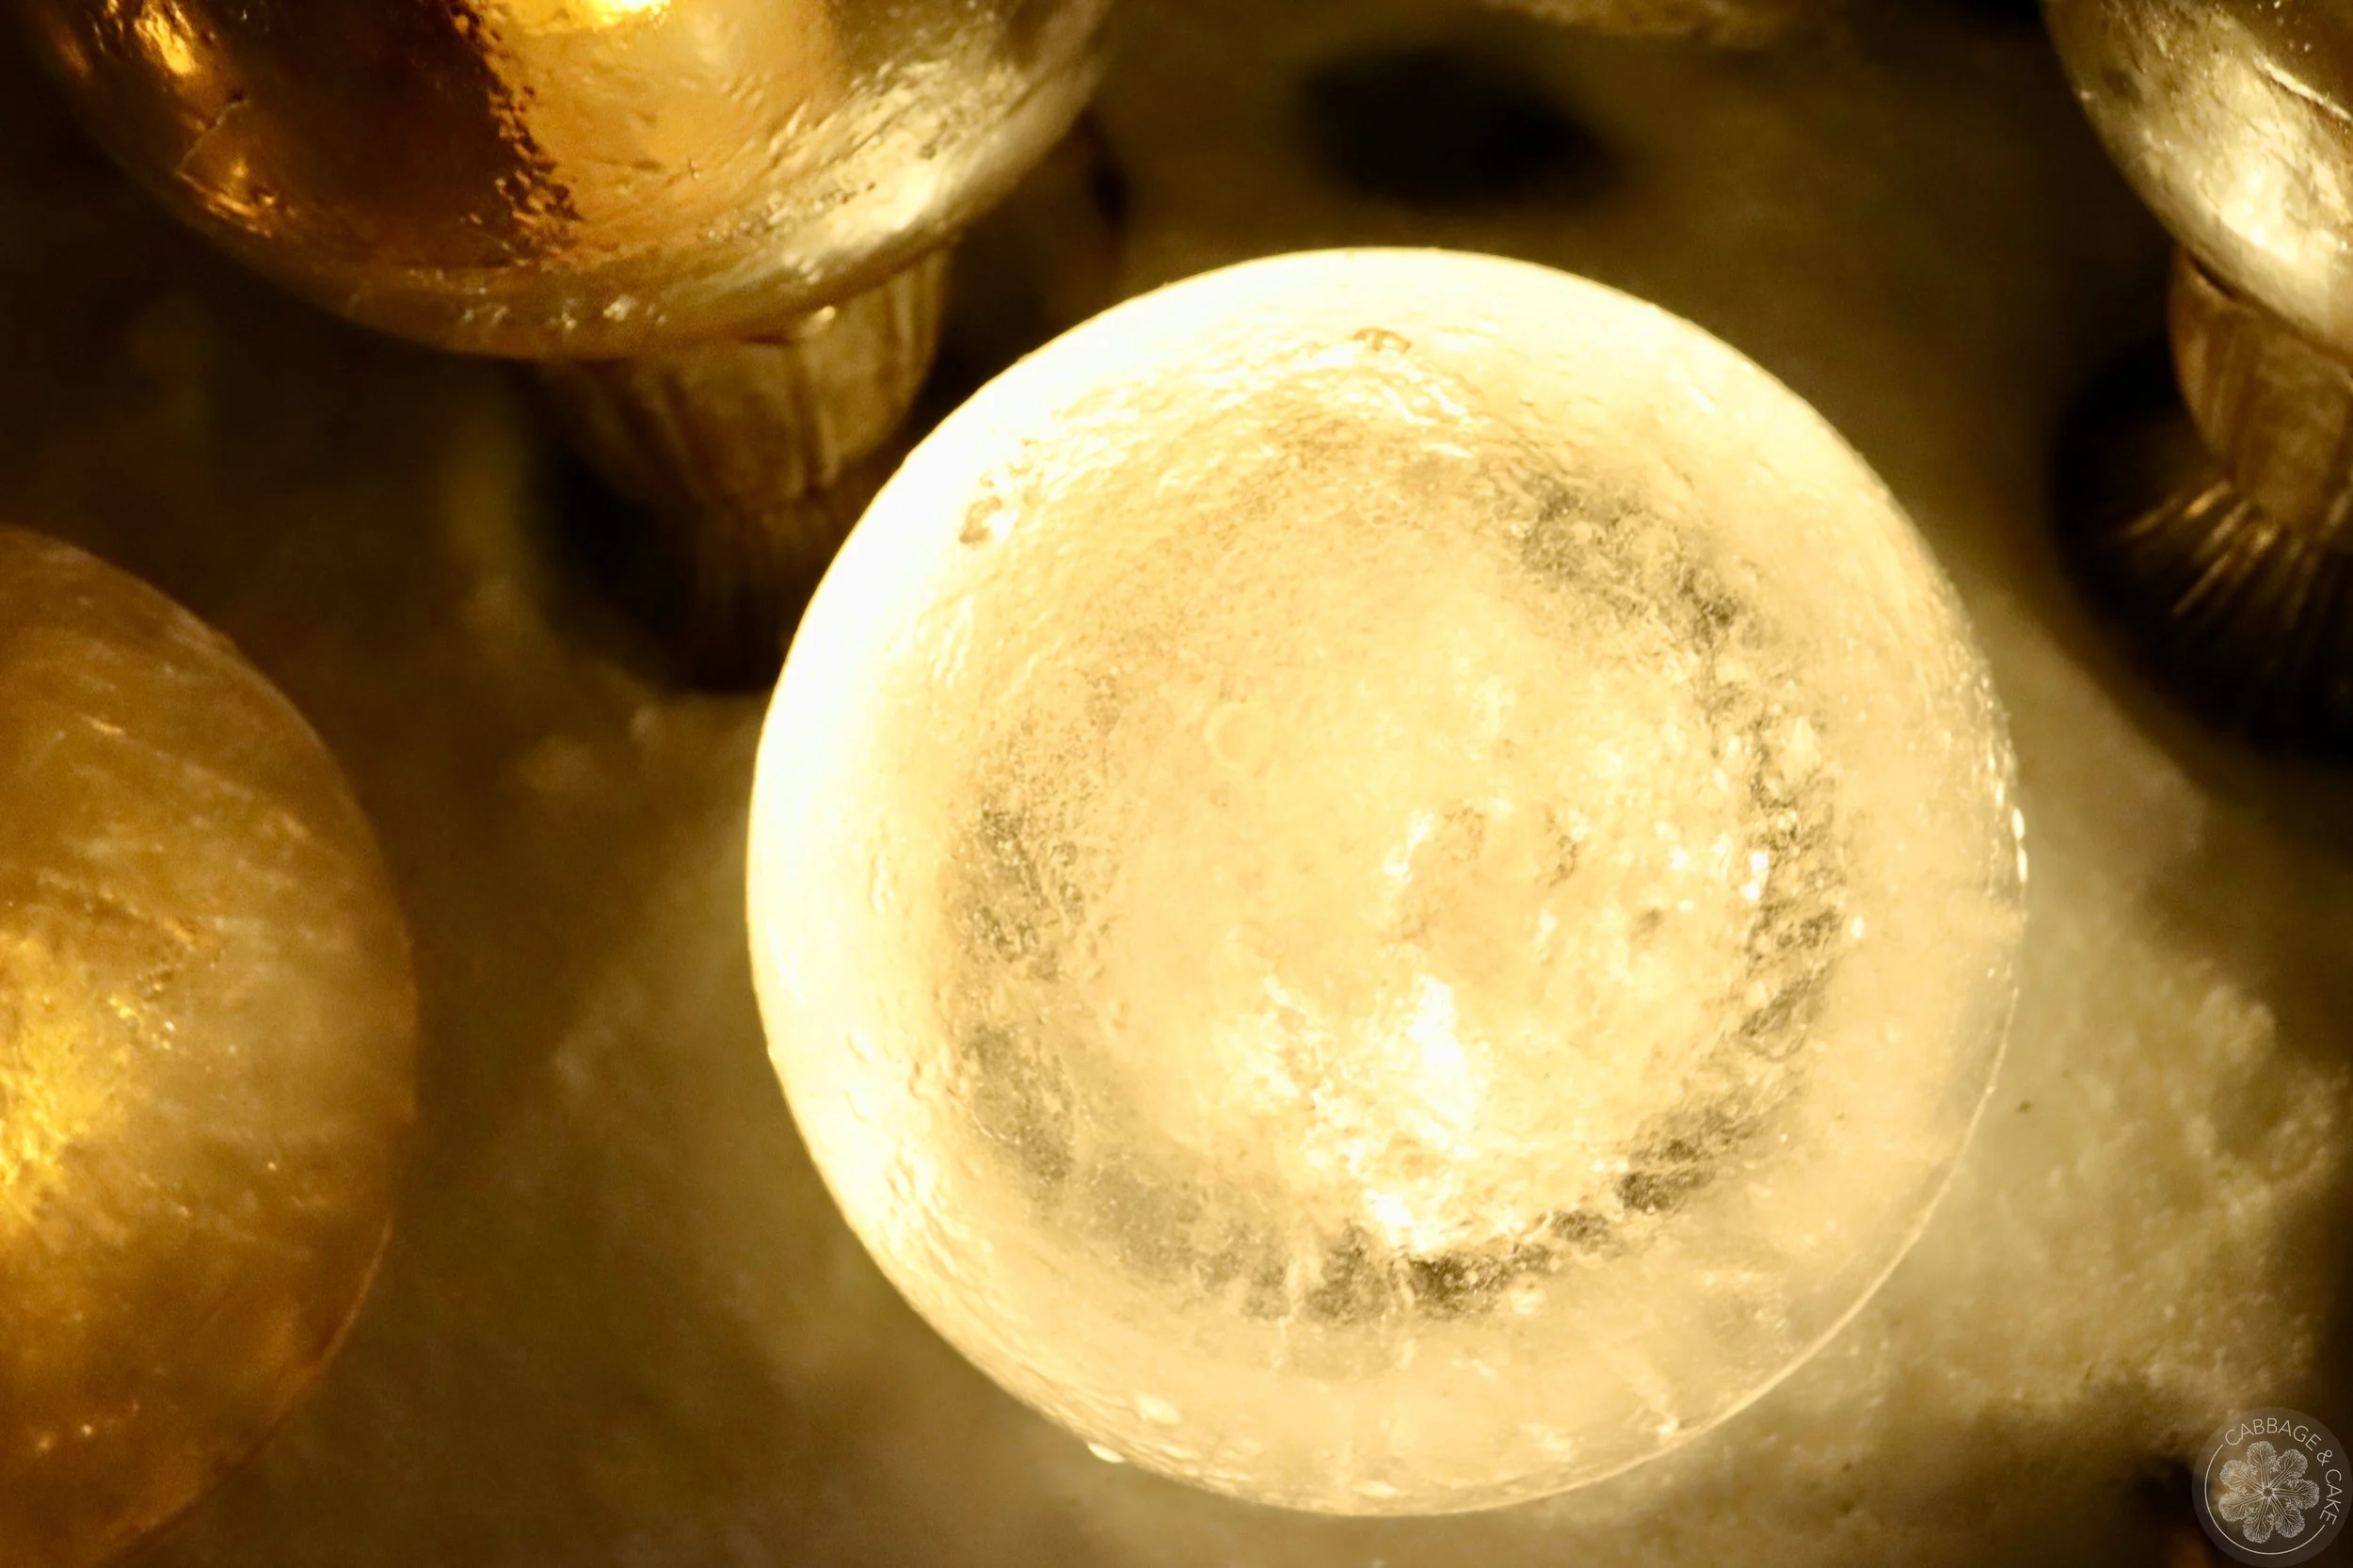
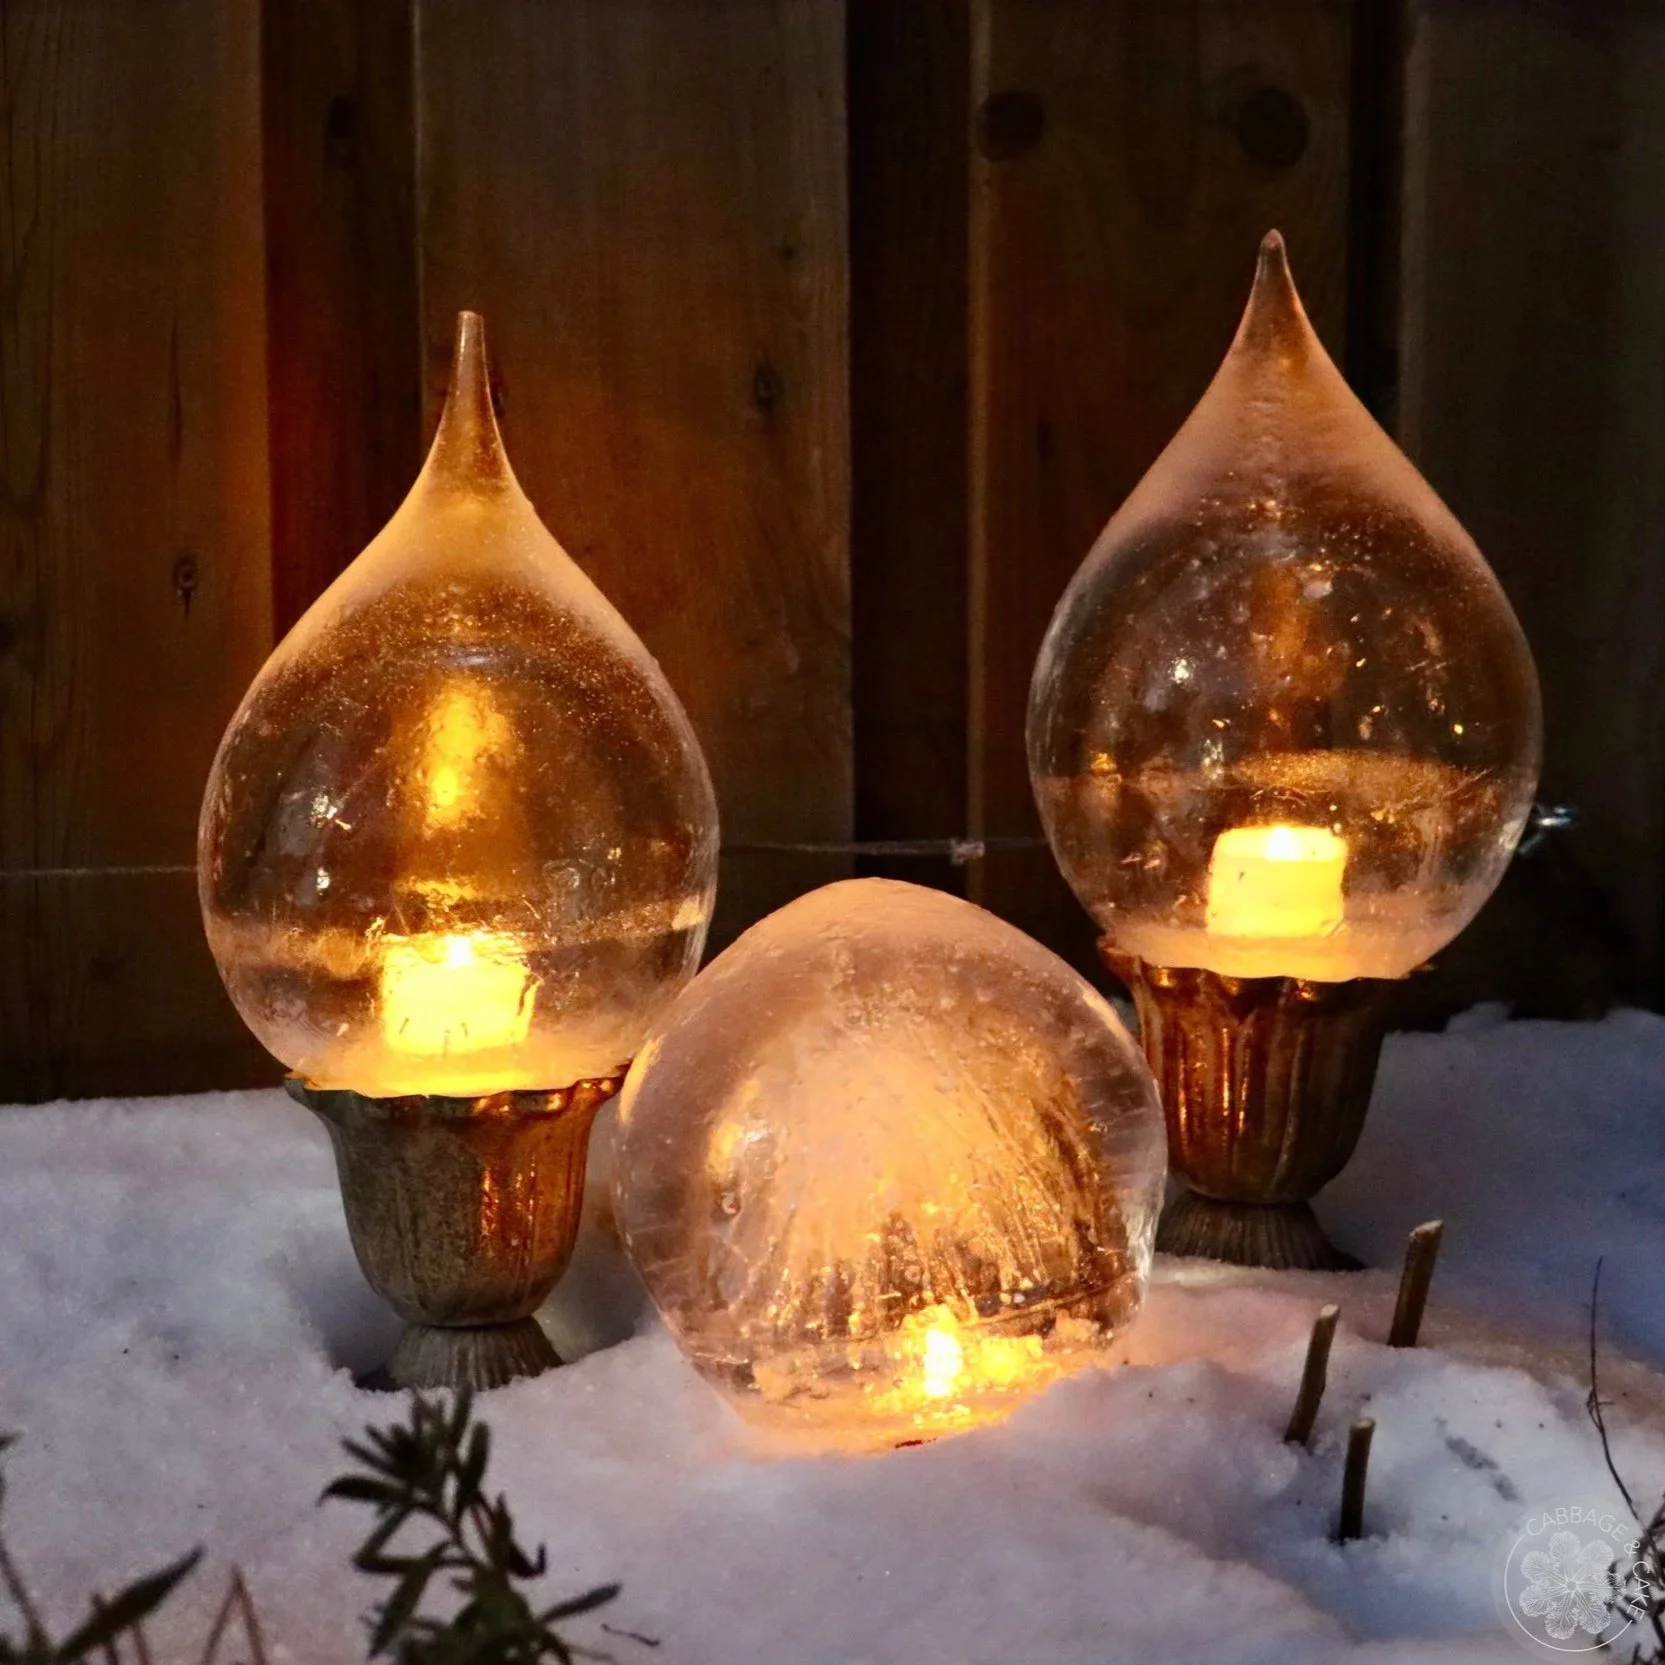
Turn your ice lantern over and place candles or string lights underneath. If you use real candles you will have to drill a small hole in the top to allow enough oxygen into the globe for the candle to burn. I used some candle holders I thrifted recently to prop the ice lanterns up.

Enjoy the magical glow of your homemade ice luminaries!
DIY ICE LANTERN – HOW TO MAKE A STUNNING GLOBE LUMINARY
by Julia
Use the cold weather to make some stunning ice lanterns that will beautify your front door, porch, backyard or balcony. All you really need is water, balloons, lights and time- and freezing temperatures of course! It’s an easy and fun DIY project and a great one to make with kids to add some magical glow to the cold and dark winter nights.
PREP TIME : 10-15 minutes WAIT TIME : 12-15 hours
MATERIALS AND TOOLS
water
balloons
shallow bowl/ container
scissors or knife
battery operated candles or string lights for outdoors or real candles
big container
string
gloves
drill, when using real candles
INSTRUCTIONS
Slip a balloon over a faucet and fill it about a third with water, depending on the size of lantern you would like to make.
Release a little bit of water before tying it. This will avoid air bubbles being trapped inside that can cause flat spots on top of your luminaries.
Tie off your balloon and set it in a bowl or shallow round dish with the knot on the bottom for the globe shape.
Place it on the ground in snow or a mat to avoid the bottom from freezing.
For a more pointed shape, you can tie the knot upwards with some twine, like I did to the bottom of a chair (see picture above).
Wait for 12-15 hours below zero until the balloons feel solid on the outside but still unfrozen in the middle and on the bottom.
Over a container- to catch the water- cut the balloons and remove them from the ice.
The water should splash out, and the bottom should be open. If it froze a bit too much you can carefully make an opening with your scissors or a hammer.
Turn your ice lantern over and light it with your choice of candles or string lights. If you use real candles you will have to drill a small hole in the top to allow enough oxygen into the globe for the candle to burn.
Enjoy the magical glow of your homemade ice luminaries!