

DIY EASTER QUAIL EGGS
Quail eggs are small and speckled and come in different shades of beige and brown. They’re not only delicious but also make the cutest little Easter eggs to decorate.
You can either hard boil and dye quail eggs or blow them out, paint and decorate them to hang up as easter decorations. I have to admit blowing them out is a bit of a challenge since they are so small and fragile and break easily but by using a bulb syringe this becomes quite easy.
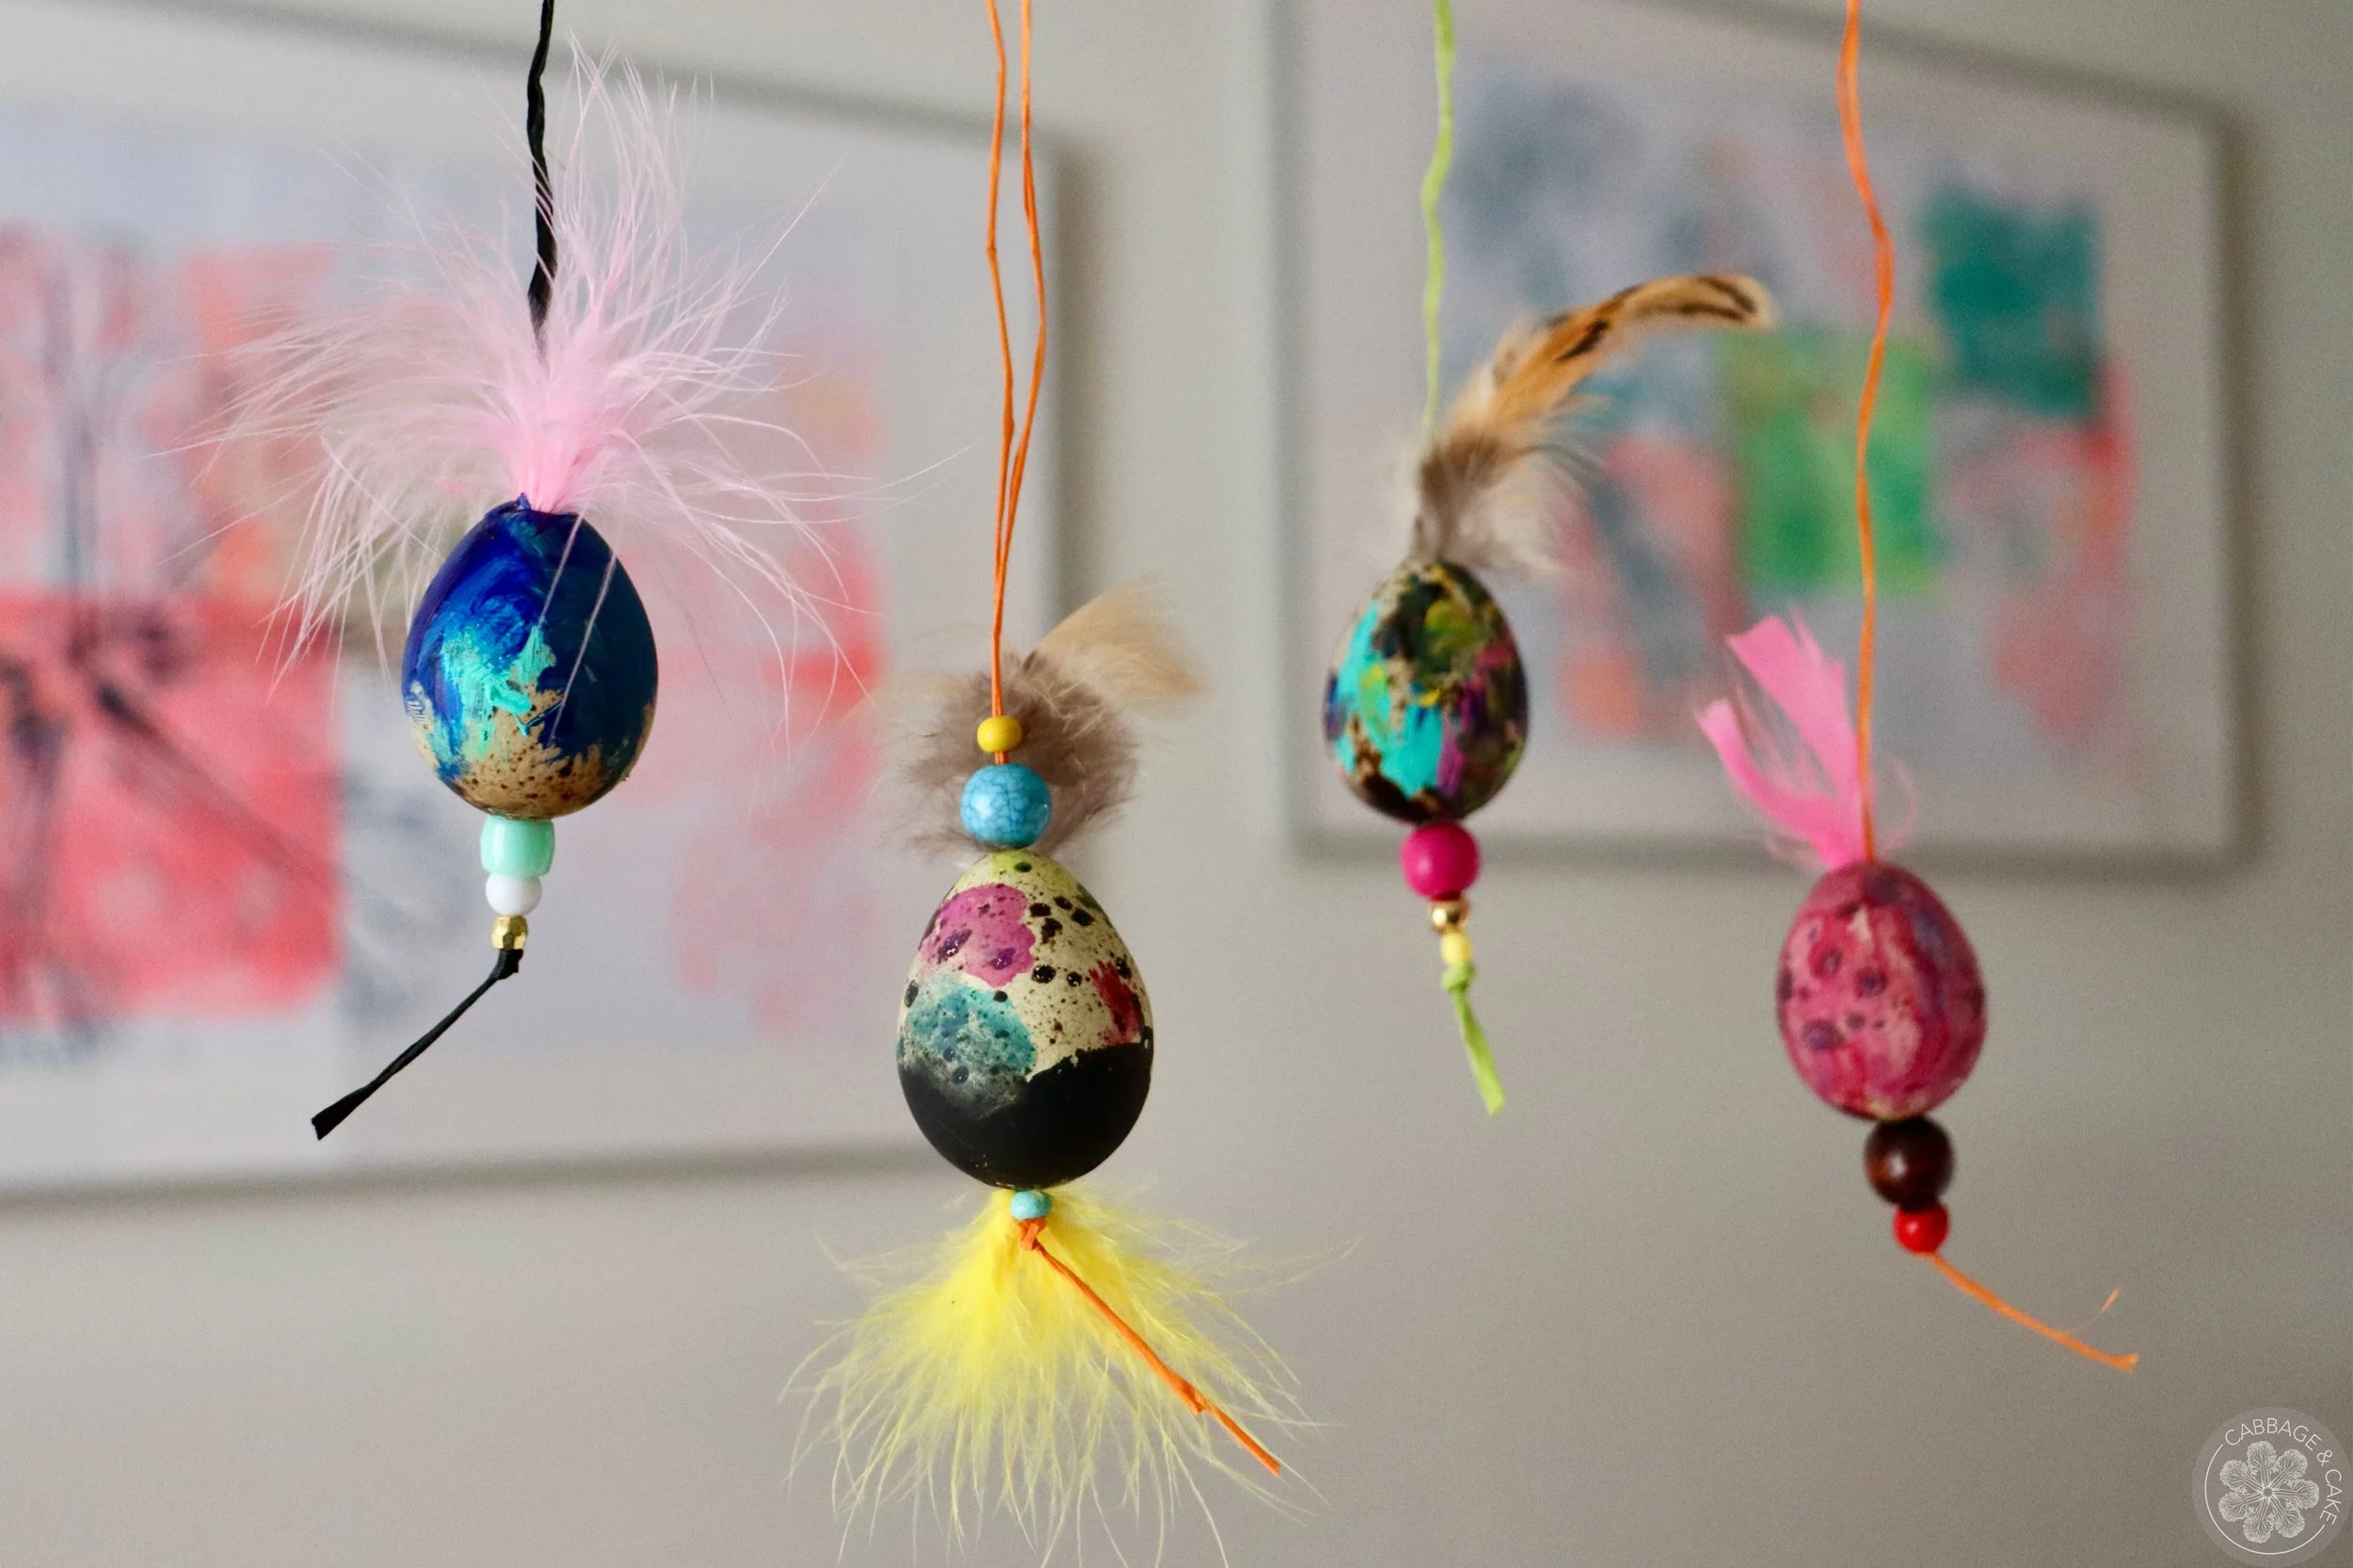
These adorable little Easter eggs are painted with some acrylic paint, strung up on strings and raffia paper ribbons and decorated with some colourful beads and feathers. It’s a great project to do with kids because they absolutely love these tiny eggs.
Make these unique mini quail eggs in your favourite colours and style as a happy addition to your Easter decoration this year.
TIPS TO MAKE THE PERFECT EASTER QUAIL EGGS
Gather everything you will need in advance to avoid interrupting your creative flow.
You can blow out your quail eggs by mouth, but I recommend using a bulb syringe, since they are fragile and can break easily.
Set the blown -out eggs in a bowl with water and rinse them thoroughly once they are all empty.
I like to put the eggs on a wooden skewer to paint them and to avoid fingerprints all over them.
Trust your creativity and follow your creative instincts. Enjoy the creative process just as much as the end result and let go of any fixed ideas.
Be open to incorporating new materials or some you might already have and play around with different colours and textures.
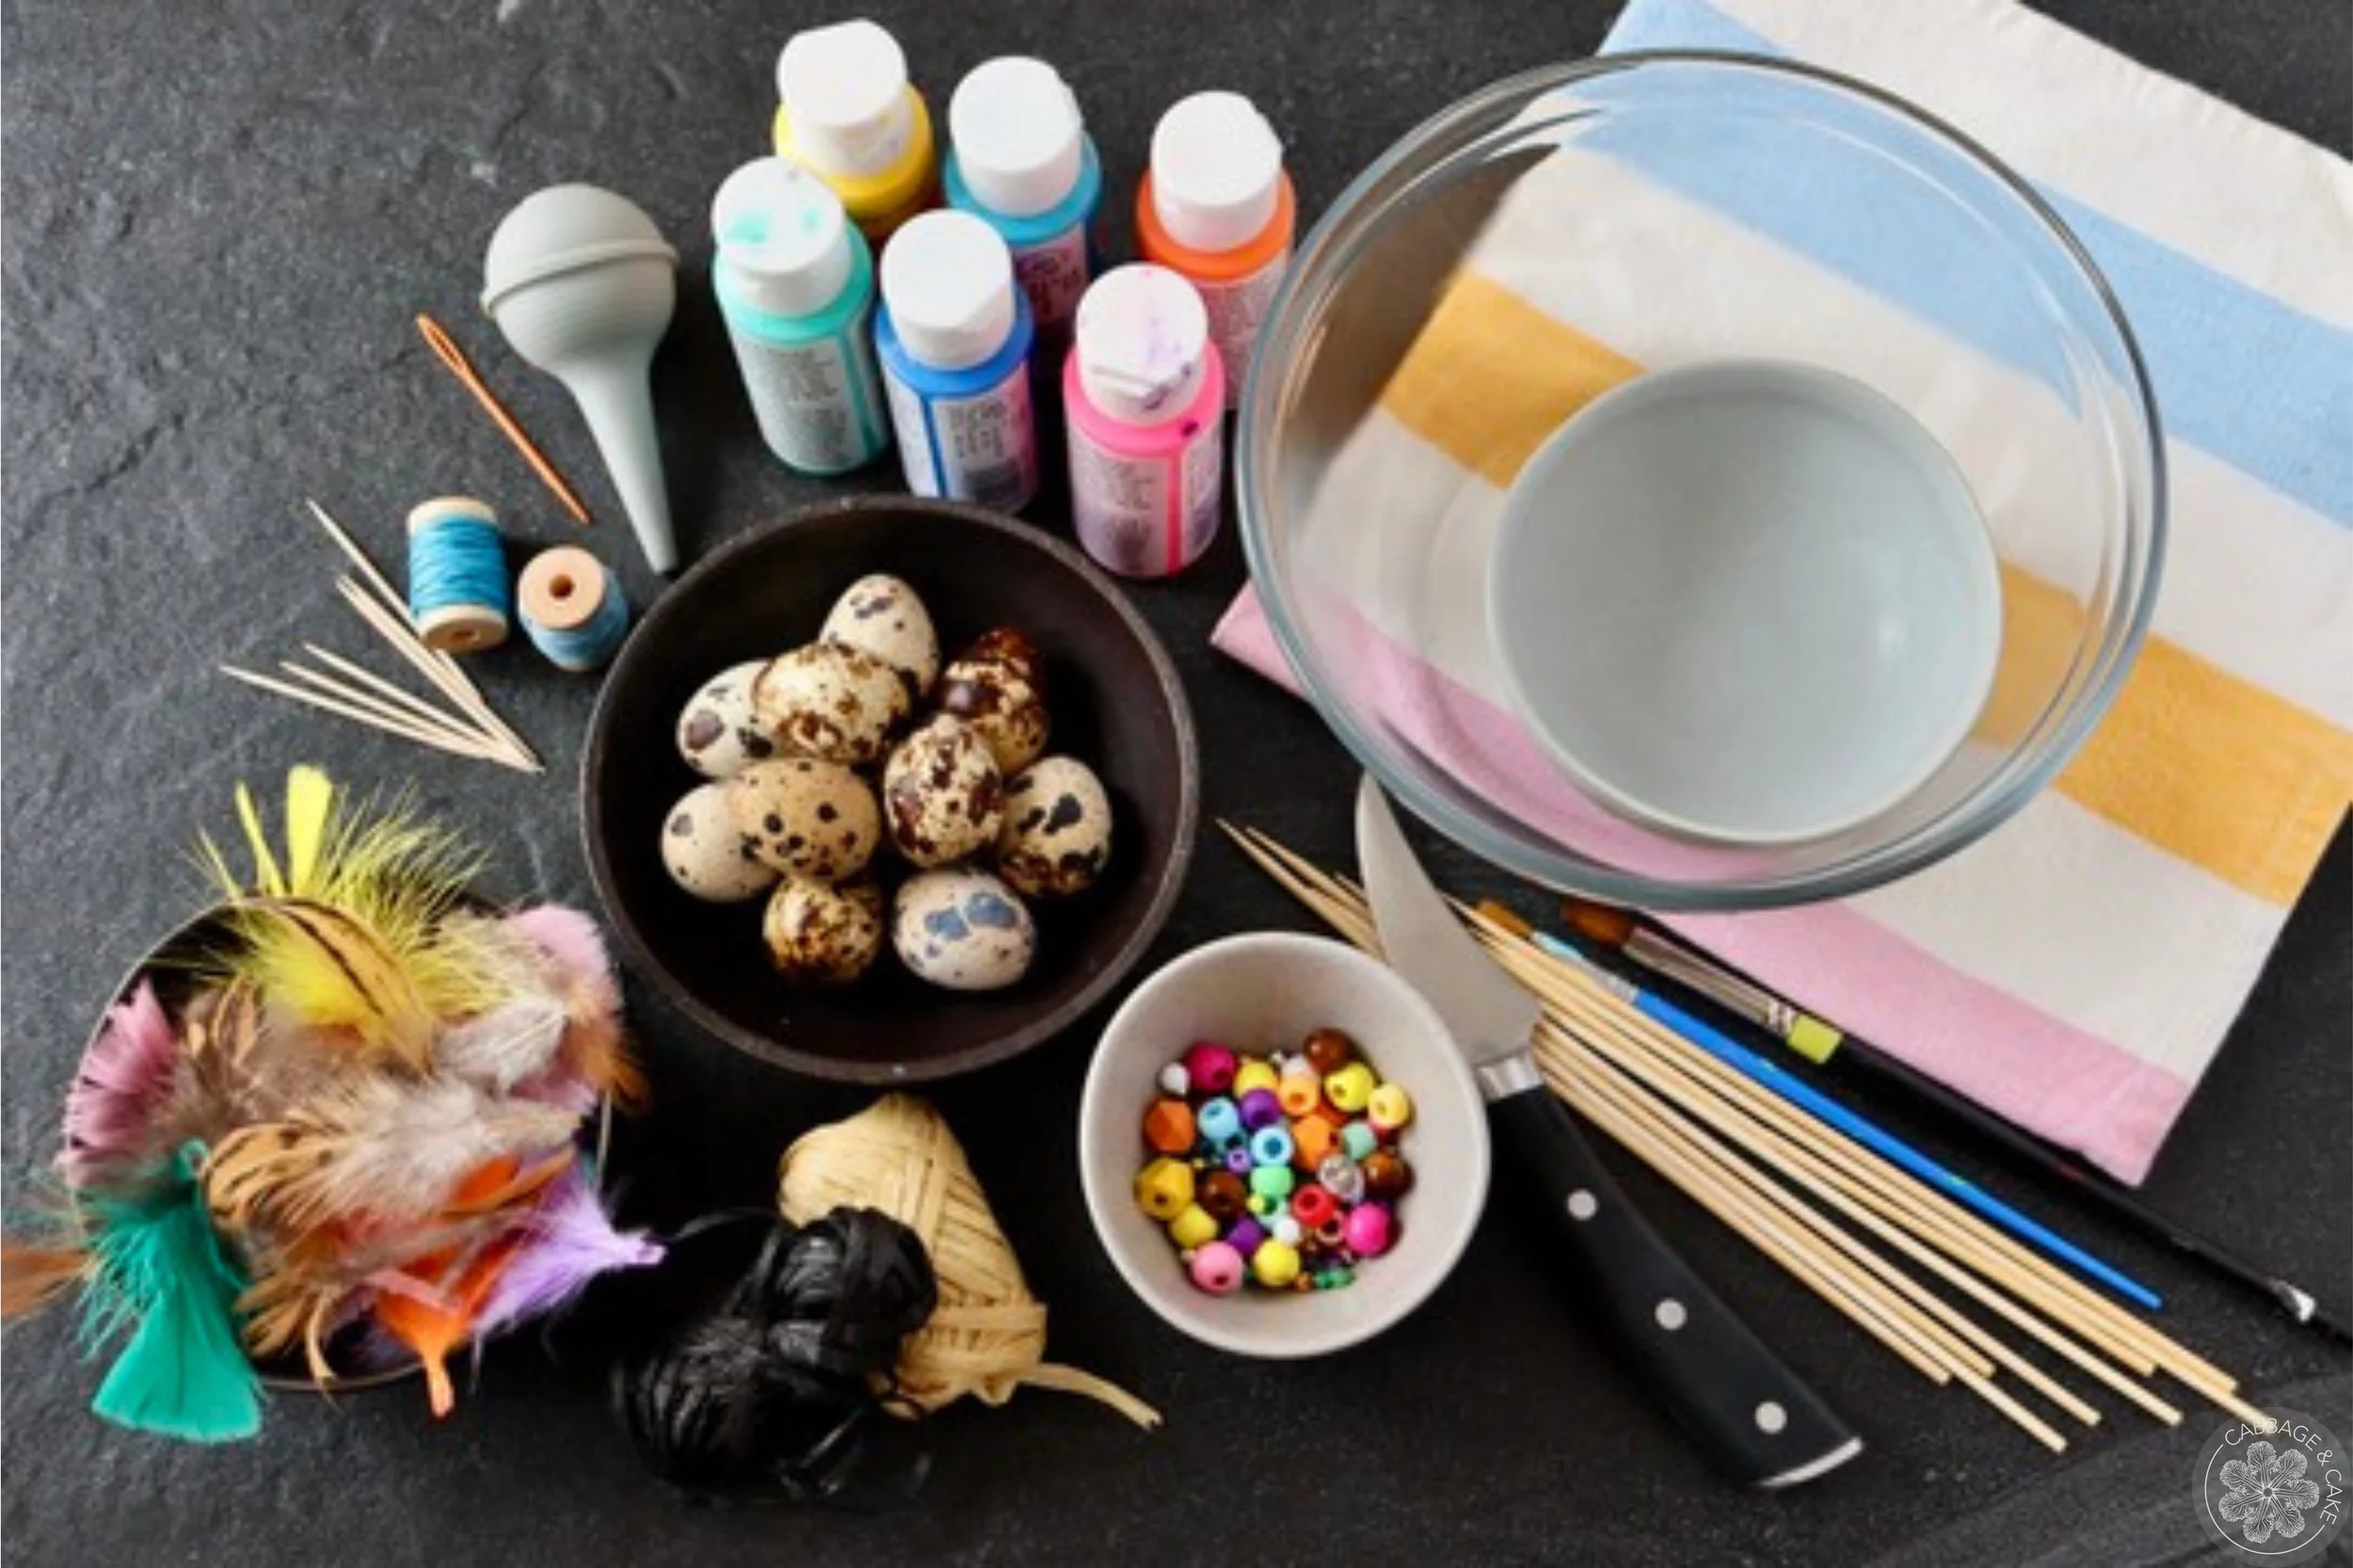
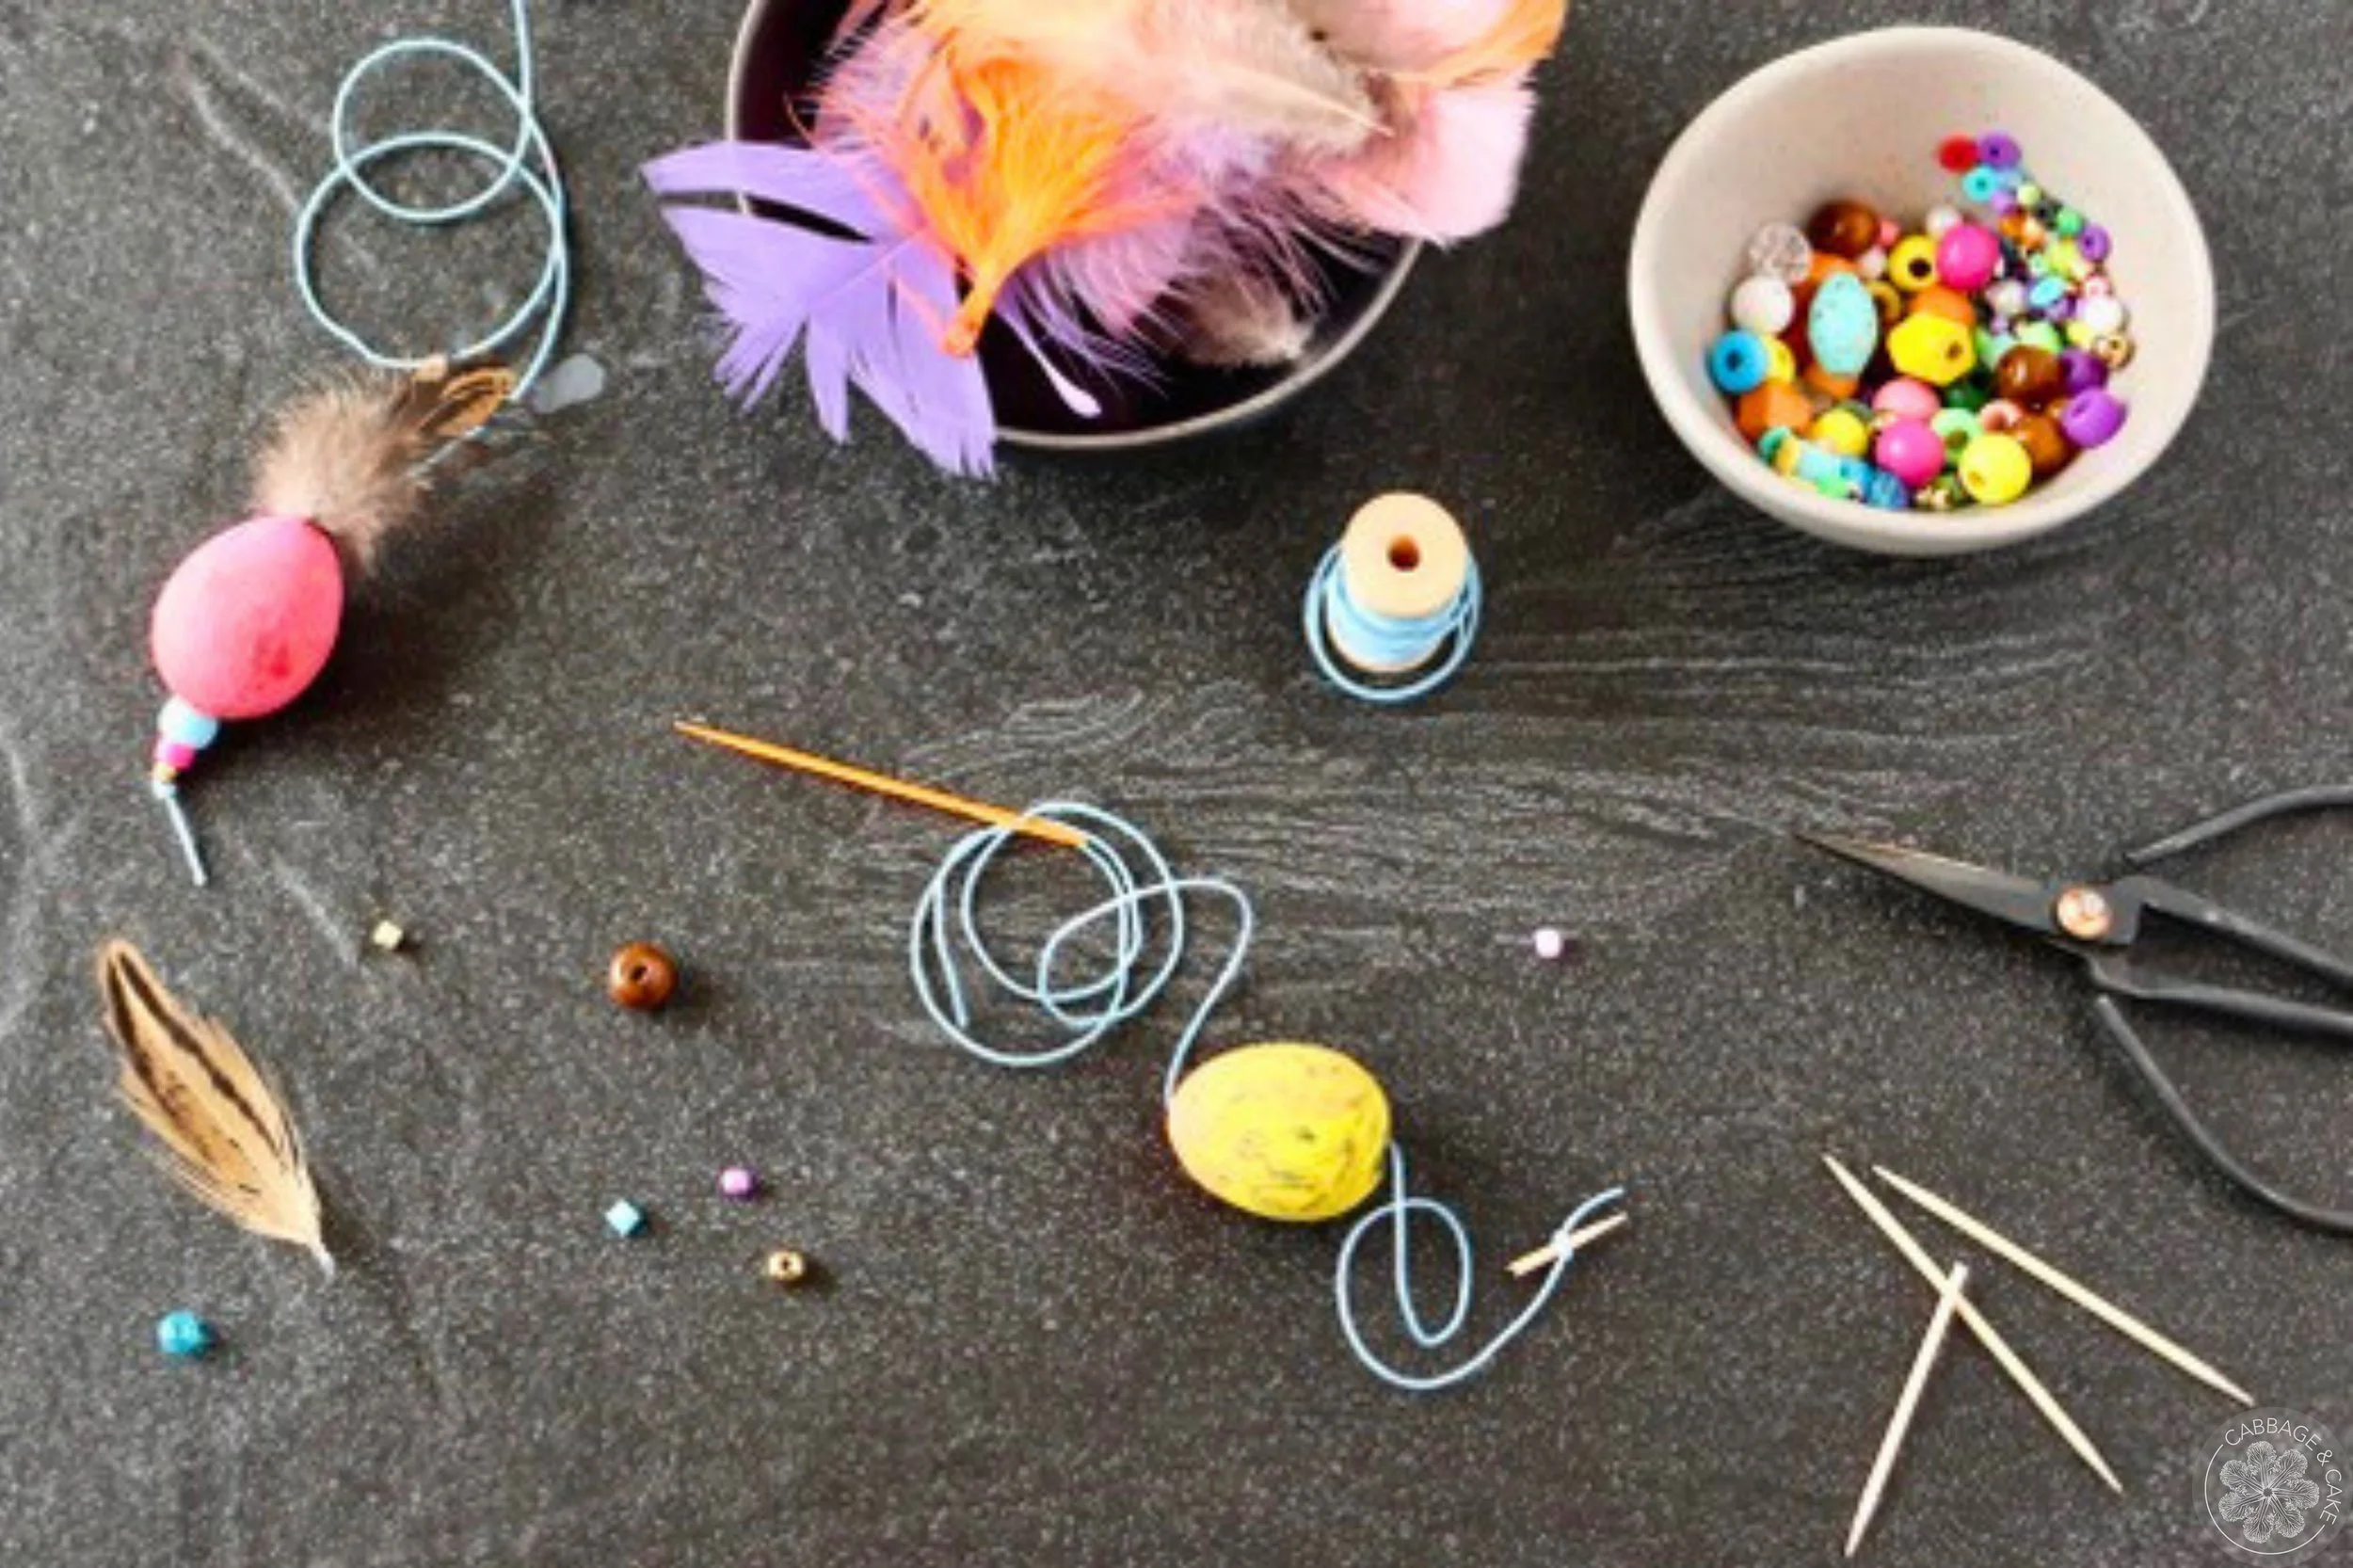
MATERIALS YOU WILL NEED
quail eggs
bulb syringe
two bowls
dish towel or paper towel
long needle
toothpicks
pointy knife or needle
wooden skewer
acrylic paint and paintbrush
scissors
string/ raffia paper ribbons
beads
feathers
glue (optional)
INSTRUCTIONS STEP BY STEP
Gather all your materials.
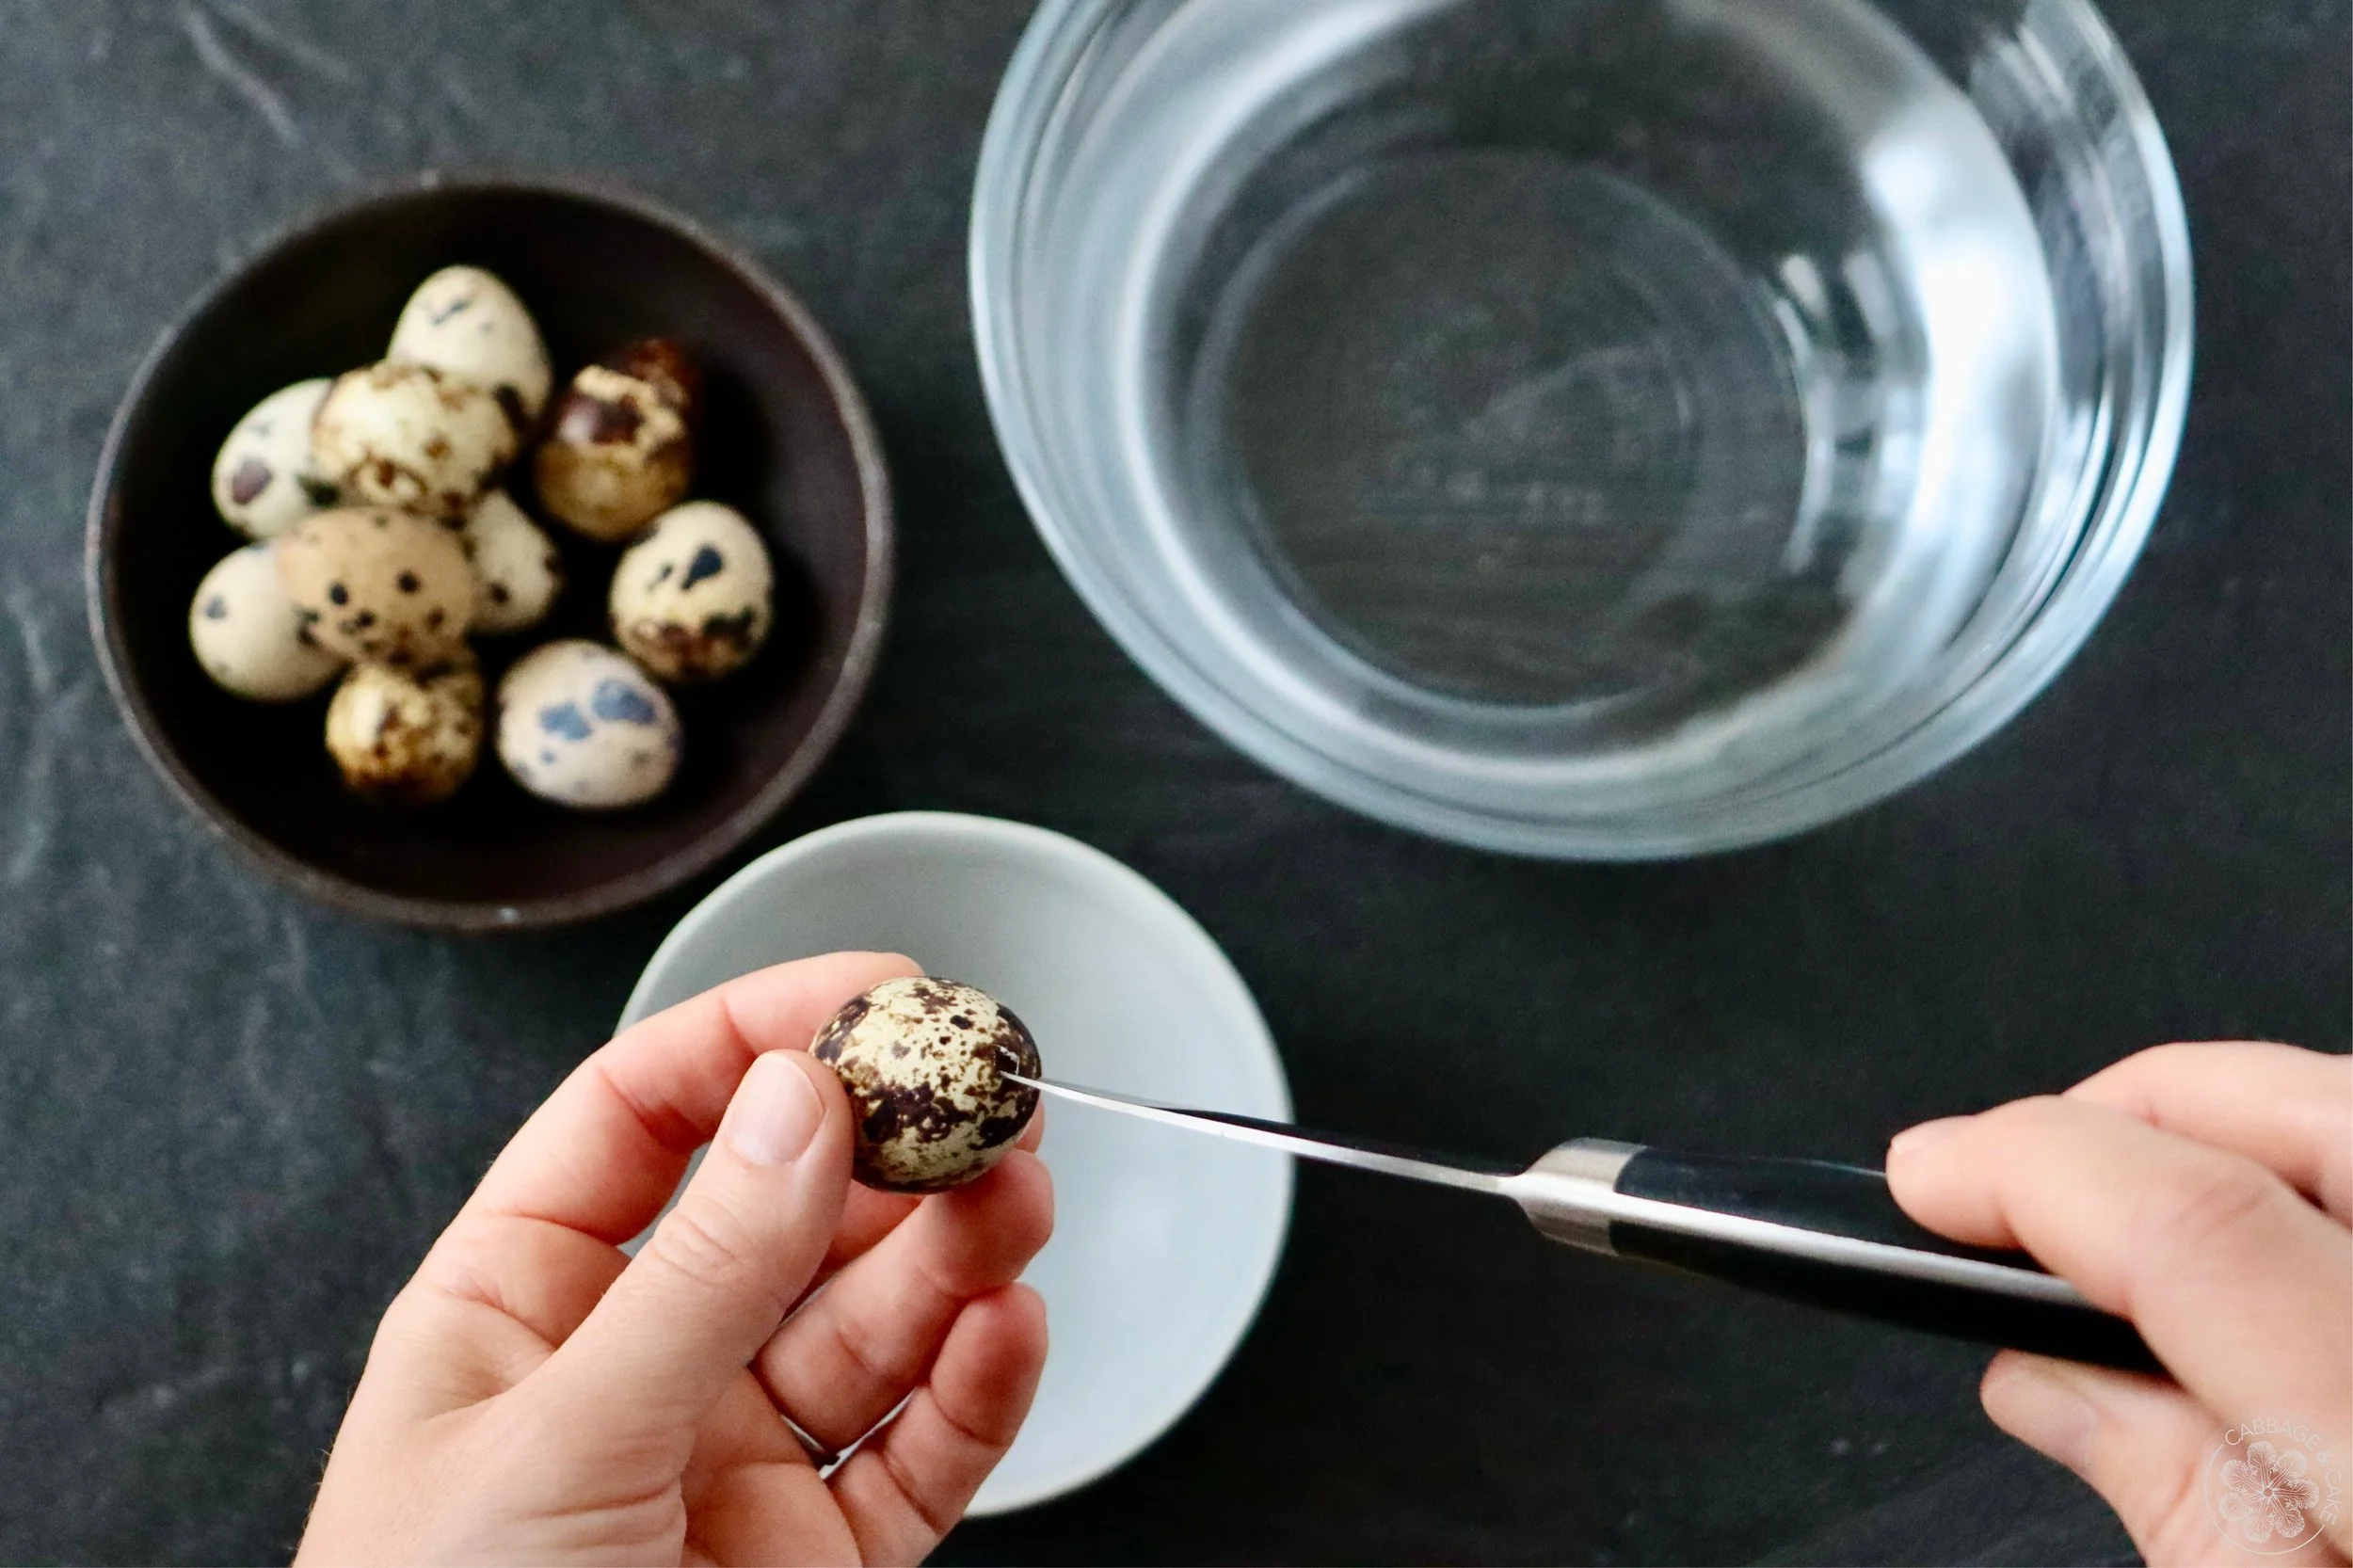
With a pointy knife or needle make two small holes on both ends of your quail egg by gently tapping it with the tip of your knife.
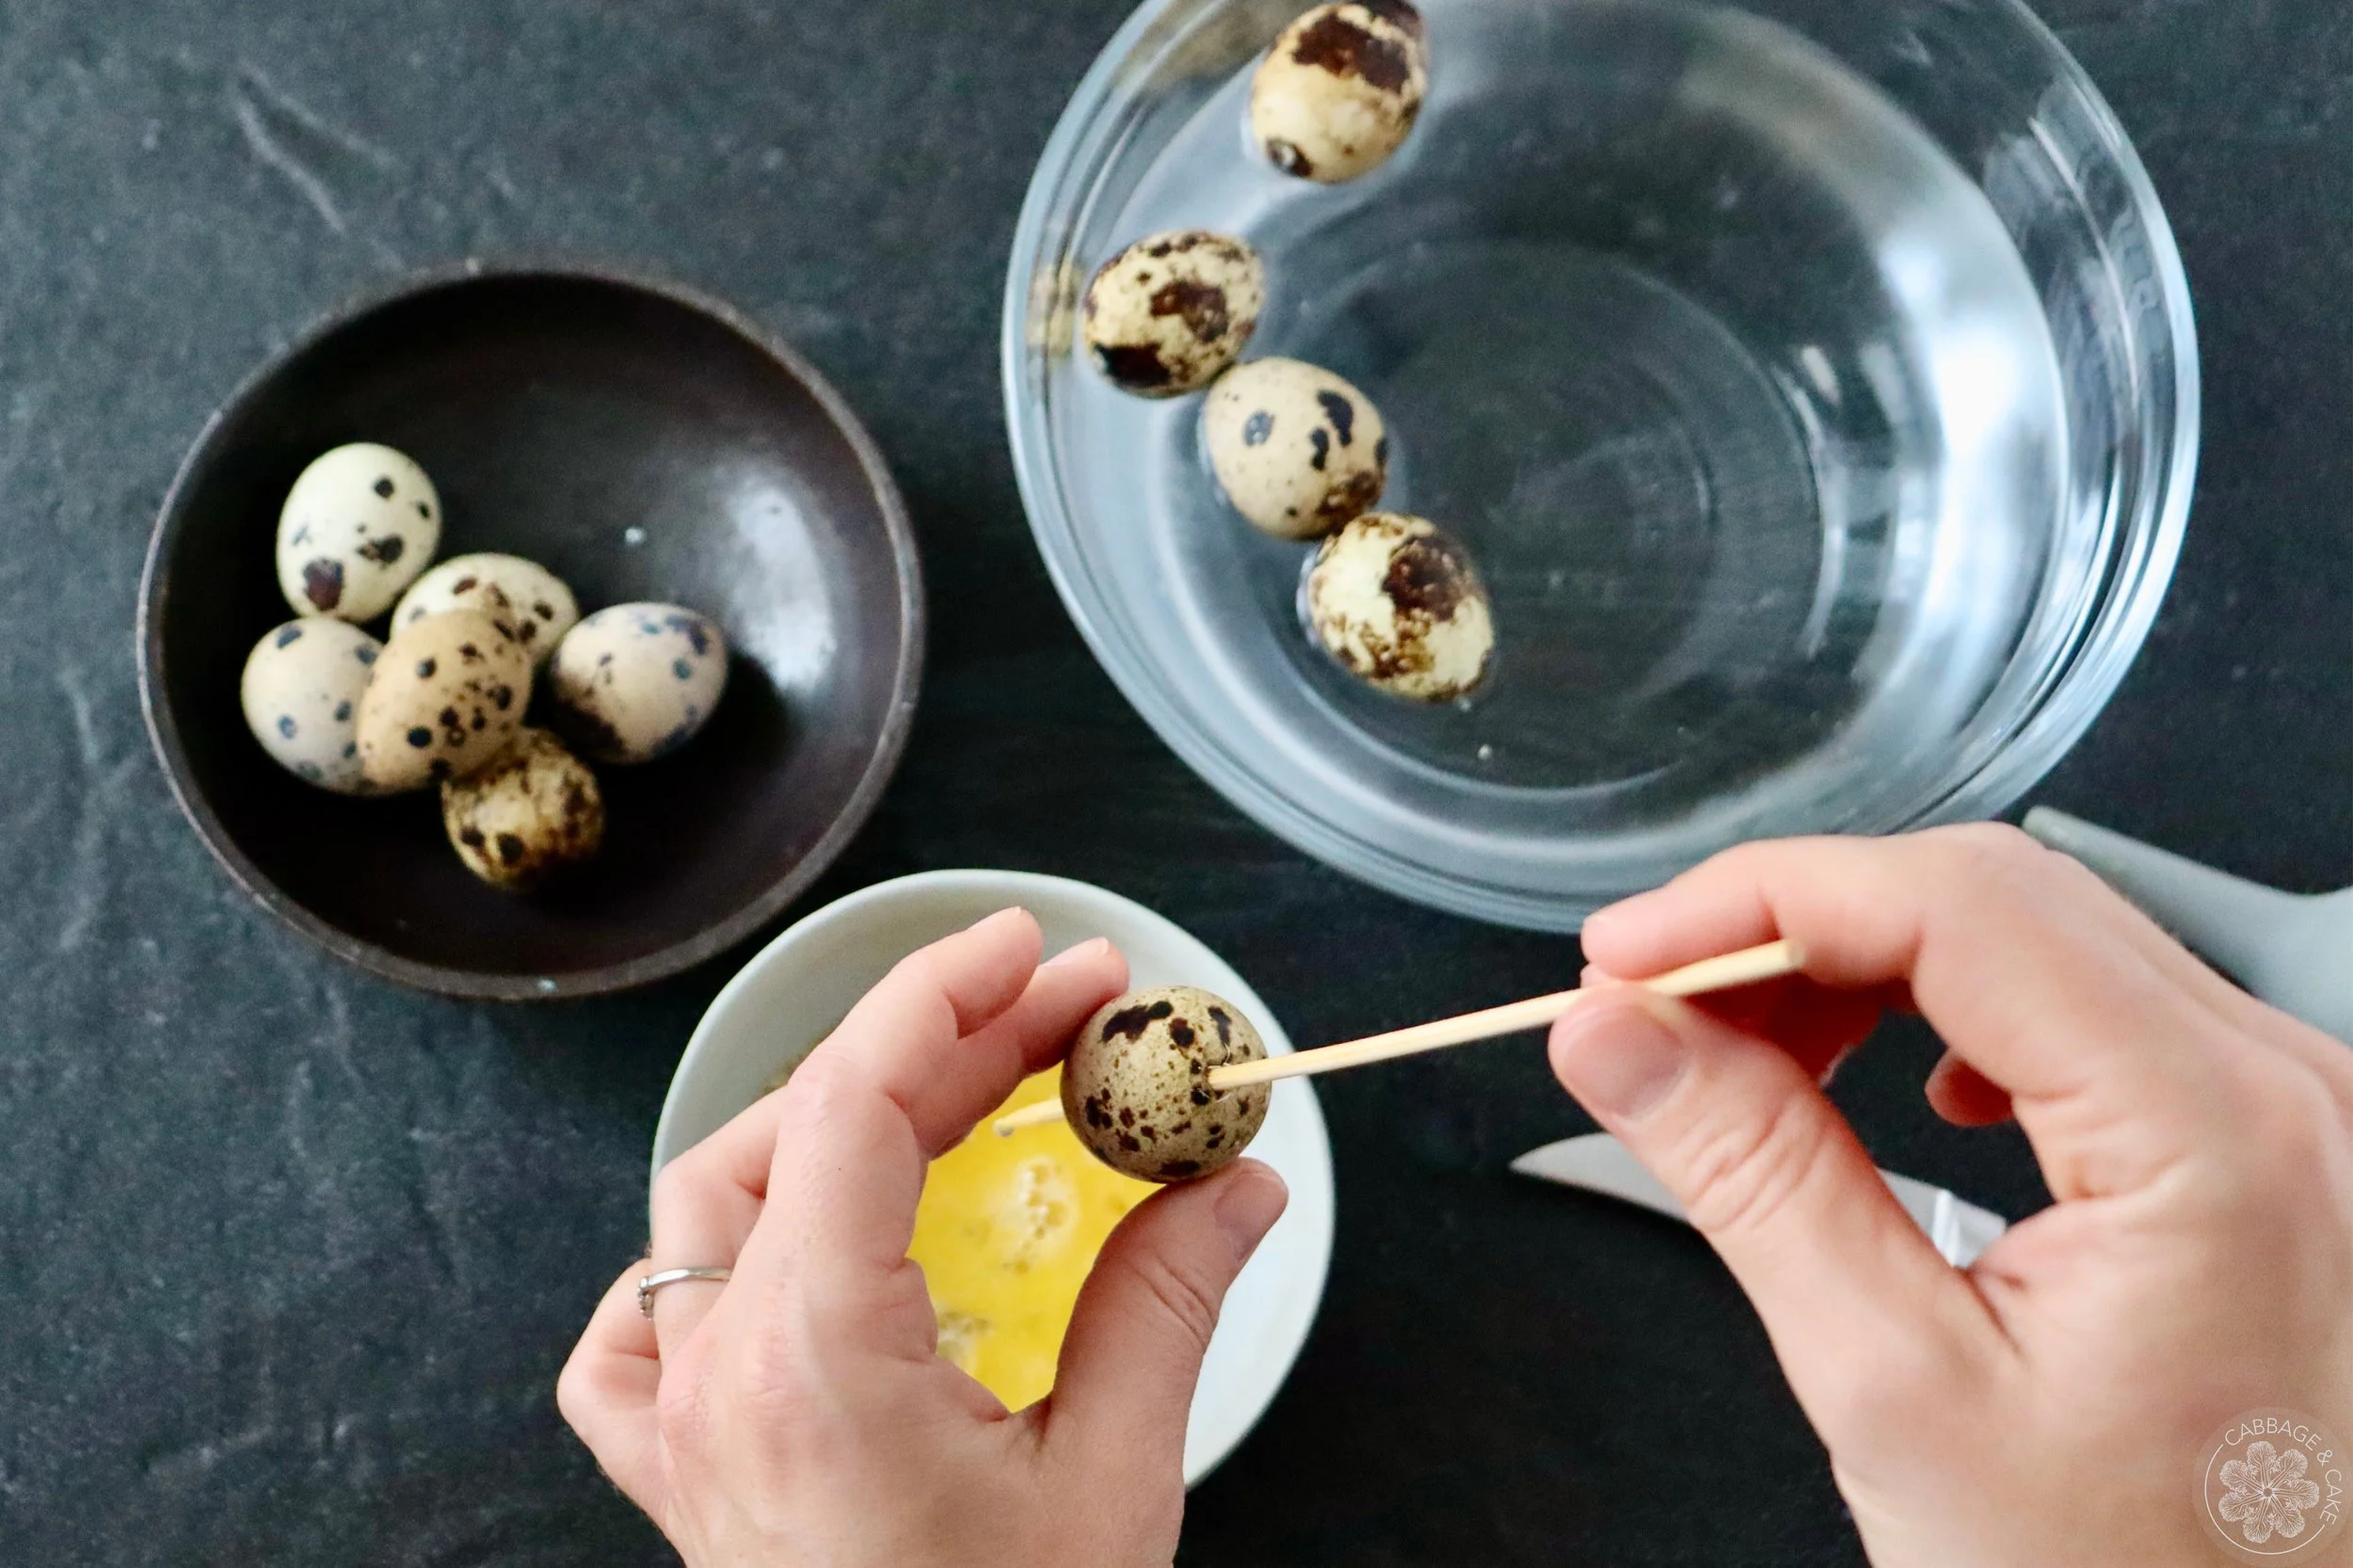
Over an empty bowl or container stick a wooden skewer through the egg, making sure both holes are big enough and breaking up the inside of the egg.
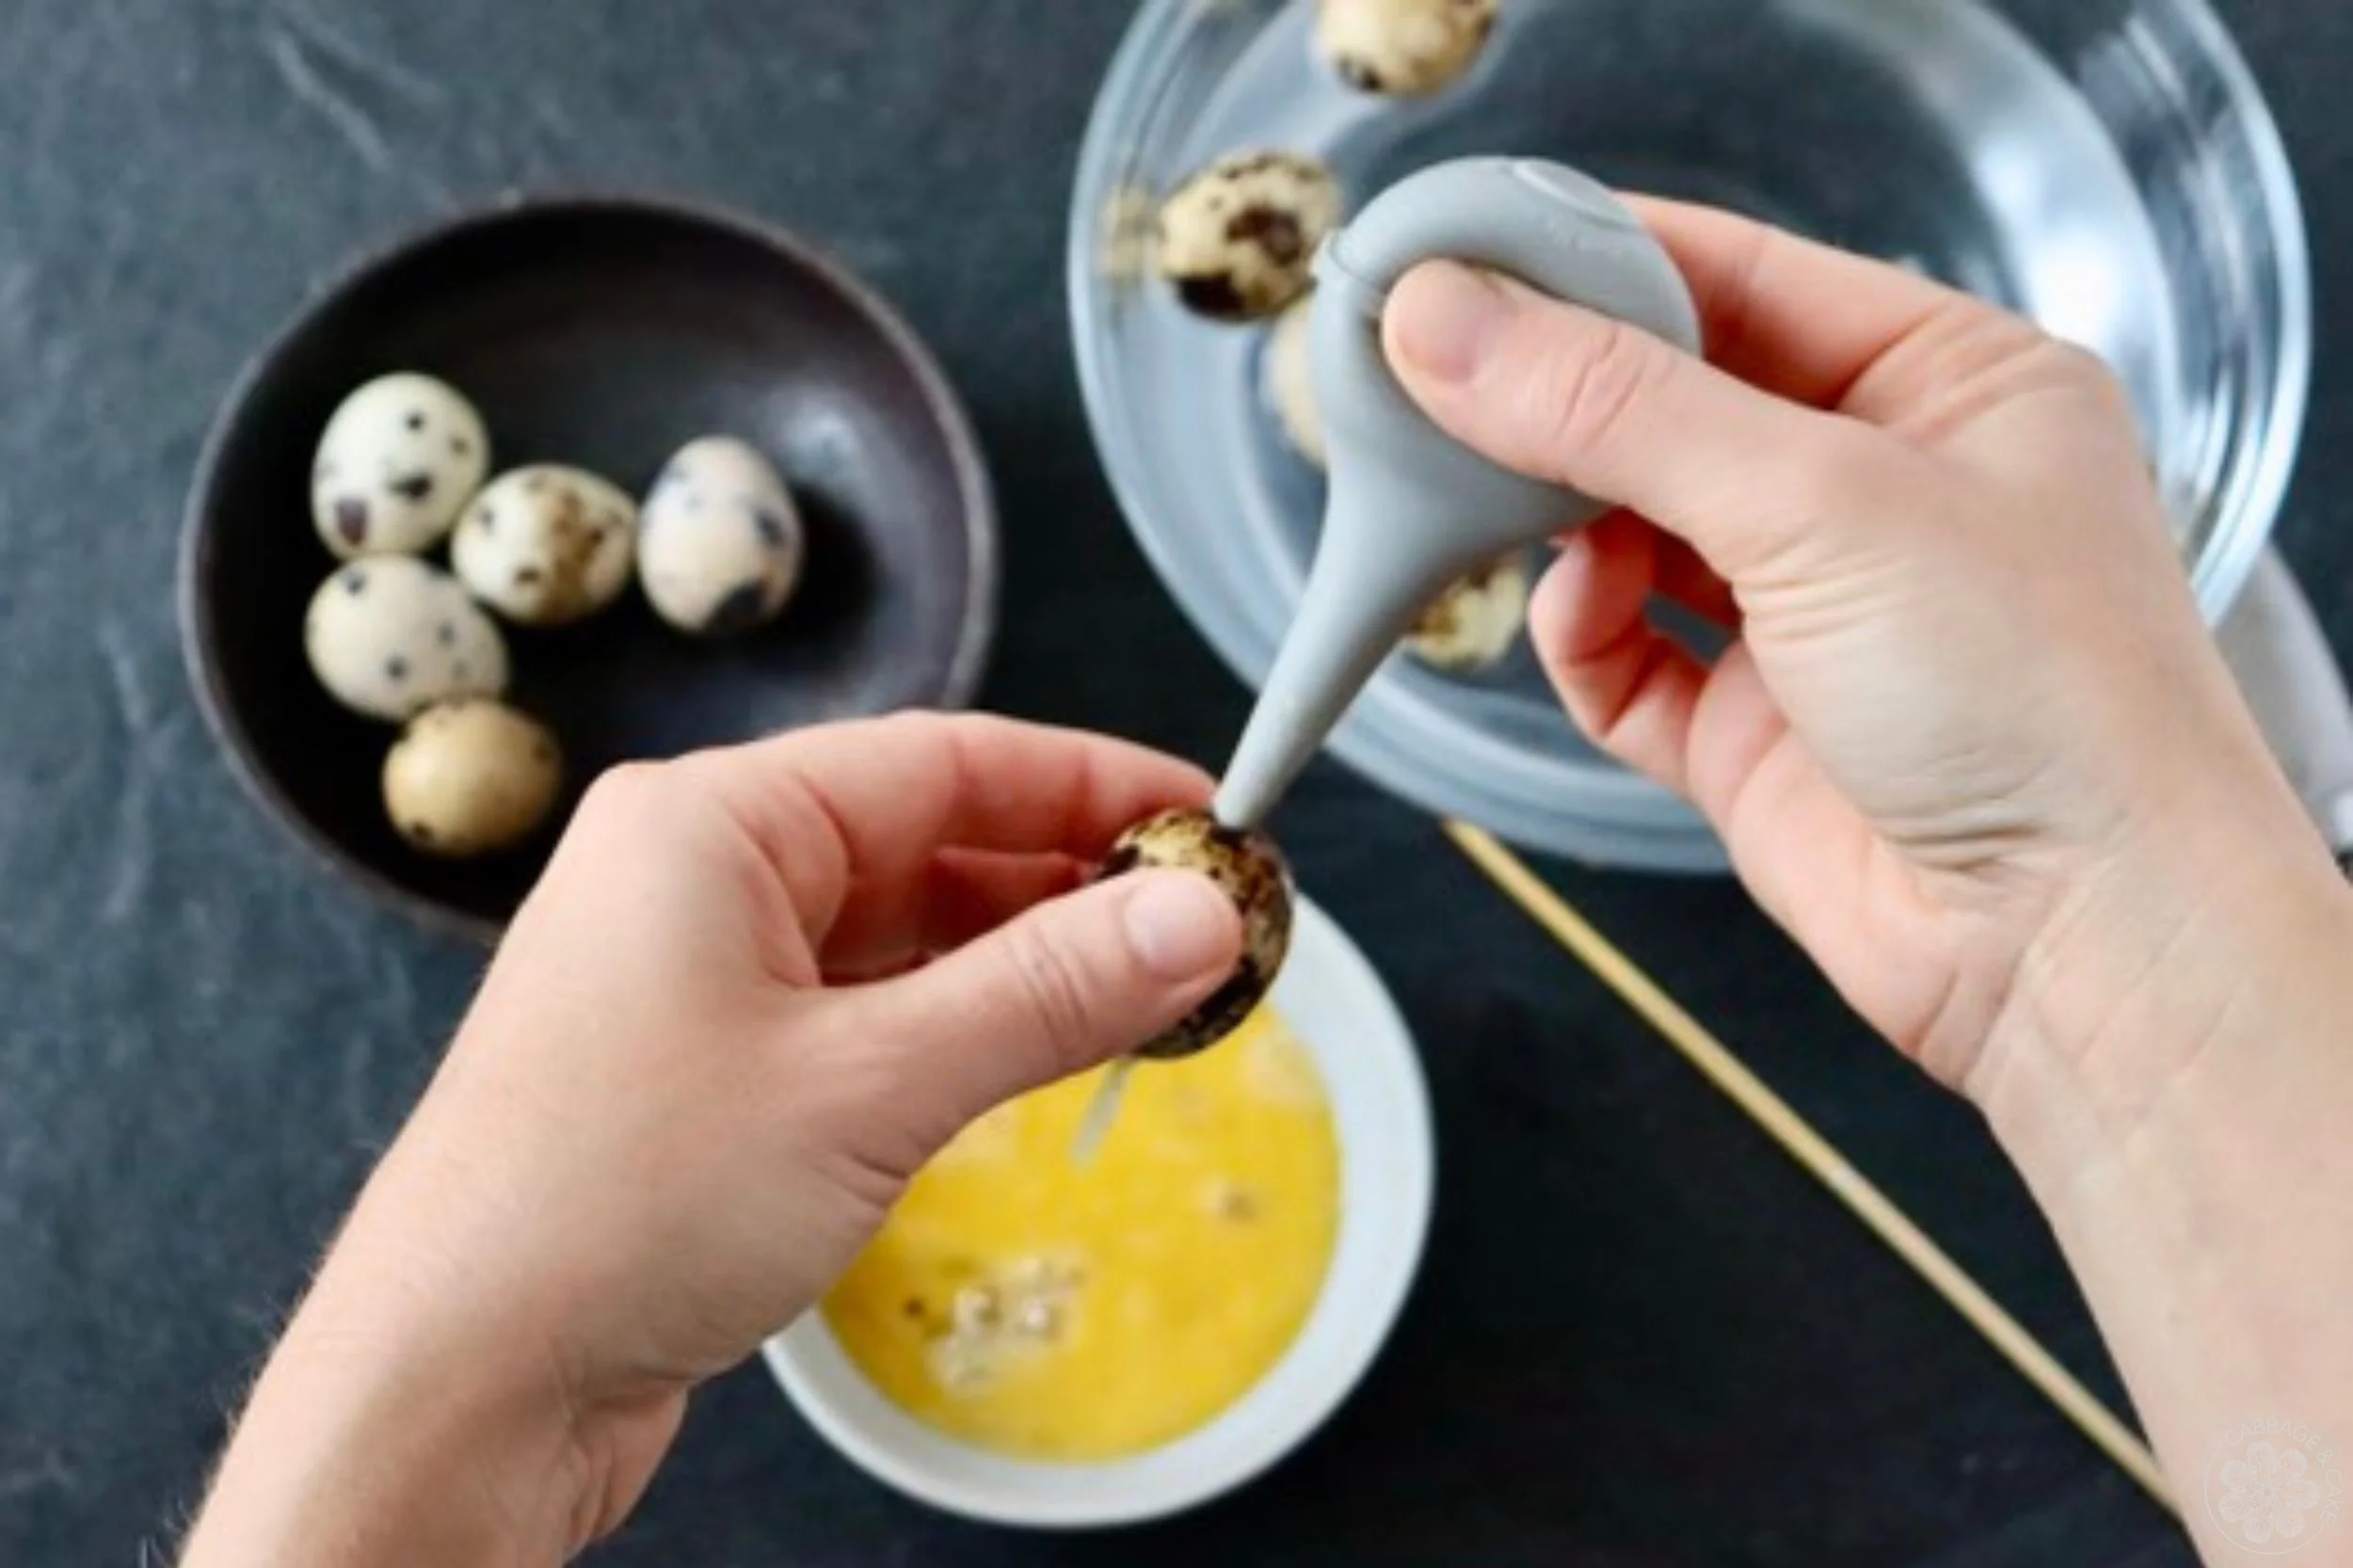
Blow from the top or suck from the bottom of the egg using the bulb syringe and once they are empty, place them in a bowl with water after.

Once all your eggs are empty, rinse them out at the sink and set them on some paper towel or a dish towel to dry.
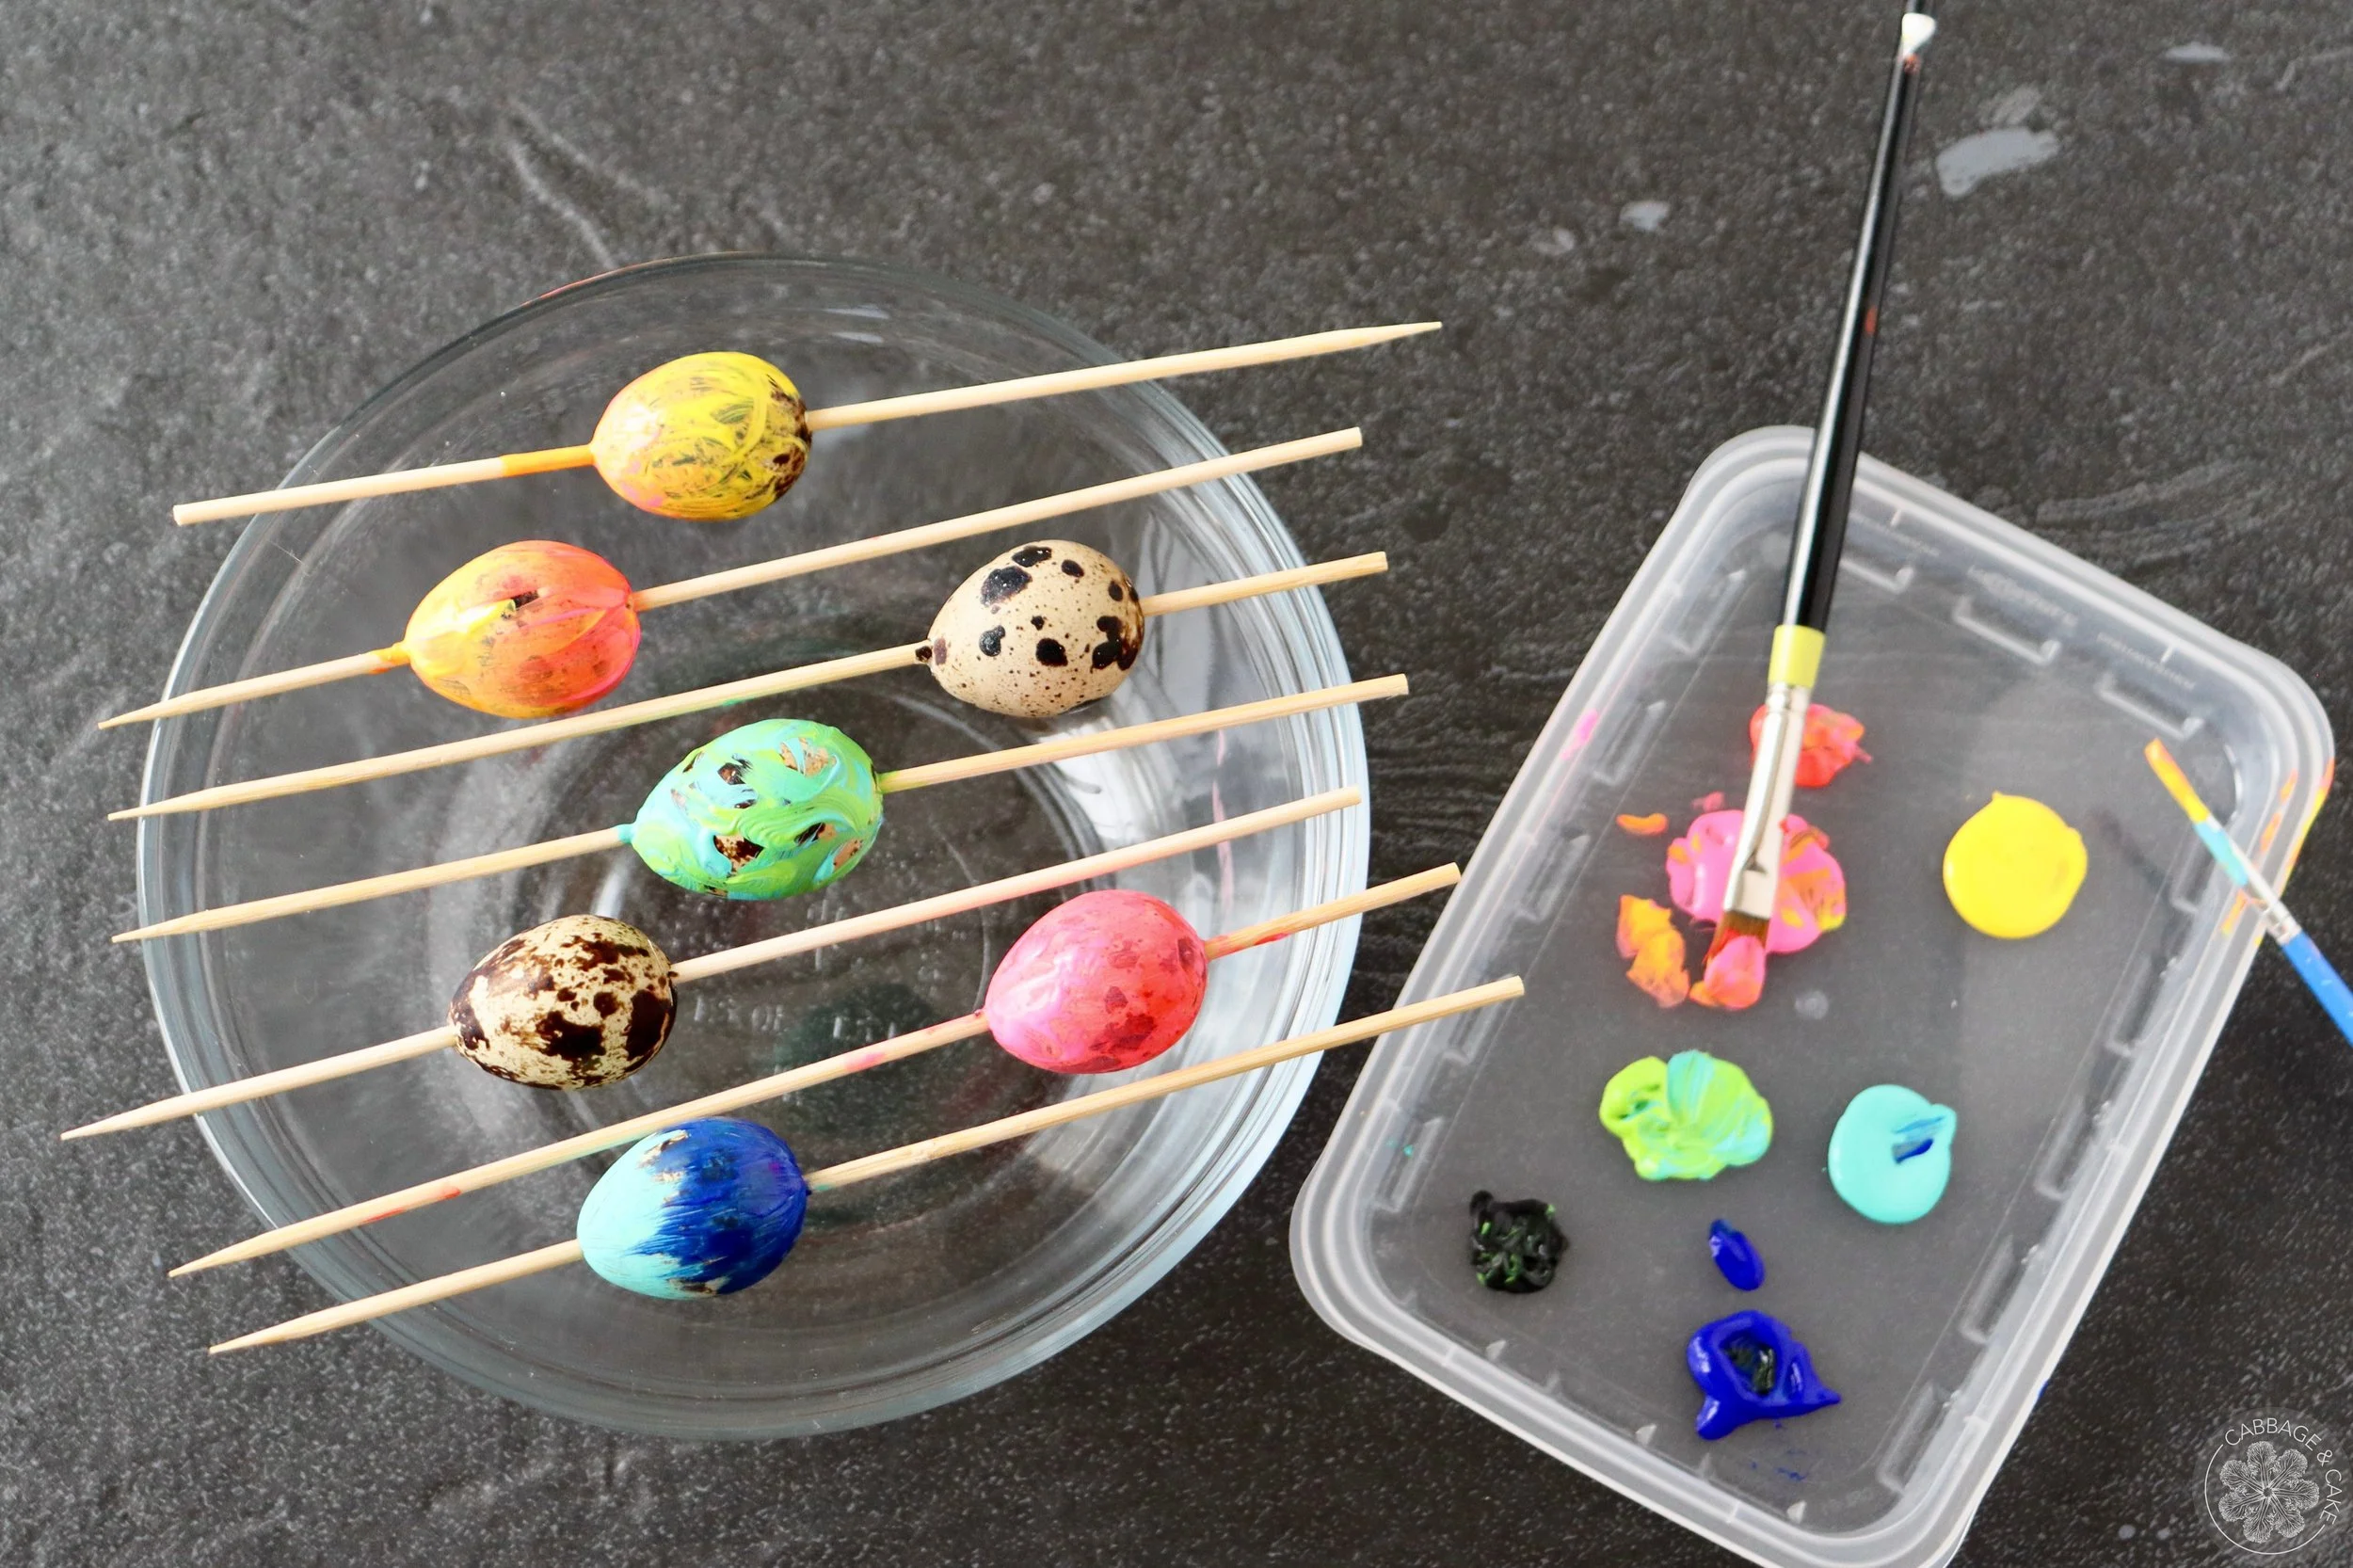
Stick the eggs on a wooden skewer to paint them and let them dry completely.
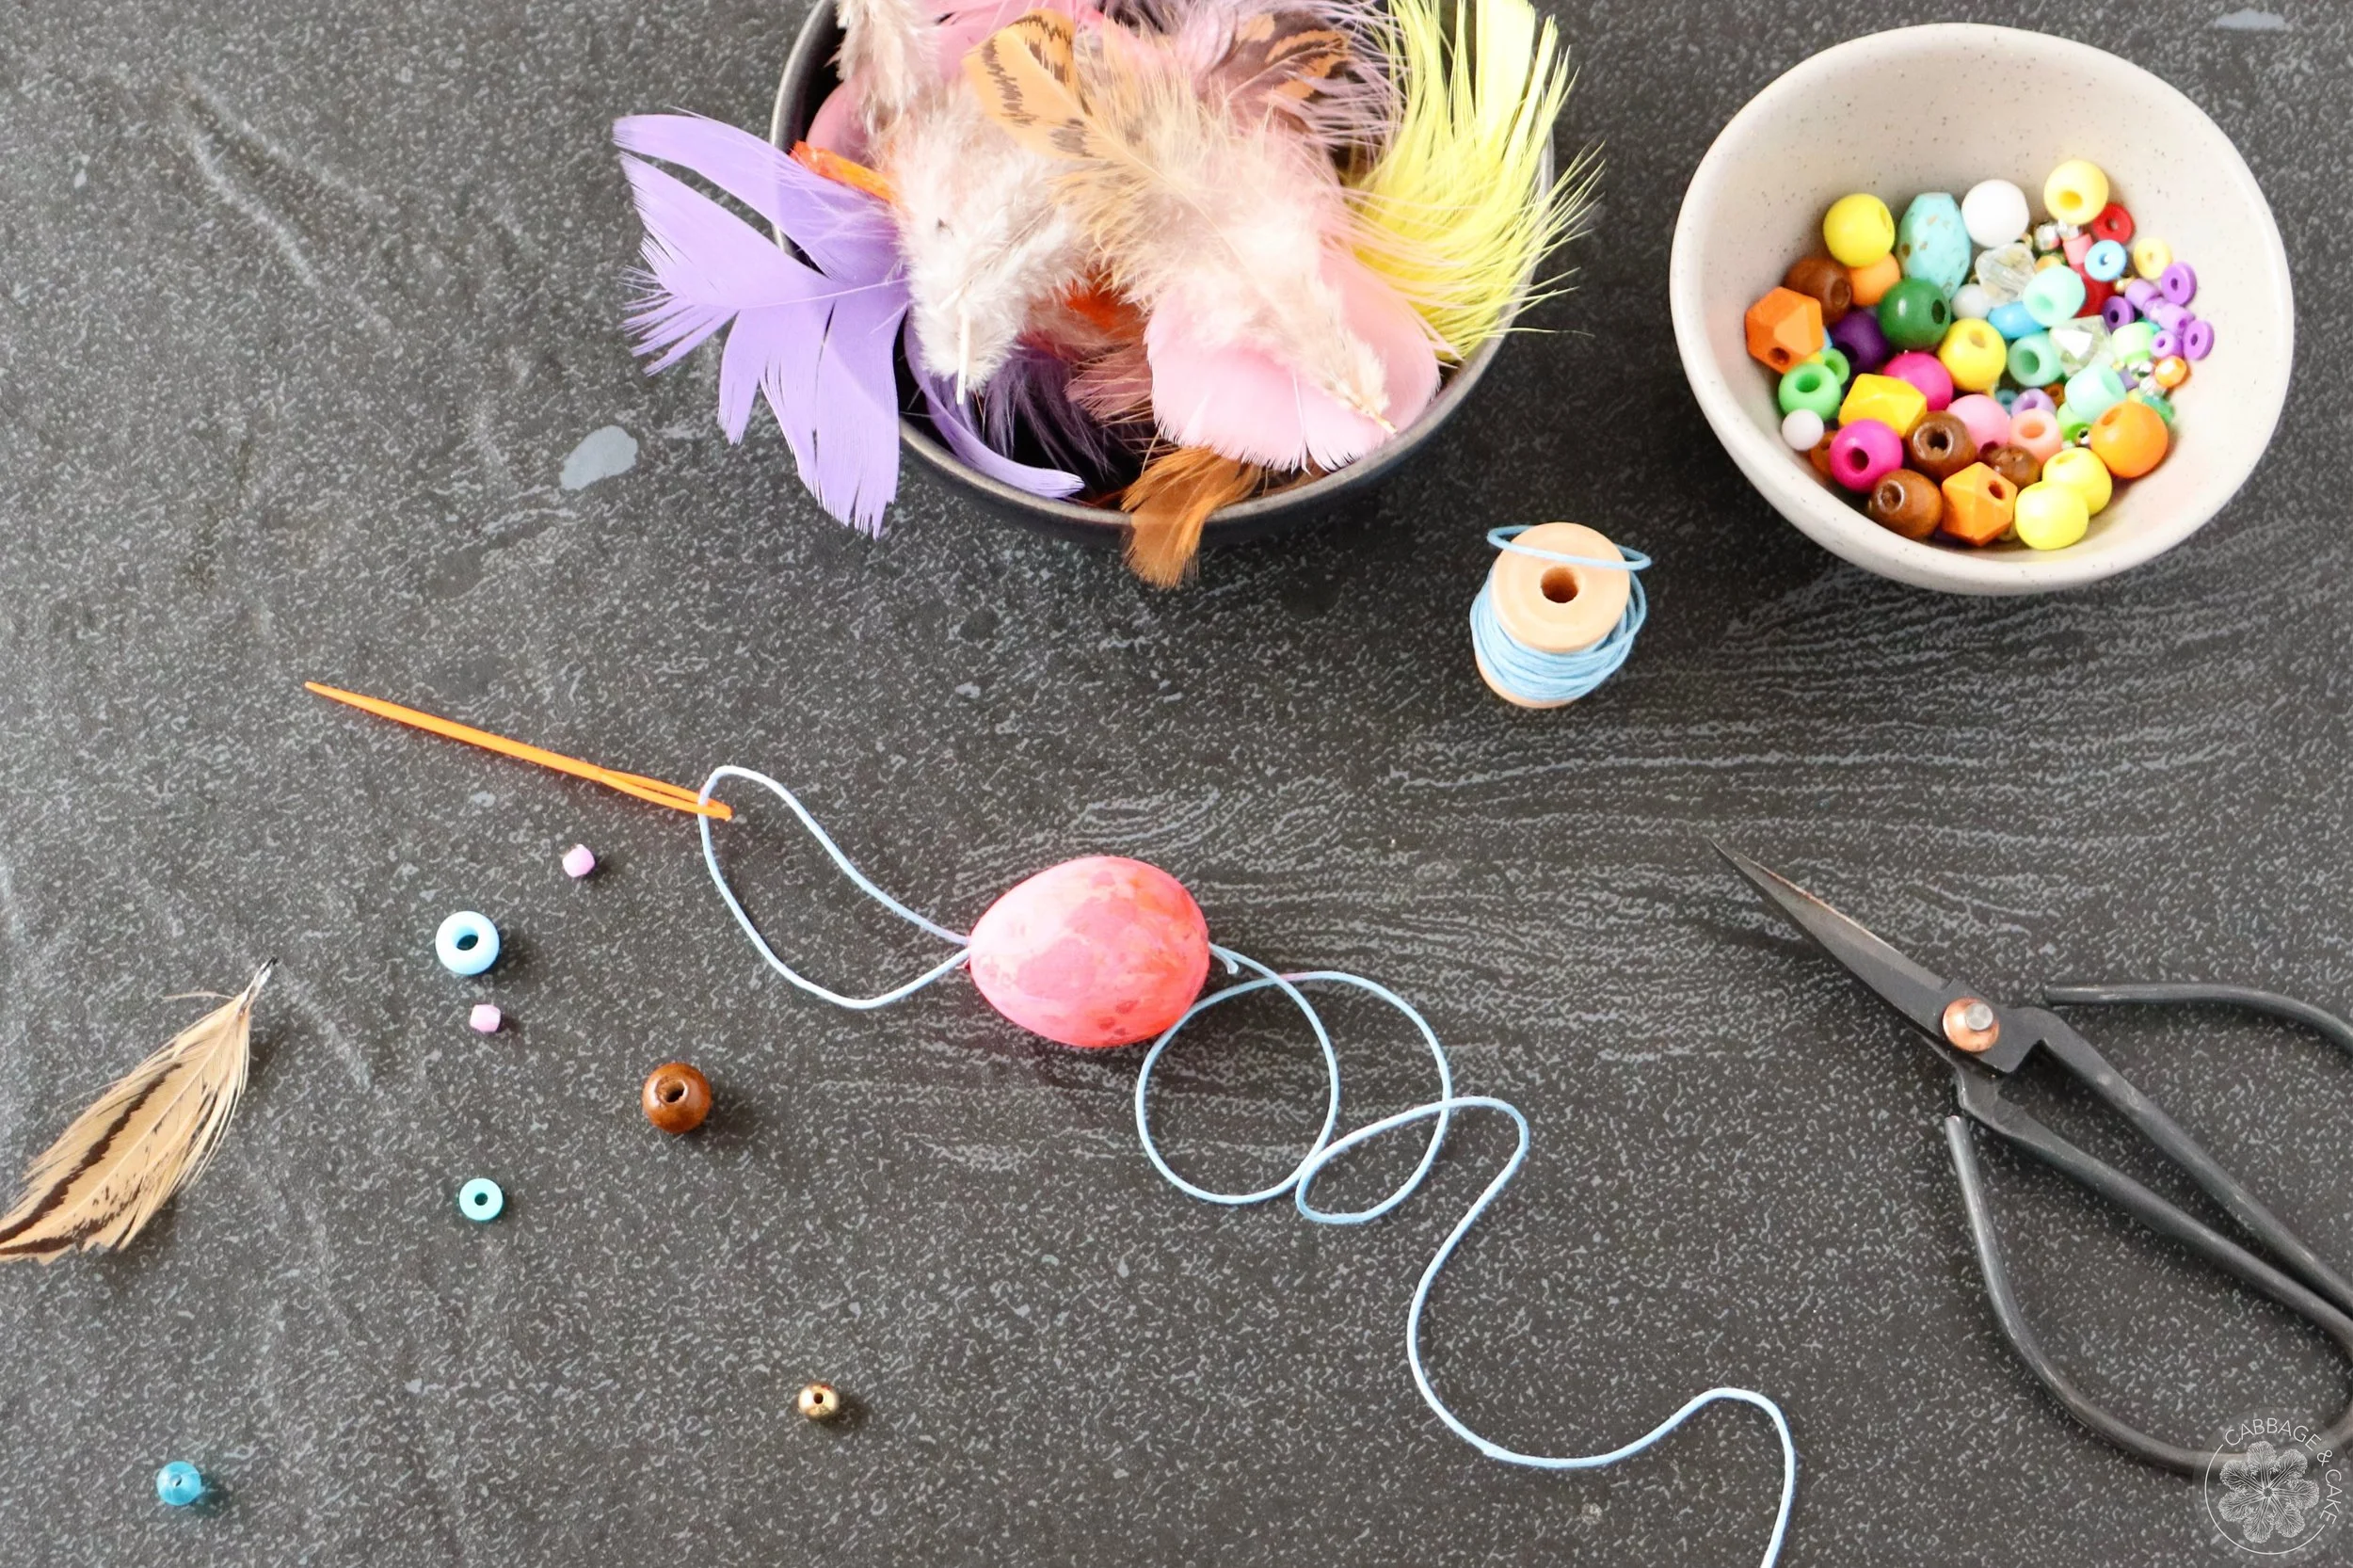
Cut your string in the desired length, making sure you have enough to add beads and knots, attach it to the needle and pull it all the way through.
Alternatively (if you don’t want to add beads on the bottom), you can tie a small piece of toothpick to the end of the string and push it through the bottom hole. This will hold your string in place, and you can put a feather on the bottom of the egg.
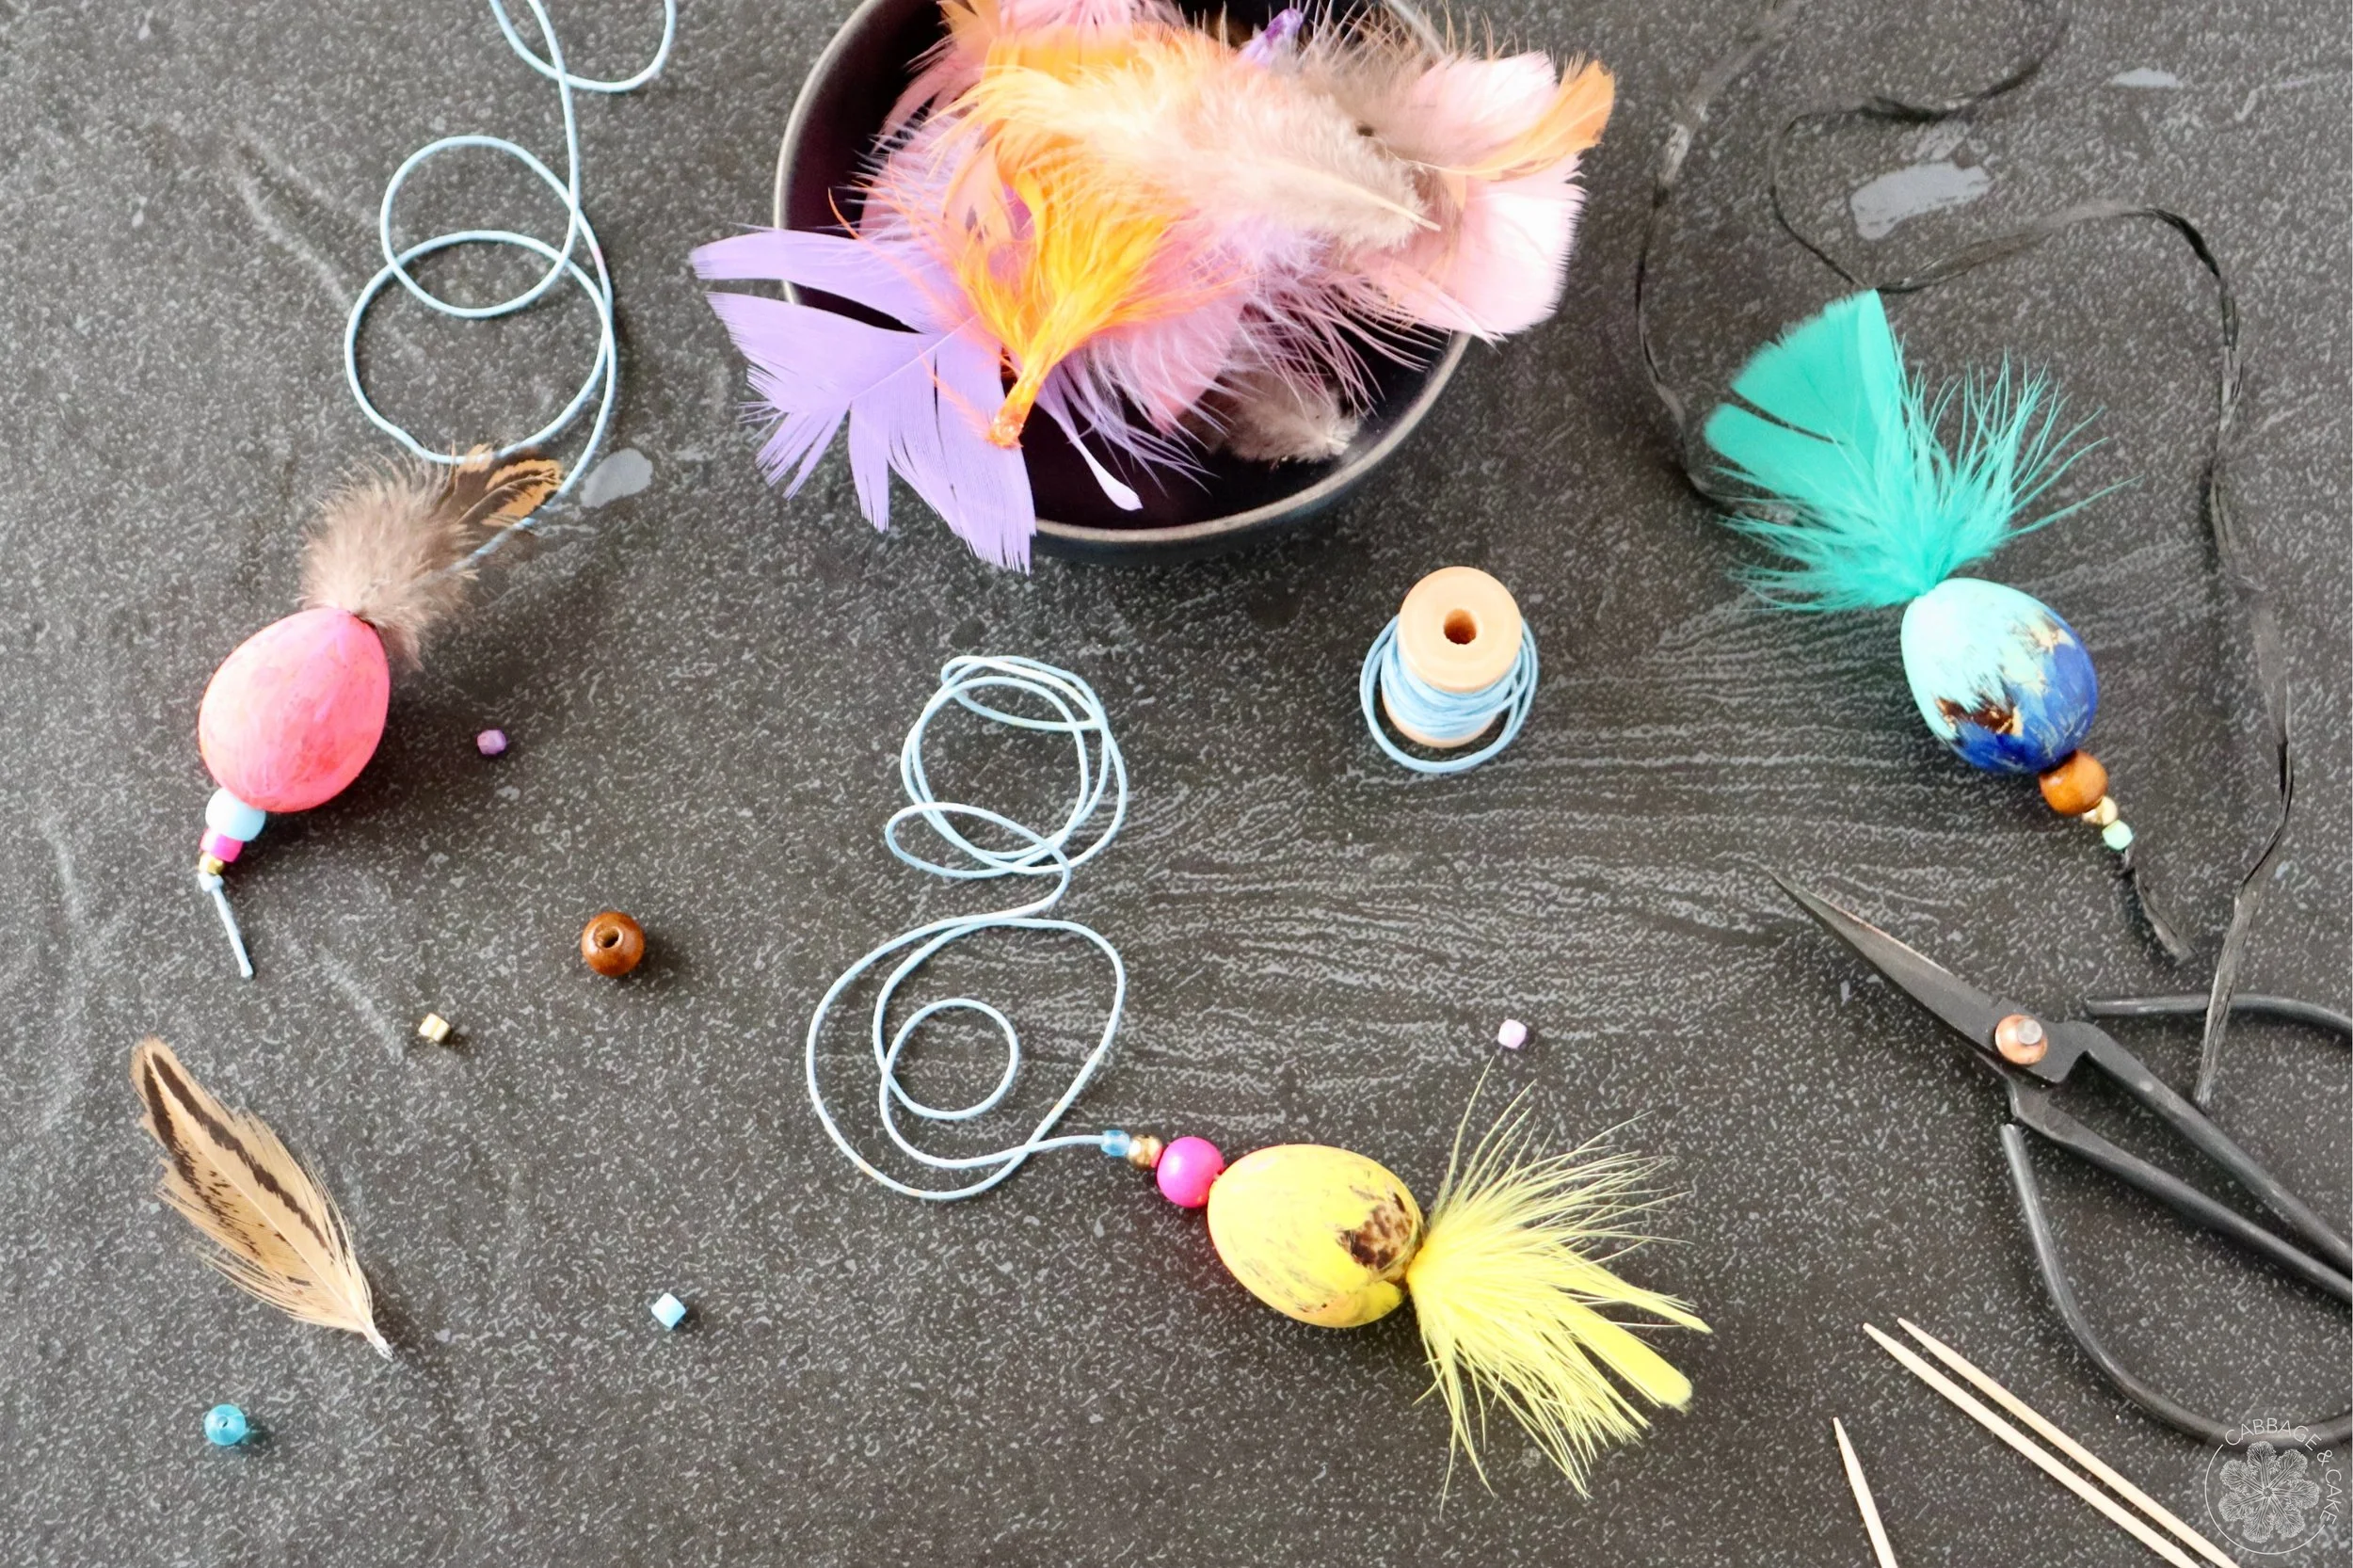
Add beads and feathers and tie off the ends to avoid the string from slipping out (use a bit of glue if necessary).
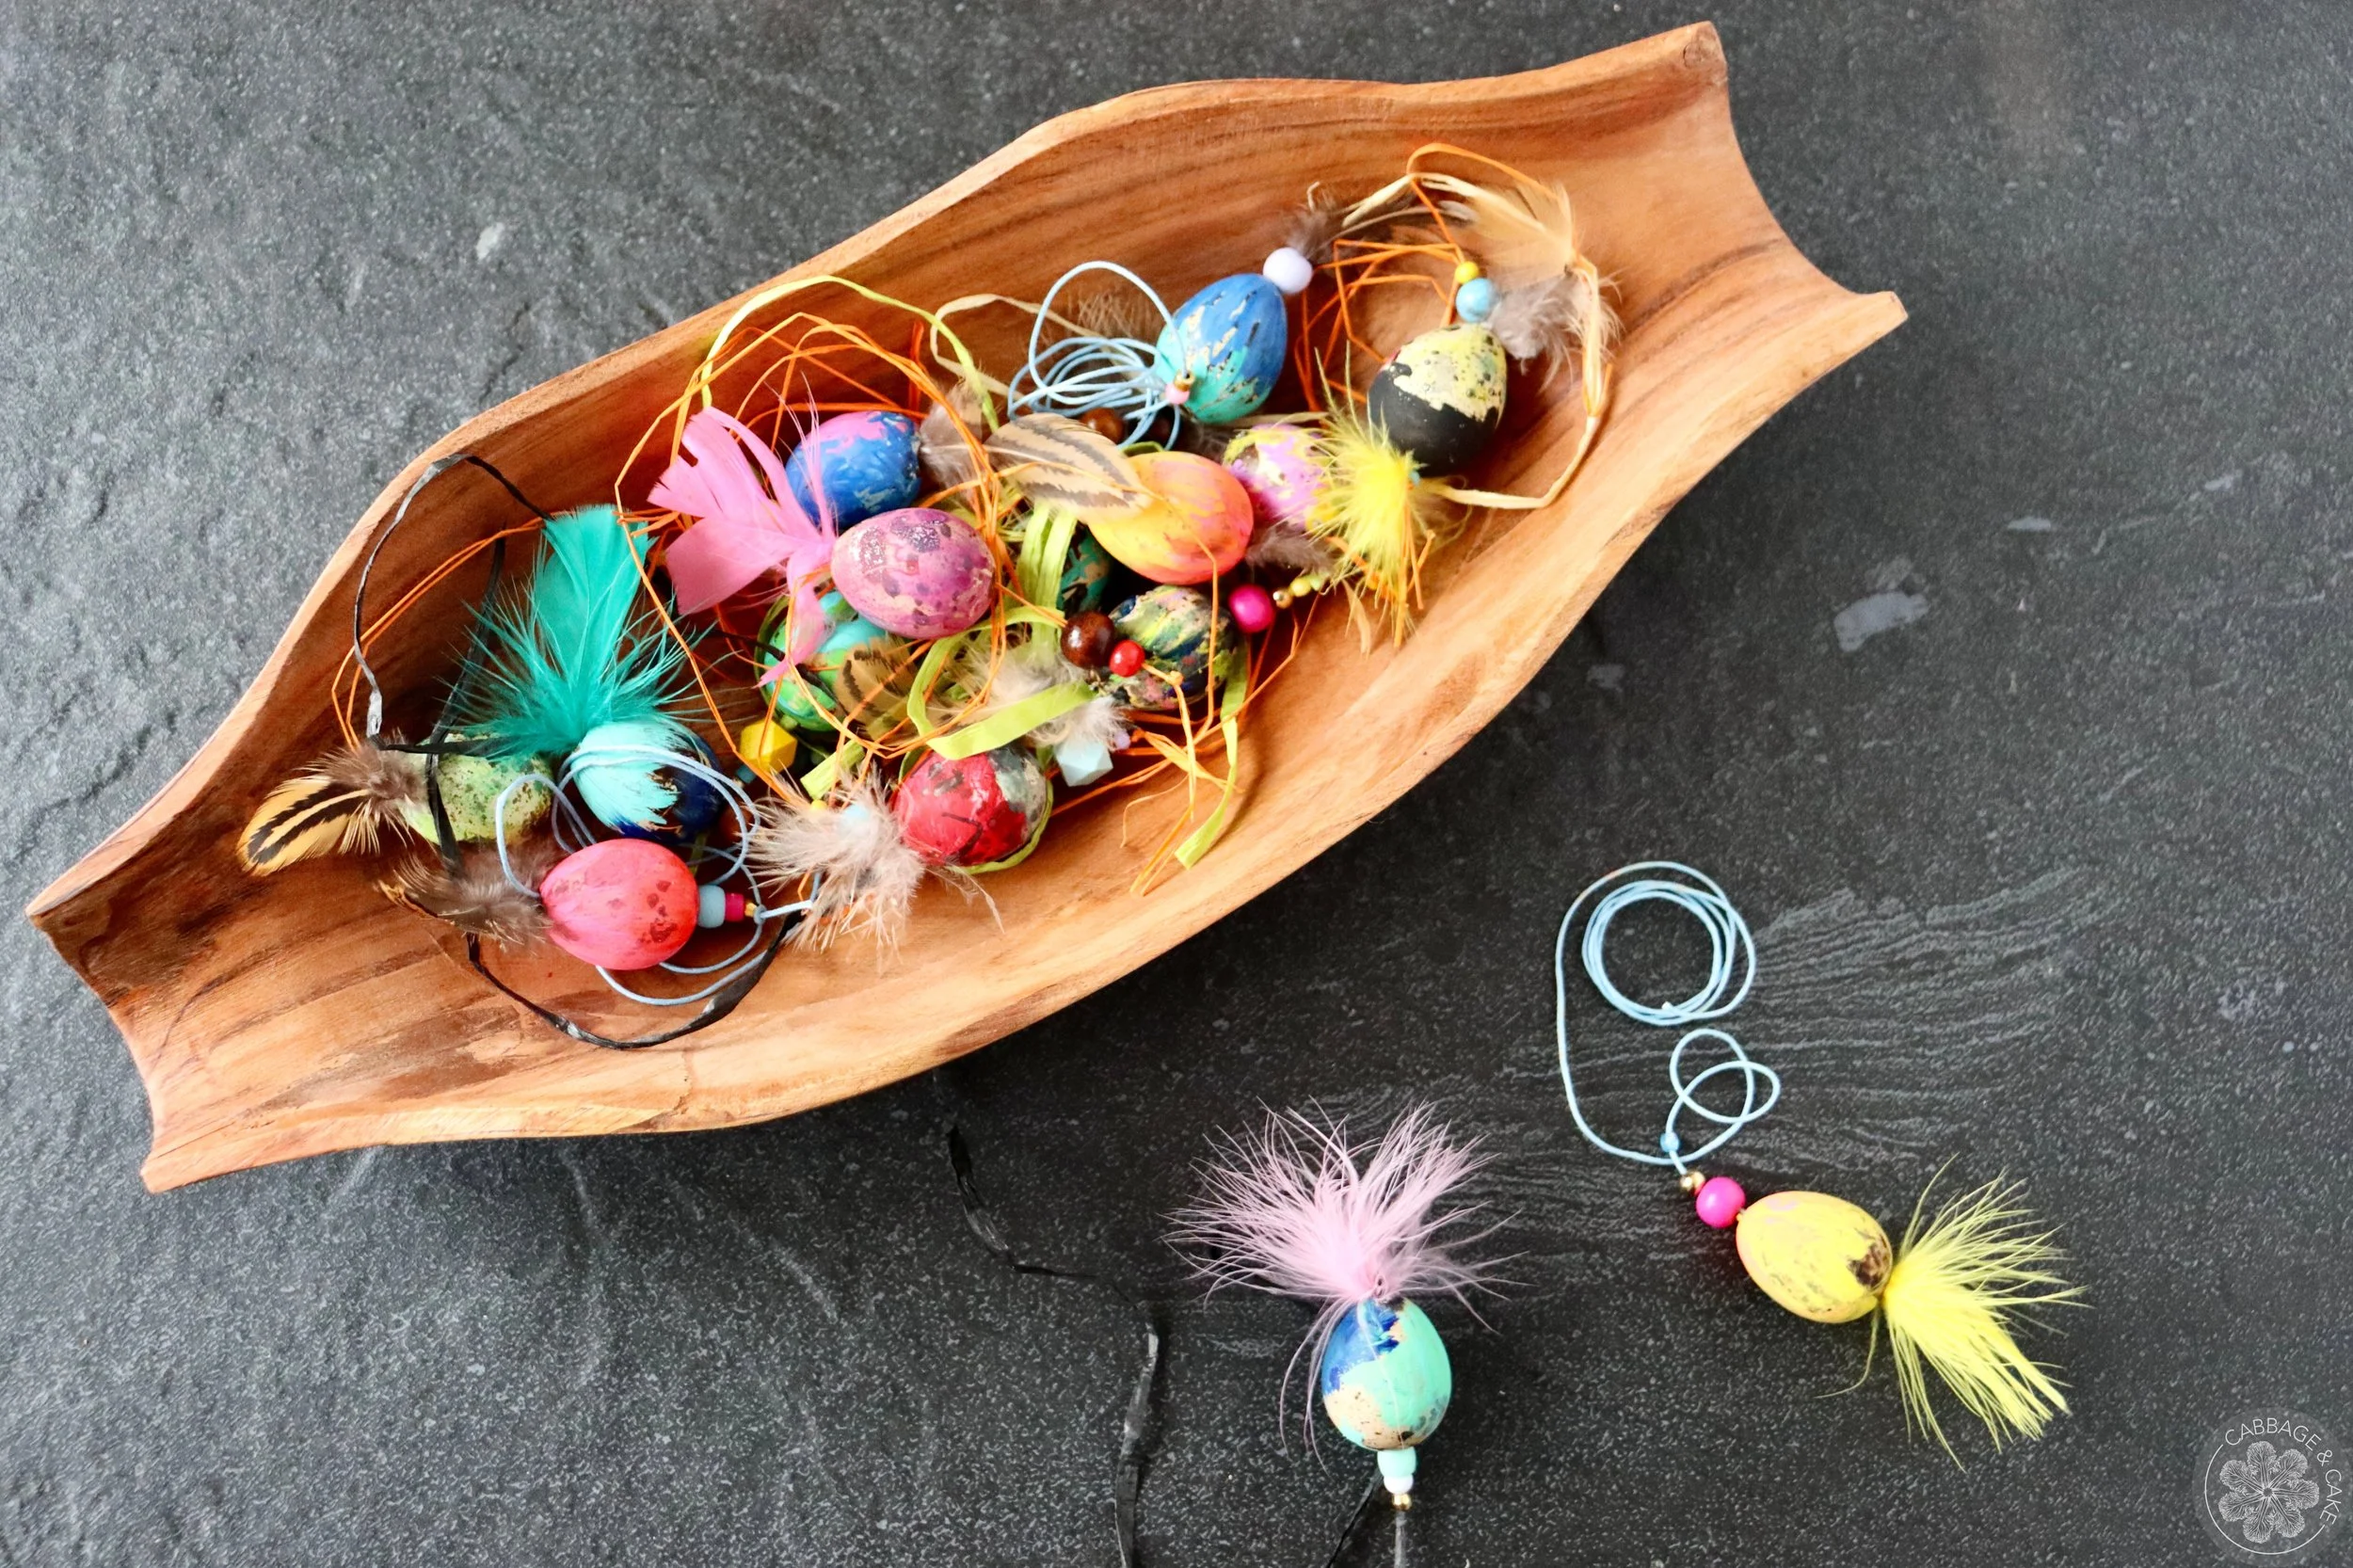
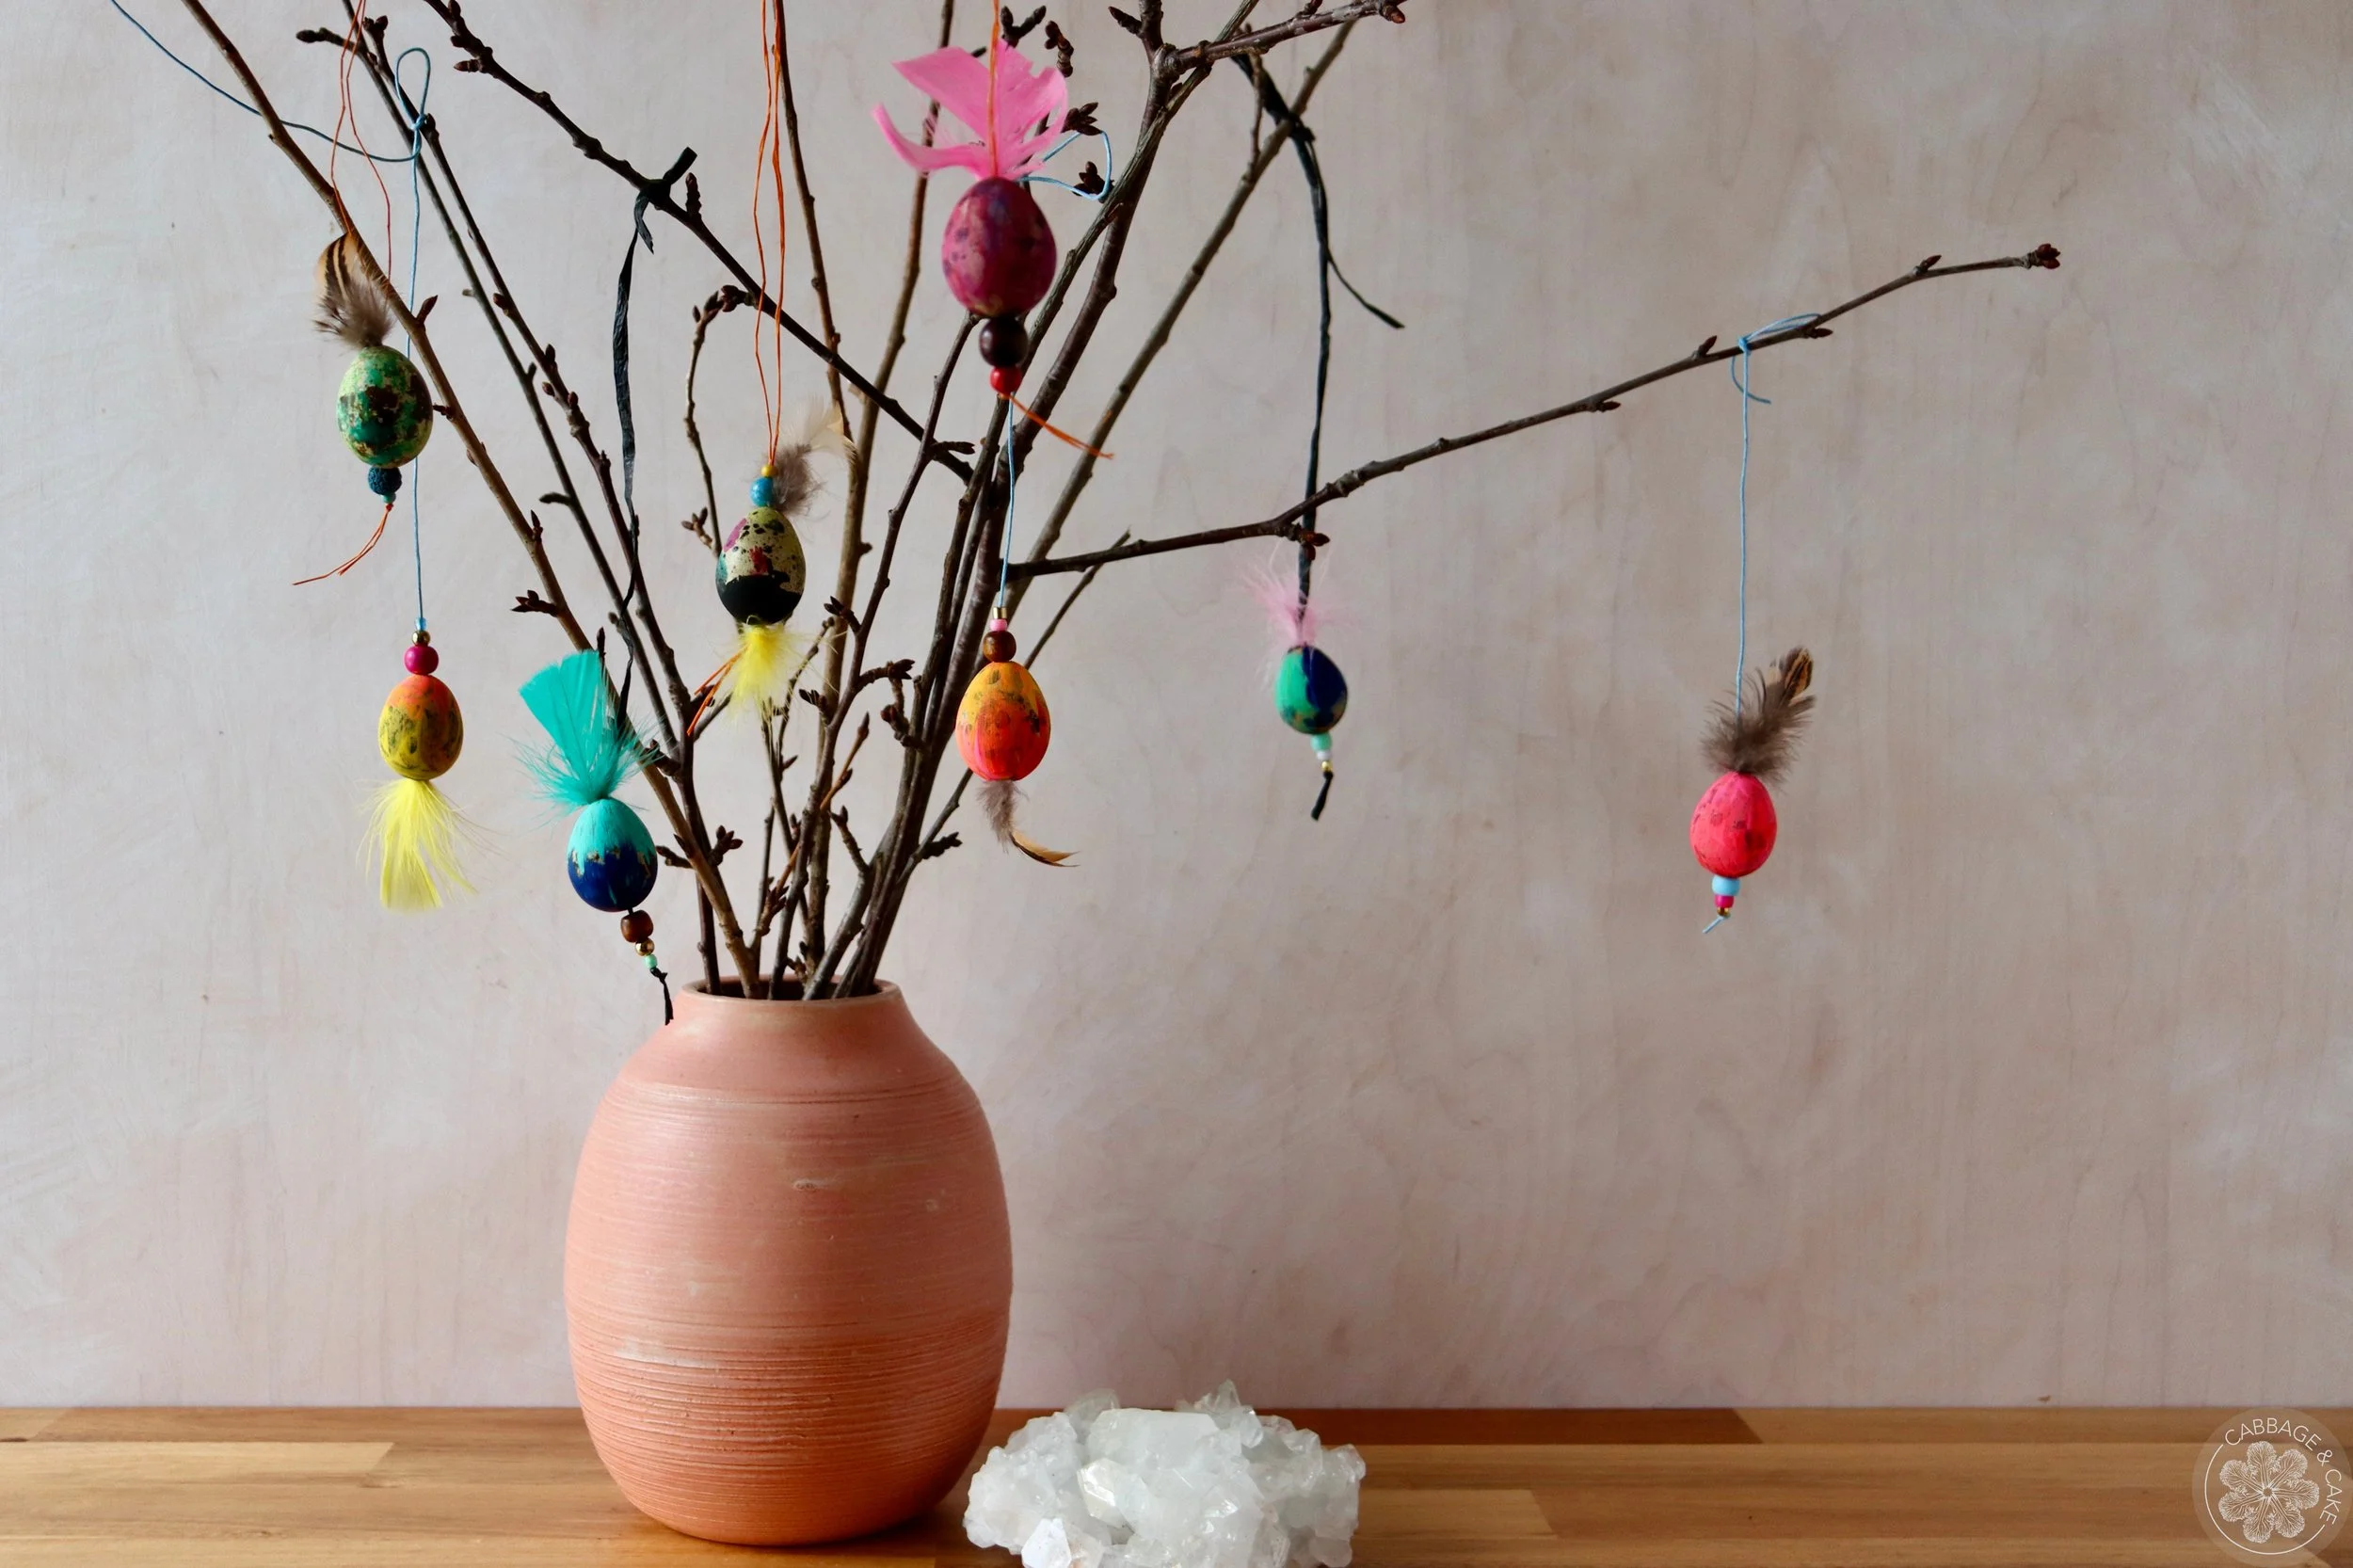
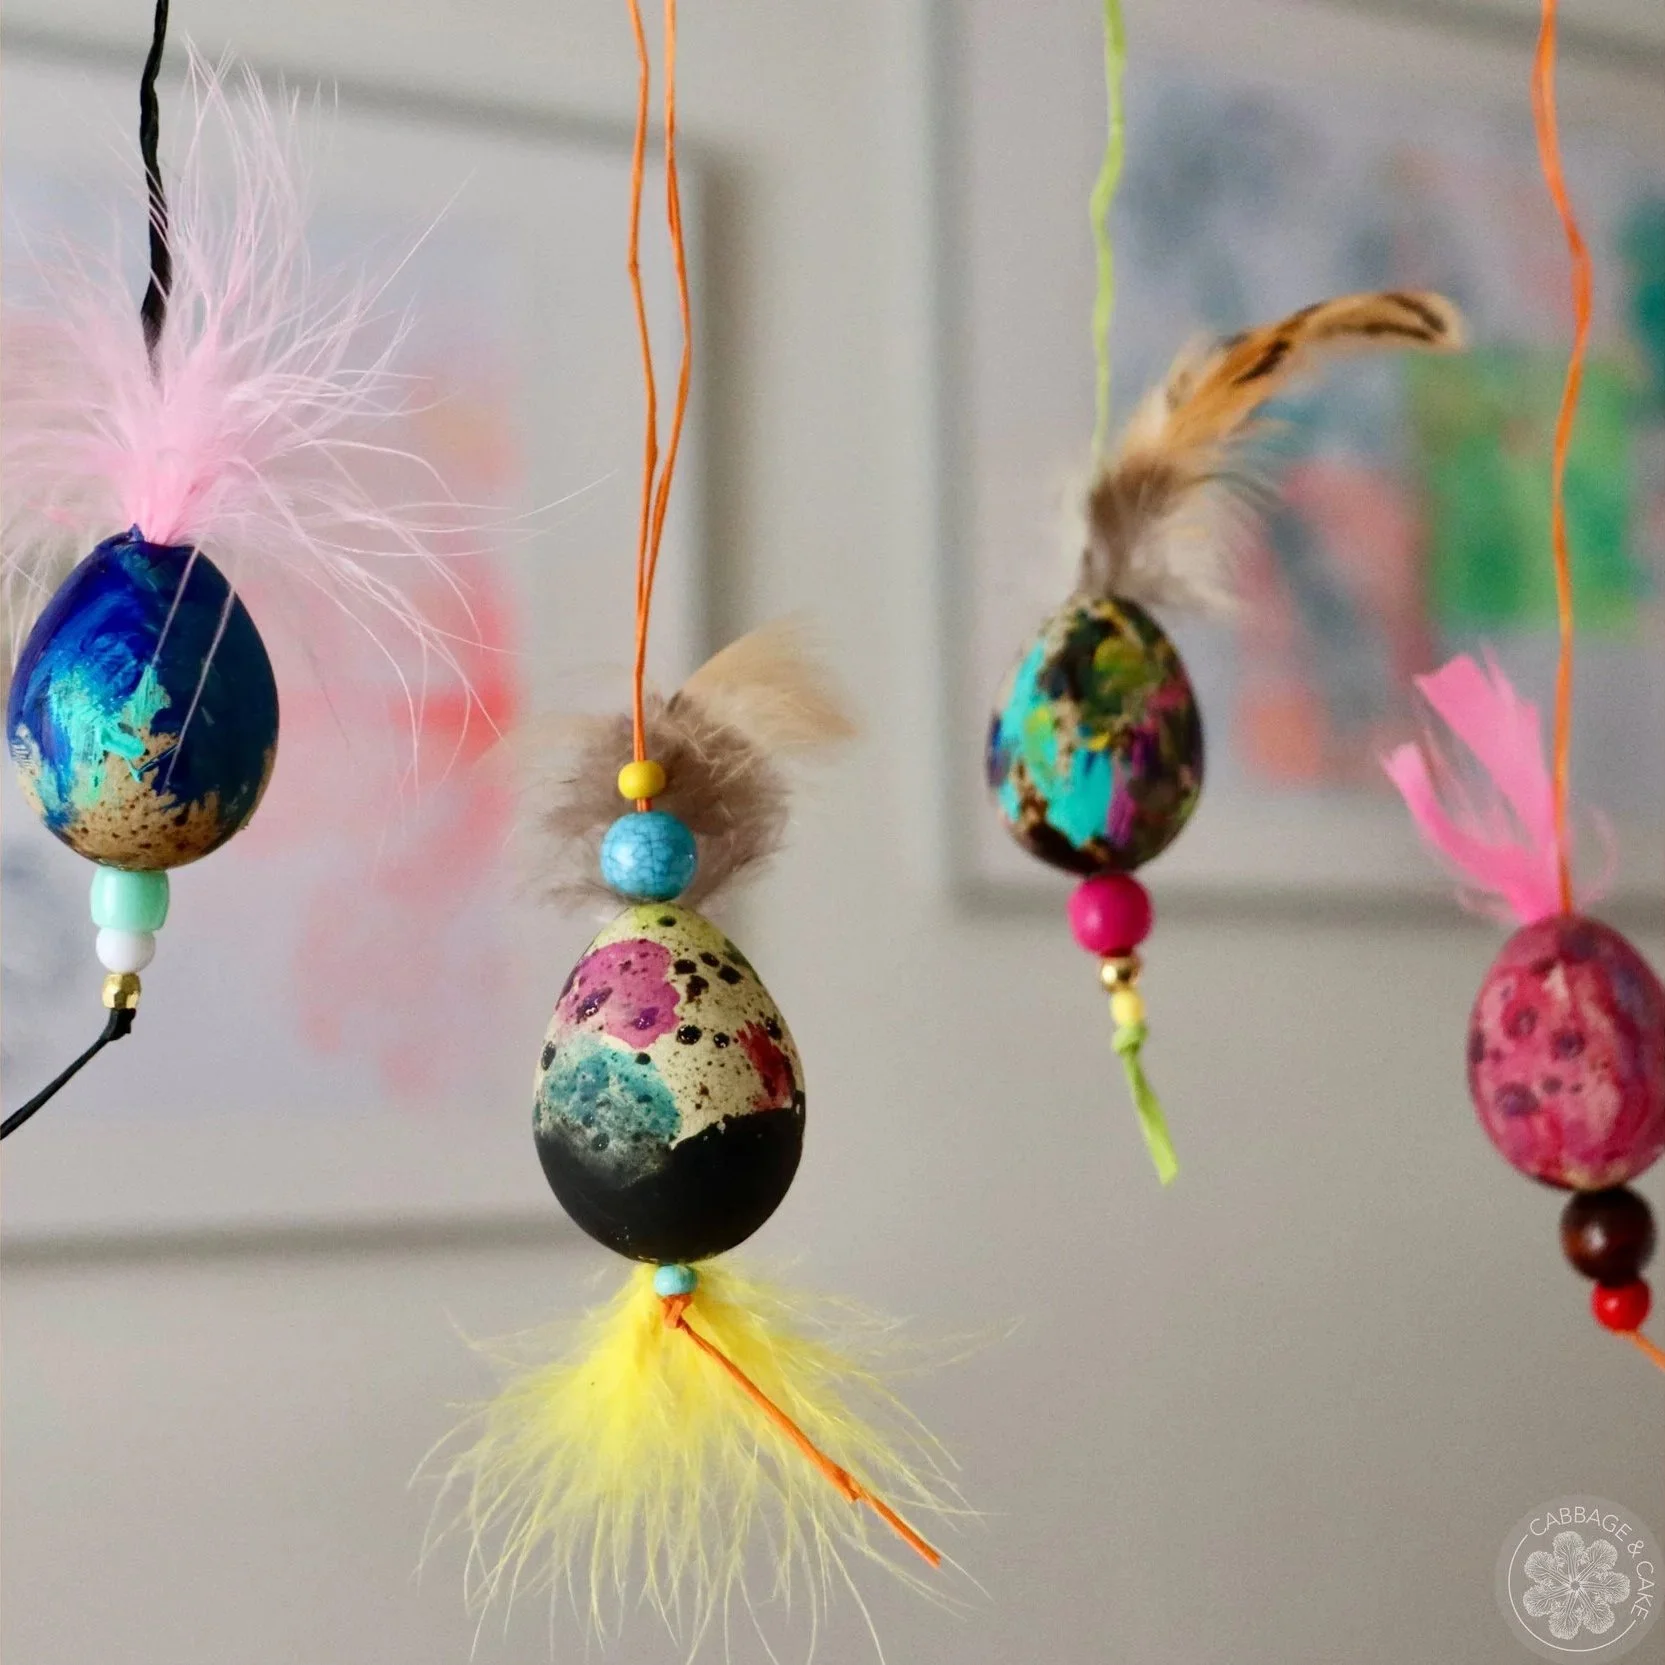
Hang up your unique mini Easter eggs and enjoy!
EASTER QUAIL EGGS
by Julia
Quail eggs make the cutest little Easter eggs to decorate. Just blow them out, paint them with some acrylic paint in your favourite colours, add some pretty beads and feathers, and hang them up as a unique and happy addition to your Easter decorations this year!
MATERIALS
quail eggs
bulb syringe
two bowls
dish towel or paper towel
long needle
toothpicks
pointy knife or needle
wooden skewer
acrylic paint and paintbrush
scissors
string/ raffia paper ribbons
beads
feathers
glue (optional)
INSTRUCTIONS
Gather all your materials.
With a pointy knife or needle make two small holes on both ends of your quail egg by gently tapping it with the tip of your knife.
Over an empty bowl or container stick a wooden skewer through the egg, making sure both holes are big enough and breaking up the inside of the egg.
Blow from the top or suck from the bottom of the egg with the bulb syringe and once they are empty, place them in a bowl with water after.
Once all your eggs are empty, rinse them out at the sink and set them on some paper towel or a dish towel to dry.
Stick the eggs on a wooden skewer to paint them and let them dry completely.
Cut your string in the desired length, making sure you have enough to add beads and knots, attach it to the needle and put the string through both holes of each egg.
Alternatively (if you don’t want to add beads on the bottom), you can tie a small piece of toothpick to the end of the string and push it through the bottom hole. This will hold your string in place, and you can put a feather on the bottom of the egg.
Add beads and feathers and tie off the ends to avoid the string from slipping out (use a bit of glue if necessary).
Hang up your unique mini Easter eggs and enjoy!