

DIY HERB DRYING RACK WITH EMBROIDERY HOOPS
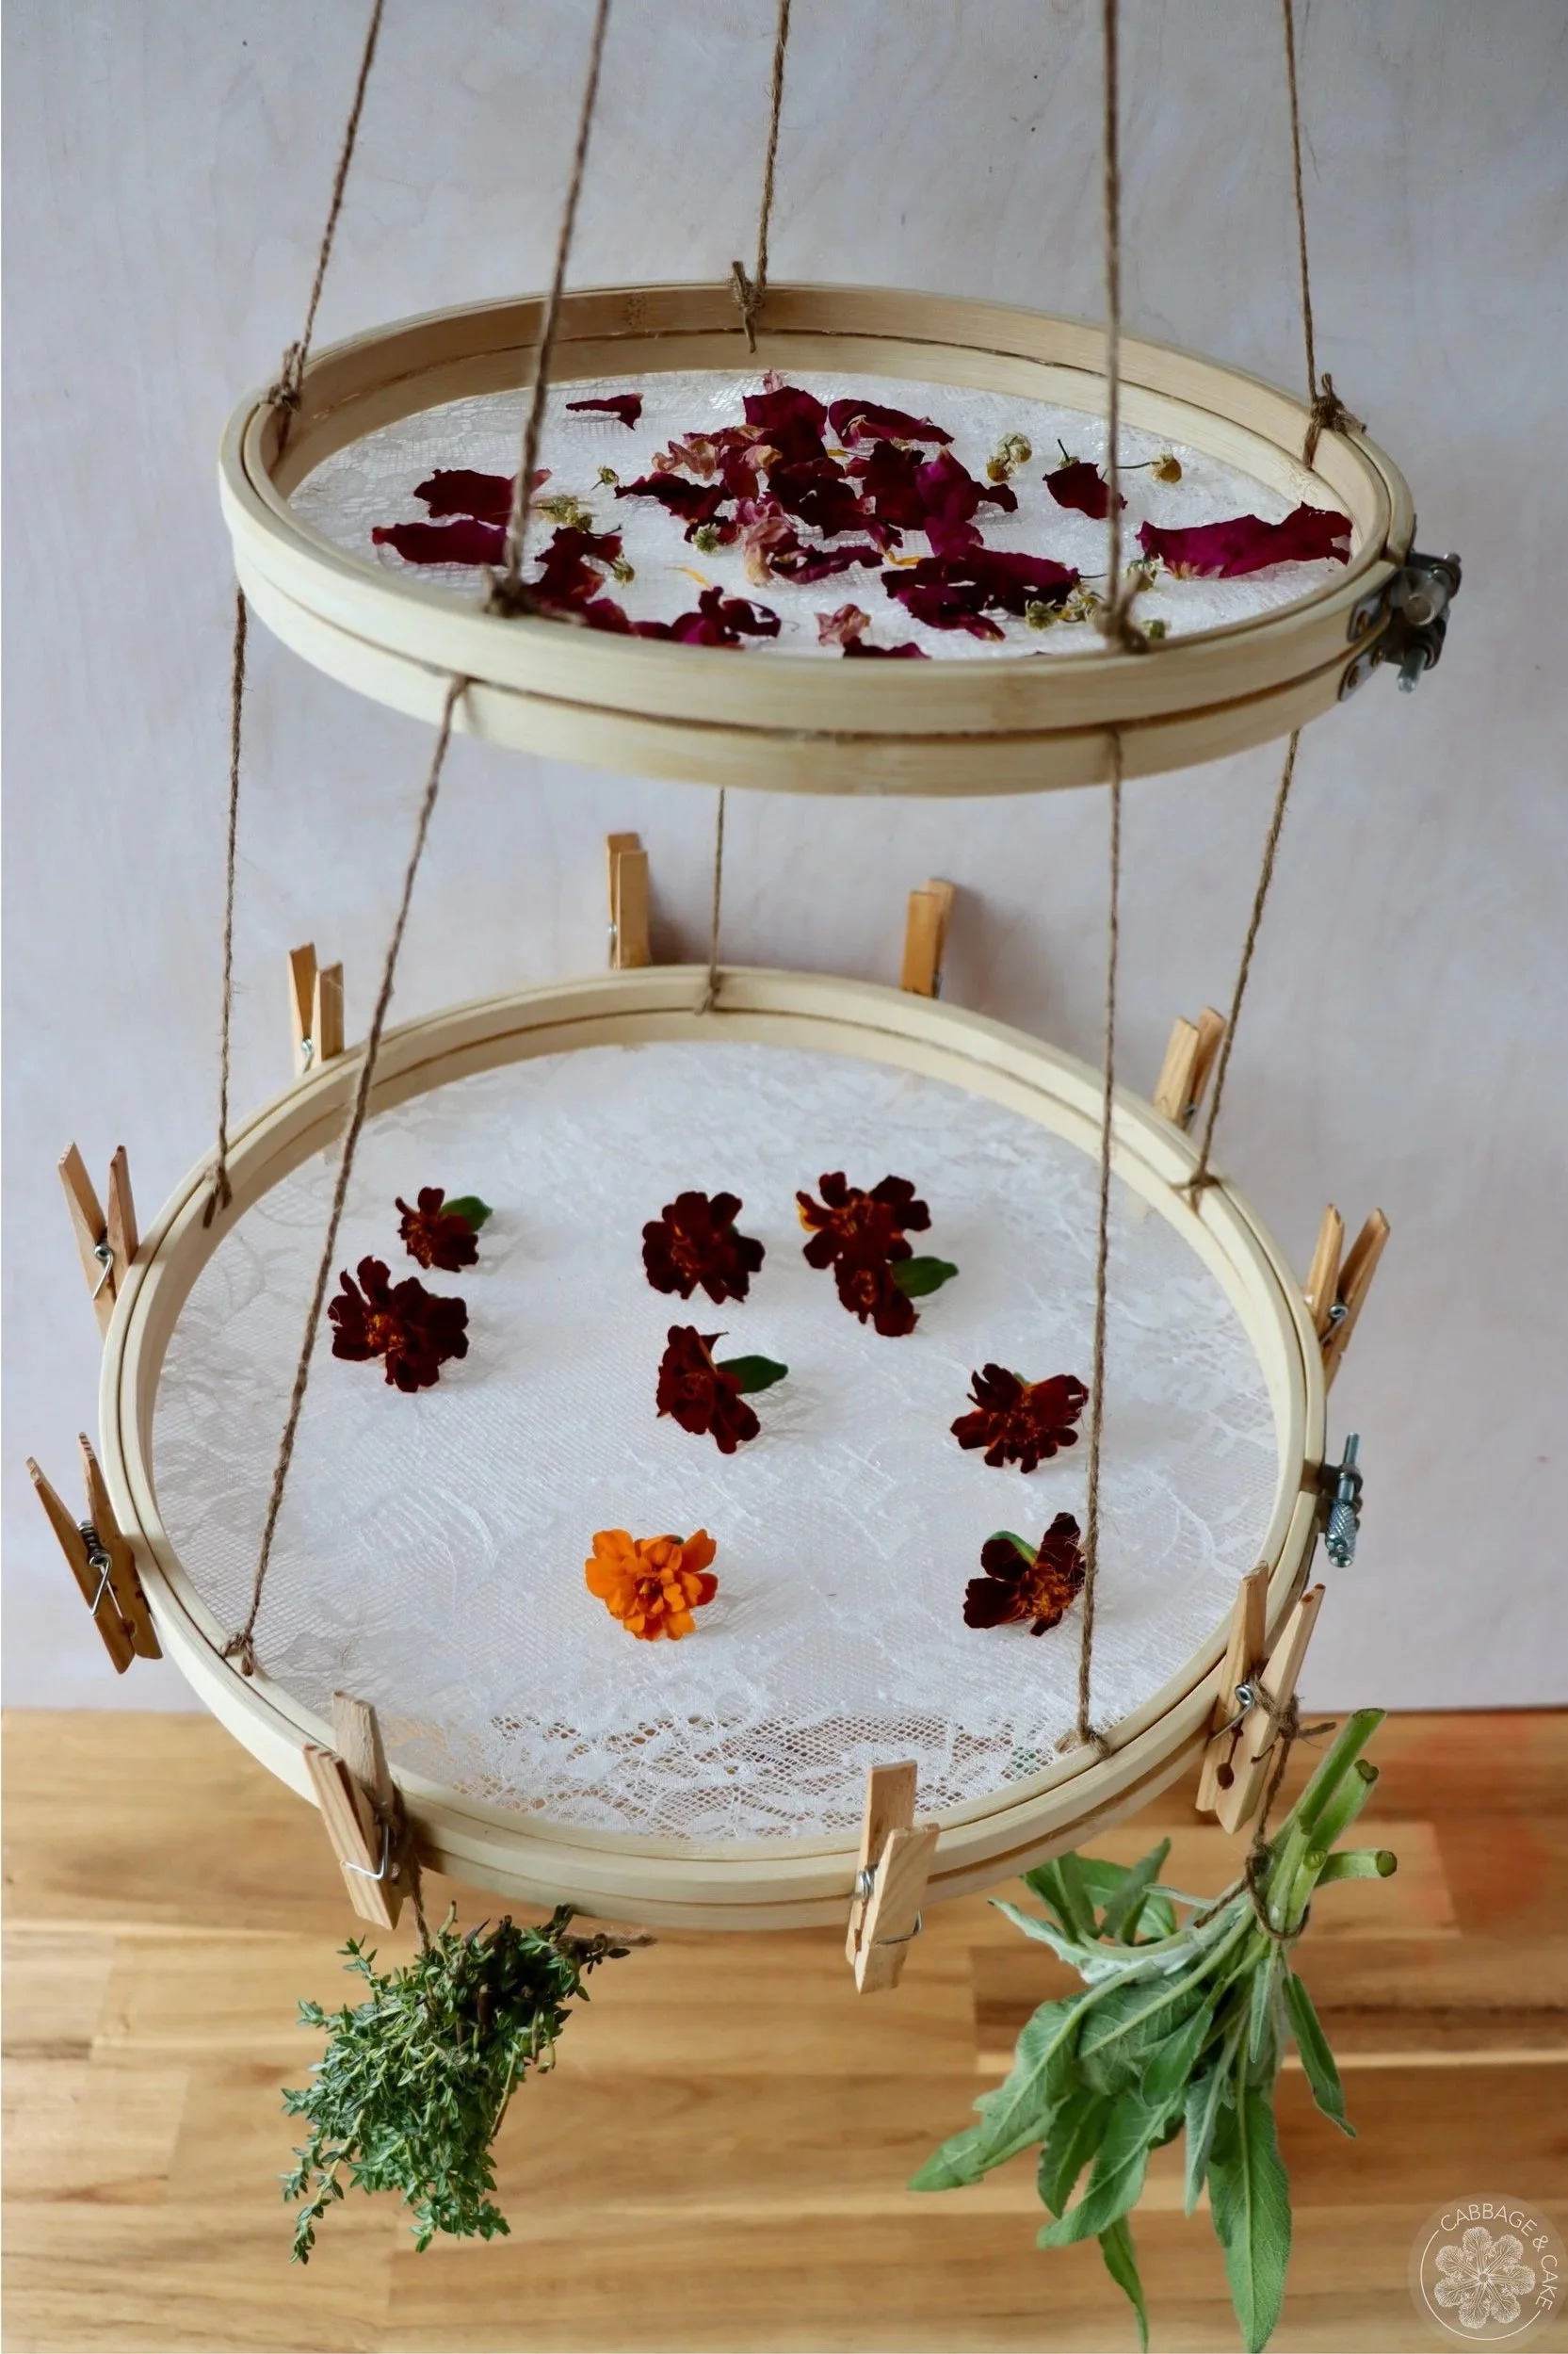
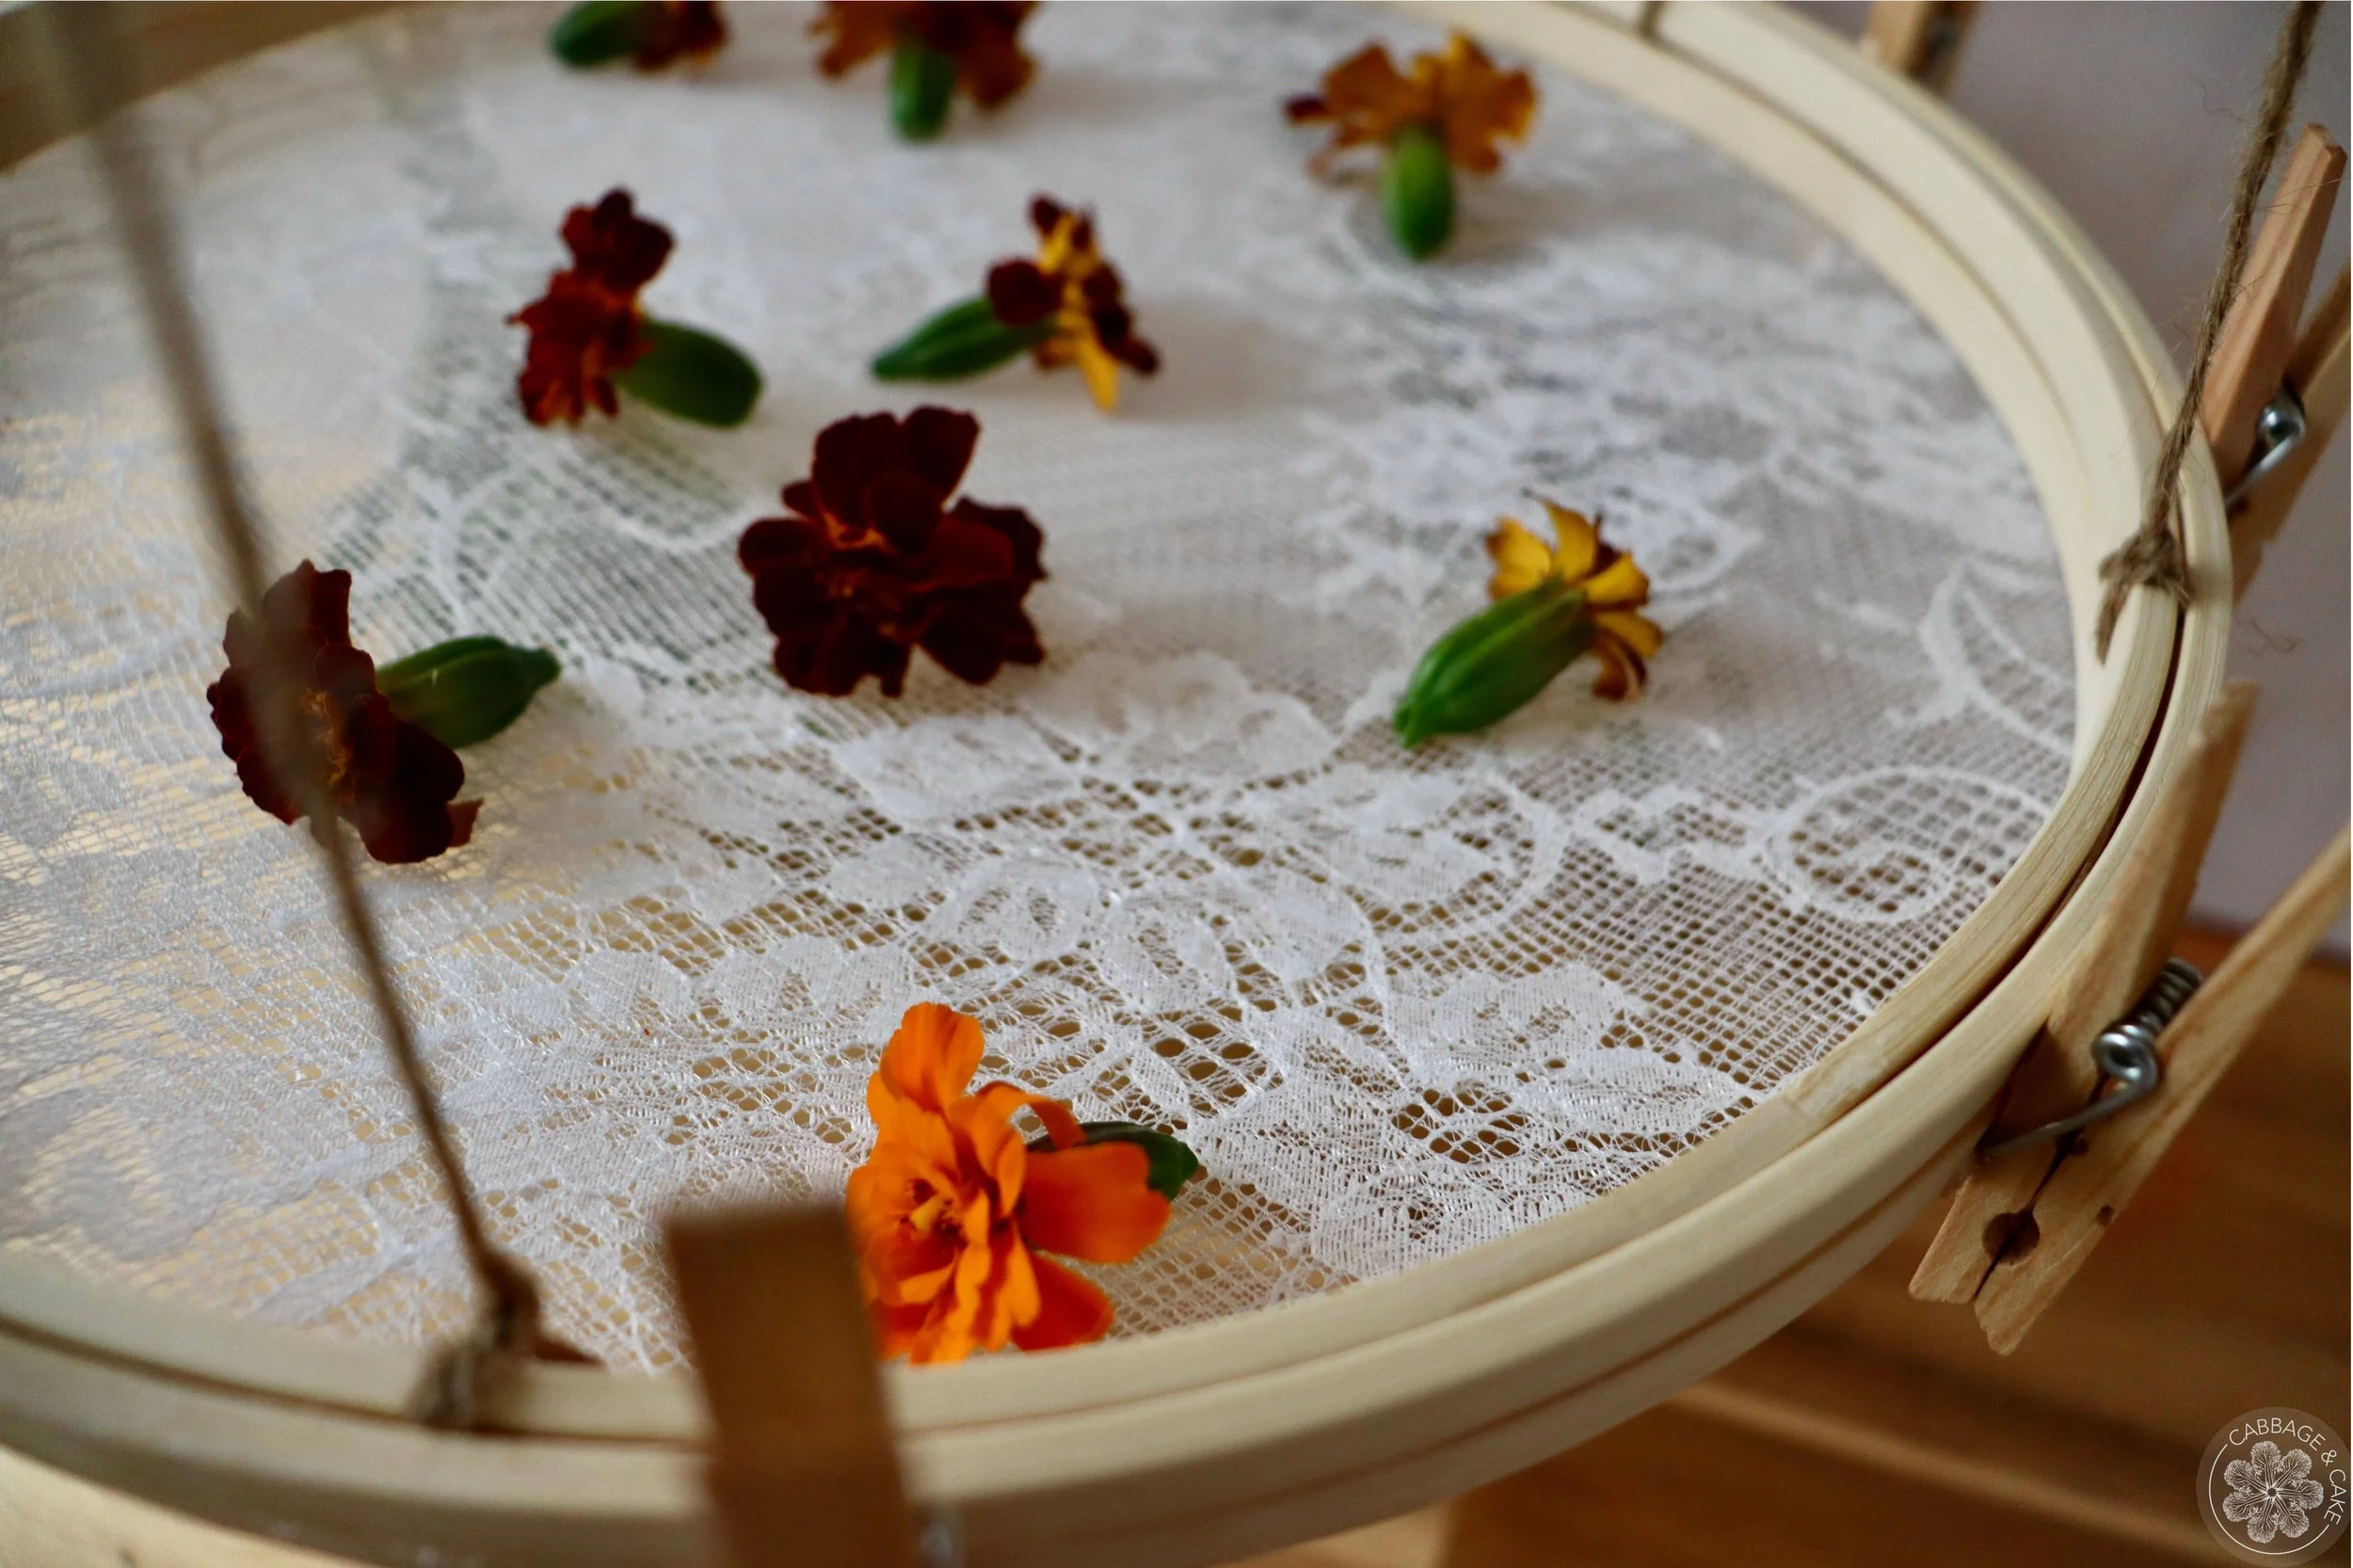
This is a great and easy DIY project for a simple two-layered herb drying rack to air dry small flowers, blooms and herbs. It’s quickly made by inserting thin fabric into two different sized embroidery hoops and hanging them up horizontally with some twine. Clothespins can be glued on the outside of the hoops to give you some extra drying space for small herb bundles as well.
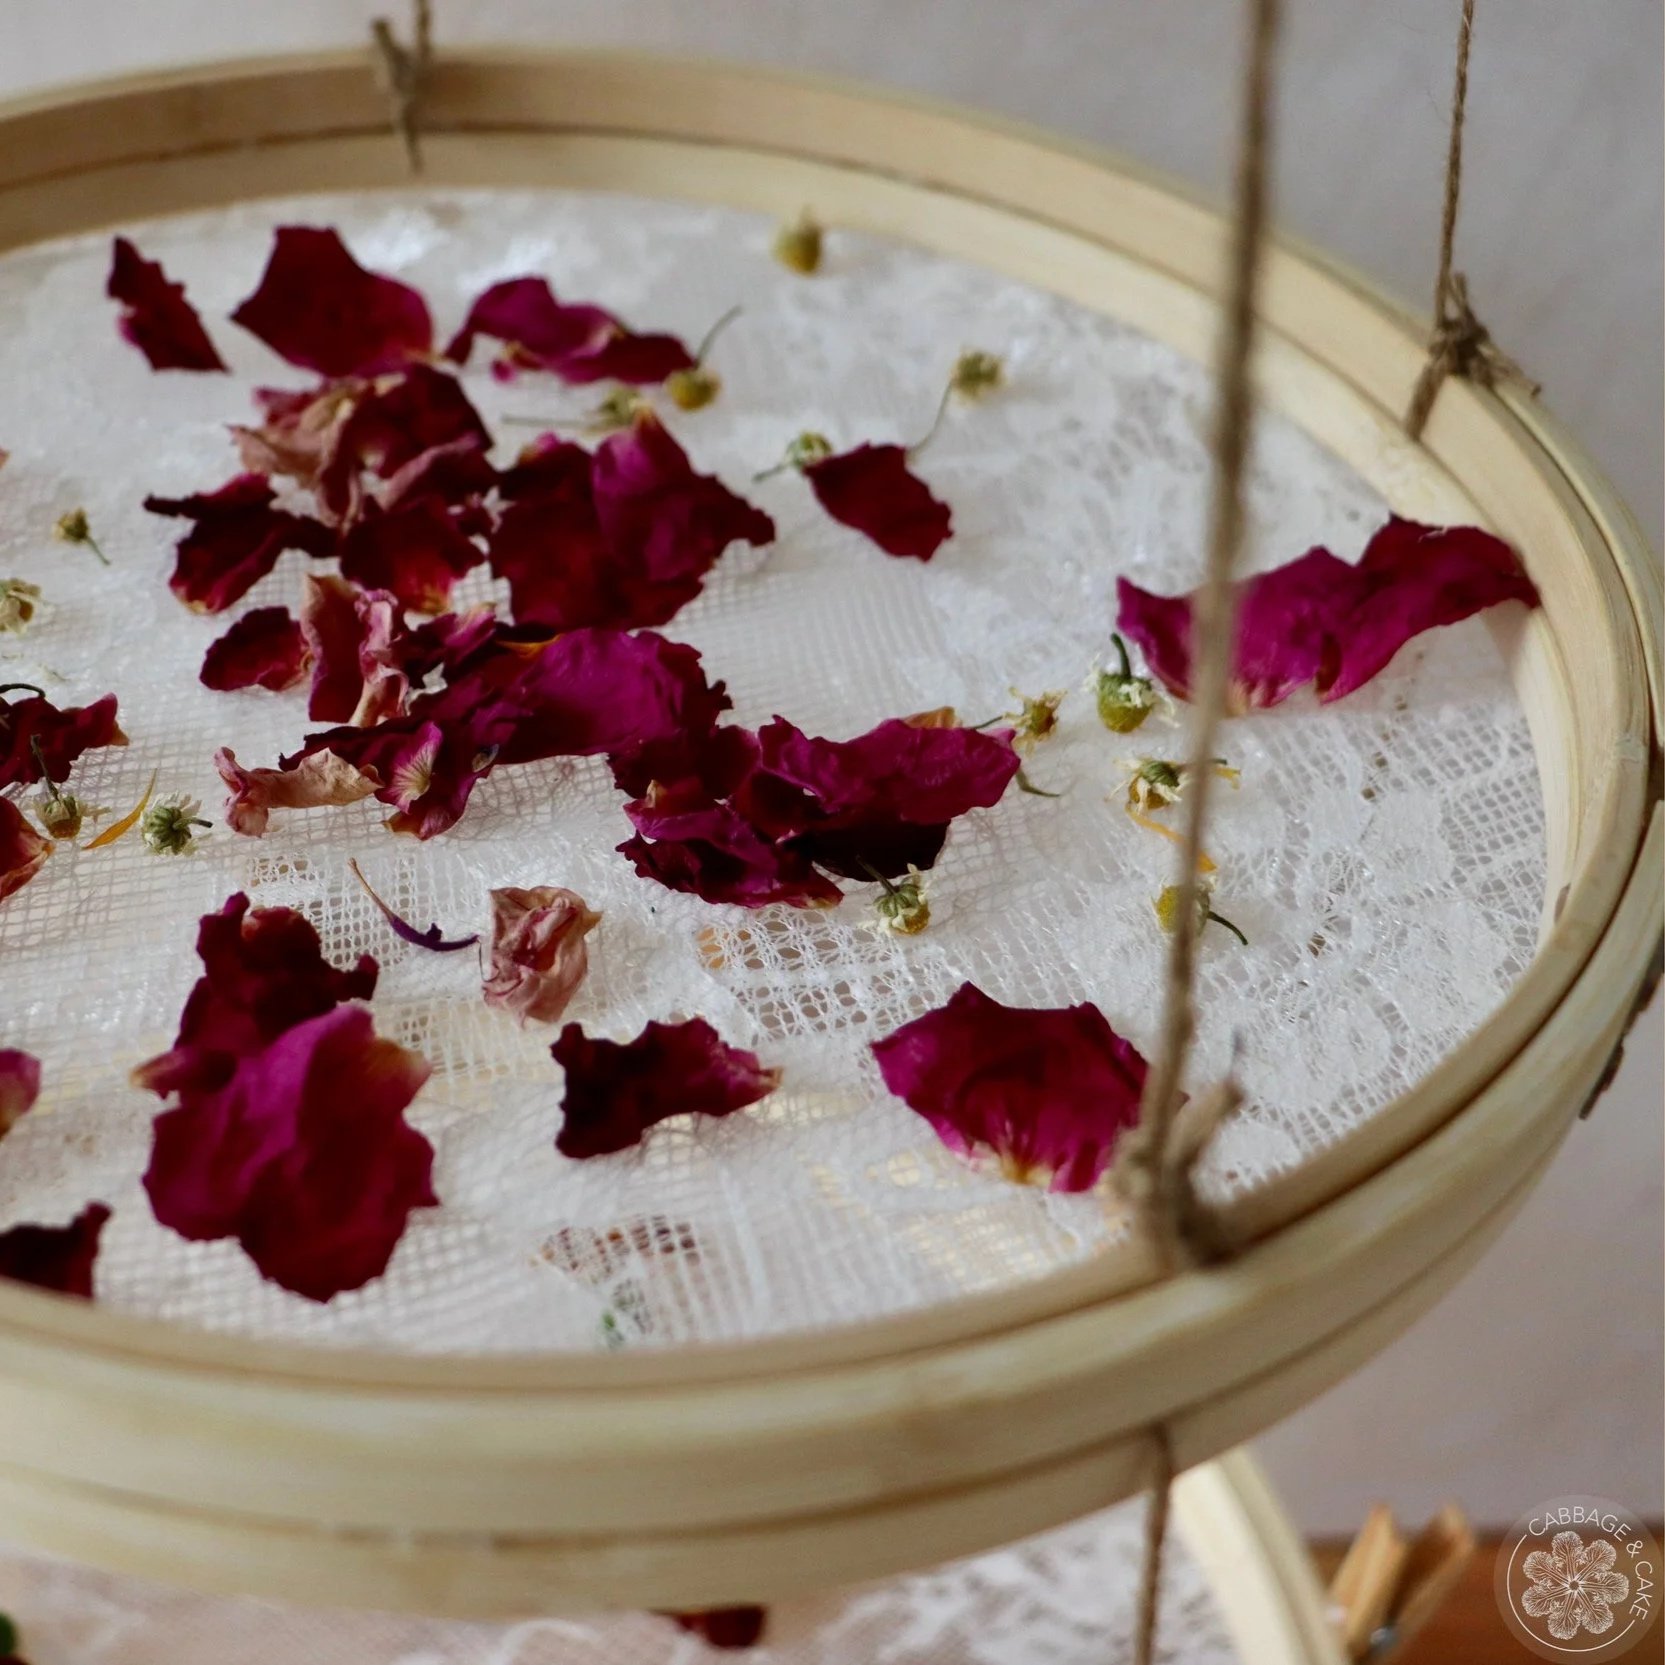
The summer months come with a bounty of amazing herbs and flowers to dry for cooking, herbal teas, natural skincare and craft projects. Drying them on a screen like this is practical and saves space. Once you are done drying your herbs and flowers, it collapses easily and can be stored away without taking up too much space or taken apart for some embroidery projects during the winter months.
I usually like to hang my herbs in small bundles to dry them after harvesting, but I needed a better solution for flowering tops like calendula, chamomile, bee balm and rose petals. For a detailed description on how I bundle and hang my herbs, check out my post MY FAVOURITE 7 HERBS TO HARVEST AND DRY FOR HERBAL TEAS ALL WINTER LONG.
Originally, I was going to buy some screen mesh for this herb drying rack, but then I found this pretty white floral lace fabric at a thrift store and thought this could not only be a cheap and practical solution for my project, but also a beautiful one.
TIPS TO MAKE THE PERFECT HERB DRYING RACK
WITH EMBROIDERY HOOPS
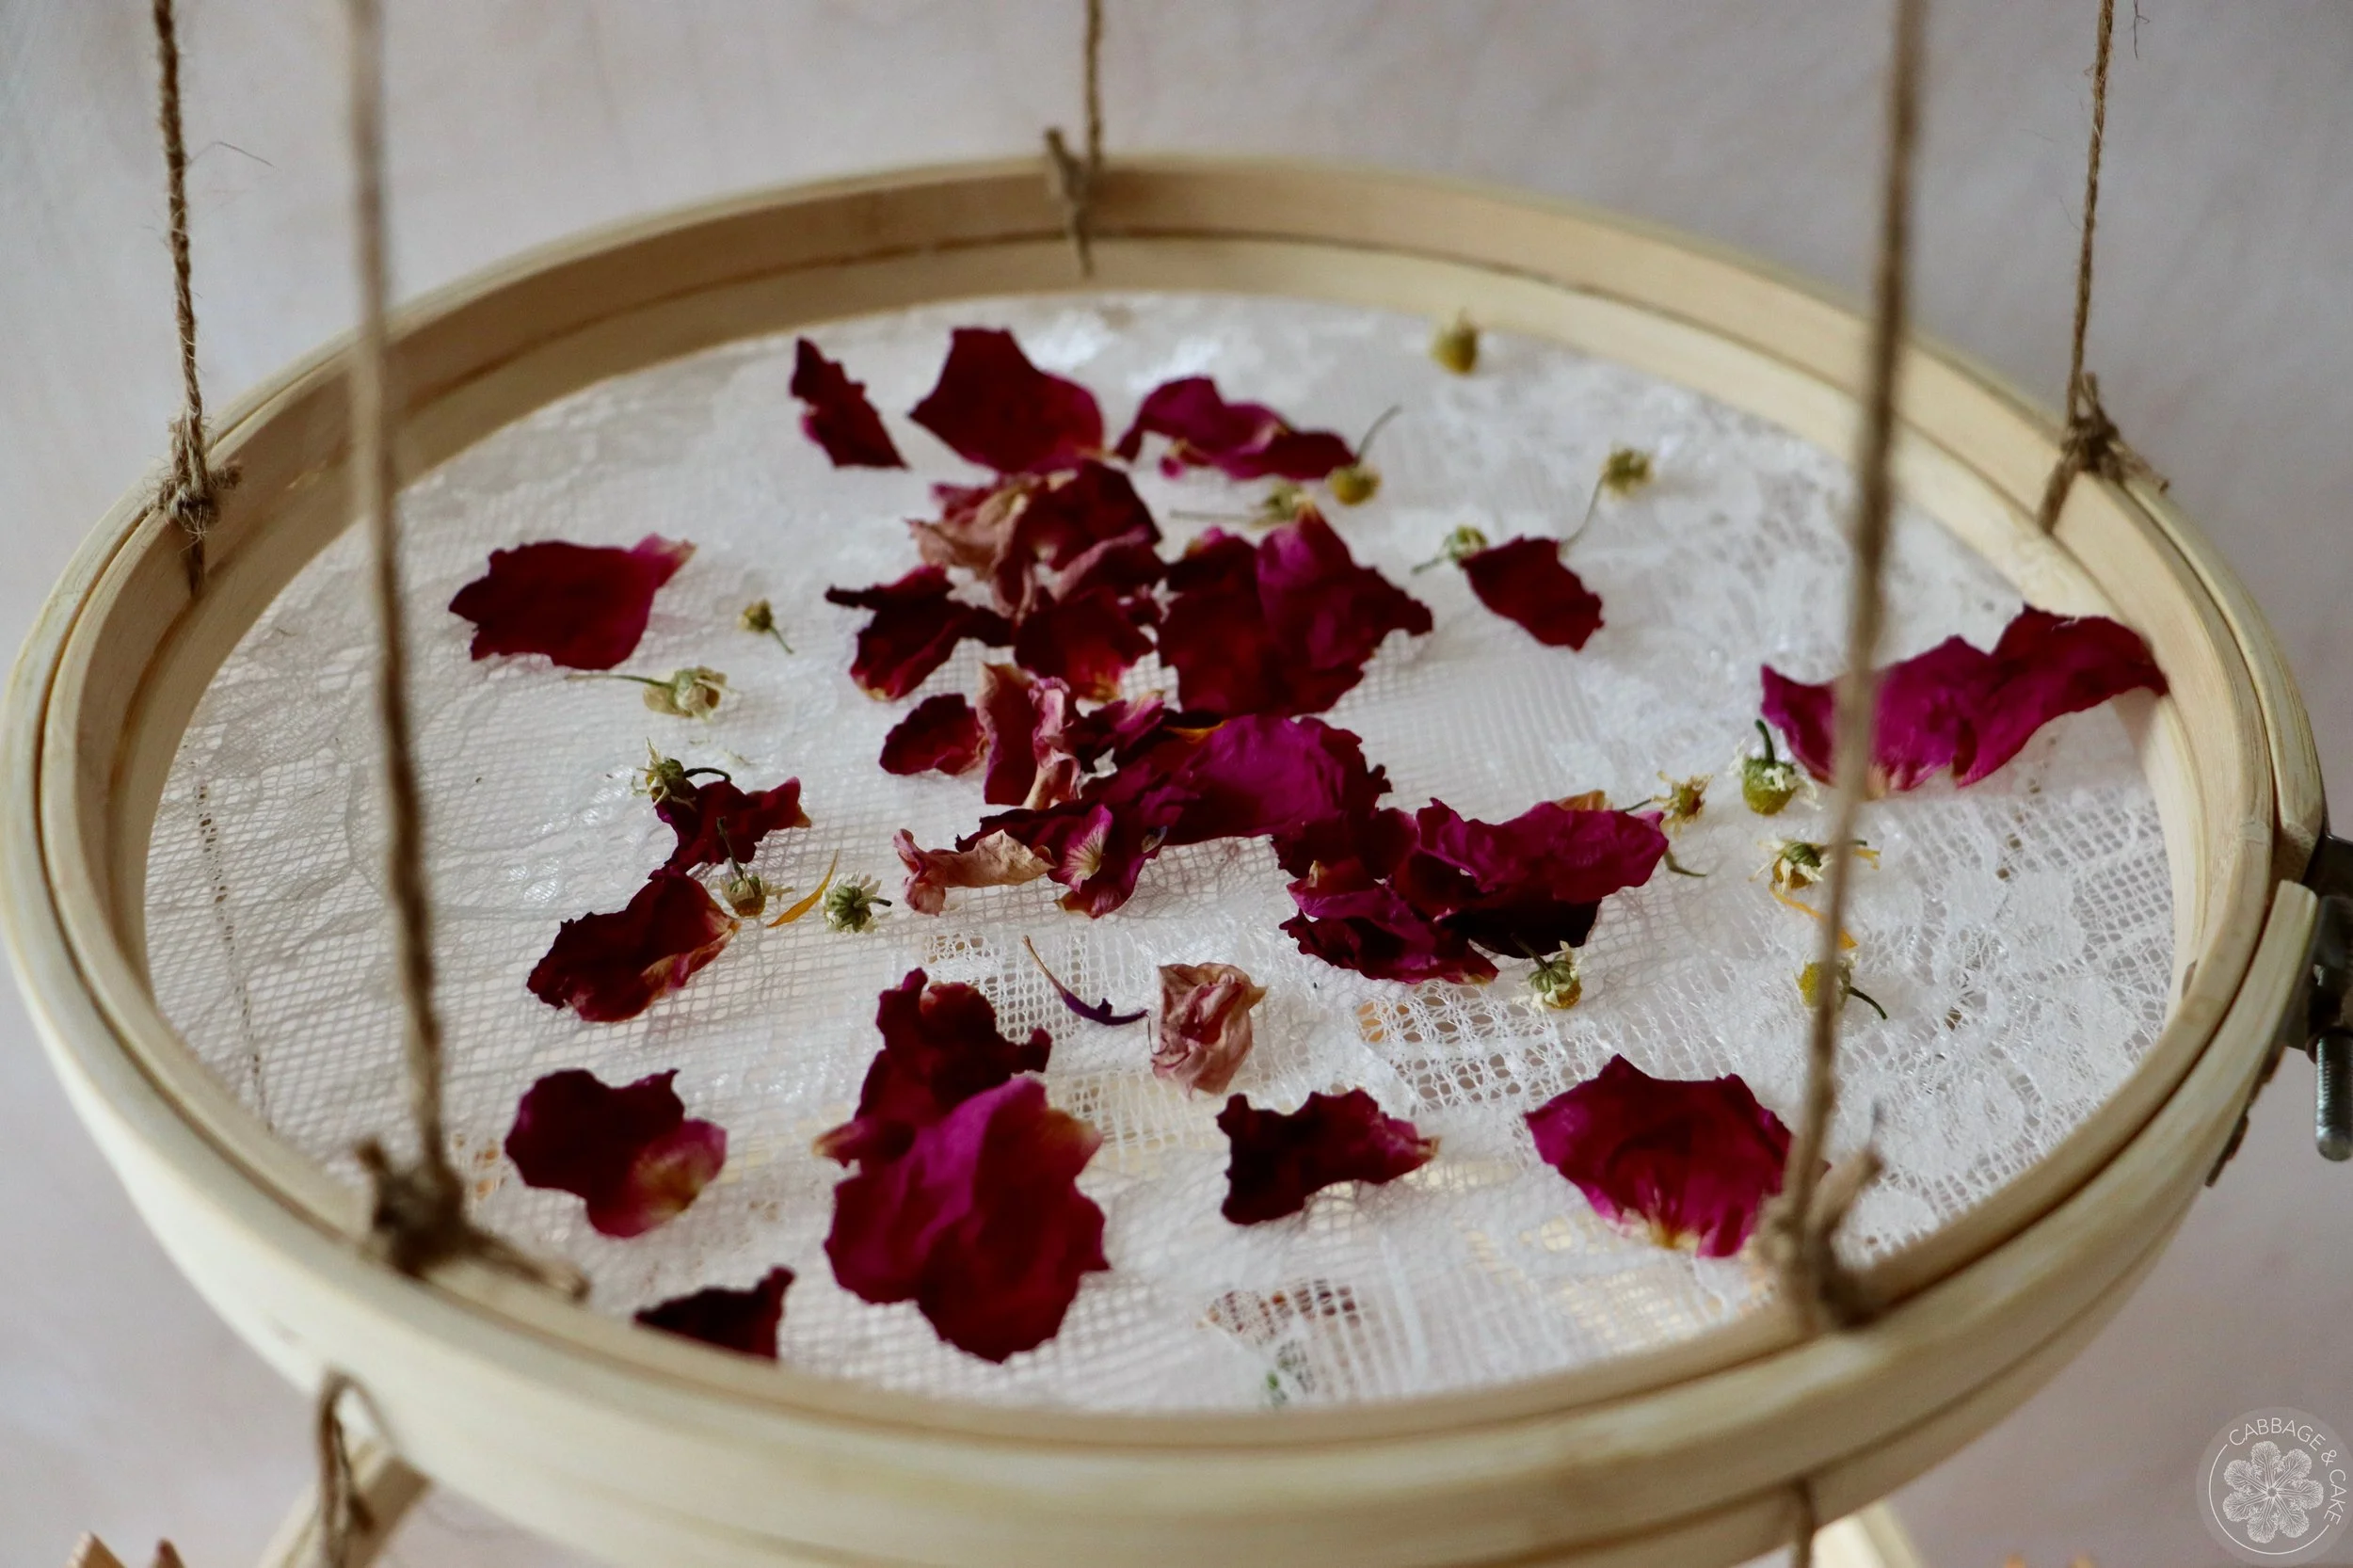
Use a thin, air-permeable fabric like sheer lace, cheese cloth, muslin or screen mesh to ensure a good airflow to dry your herbs and flowers.
Adding a second hoop on top of the first one is optional, but it really helps with stability and creates a border for the delicate flower tops and petals to stay in.
If you are using sheer lace fabric with holes in it, you might want to double it up to avoid delicate little flower petals from falling through.
Make sure to dry your herbs in a cool, dry and well- ventilated area, away from direct sunlight and any moisture.
MATERIALS YOU WILL NEED
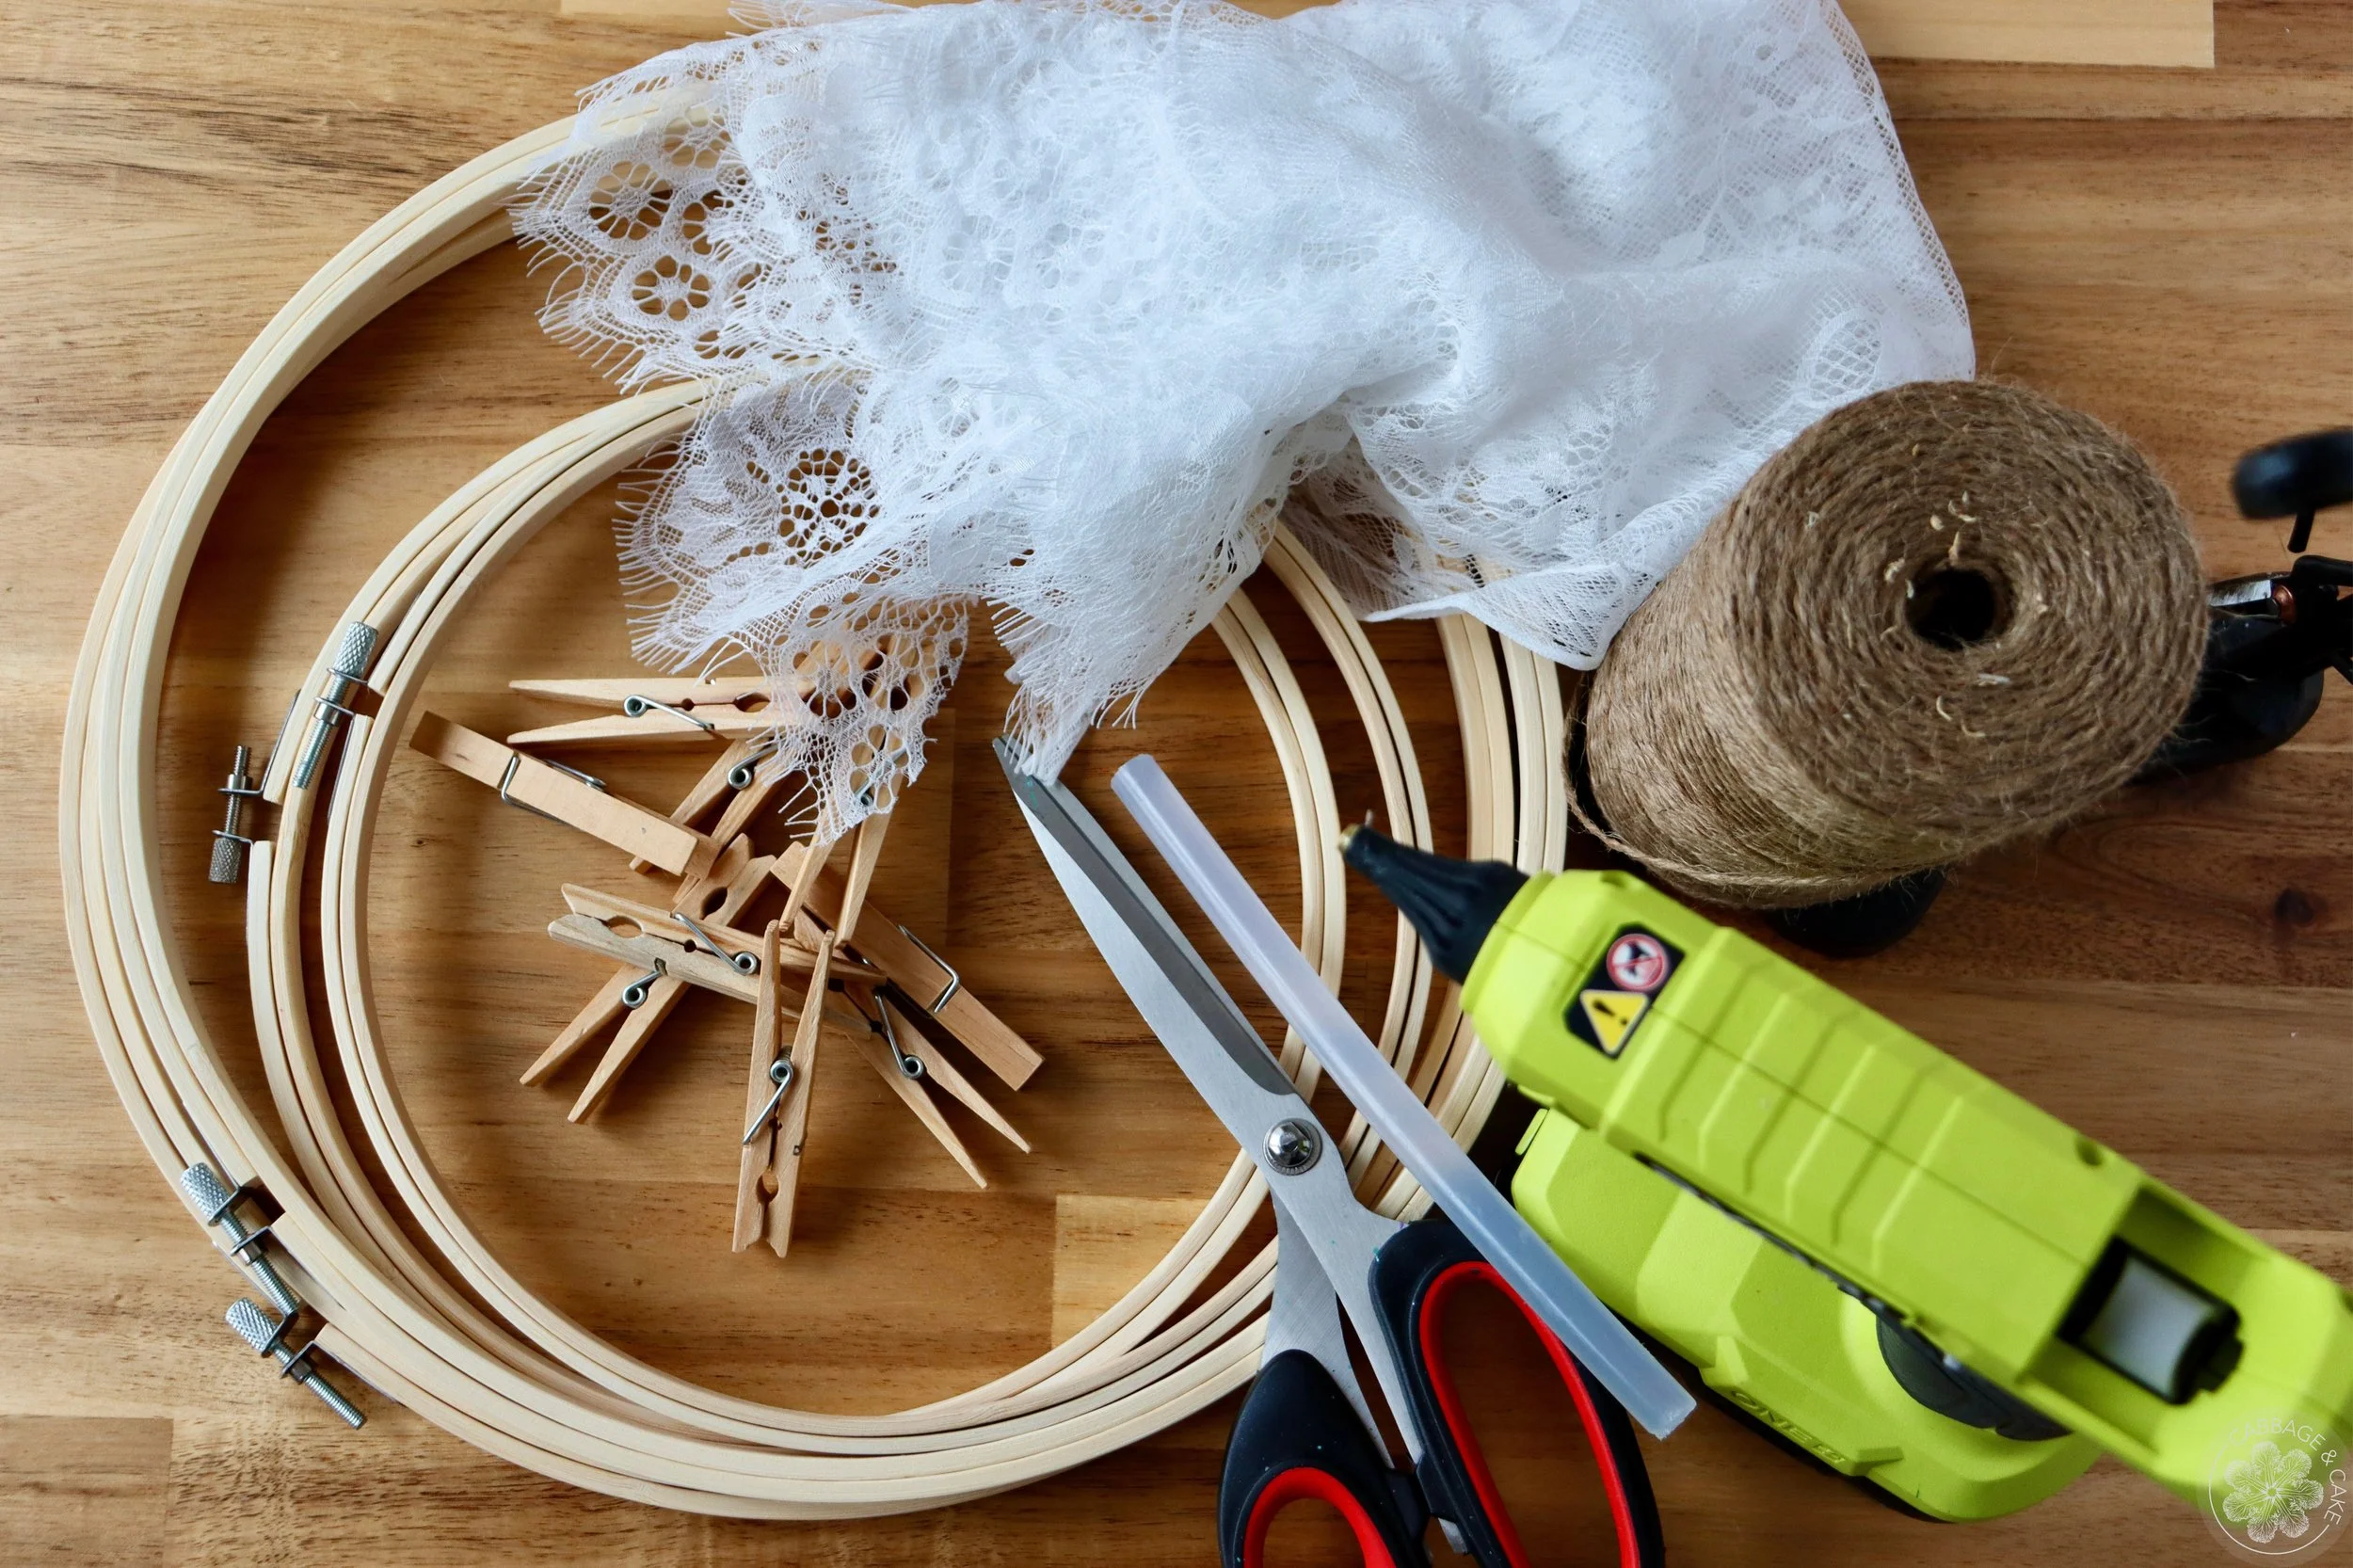
4 embroidery hoops
thin fabric, cheese cloth or screen mesh
twine or other string
scissors
clothespins
hot glue gun with glue sticks
INSTRUCTIONS STEP BY STEP
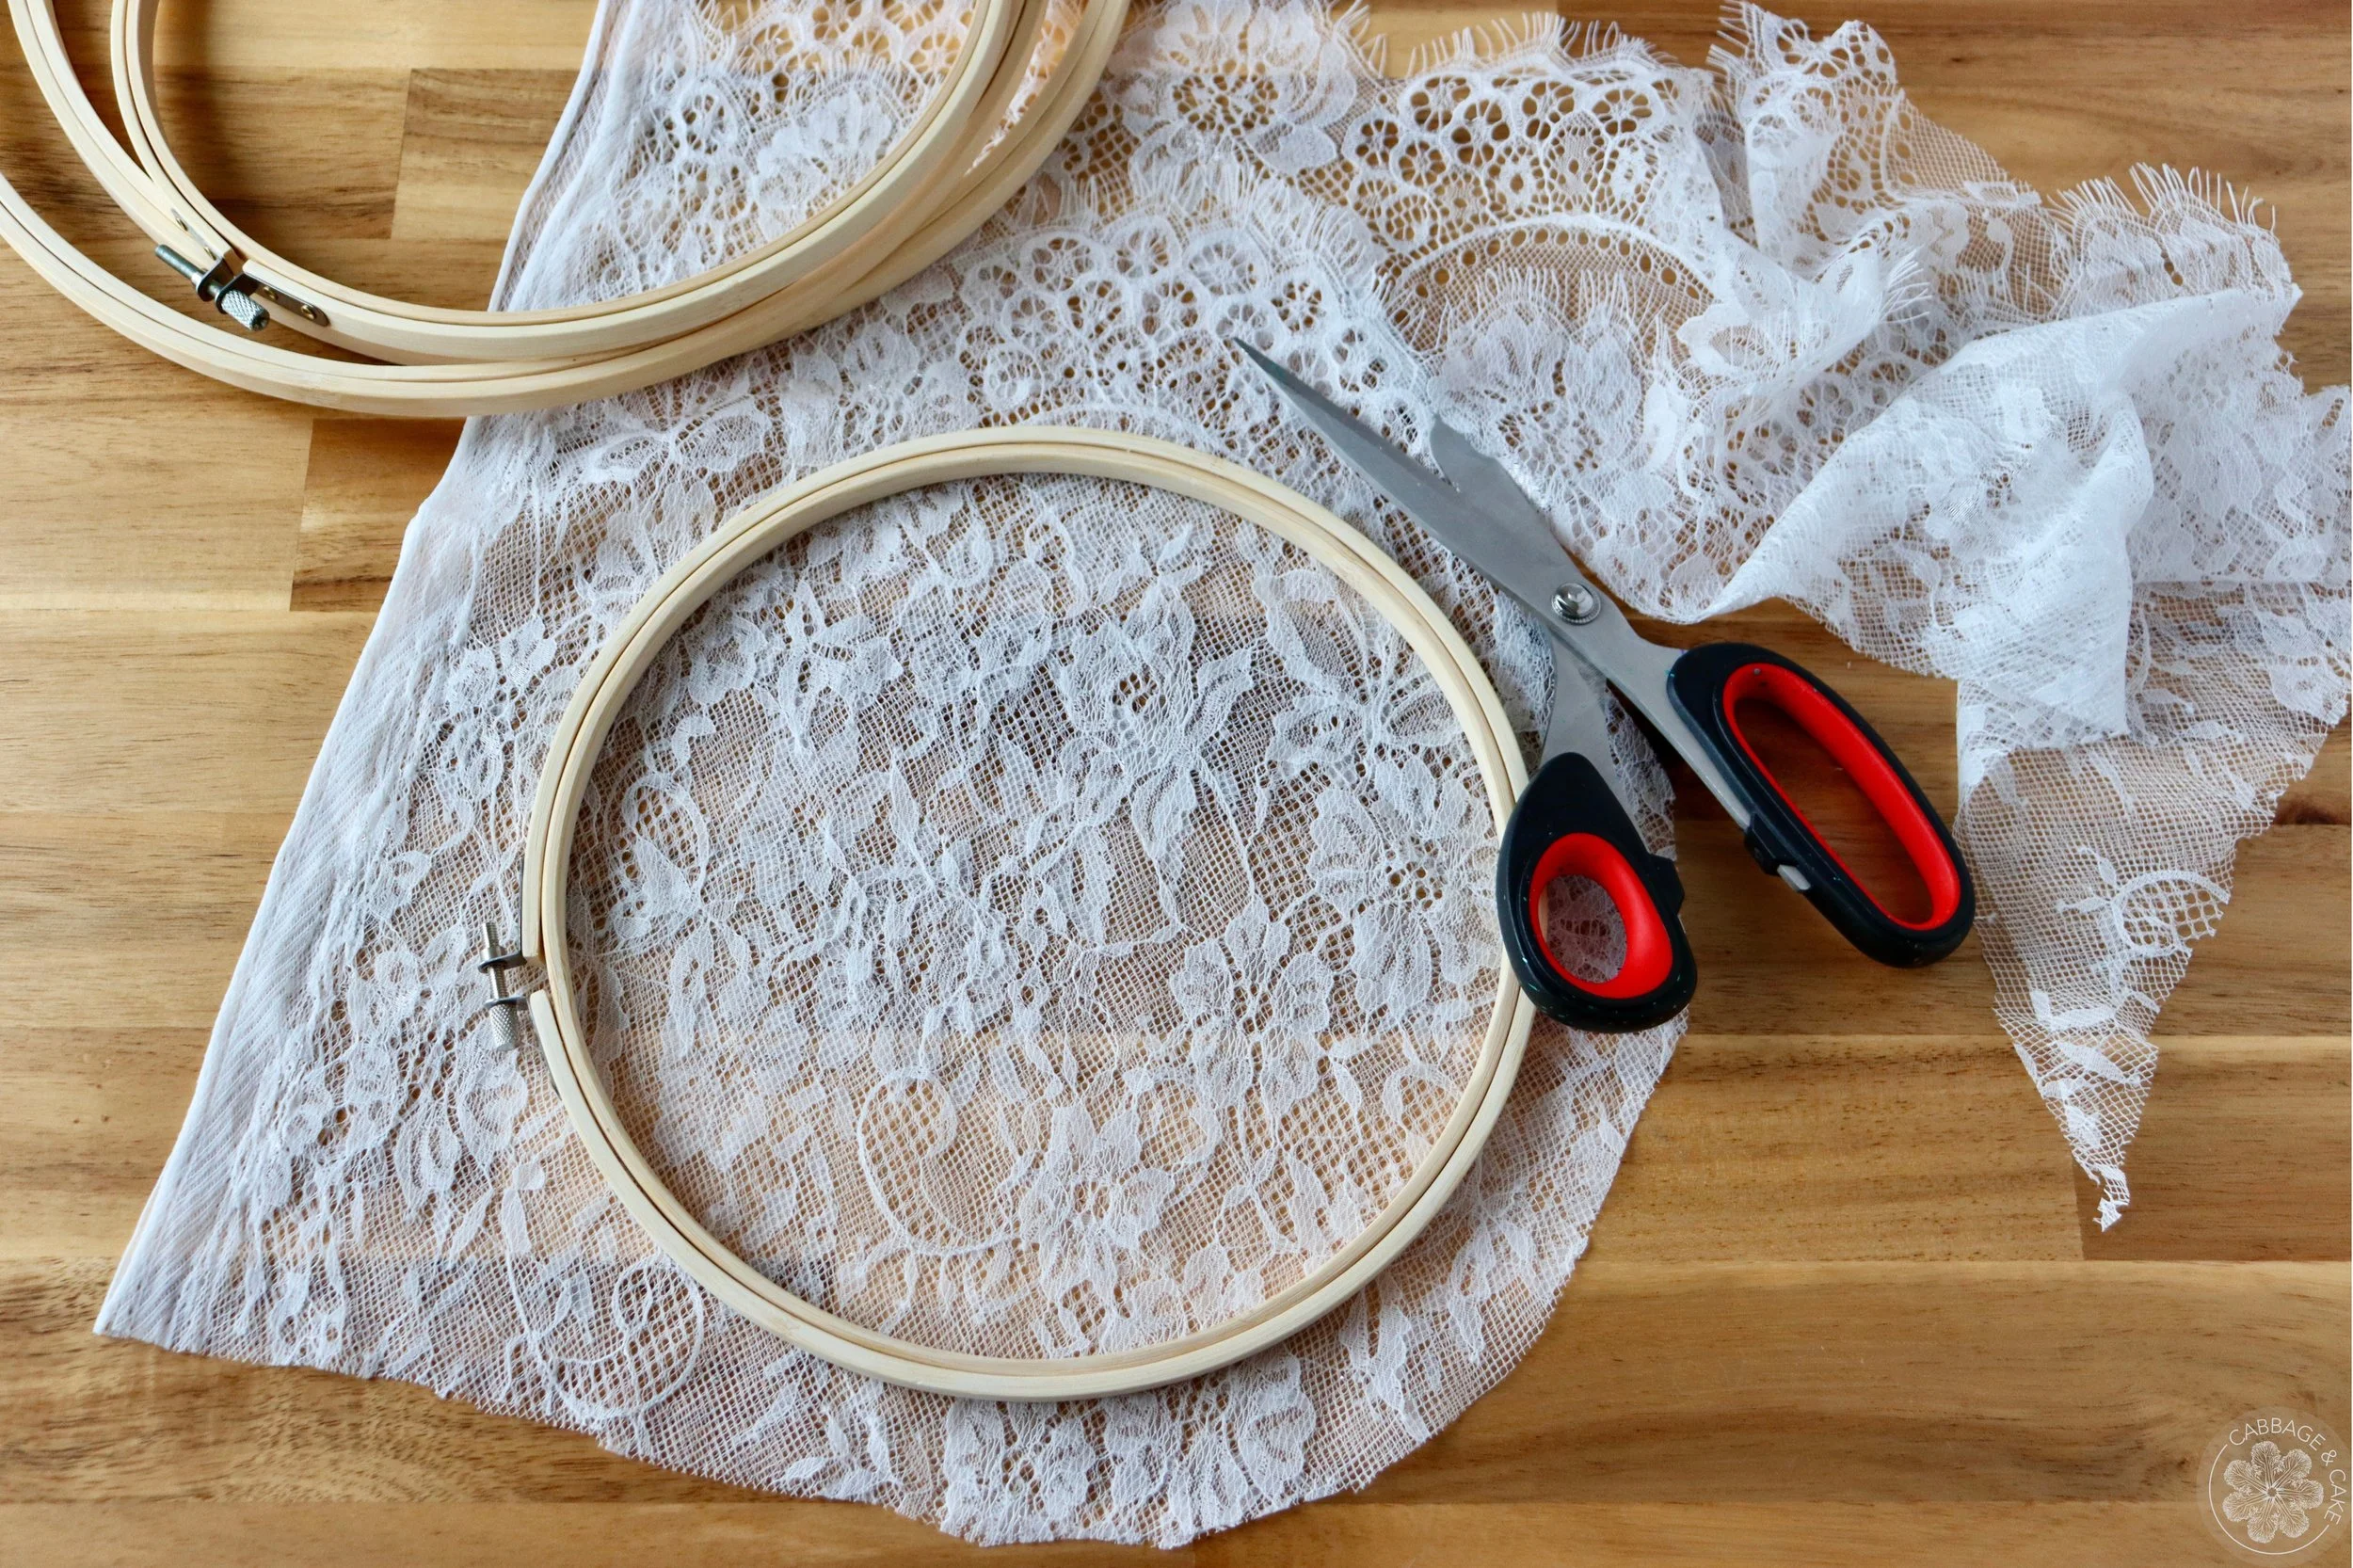
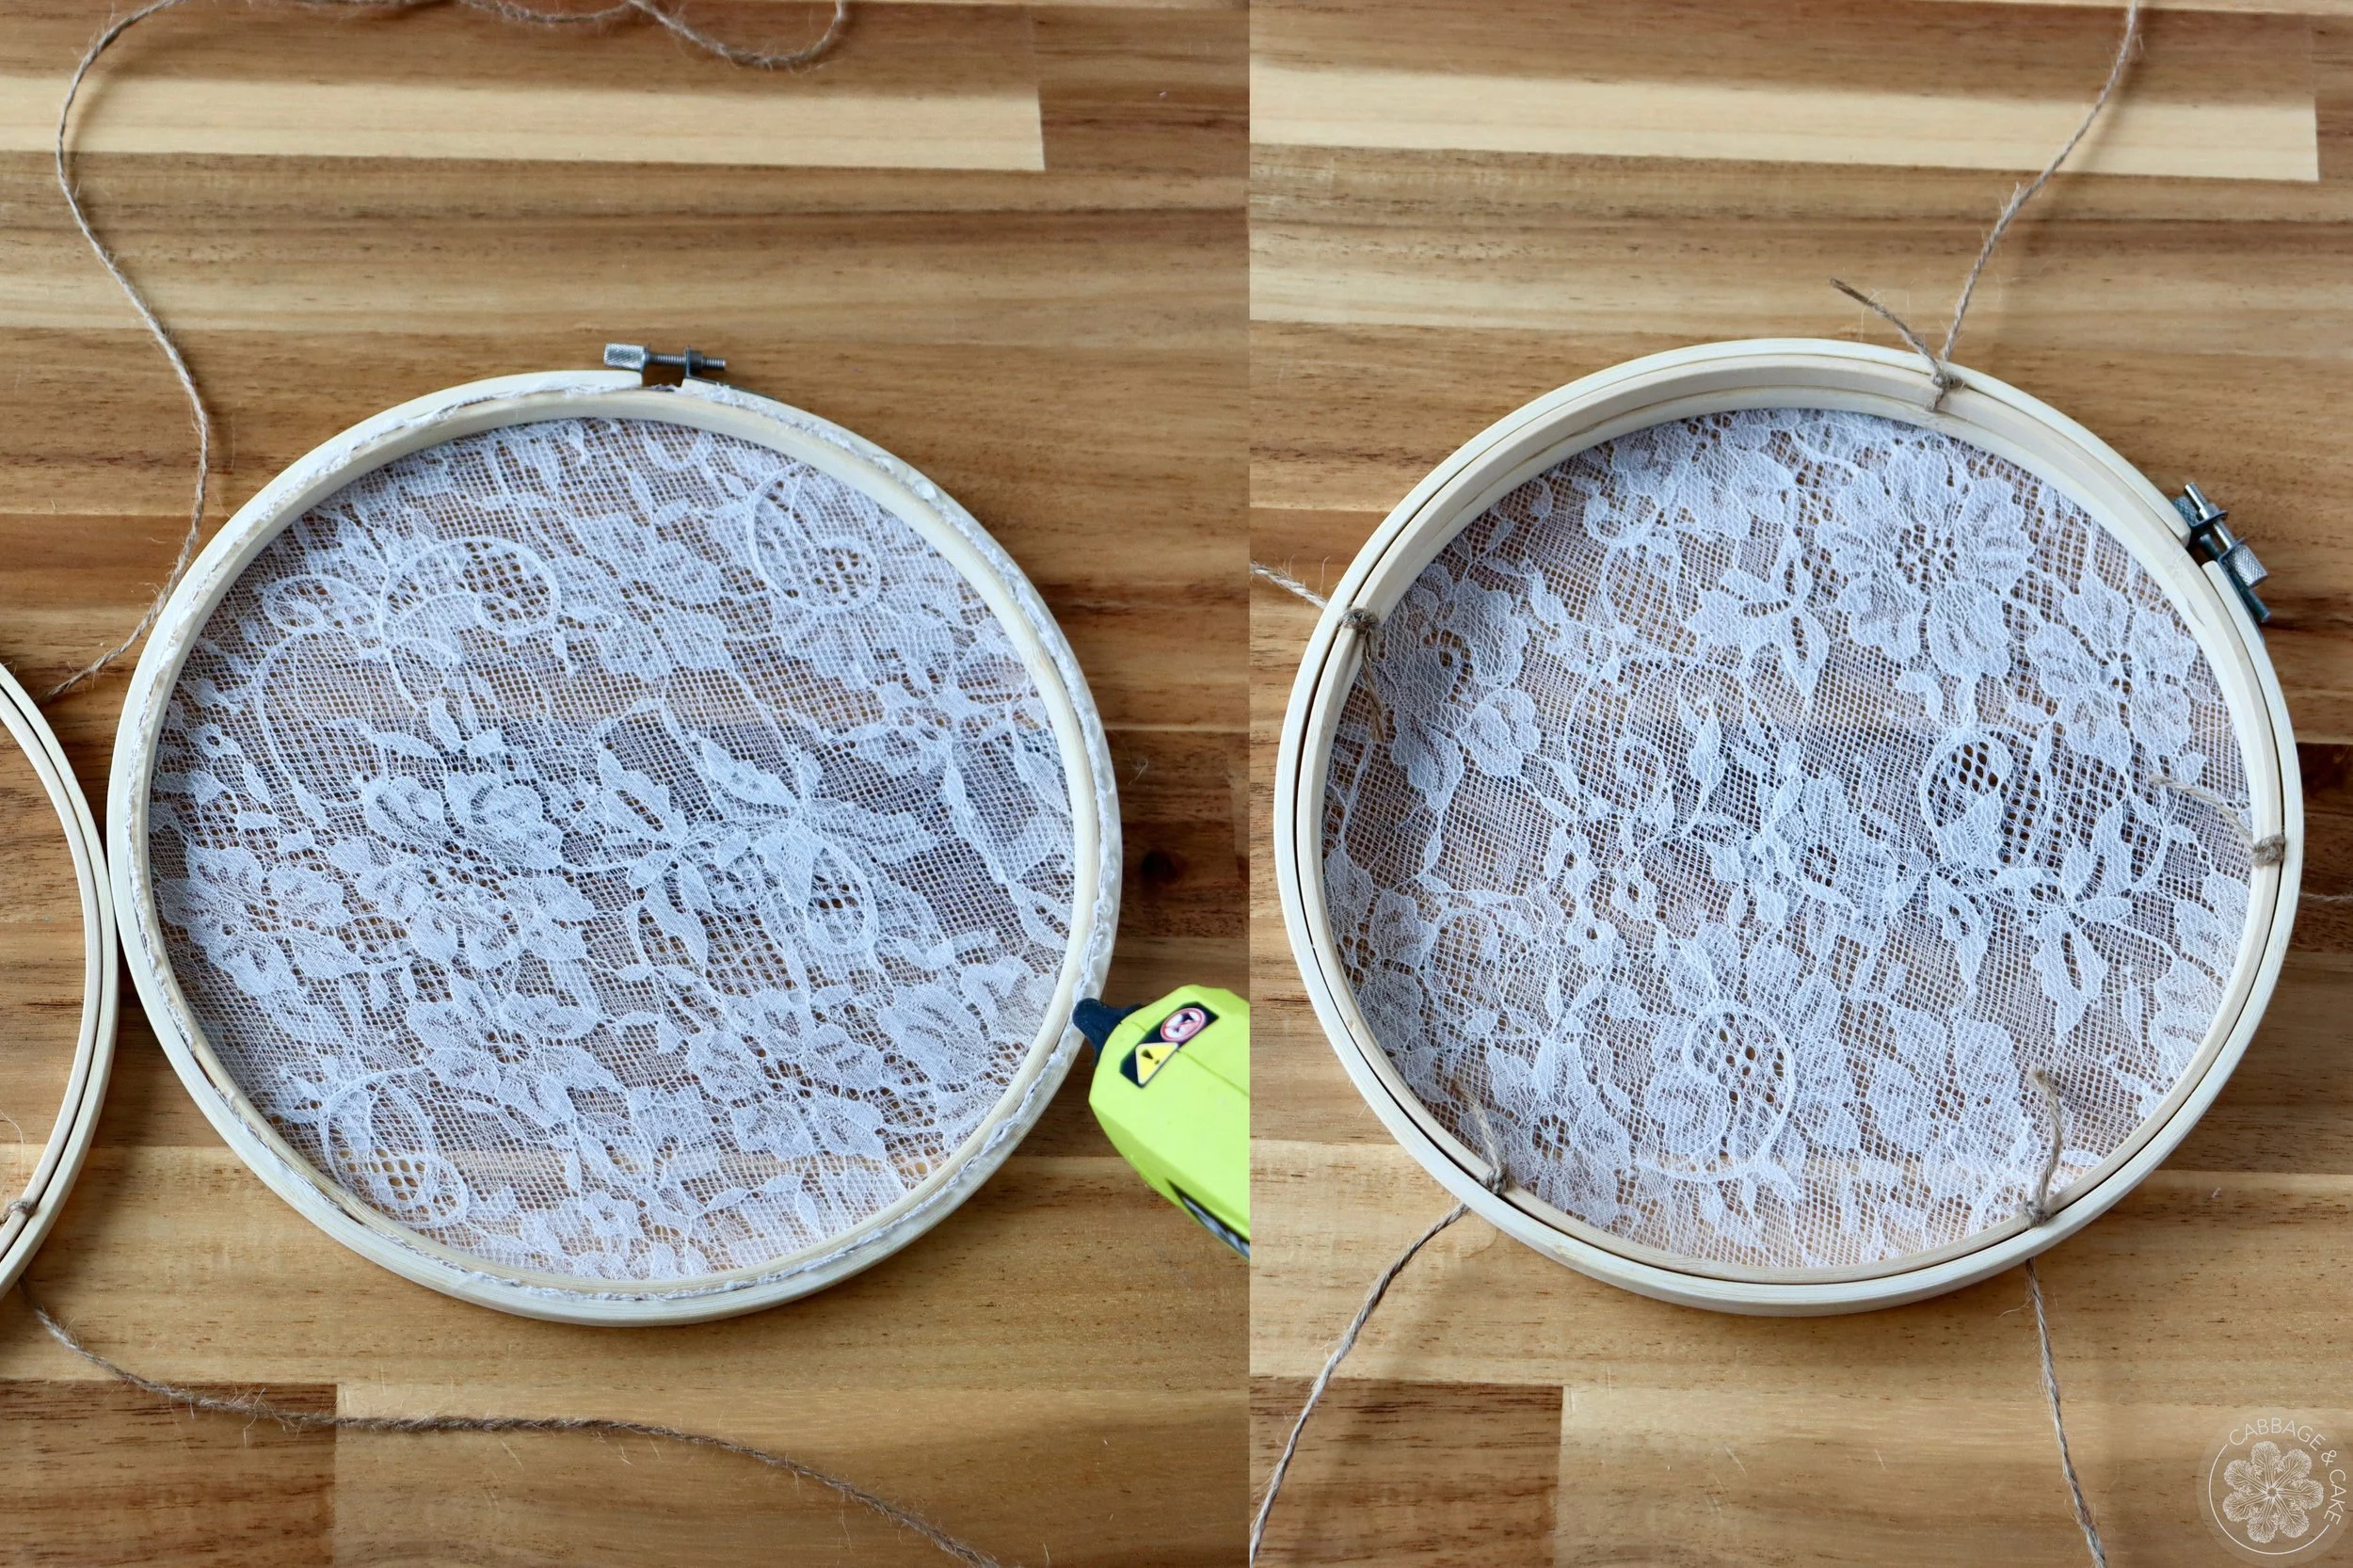
Cut a piece of fabric for your embroidery hoop, adding one inch on each side.
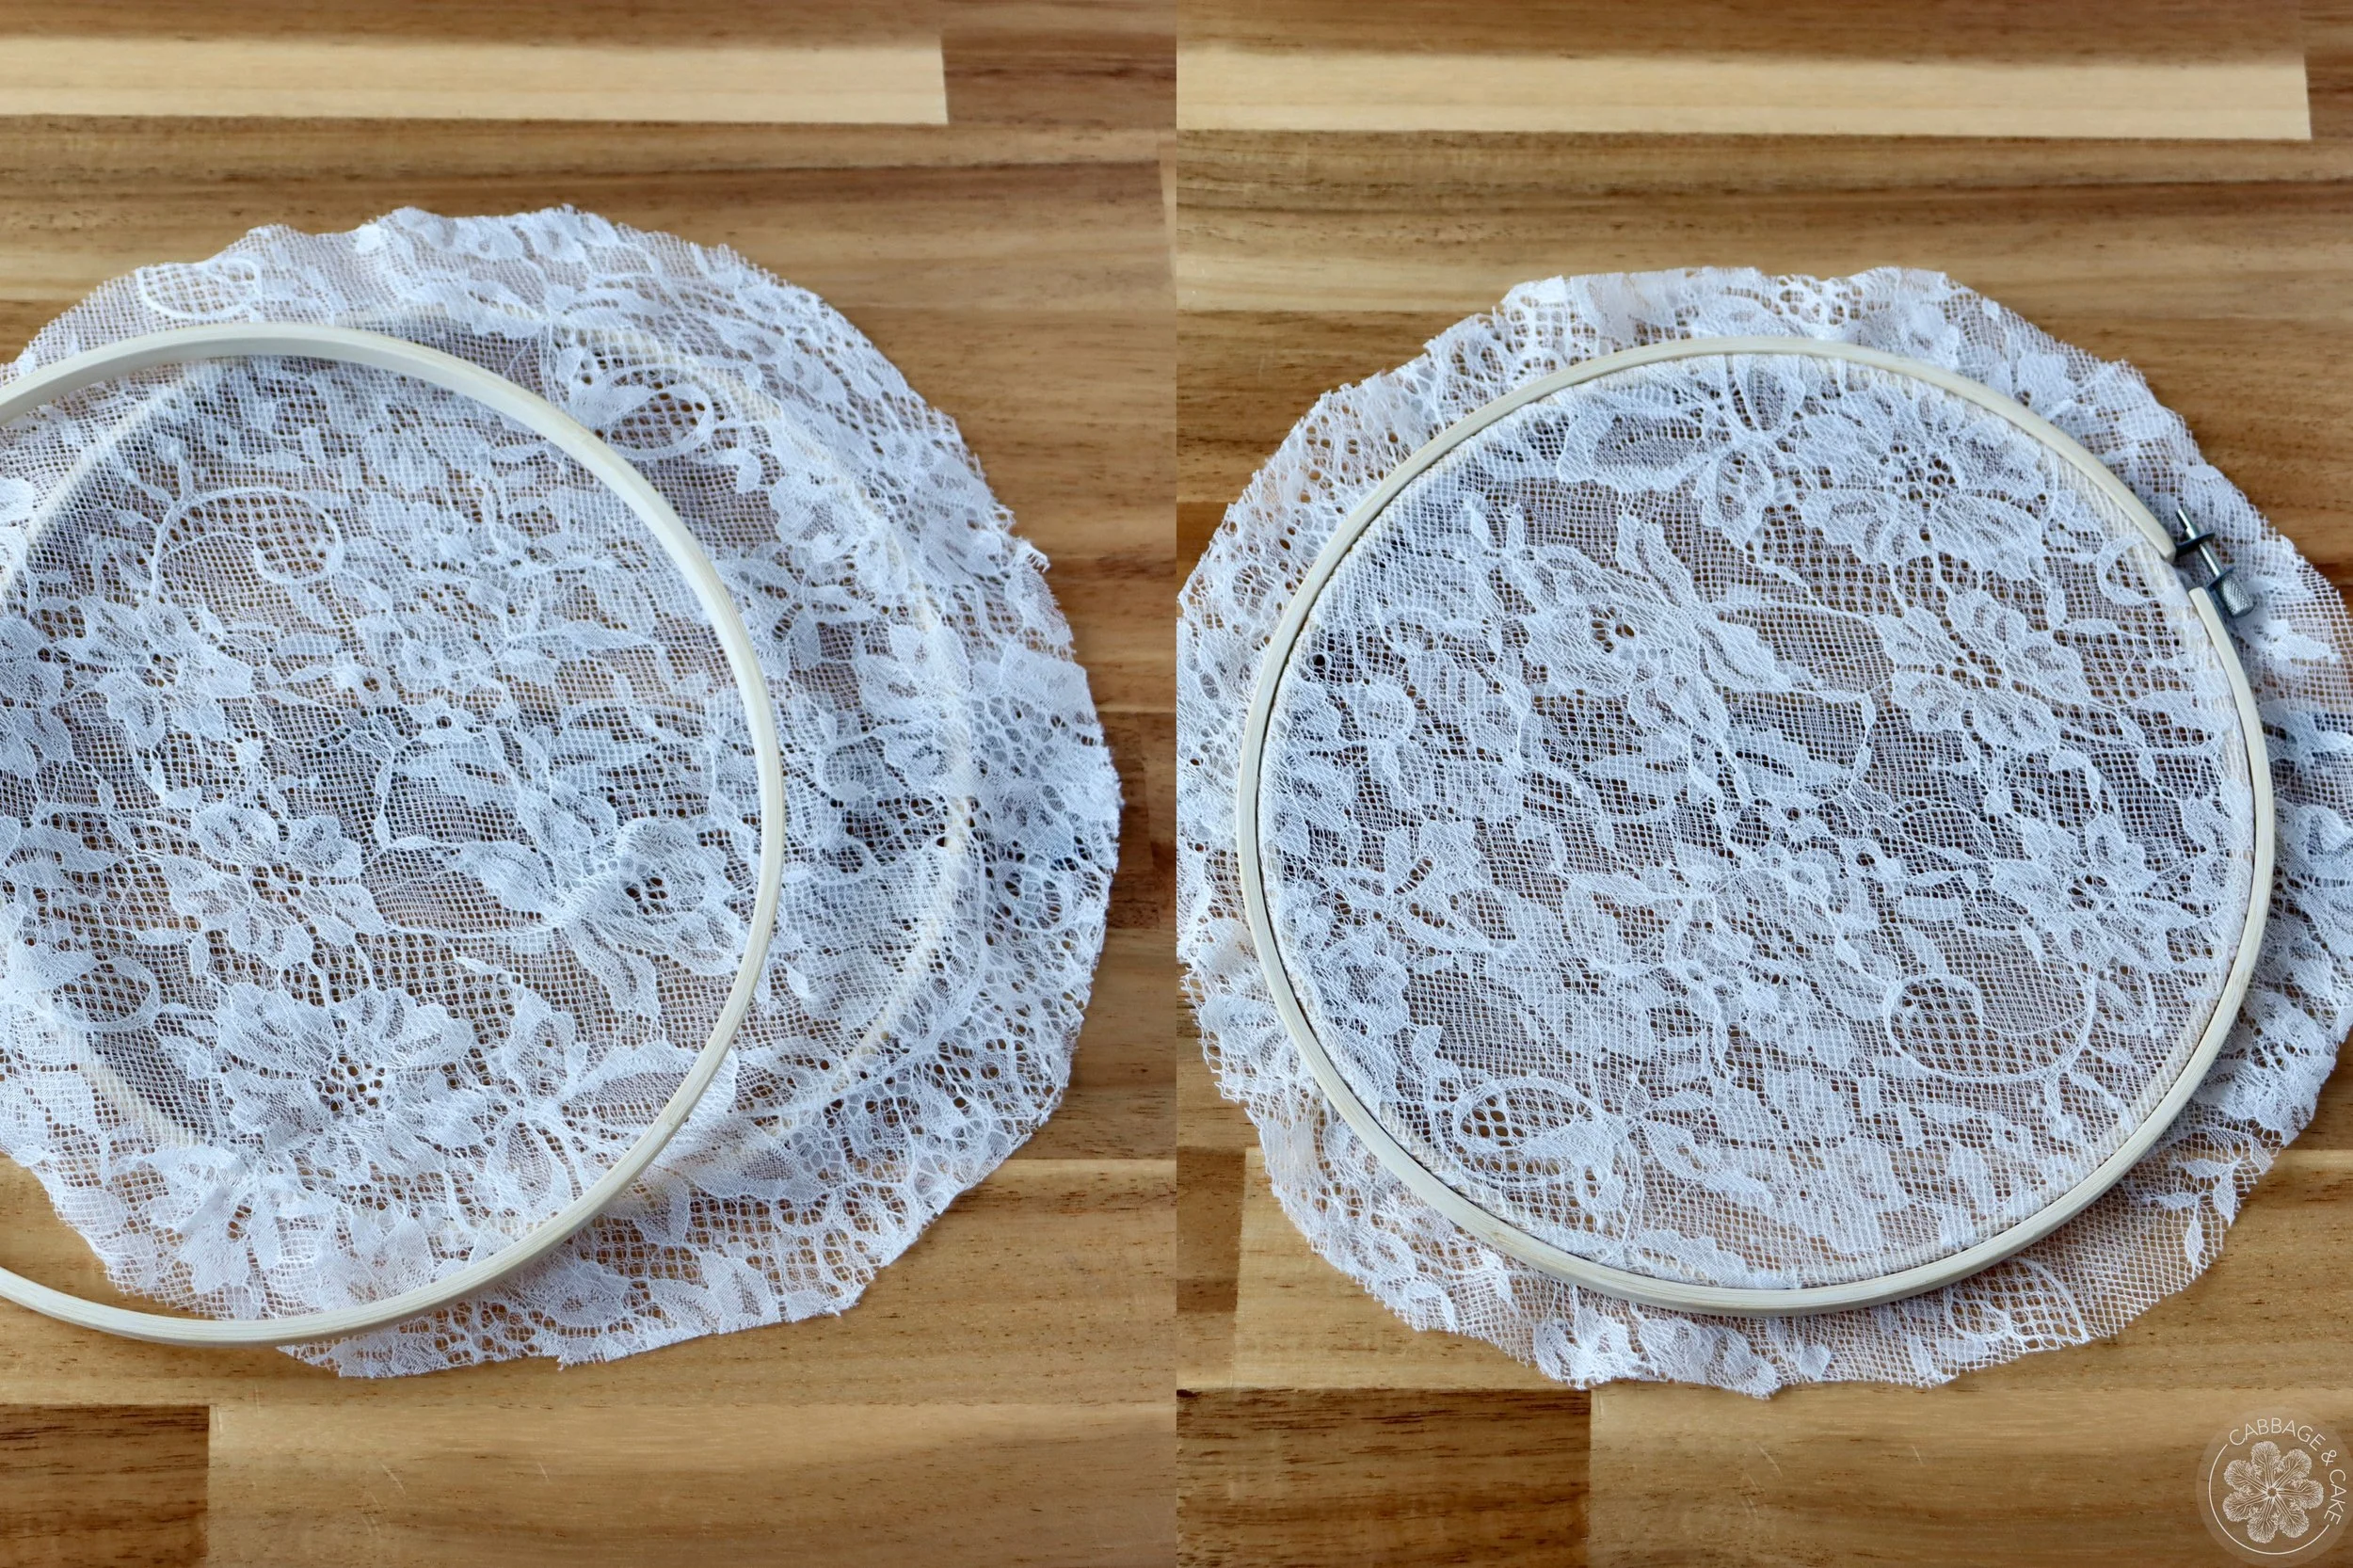
Unscrew your embroidery hoop, insert a piece of fabric and tighten it, making sure the fabric is nicely tight and flat.
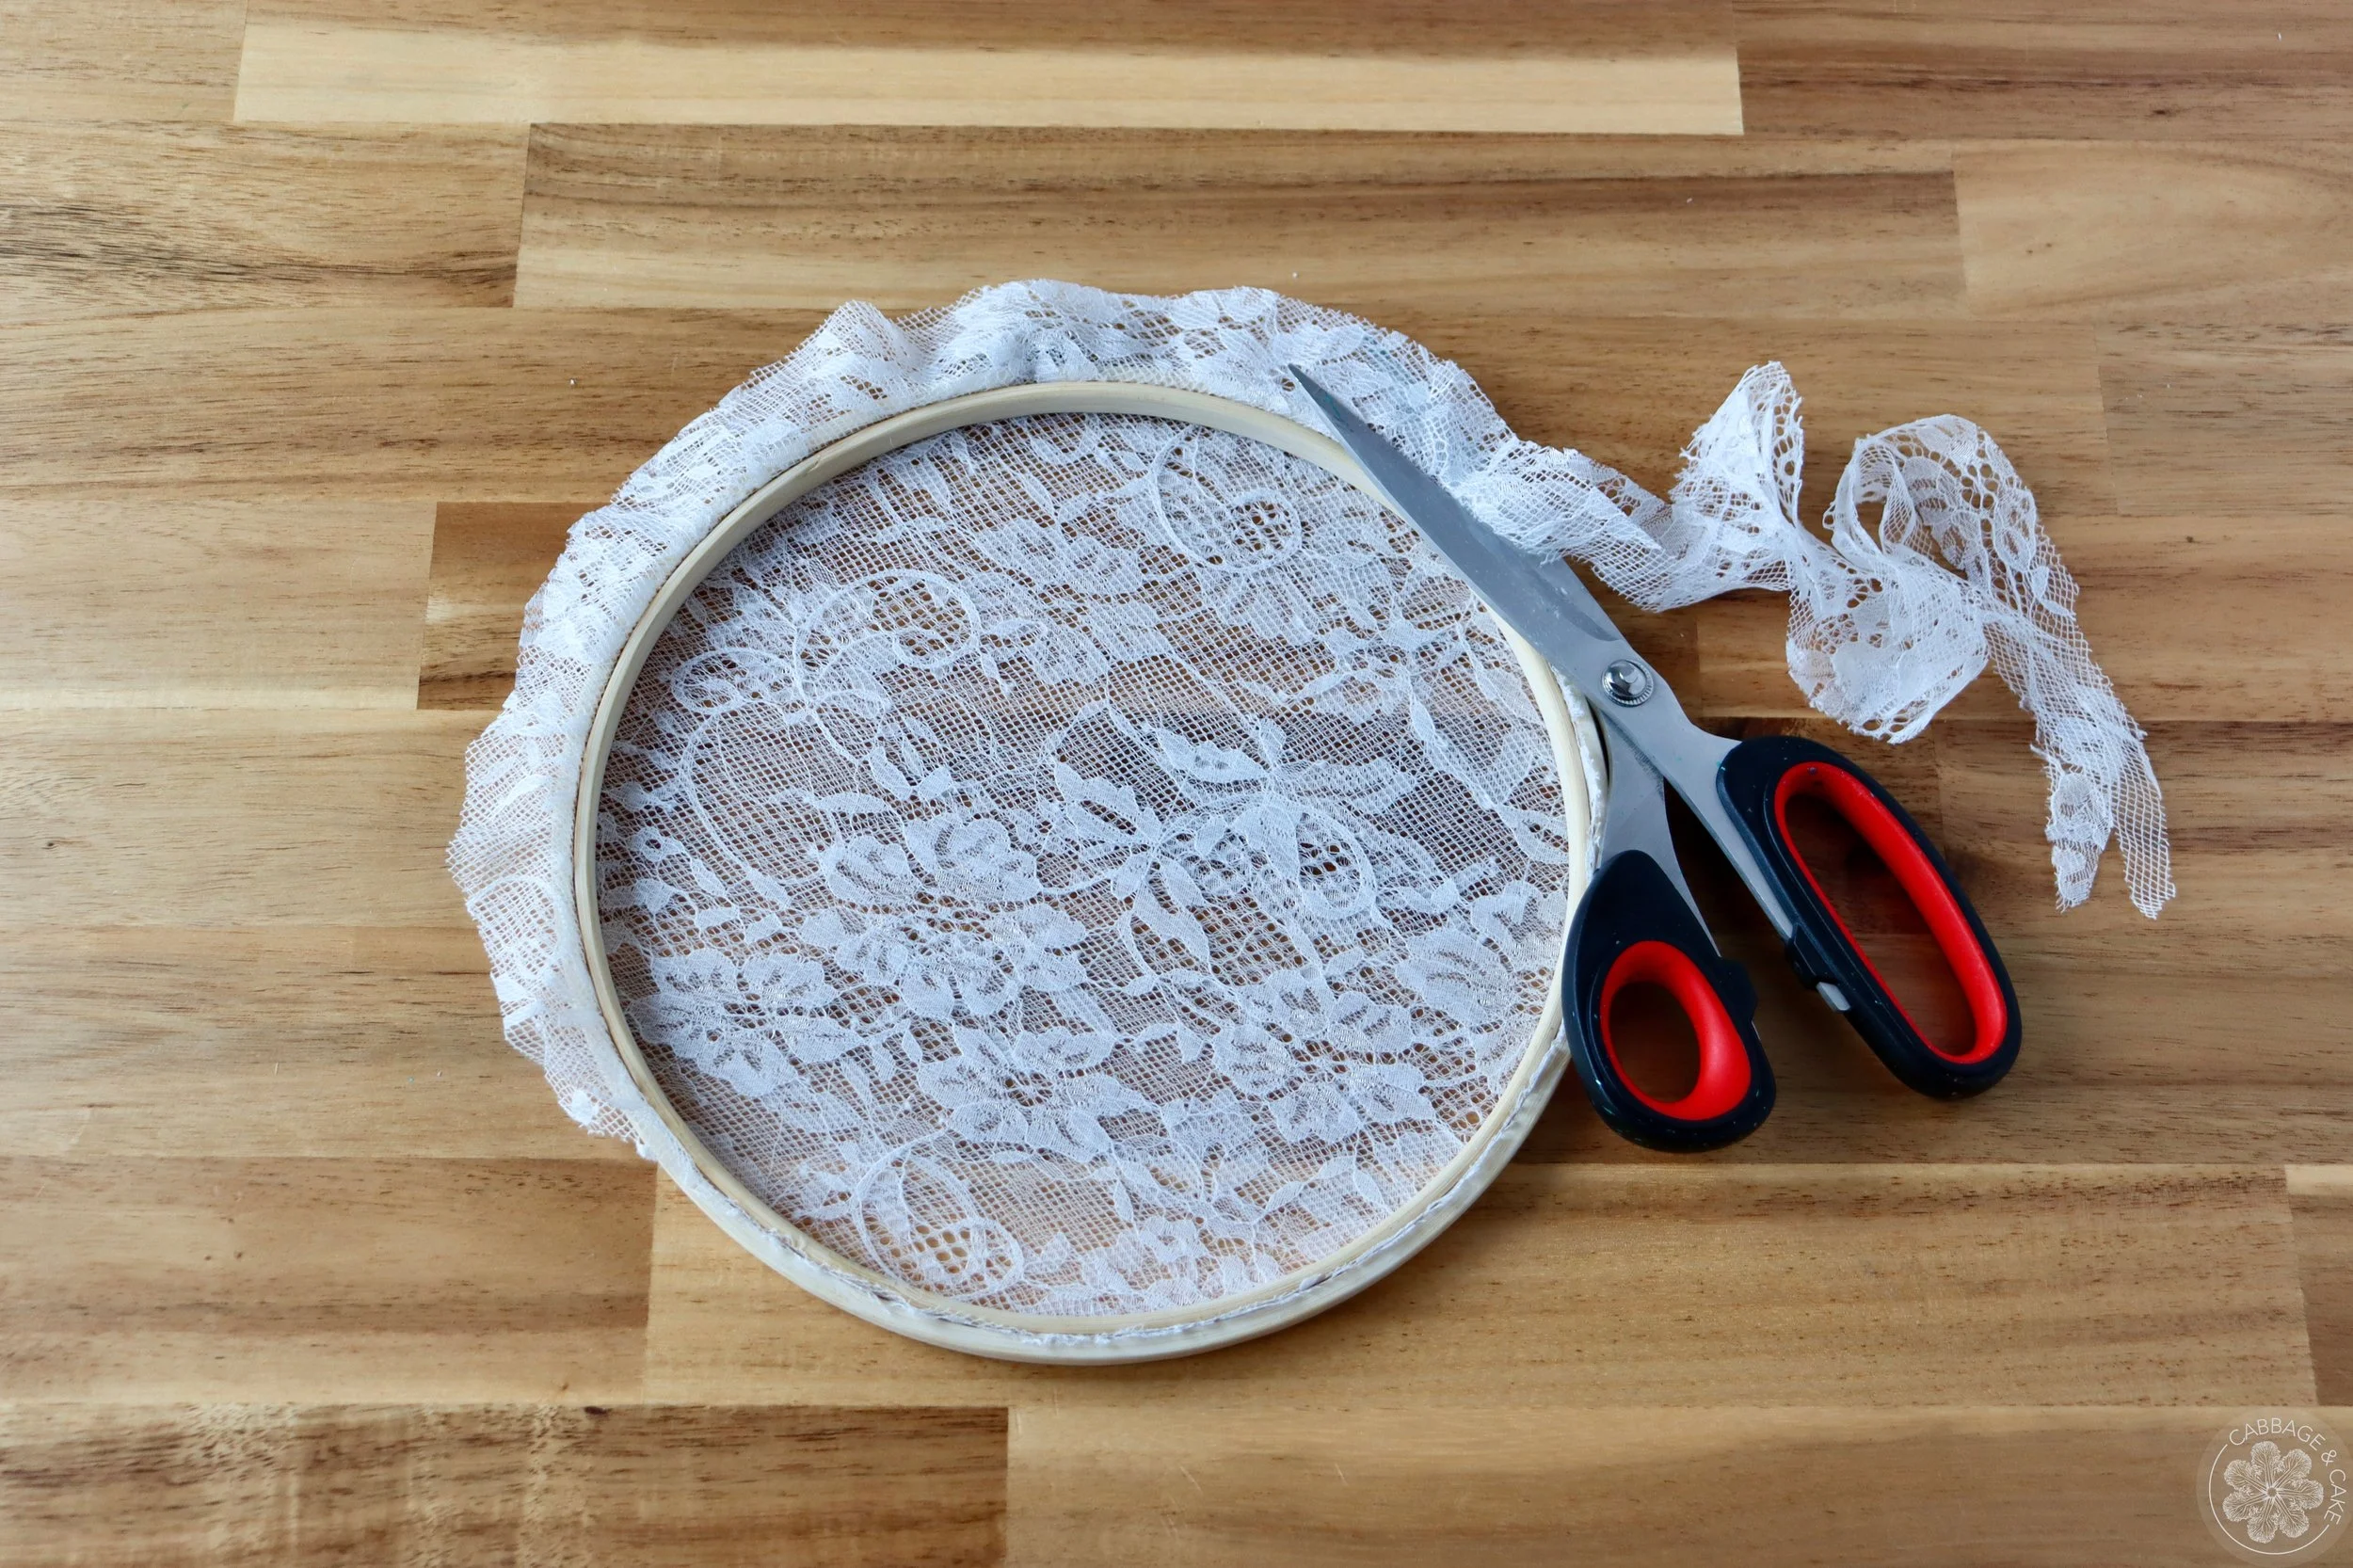
Cut the excess fabric off.
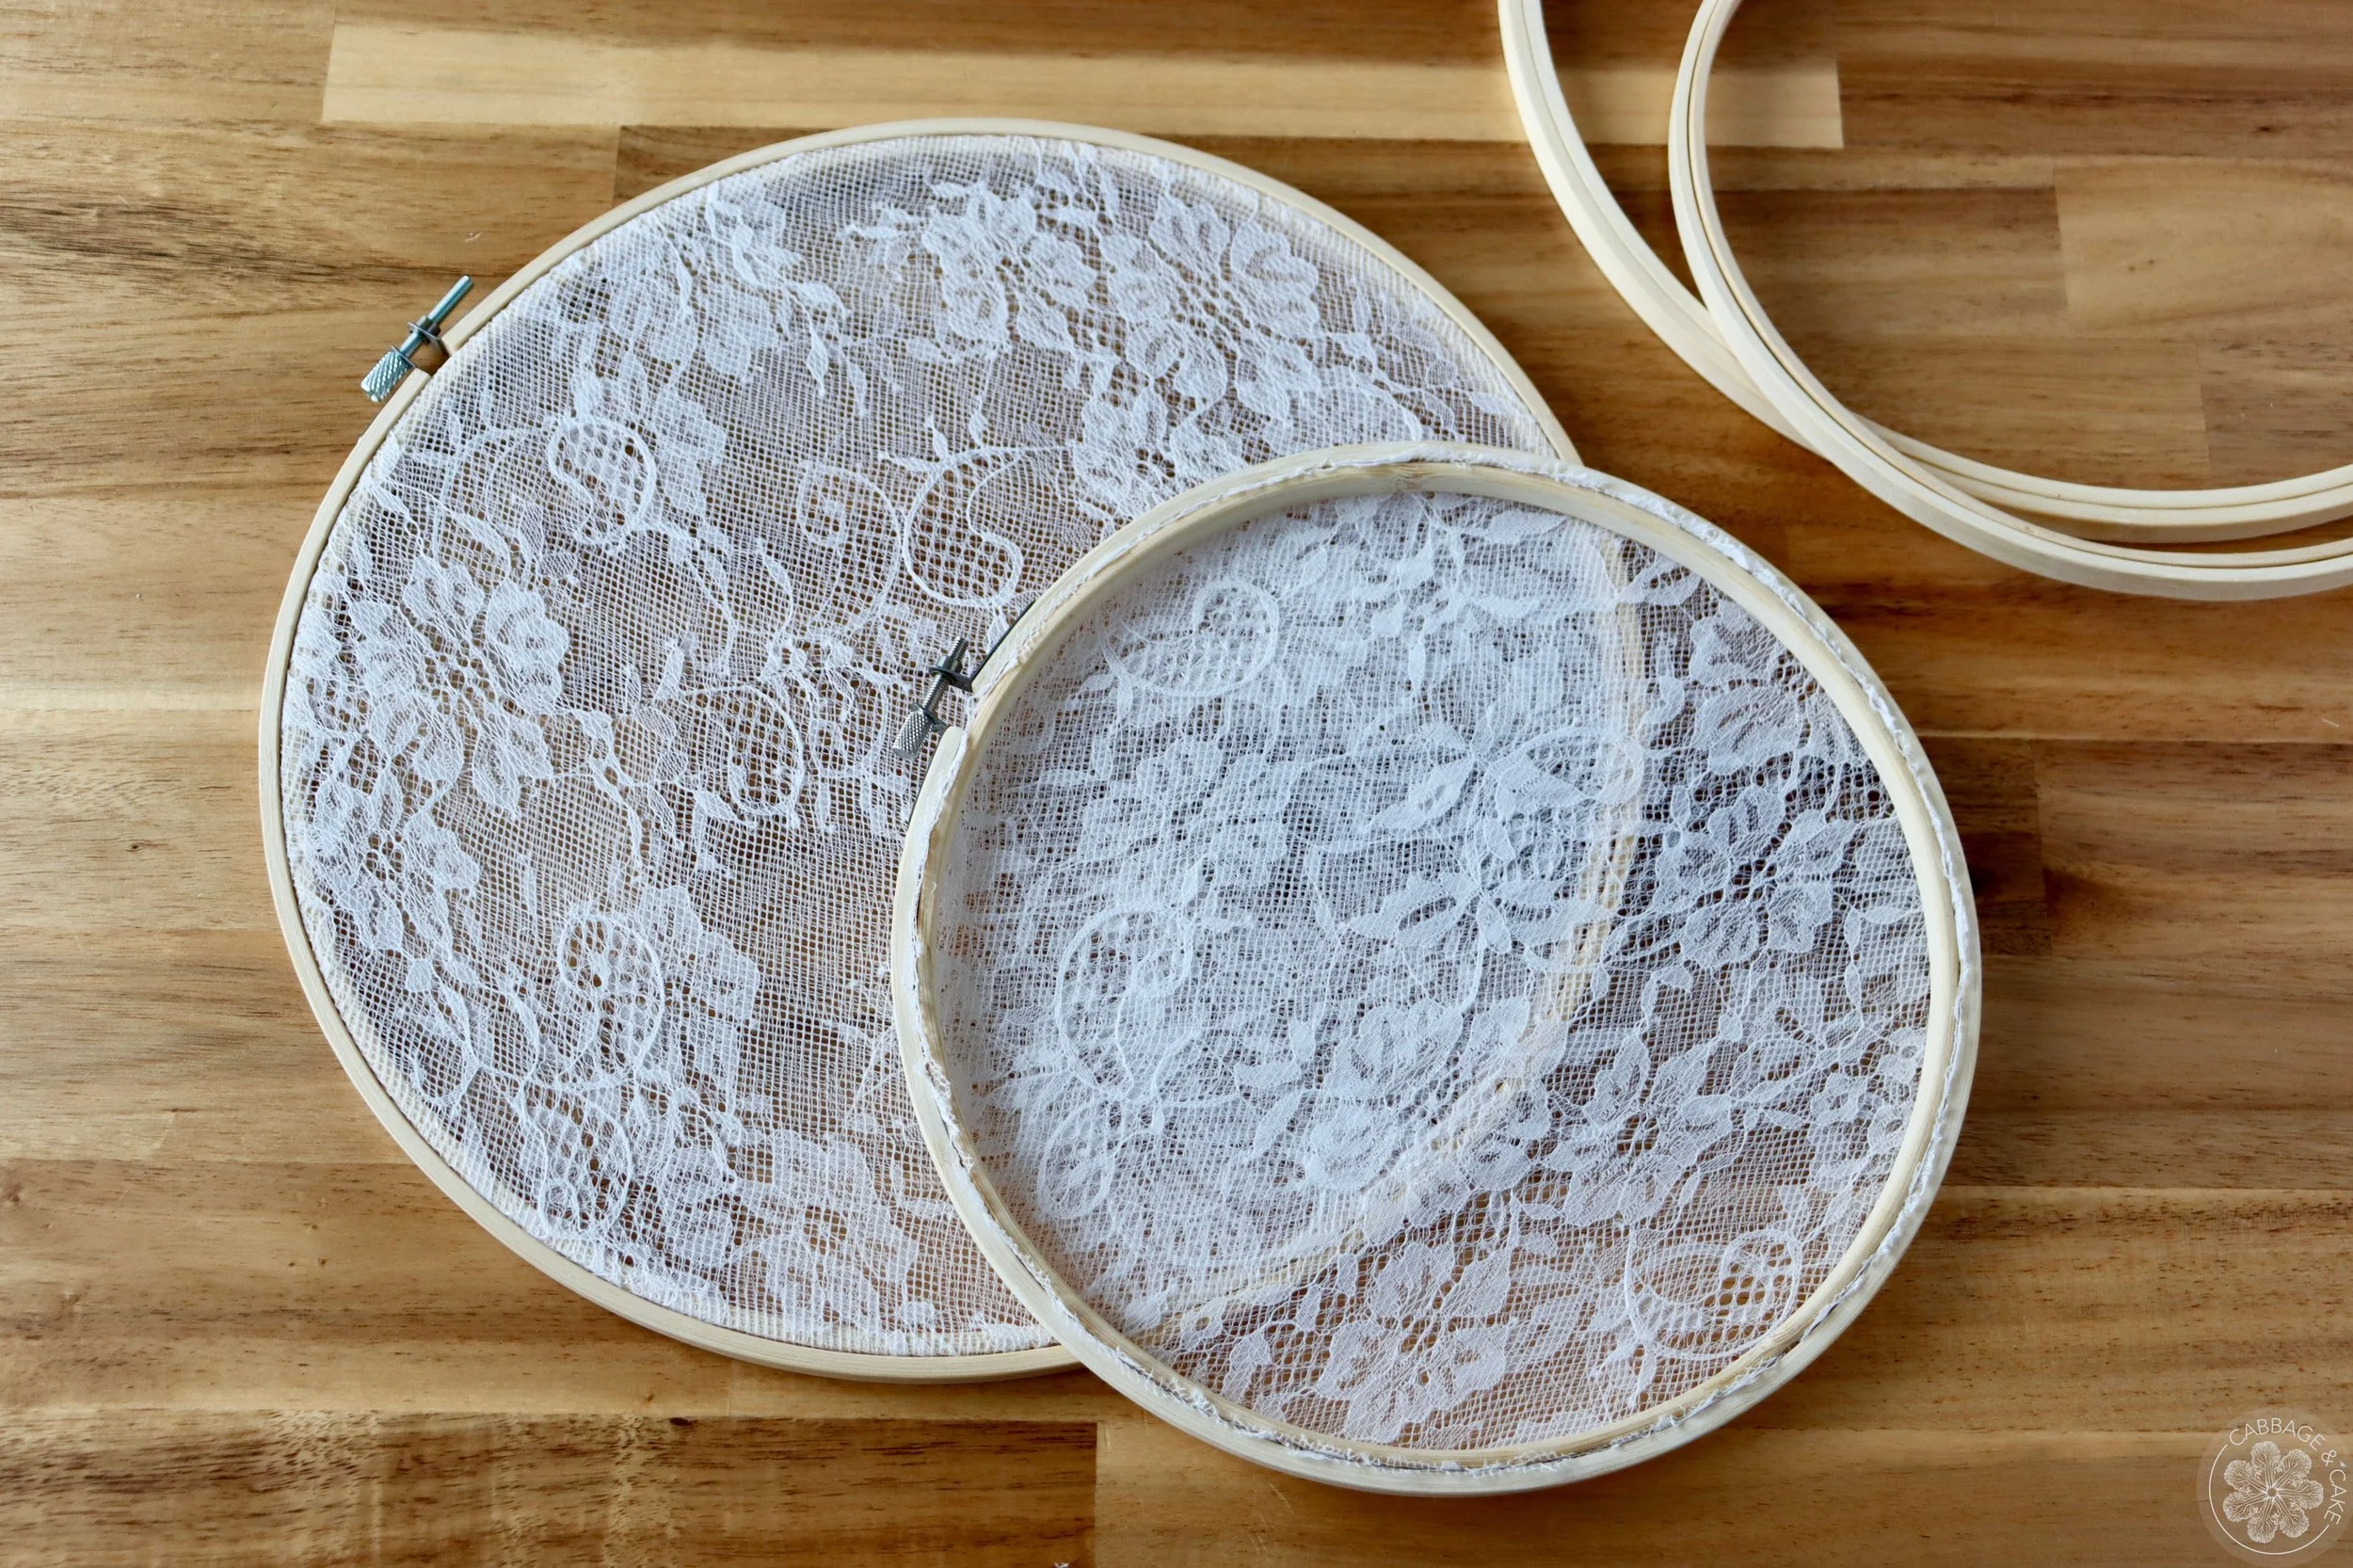
Repeat the steps above with a second, bigger hoop.
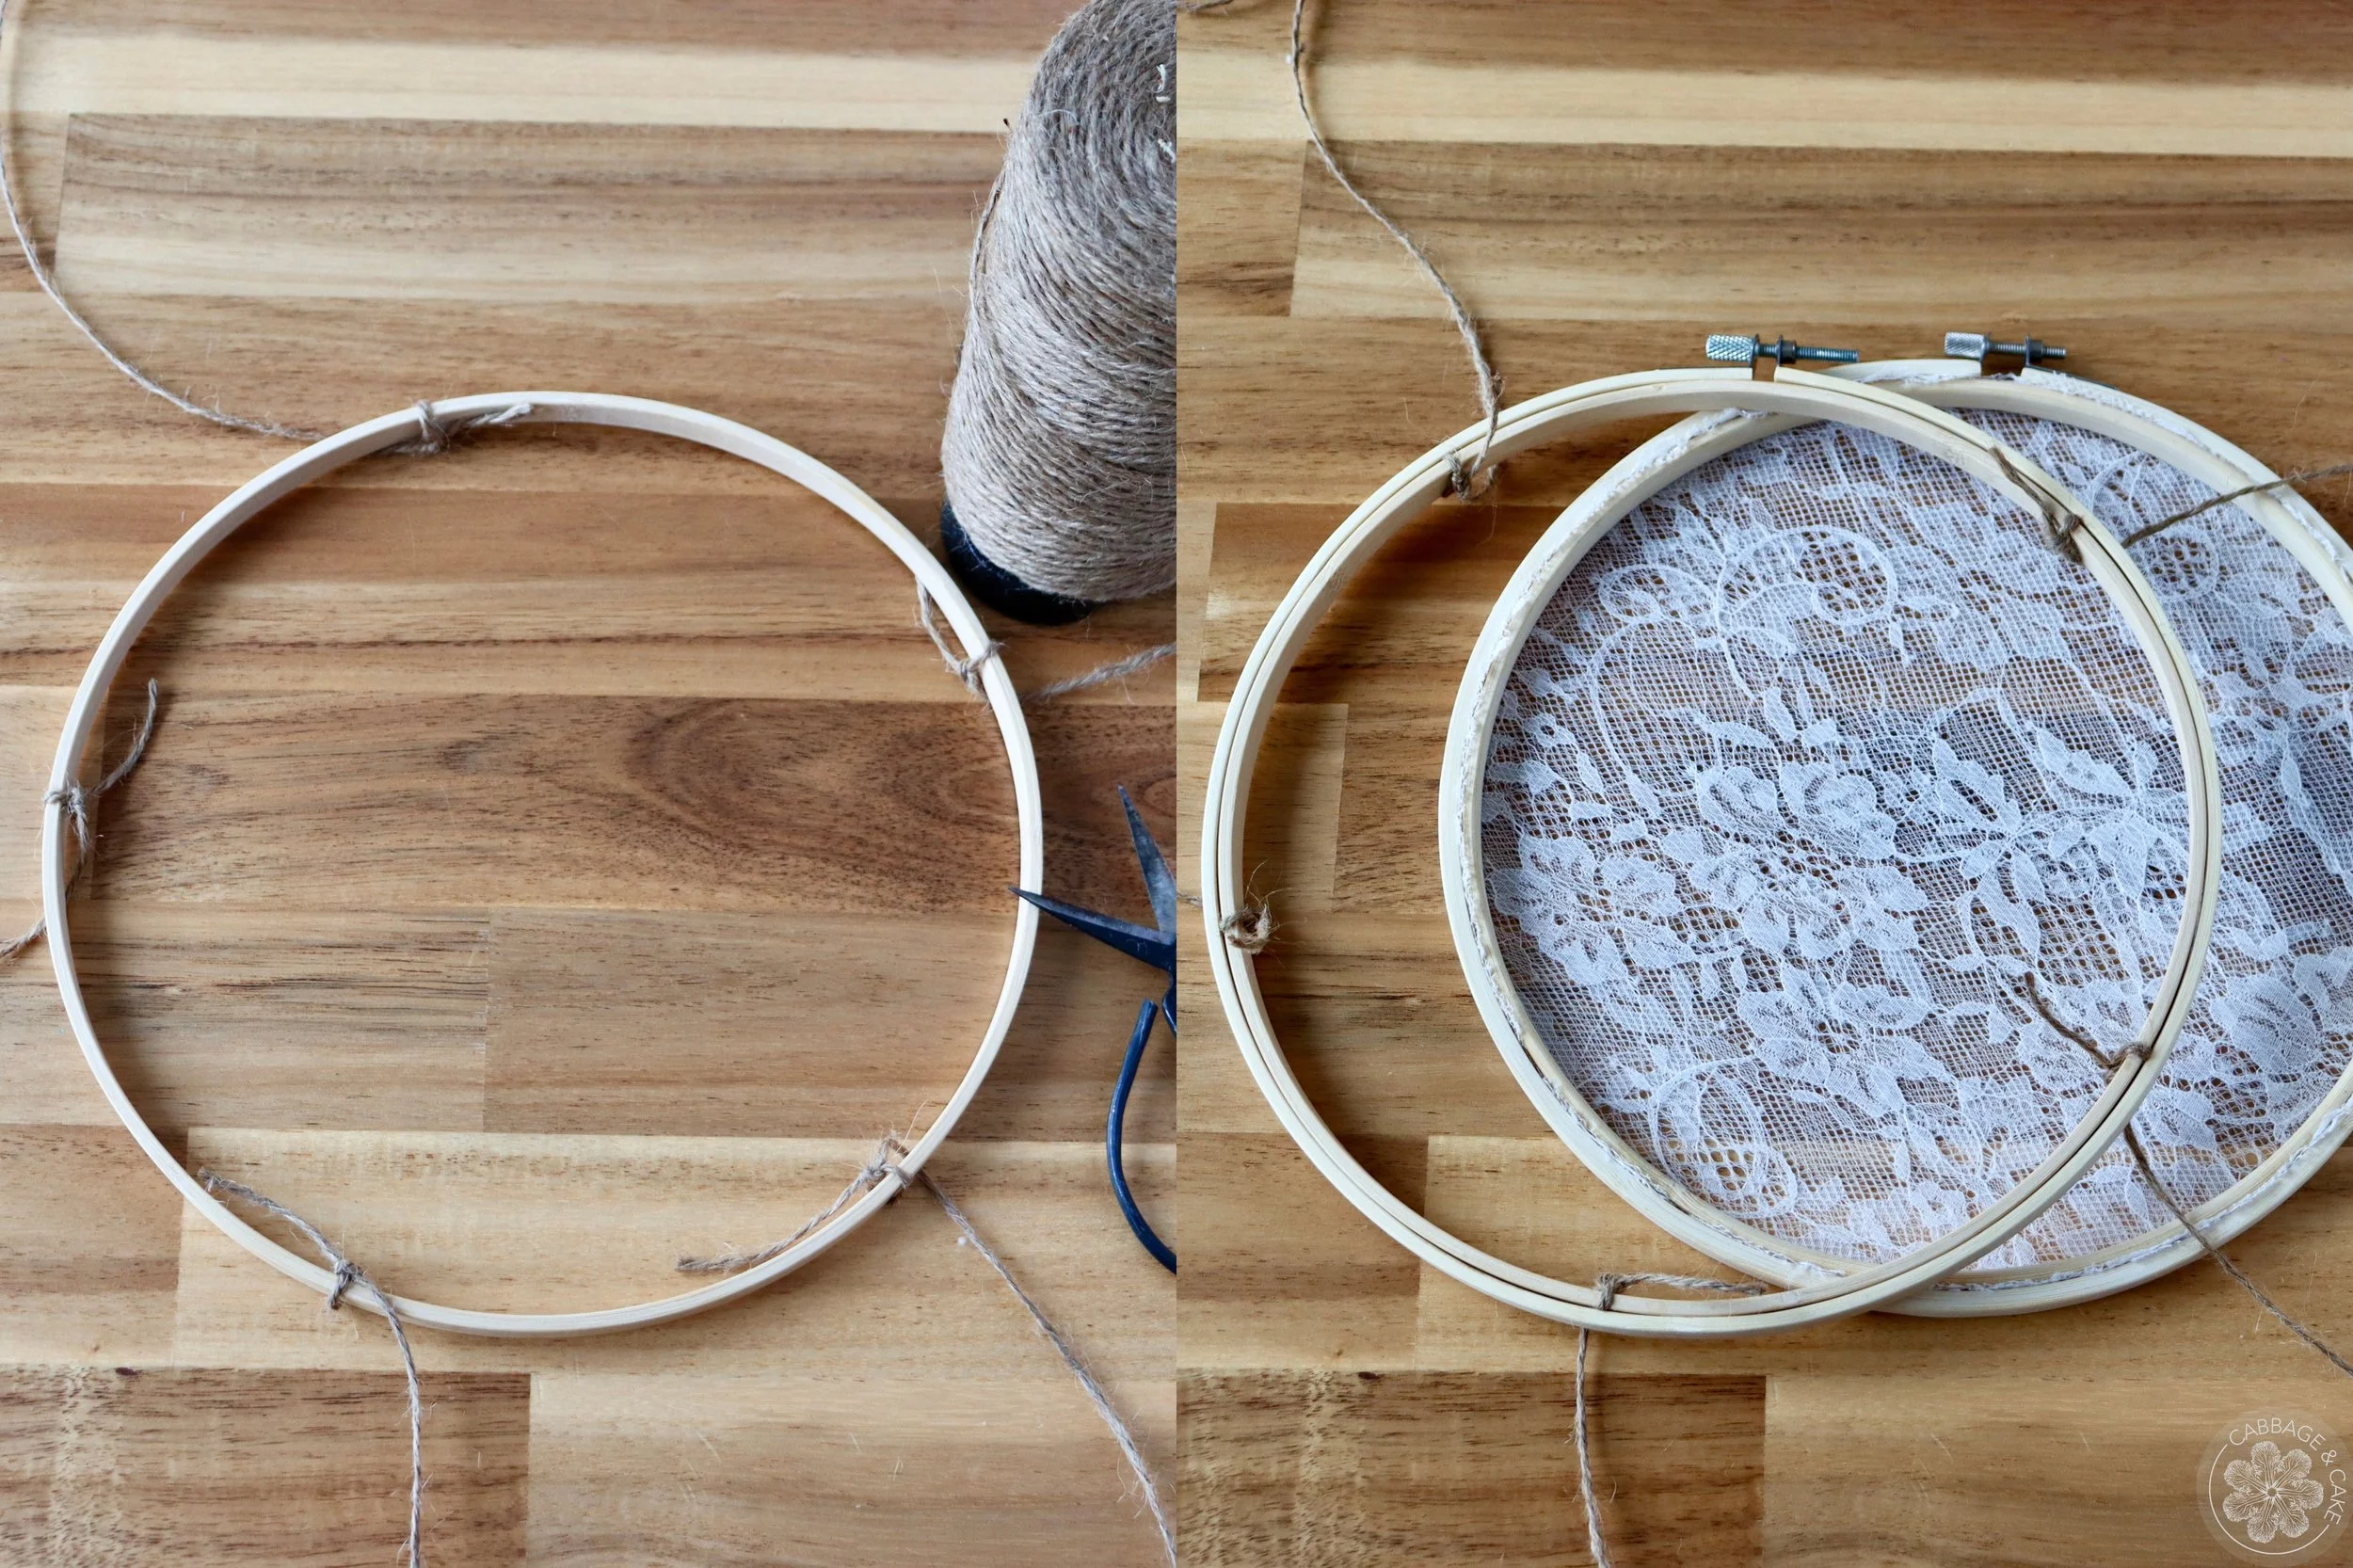
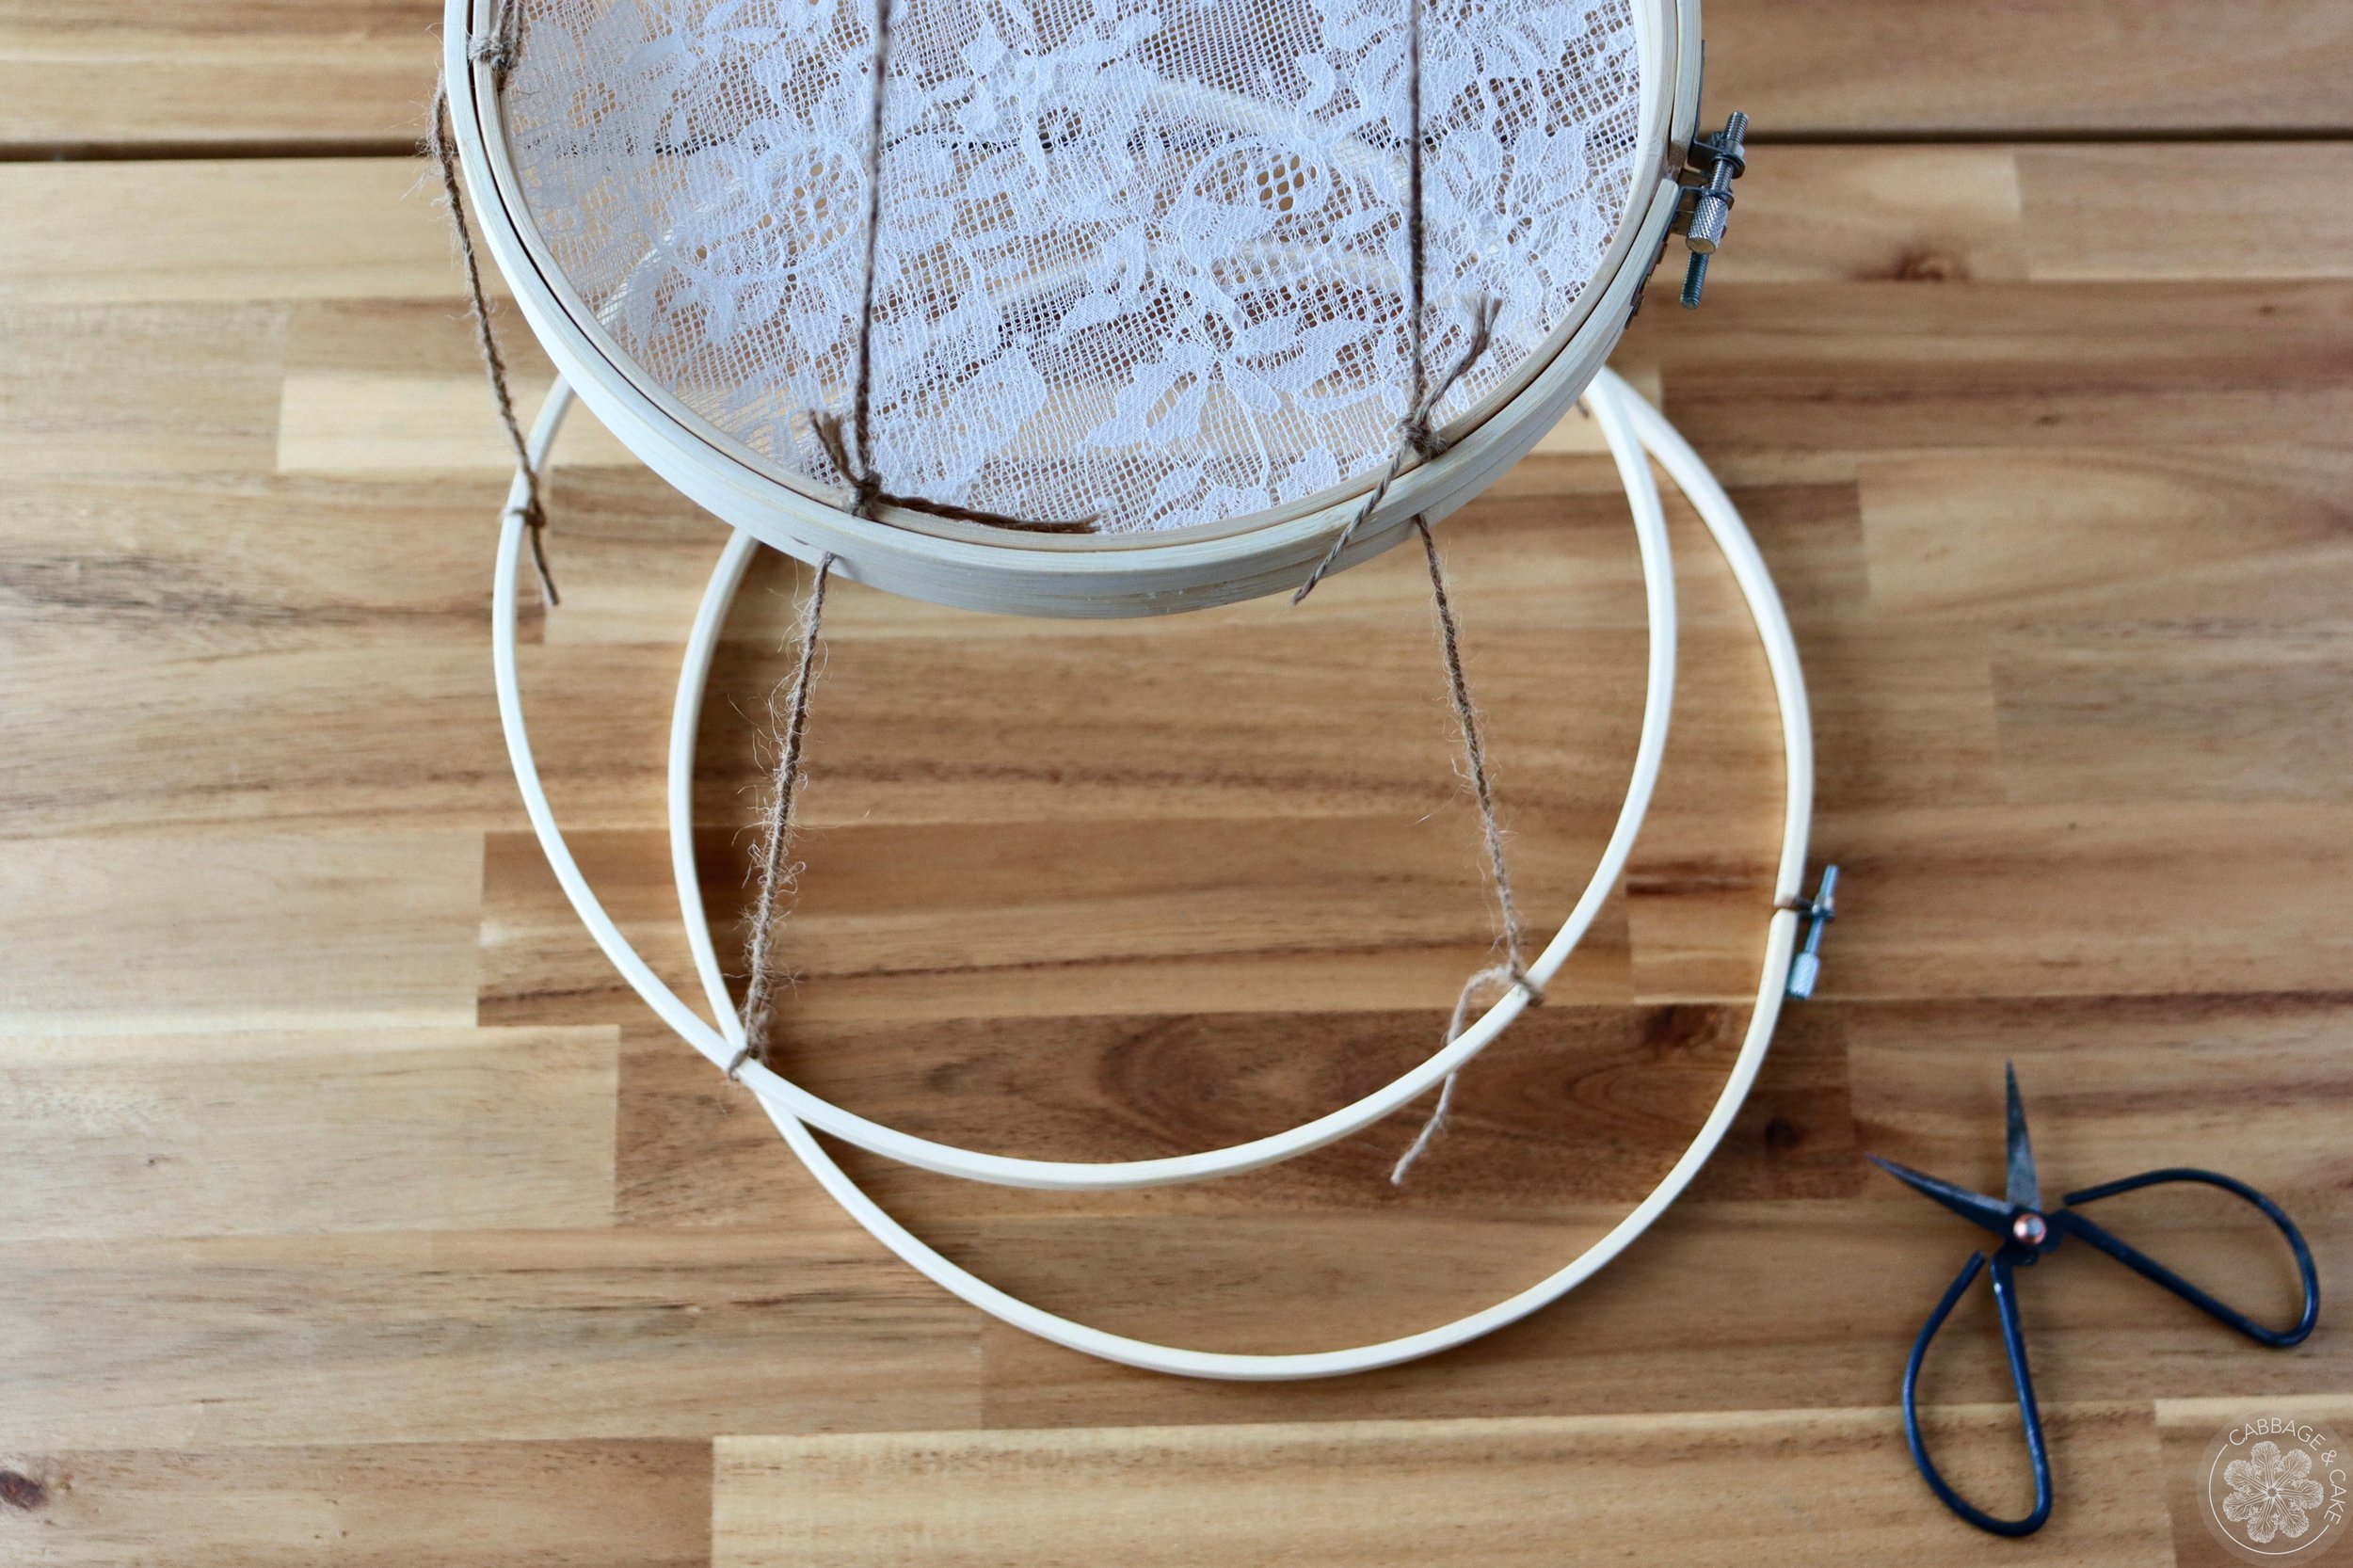
Unscrew the second, smaller sized hoop, attach three to five twine strings of equal lengths and long enough to attach to the bottom layer of the drying rack, spacing them evenly around the hoop and tighten the hoop back together again.
Glue the second hoop on top of the one with the attached screen, letting the strings hang down.

Add some strings to the top of your smaller hoops to hang your drying rack up and make it easier to attach the bottom part.
Unscrew the inner hoop of your second big hoop, attach to the strings, making sure it is nice and flat and tighten it back together again.
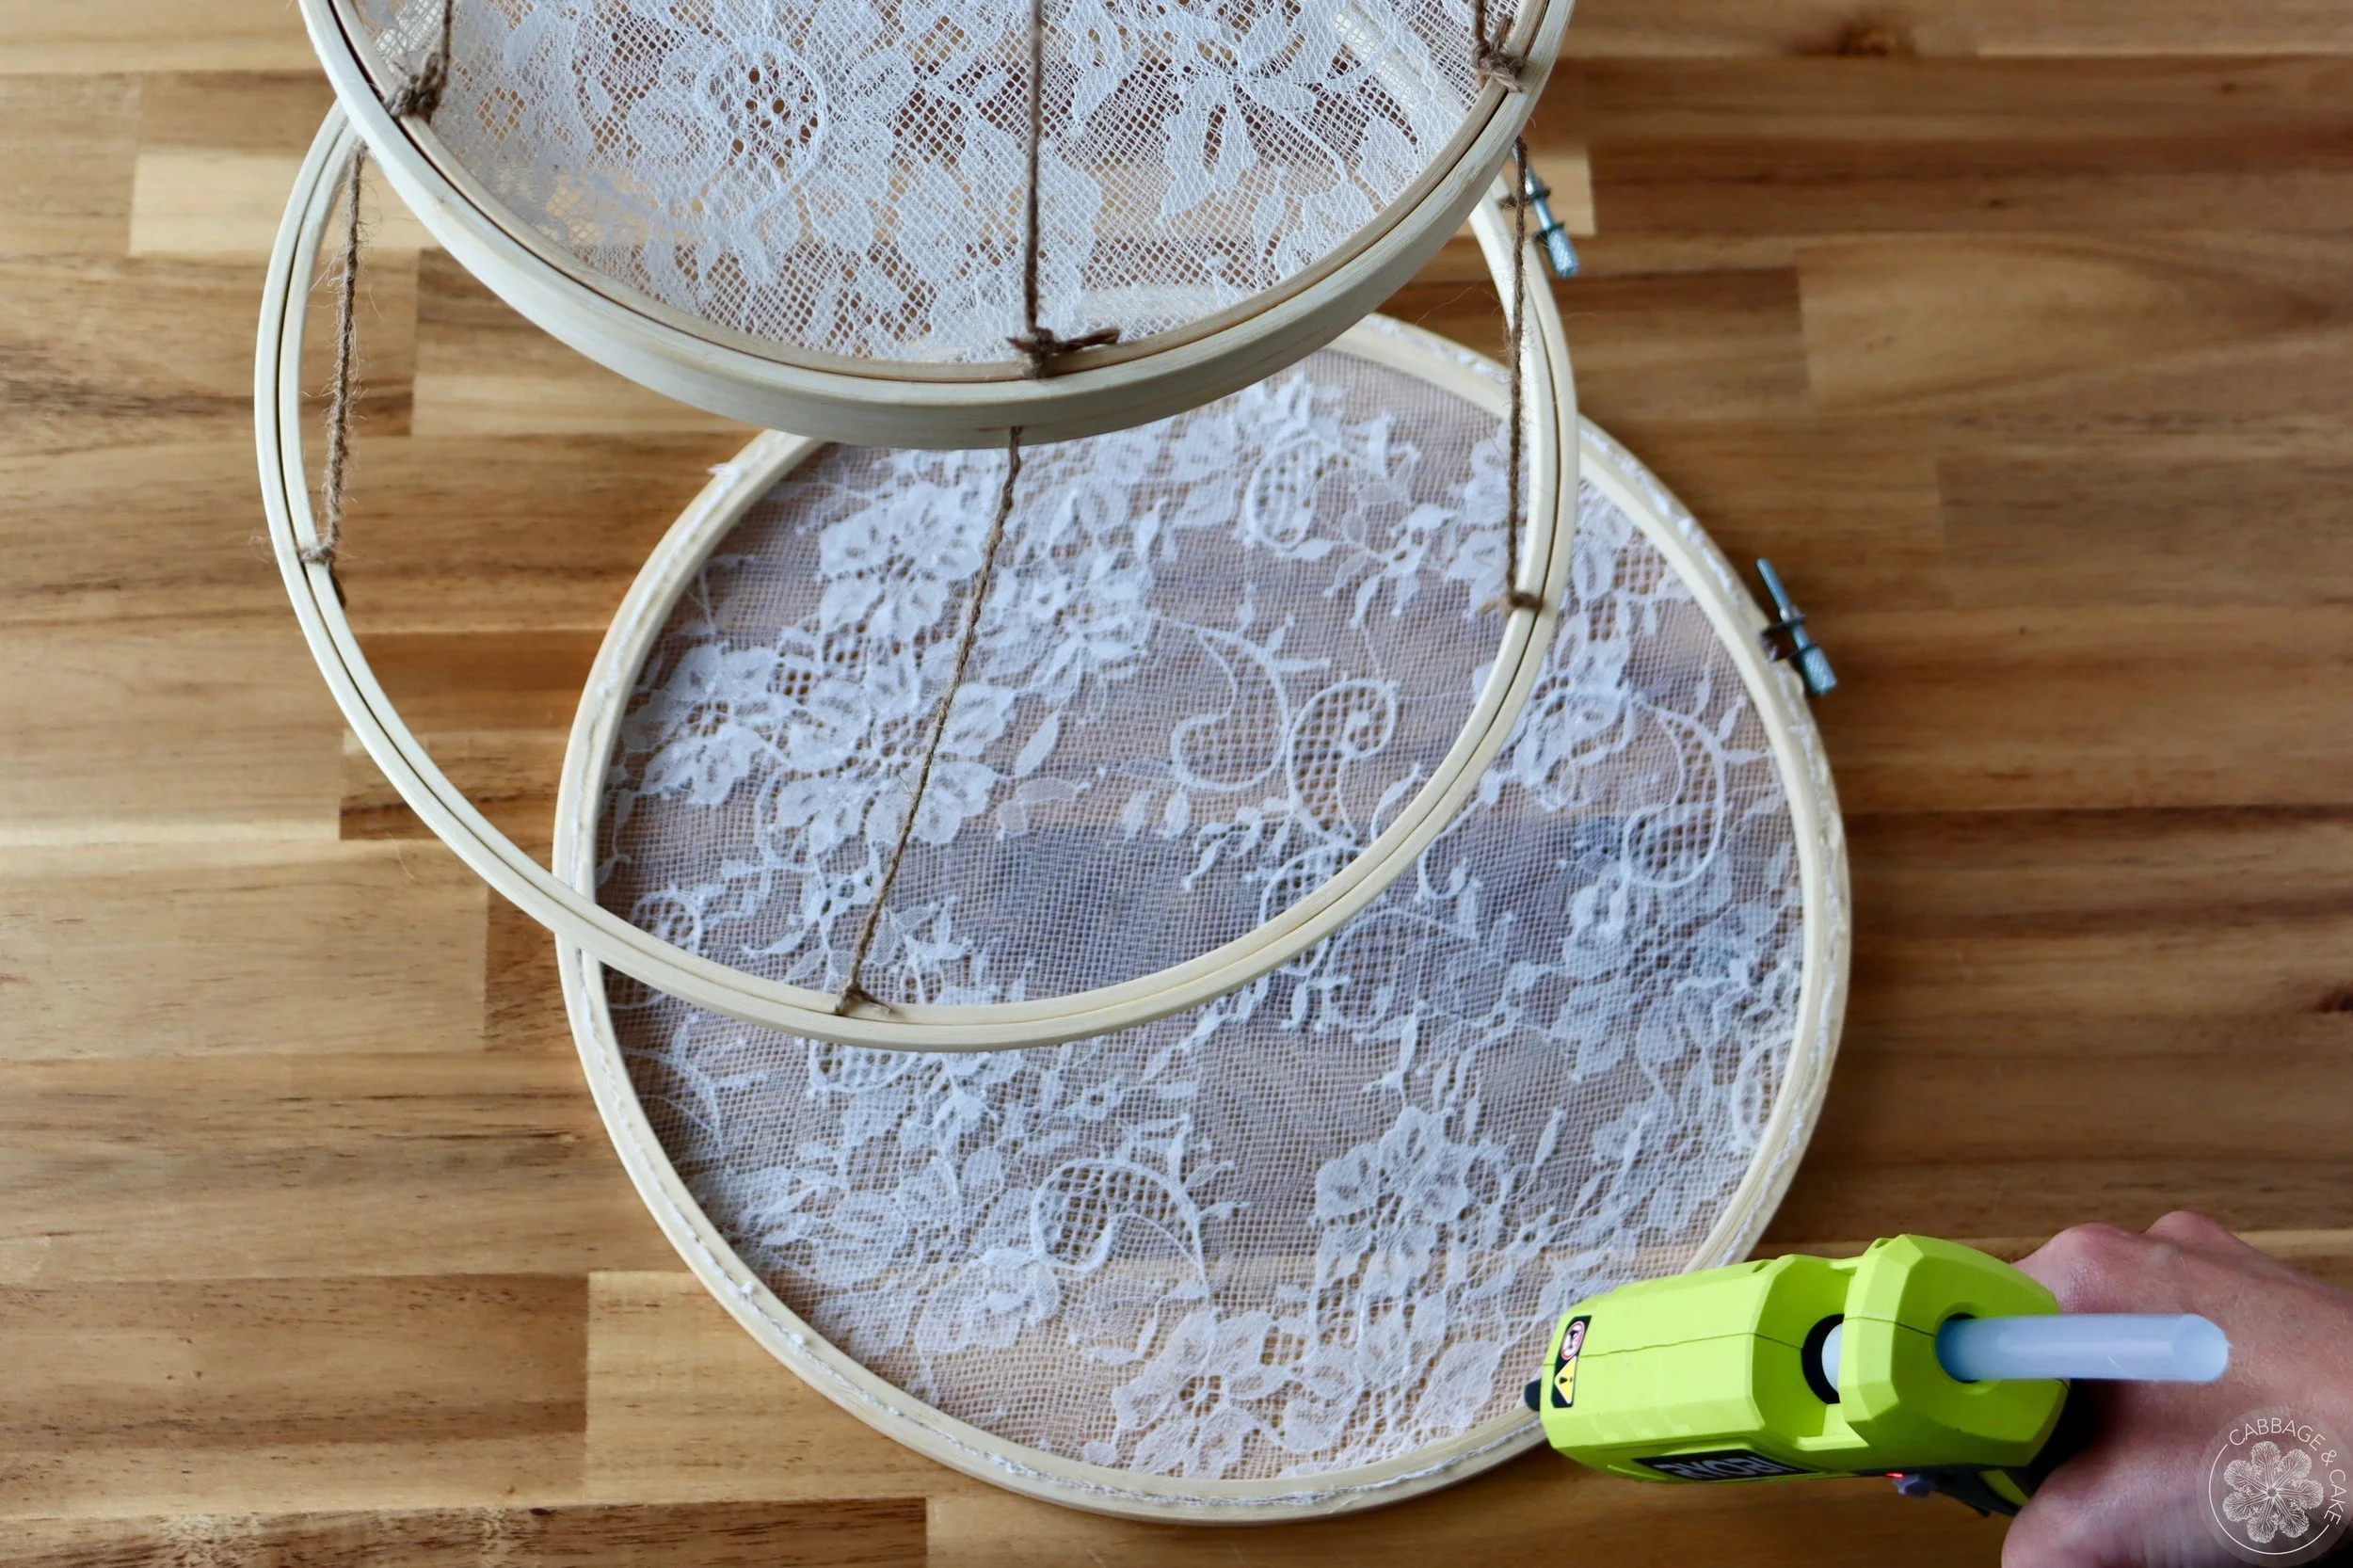
Add some glue to the big hoop with the fabric attached and glue it onto the bottom as your second layer.
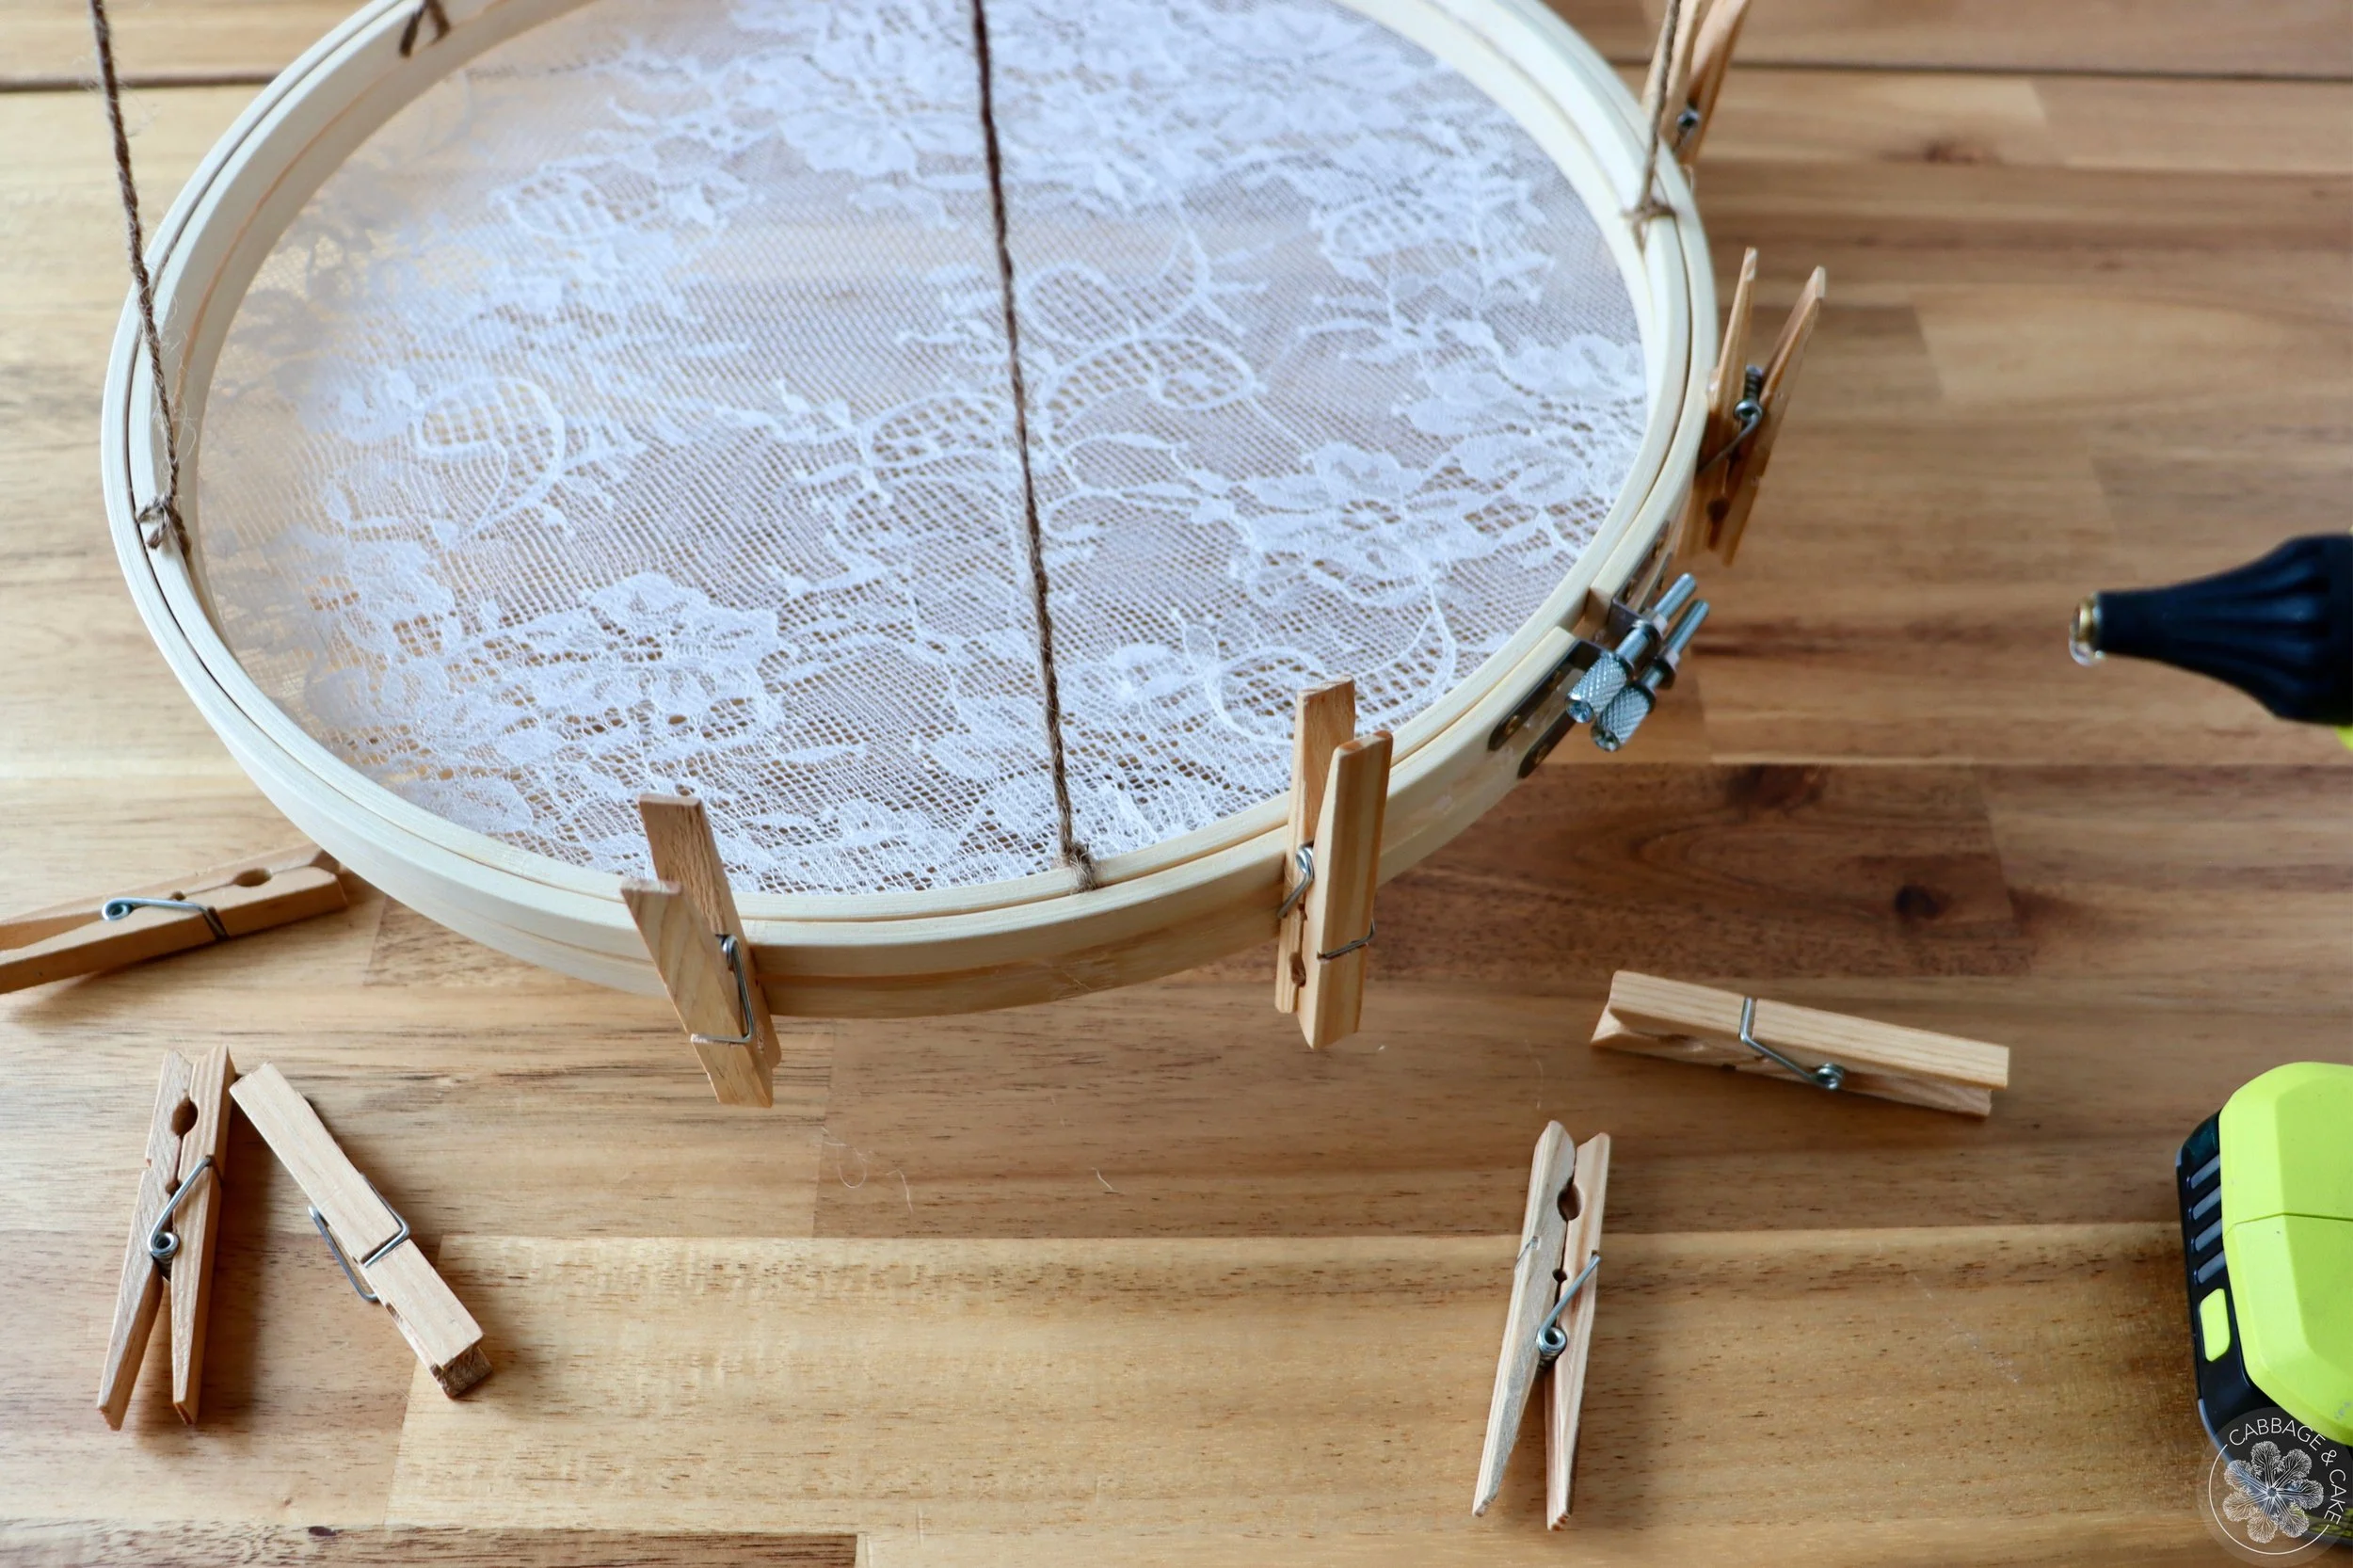
Glue some clothespins on the outside of your hoops for extra drying space for small herb bundles.
Find a cool, dry, and well- ventilated area, away from direct sunlight and any moisture to hang your new herb drying rack with embroidery hoops and start drying your herbs and flowers.
DIY HERB DRYING RACK WITH
EMBROIDERY HOOPS
by Julia
This is a great and easy DIY for a simple two-layered herb drying rack to air dry small flowers, blooms and herbs. It’s practical and space saving and you can quickly make it by inserting thin fabric into two different sized embroidery hoops and hanging them up horizontally with some twine.
MATERIALS
4 embroidery hoops
thin fabric, cheese cloth or screen mesh
twine or other string
scissors
clothespins
hot glue gun with glue sticks
INSTRUCTIONS
Cut a piece of fabric for your embroidery hoop, adding one inch on each side.
Unscrew your embroidery hoop, insert a piece of fabric and tighten it, making sure the fabric is nicely tight and flat.
Cut the excess fabric off.
Repeat the steps above with a second, bigger hoop.
Unscrew the second, smaller sized hoop, attach three to five twine strings of equal lengths and long enough to attach to the bottom layer of the drying rack, spacing them evenly around the hoop and tighten the hoop back together again.
Glue the second hoop on top of the one with the attached screen, letting the strings hang down.
Add some strings to the top of your smaller hoops to hang your drying rack up and make it easier to attach the bottom part.
Unscrew the inner hoop of your second big hoop, attach to the strings, making sure it is nice and flat and tighten it back together again.
Add some glue to the big hoop with the fabric attached and glue it onto the bottom as your second layer.
Glue some clothespins on the outside of your hoops for extra drying space for small herb bundles.
Find a cool, dry, and well- ventilated area, away from direct sunlight and any moisture to hang your new herb drying rack with embroidery hoops and start drying your herbs and flowers.