

DIY POPPY SEED HEAD PRINTS
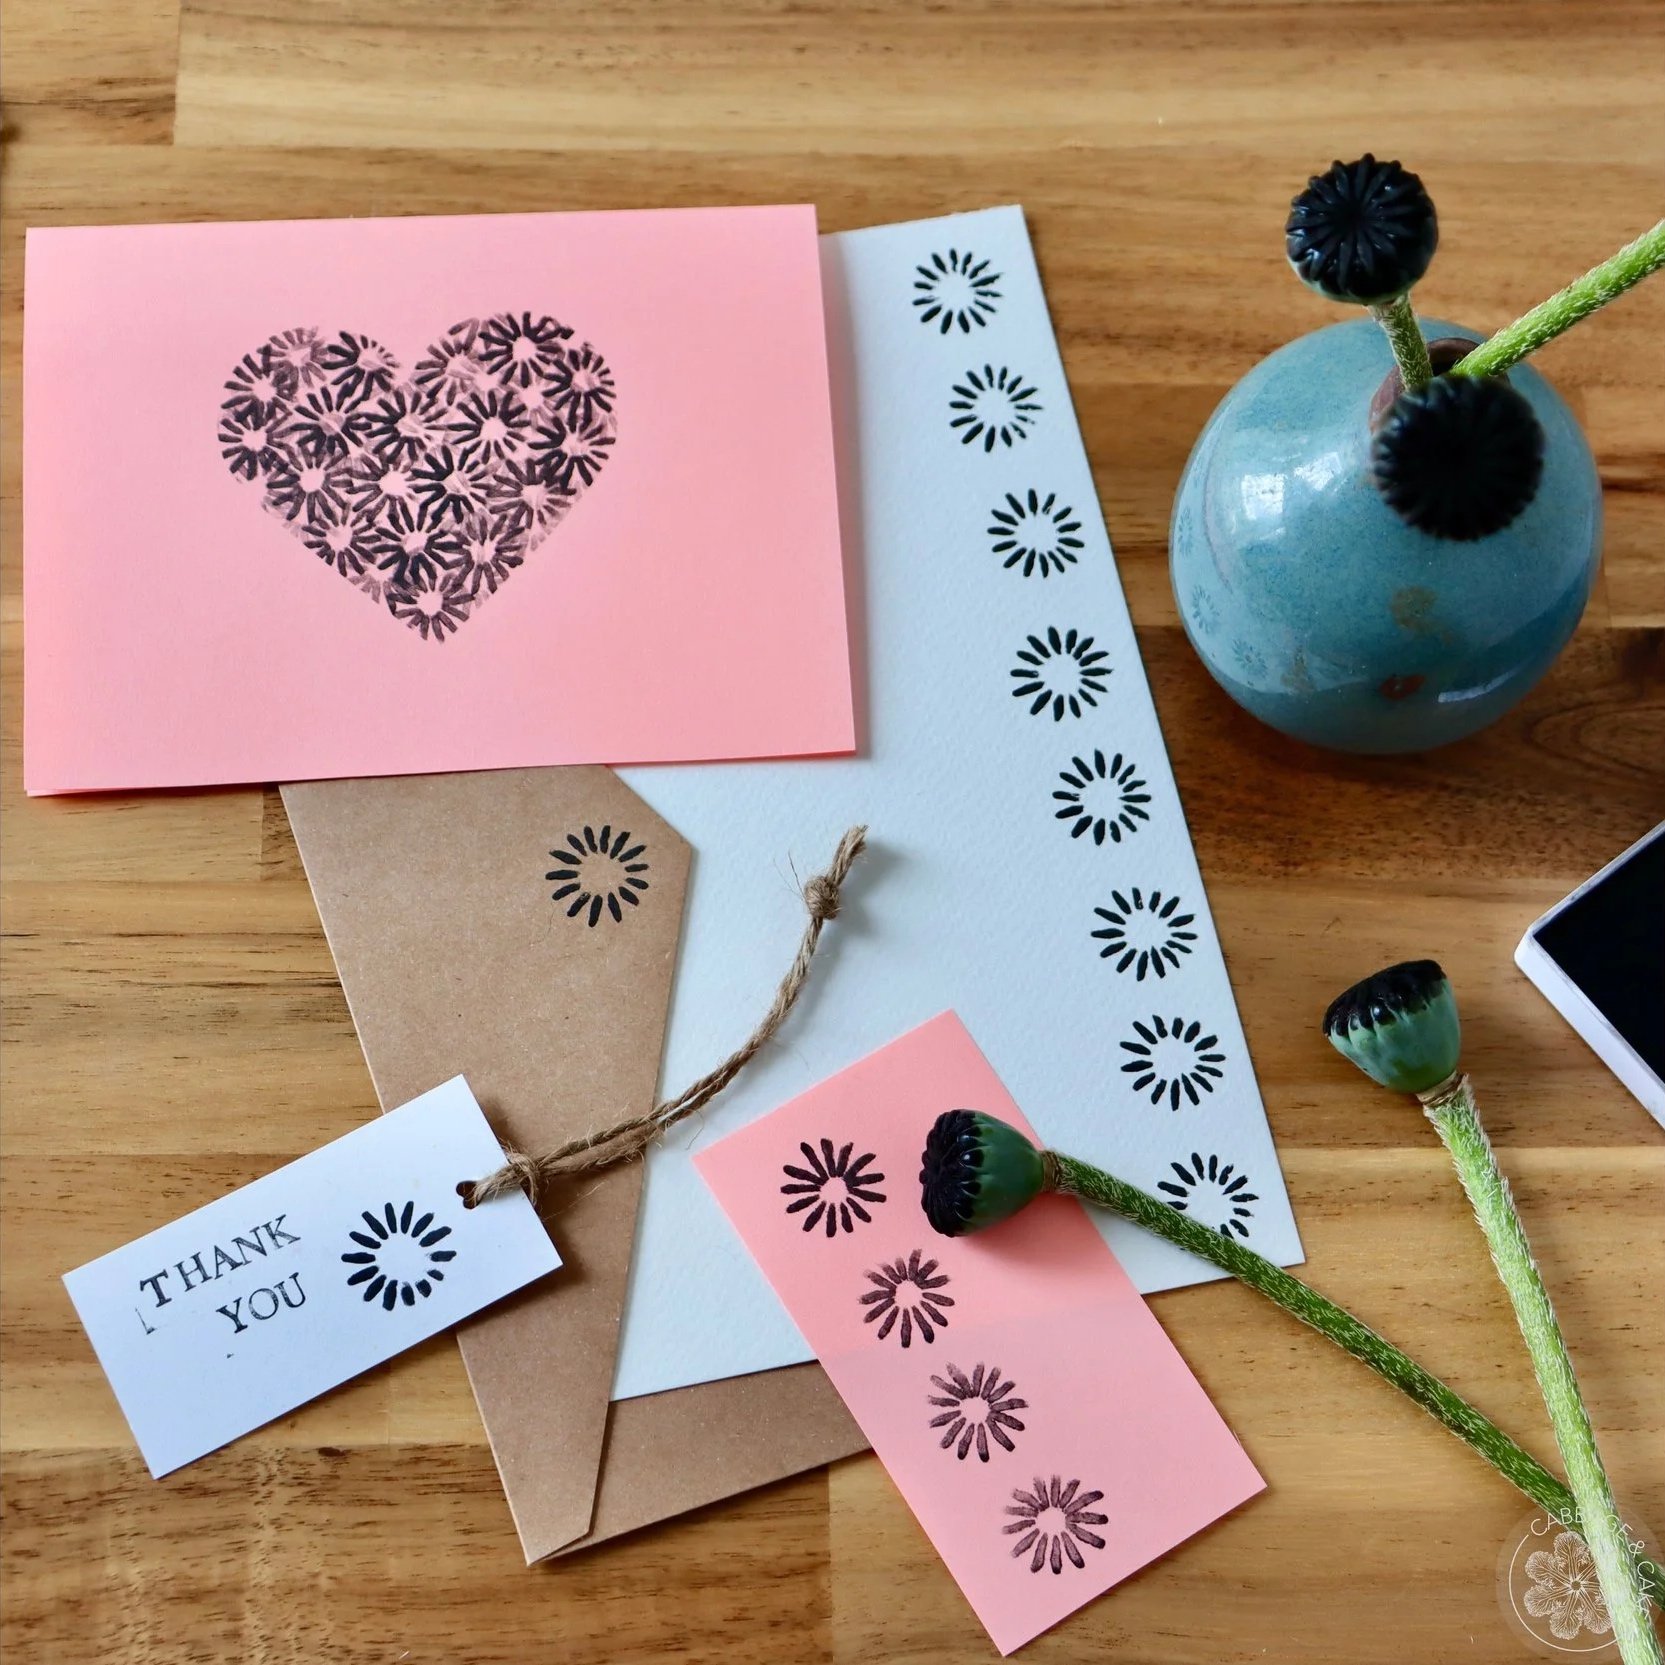
Did you know you can use fresh poppy seed heads to make adorable little prints? All you need for this DIY project are some fresh and still green poppy seed heads, a stamp ink pad, and some smooth watercolour paper.
Poppies are beautiful and easy-to-grow perennials that bloom in late spring and develop decorative seed heads once their stunning flowers are done blooming. I used oriental poppy seed heads that have big, beautiful blooms with delicate petals in a striking powdery pink and deep purple centres.
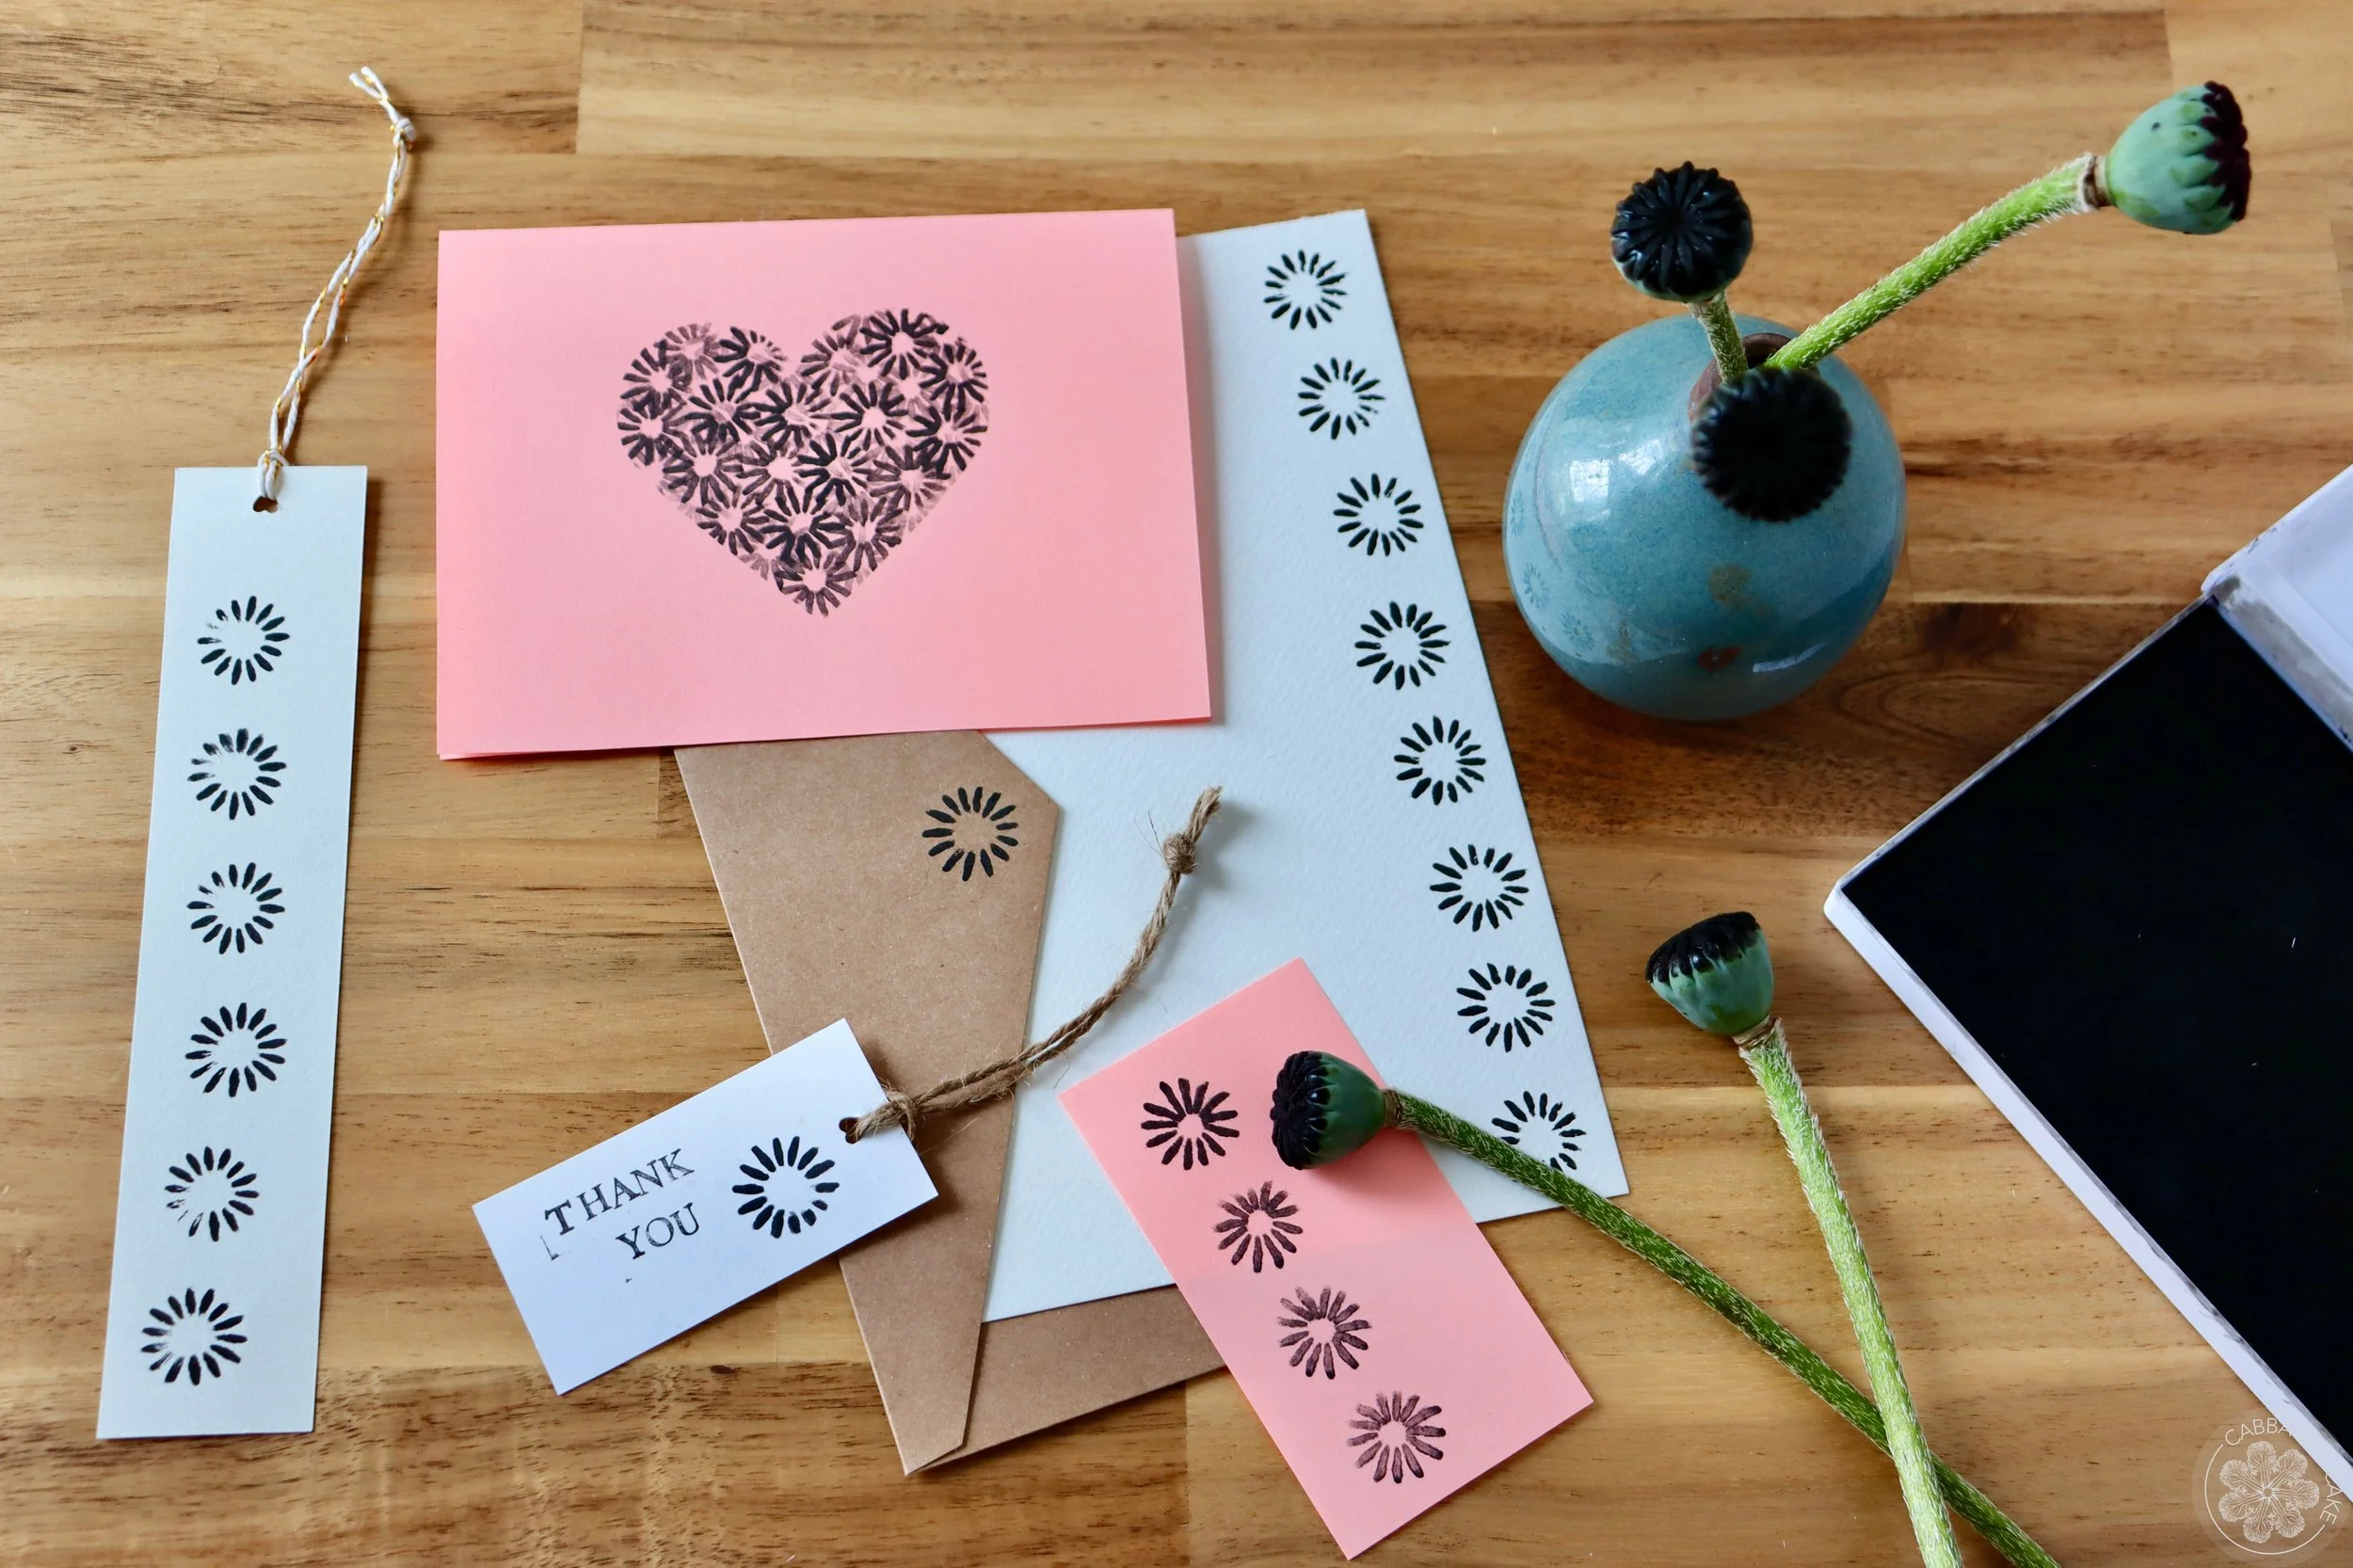
I love using dried poppy seed heads as decorations and in bouquets but using their fresh seed heads right when you cut them to make cute little prints is such an easy and satisfying DIY project that I had to share it with you today! It’s a great way to beautify greeting cards, tags, bookmarks and journal entries.
It’s also a great children’s craft activity that will keep your little ones entertained for a while. My kids love using poppy seed heads as stamps. They experimented with different coloured ink pads and different shades of coloured paper and had so much fun. If you like this DIY project please make sure to also check out this GREETING CARDS WITH EASY PAPER TOWEL DRIP ART.
TIPS TO MAKE THE
PERFECT POPPY SEED HEAD PRINTS

Gather everything you will need in advance to avoid interrupting your creative flow.
Cover your work surface for an easier clean up afterwards.
Burn the freshly cut stems over a candle or with a kitchen torch to avoid the milky sap from seeping out.
Use smooth, high-quality card stock, watercolour or printmaking paper for best print results.
Have fun experimenting with different types and colours of paper and ink.
Don’t touch the fresh prints and let them dry completely to avoid smudging them.
Trust your creativity and follow your creative instincts. Enjoy the creative process just as much as the end result and let go of any fixed ideas.
MATERIALS YOU WILL NEED
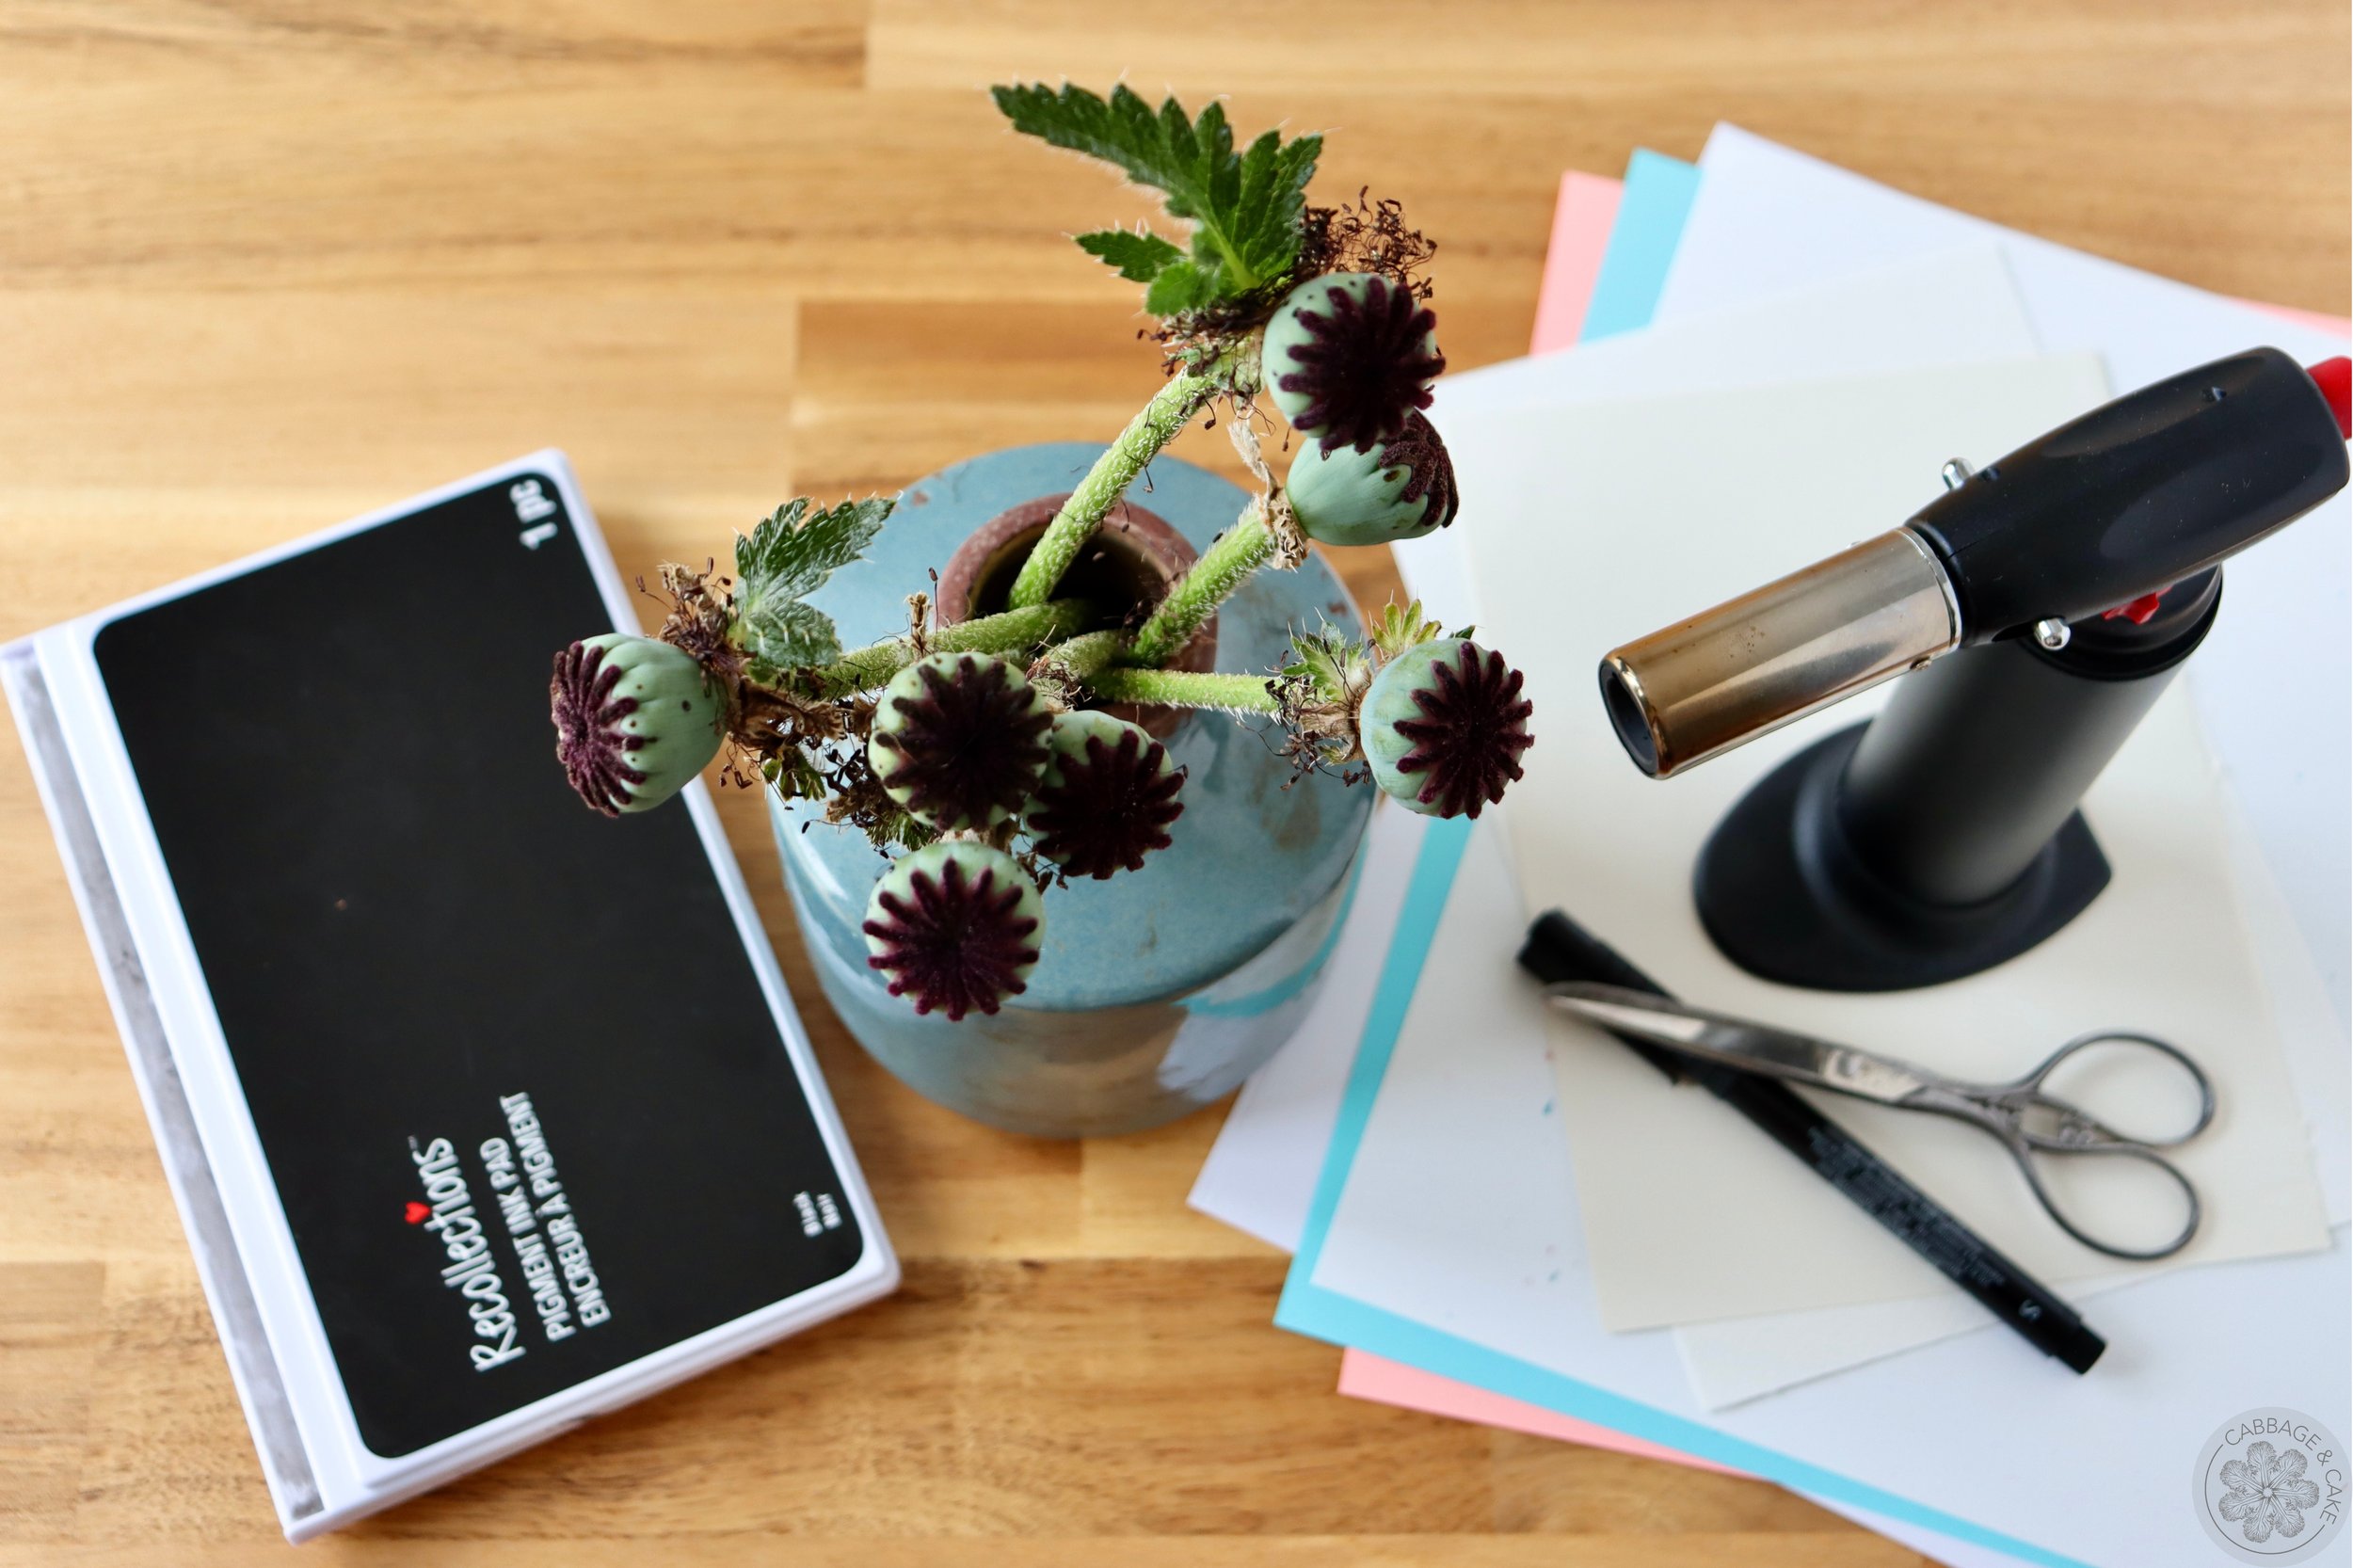
craft mat or newspaper
fresh poppy seed heads
lighter, candle or kitchen torch
ink pad
smooth watercolour or printmaking paper
scissors
INSTRUCTIONS STEP BY STEP
Cover your work surface and gather all your materials.

Brush off your poppy seed heads to make sure they are free from any debris, rests of the poppy flowers and insects.
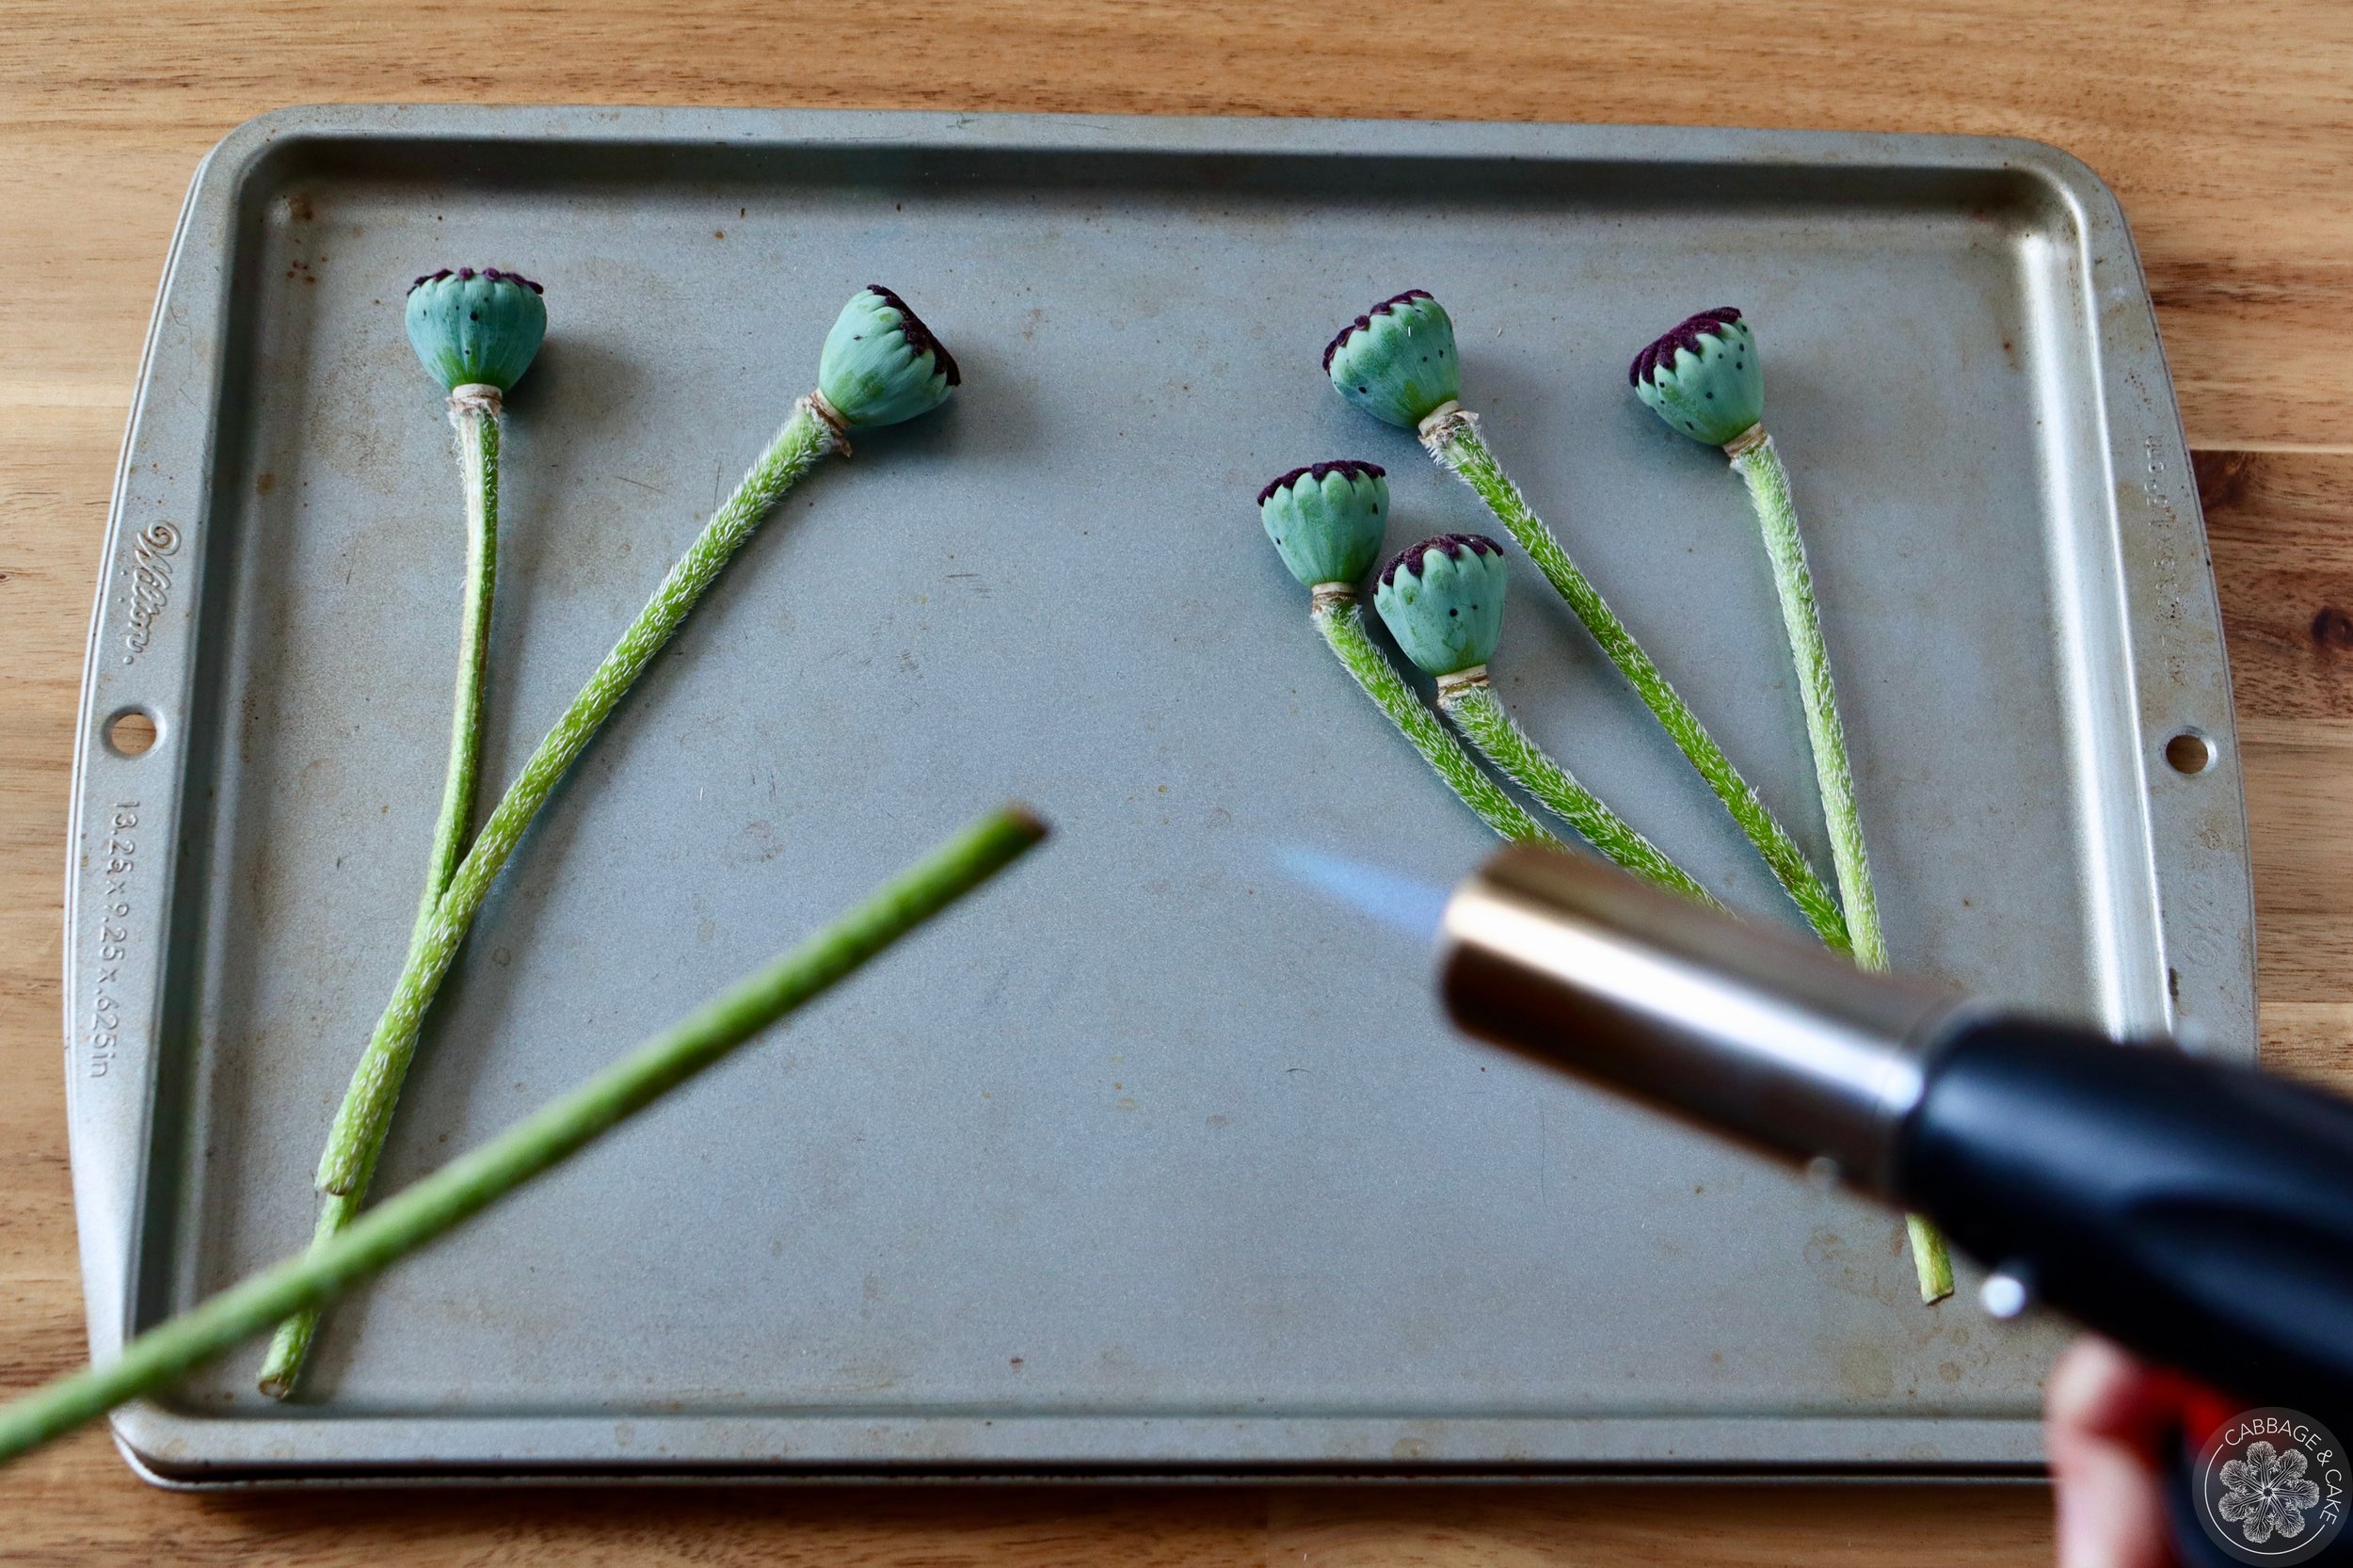
If you have freshly cut poppy seed heads, you can burn the end of the stems by using a lighter, candle or kitchen torch for 10-30 seconds to seal them and prevent the milky sap from seeping out.
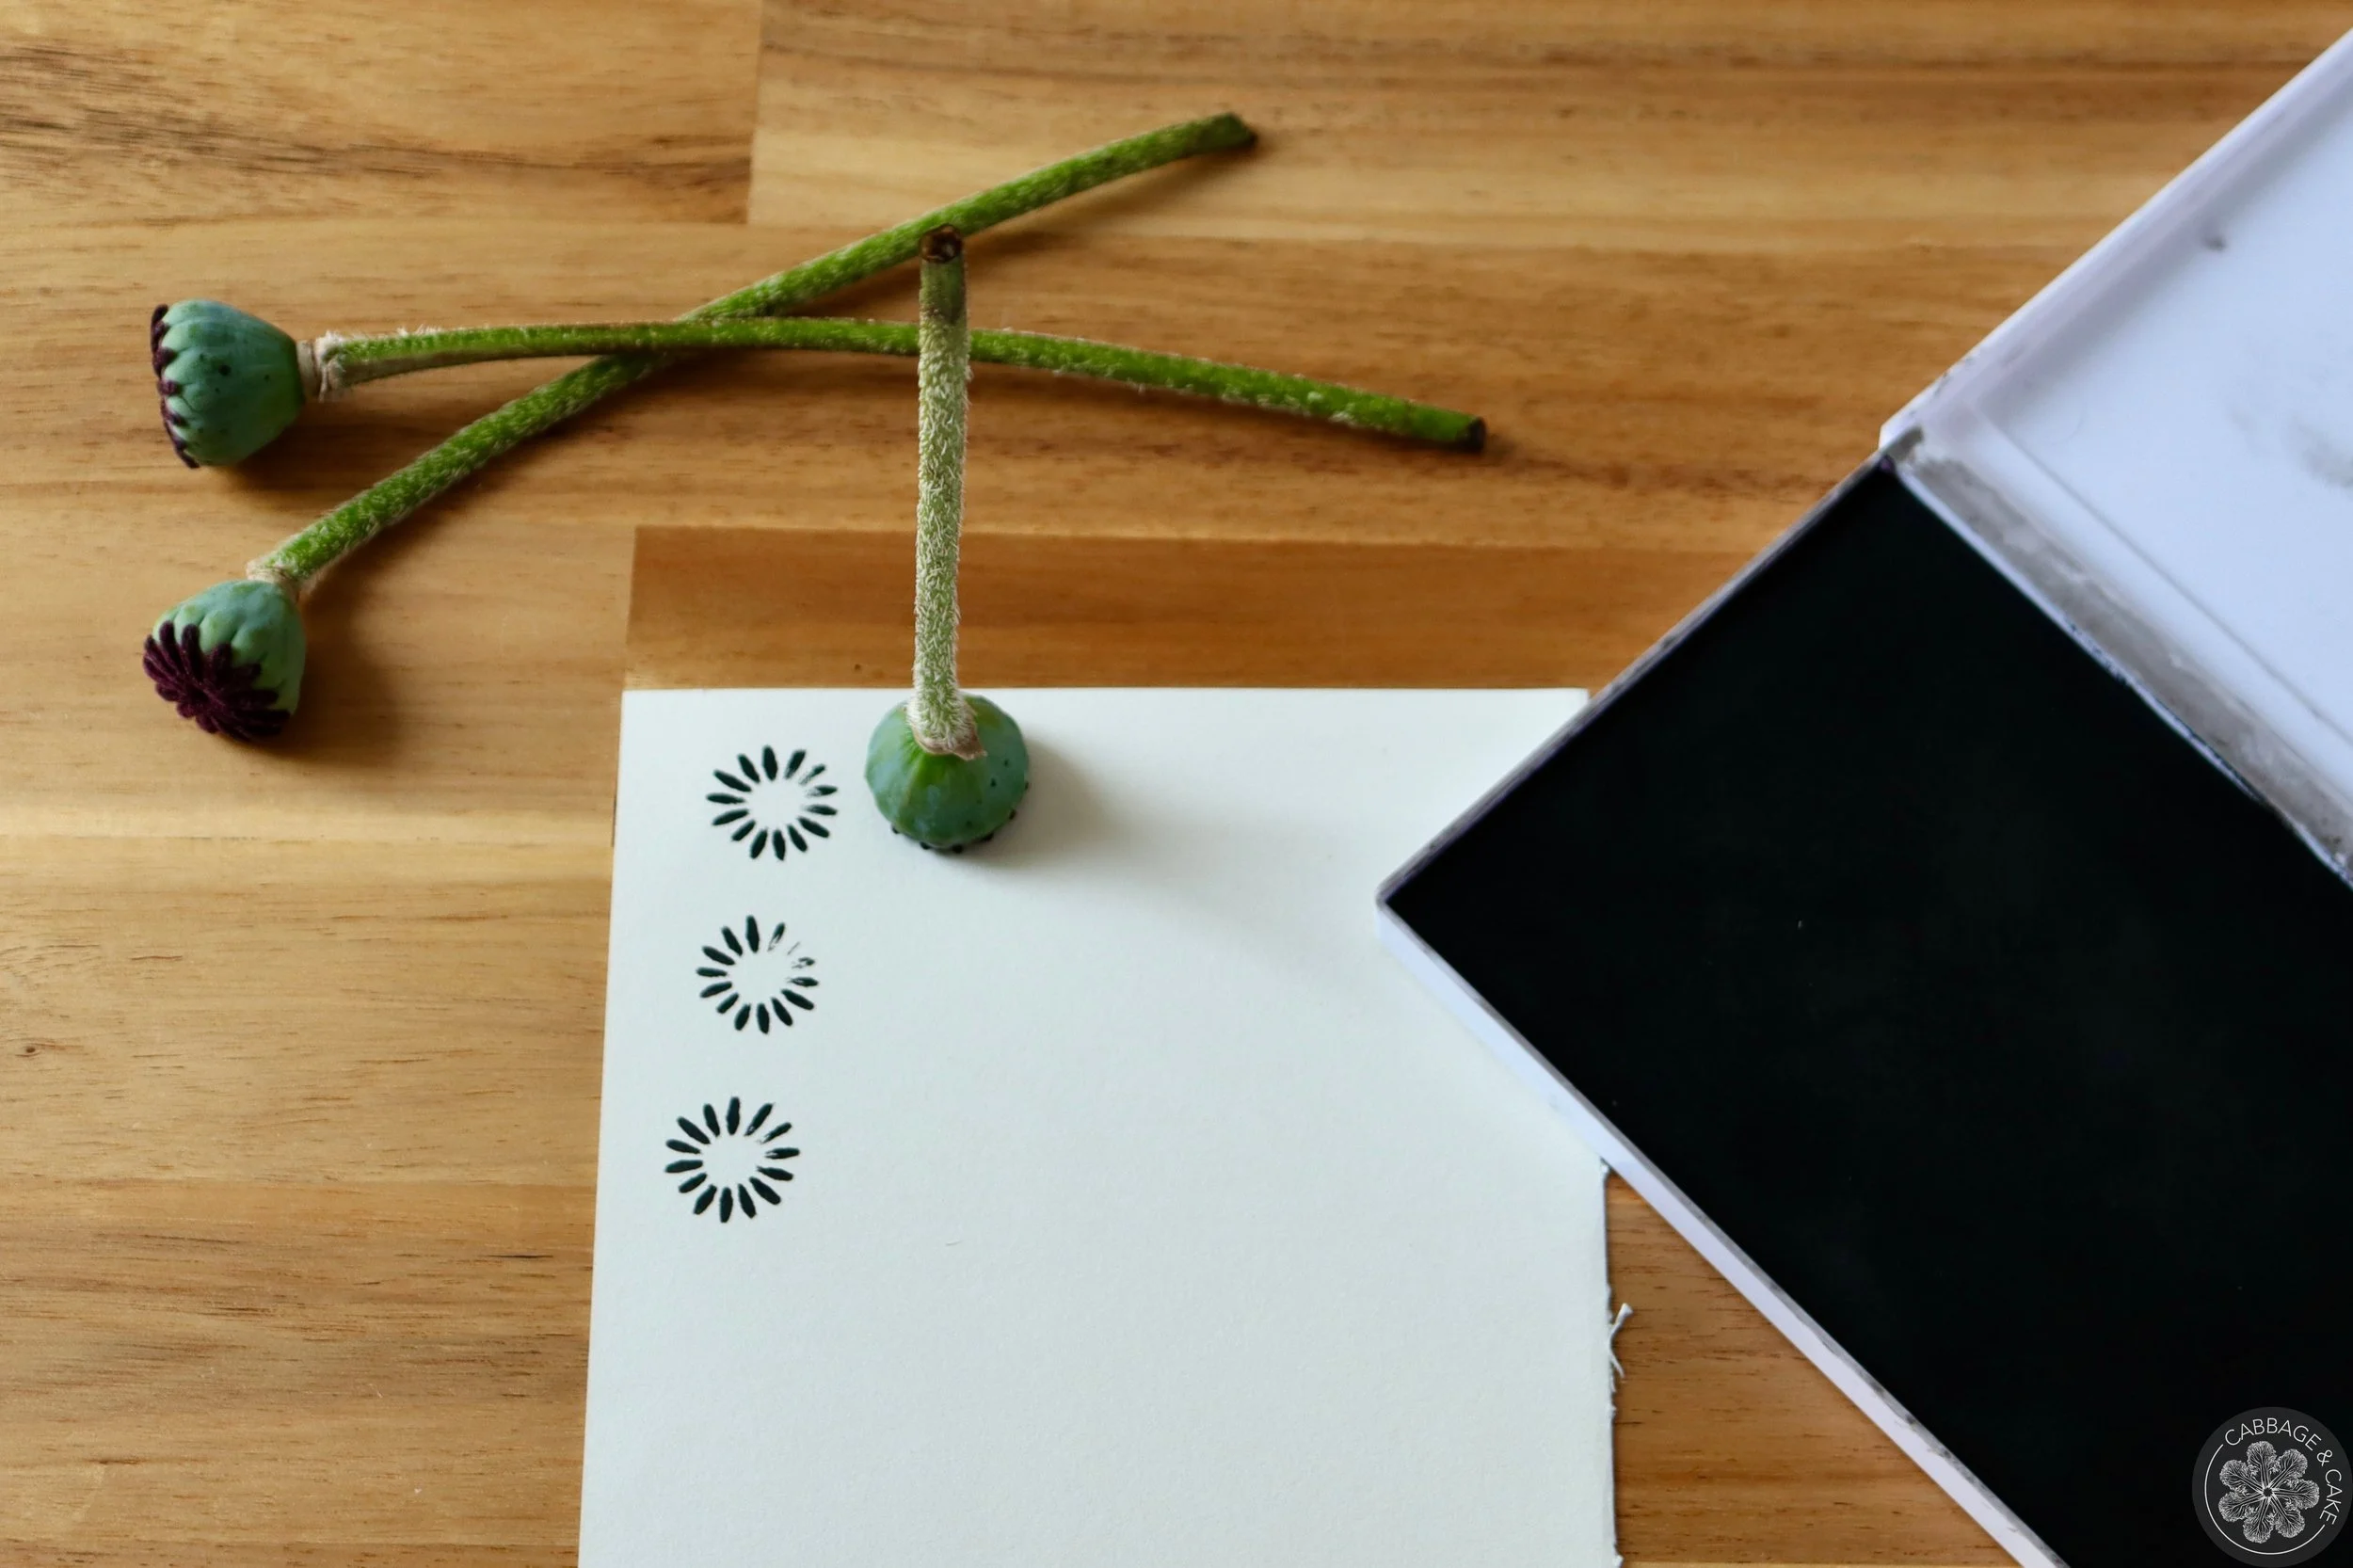
Press the seed head flatly into the ink pad just like you would with a stamp, make imprints on the paper and repeat for your desired design.
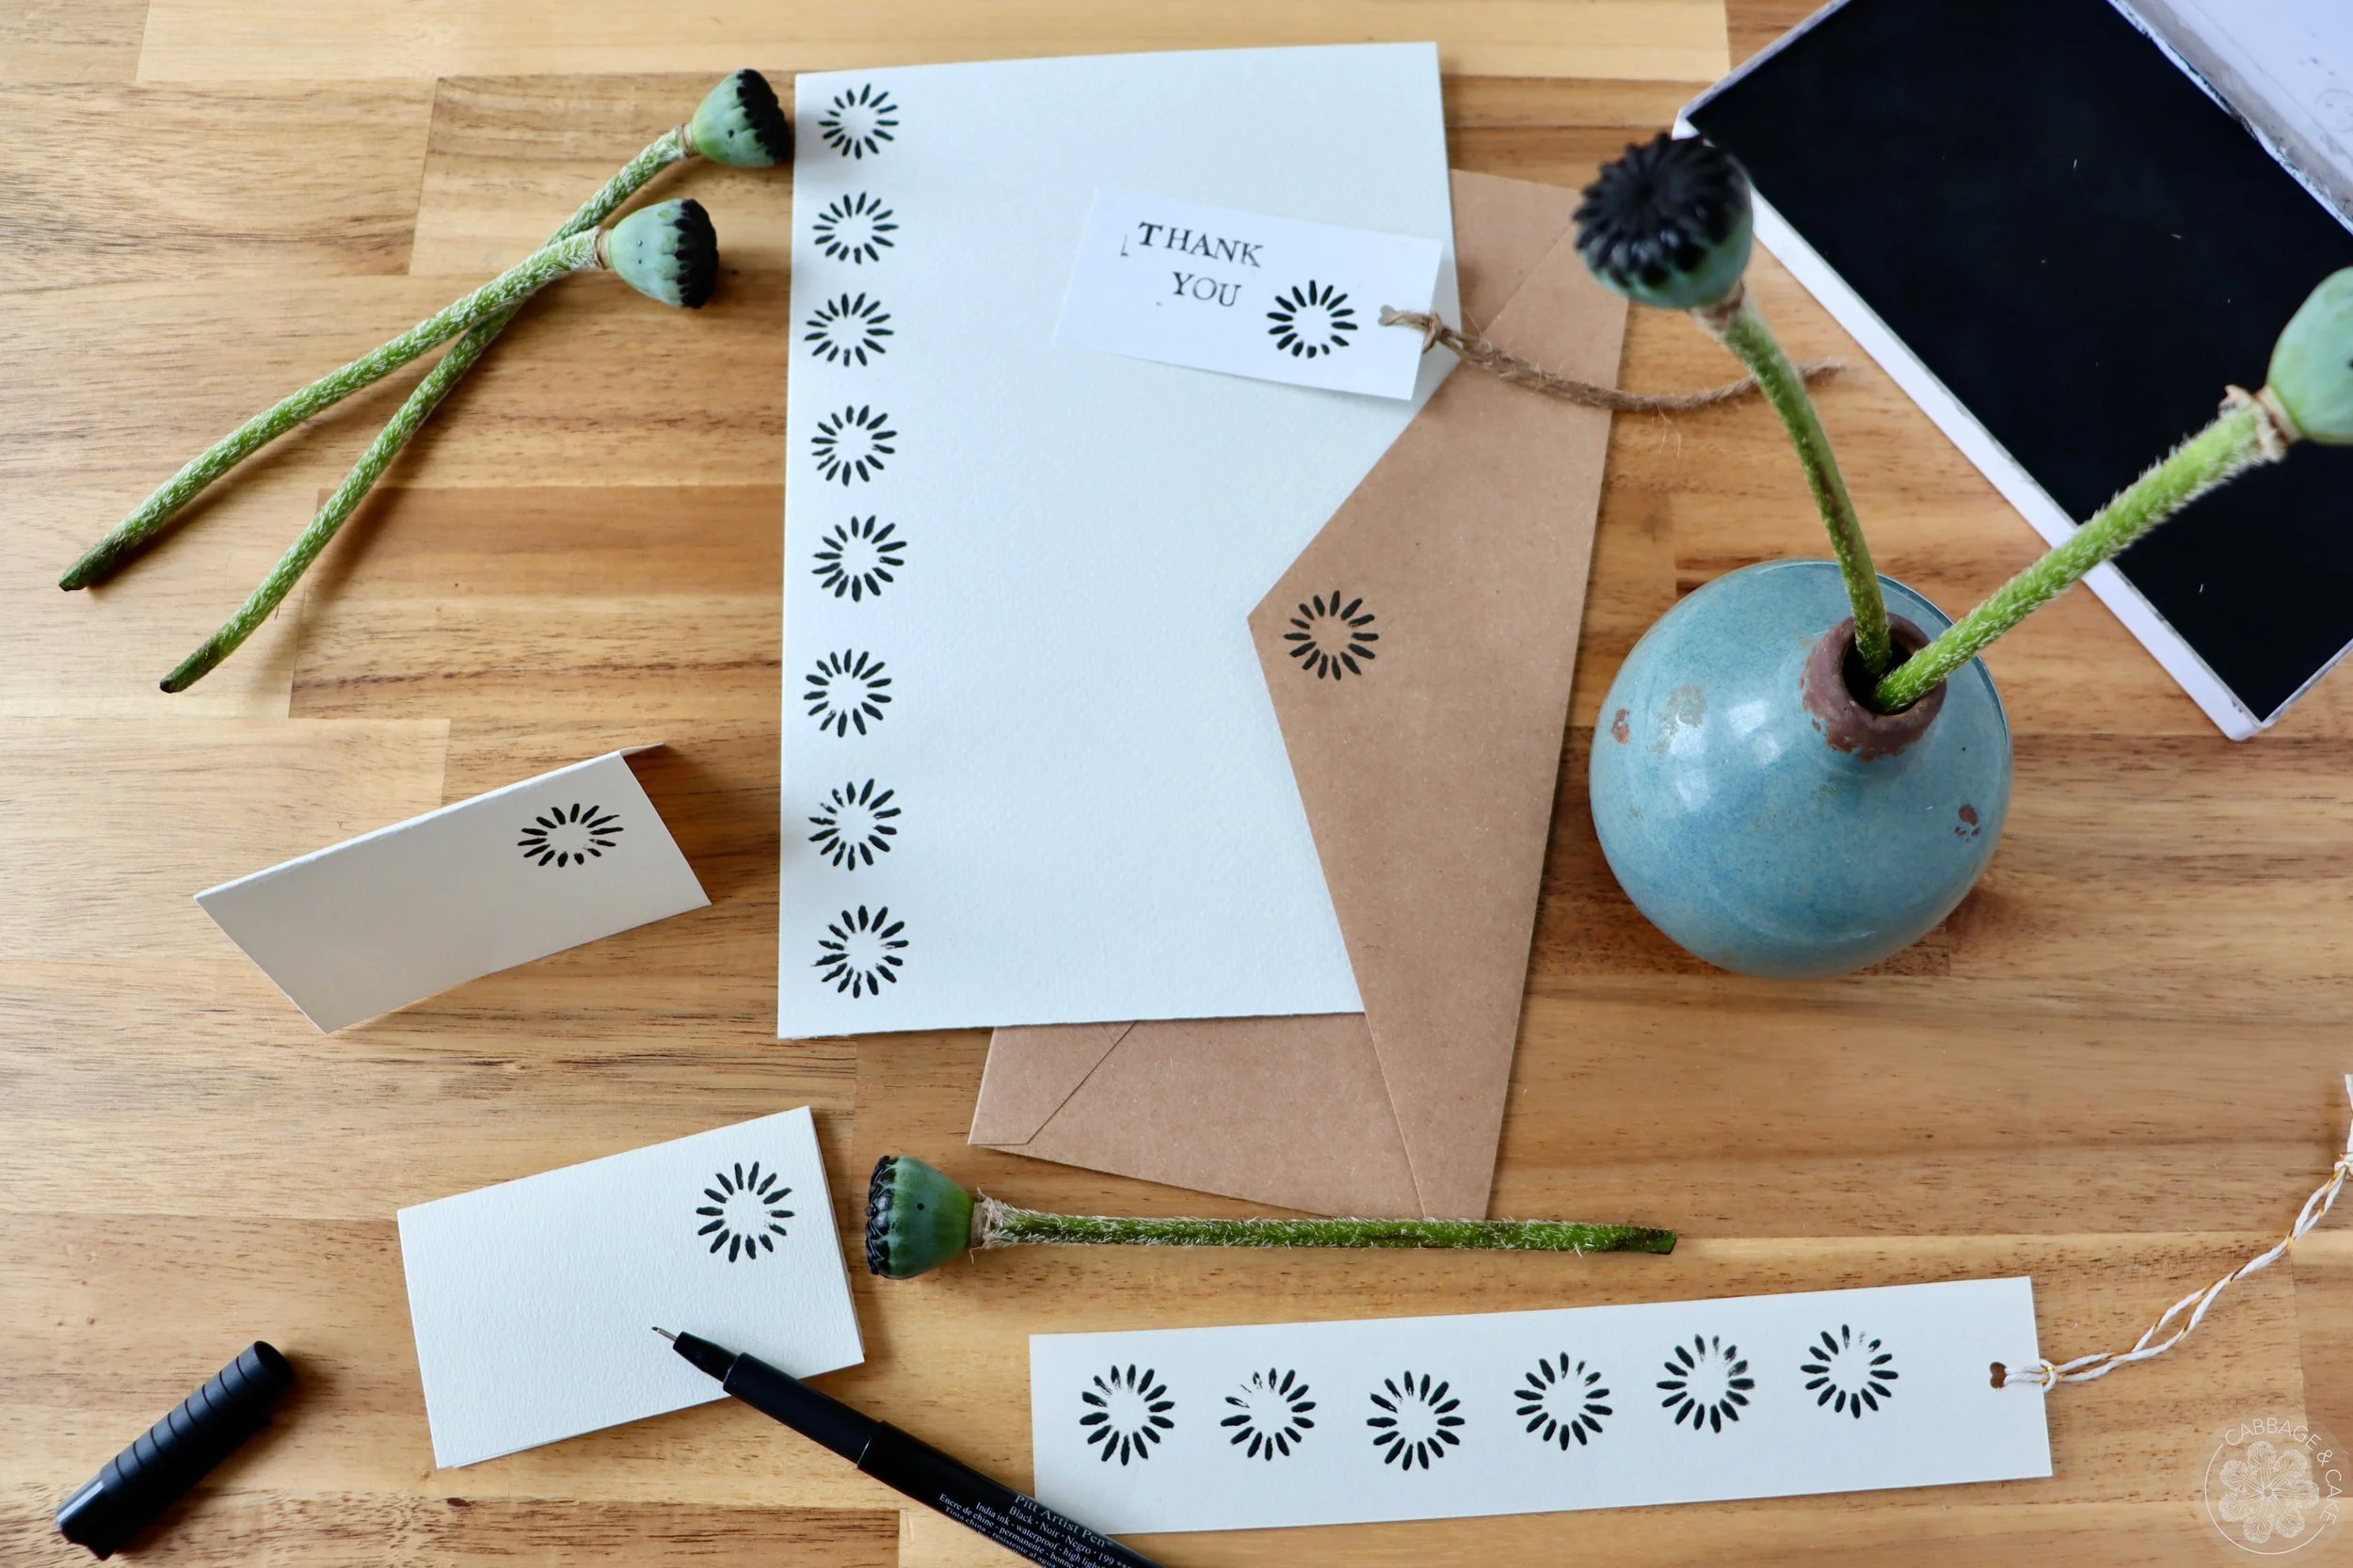
Play around with different colours and types of paper and ink to create cards, tags, bookmarks etc. and have fun!
DIY POPPY SEED HEAD PRINTS
by Julia
Using fresh poppy seed heads to make little adorable prints is such an easy and satisfying DIY project for kids and adults alike in early summer and a great way to beautify your greeting cards, tags, bookmarks and journal entries.
MATERIALS
fresh poppy seed heads
craft mat or newspaper
lighter, candle or kitchen torch
ink pad
smooth watercolour or printmaking paper
scissors
INSTRUCTIONS
Cover your work surface and gather all your materials.
Brush off your poppy seed heads to make sure they are free from any debris, rests of the poppy flowers and insects.
If you have freshly cut poppy seed heads, you can burn the end of the stems by using a lighter, candle or kitchen torch for 10-30 seconds to seal them and prevent the milky sap from seeping out.
Press the seed head flatly into the ink pad just like you would with a stamp, make imprints on the paper and repeat for your desired design.
Play around with different colours and types of paper and ink to create cards, tags, bookmarks etc. and have fun!