

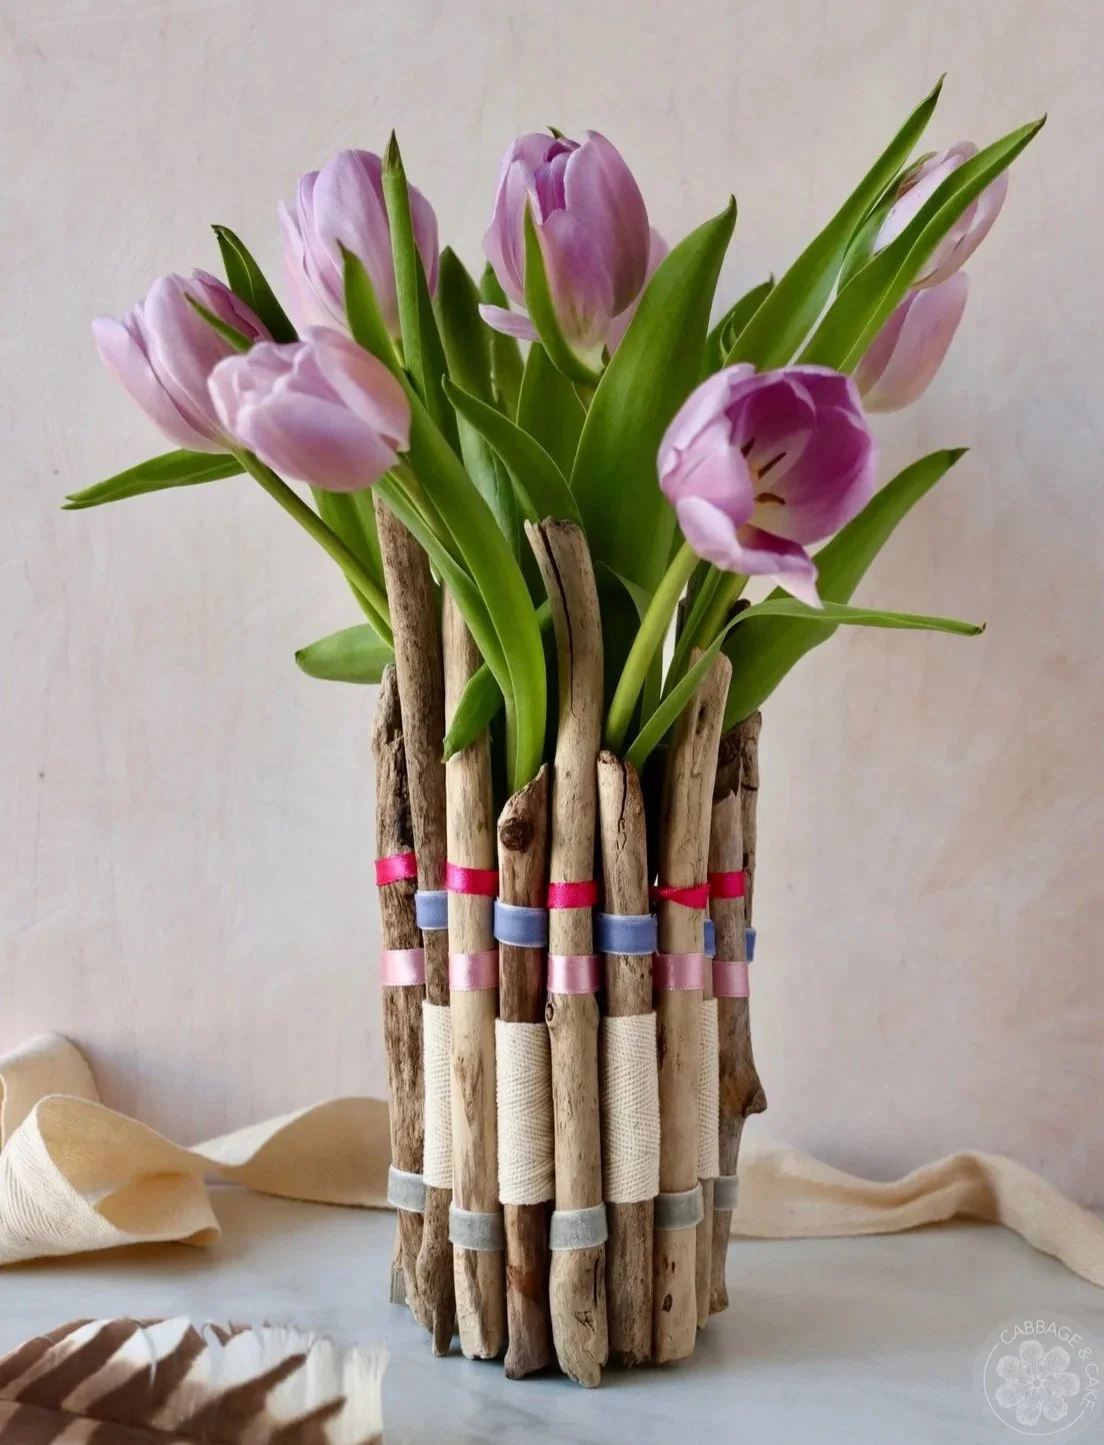
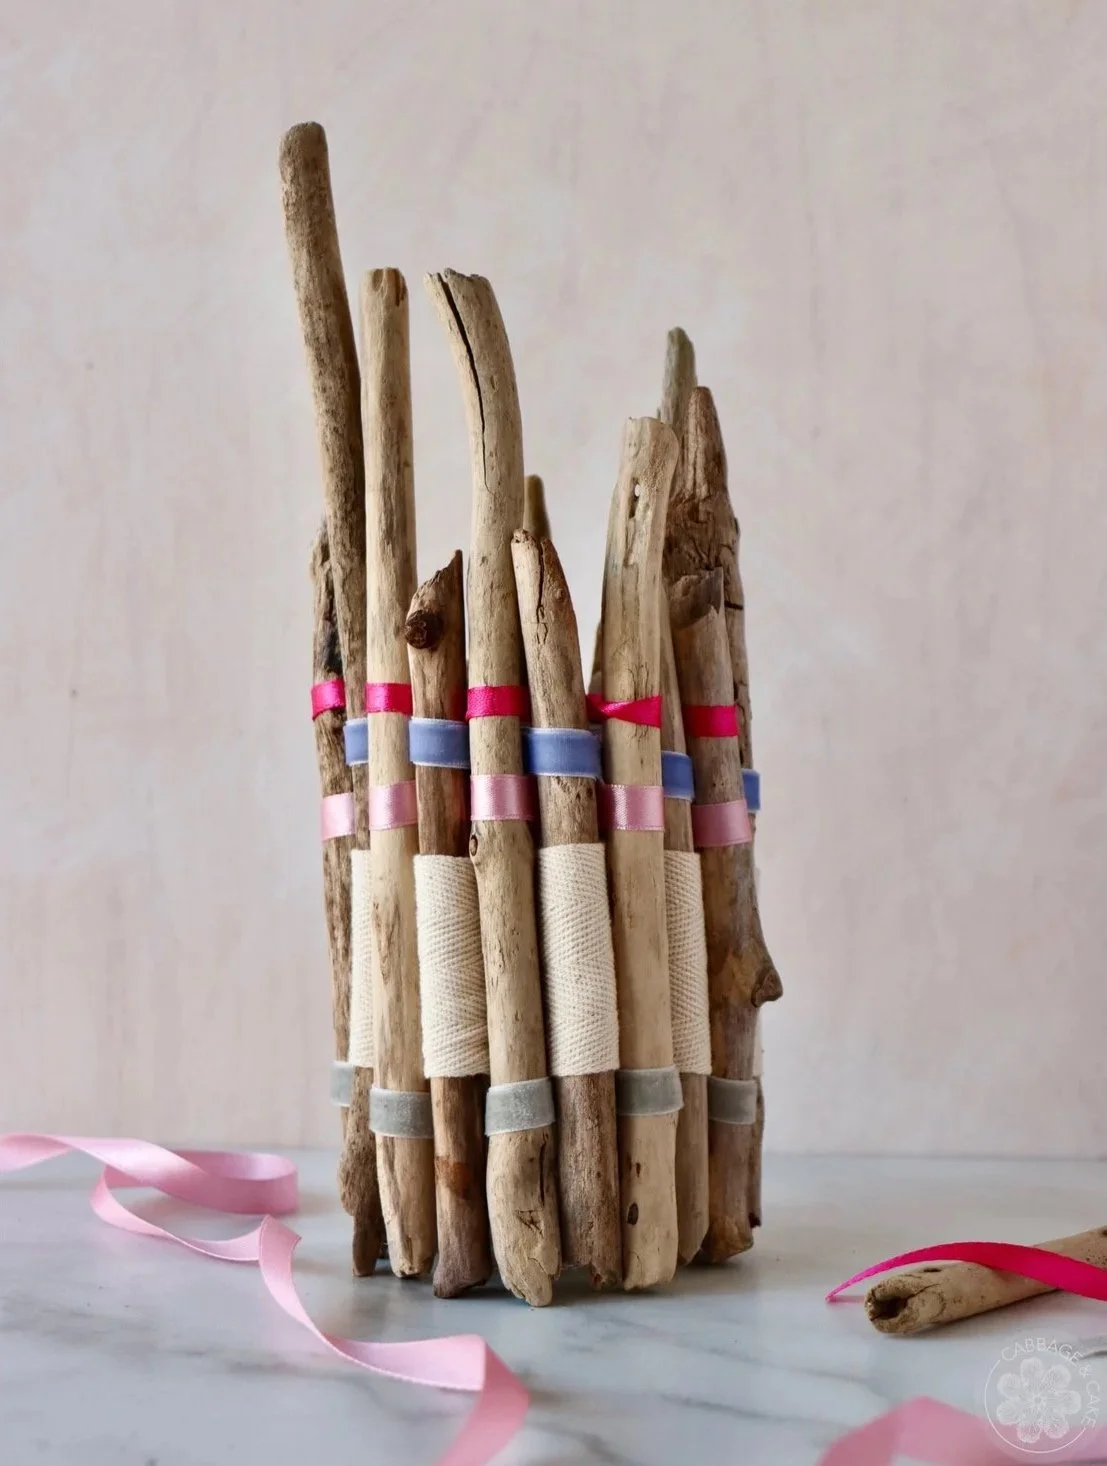
DIY DRIFTWOOD VASE
Since my last DIY driftwood project
- the ADVENT CALENDAR WITH DRIFTWOOD for Christmas, I’ve been collecting smaller pieces of driftwood this time to make an easy DIY driftwood vase to display a bunch of pretty spring flowers.
Springtime is great for finding driftwood. The snow and ice are finally melting, and the higher water levels and storms wash up lots of new pieces onto the shore and riverbanks. With the warmer weather, I’ve been drawn to go on walks along the beaches around the city to collect some driftwood for new projects. I love collecting nature’s treasures and bringing them home as a happy reminder of some time well spent outside.
For this happy spring vase, I used some pretty colourful ribbons to weave around some gathered driftwood sticks and double-sided tape to fasten it to a reused jar to hold the water with the flowers. You can reuse any container, jar or can you have at hand and either leave the driftwood natural, paint or whitewash it. Use any strings, raffia paper, twine or ribbons in different materials and shades you already have at home or get your favourite spring colours for this fun DIY project.
This is a great project to make with kids, from collecting the driftwood pieces to painting, arranging and weaving it together with colourful ribbons. You can really make it any size and design you want and have fun all the way from going to the beach to enjoying some spring flowers in your homemade driftwood vase.
For more ideas on how to display some of your favourite spring flowers, also make sure to check out my blog posts on this adorable and REUSABLE HEART WREATH DIY and this thrifty project to BRING IN SPRING WITH HYACINTHS.
TIPS TO MAKE THE PERFECT DIY DRIFTWOOD VASE

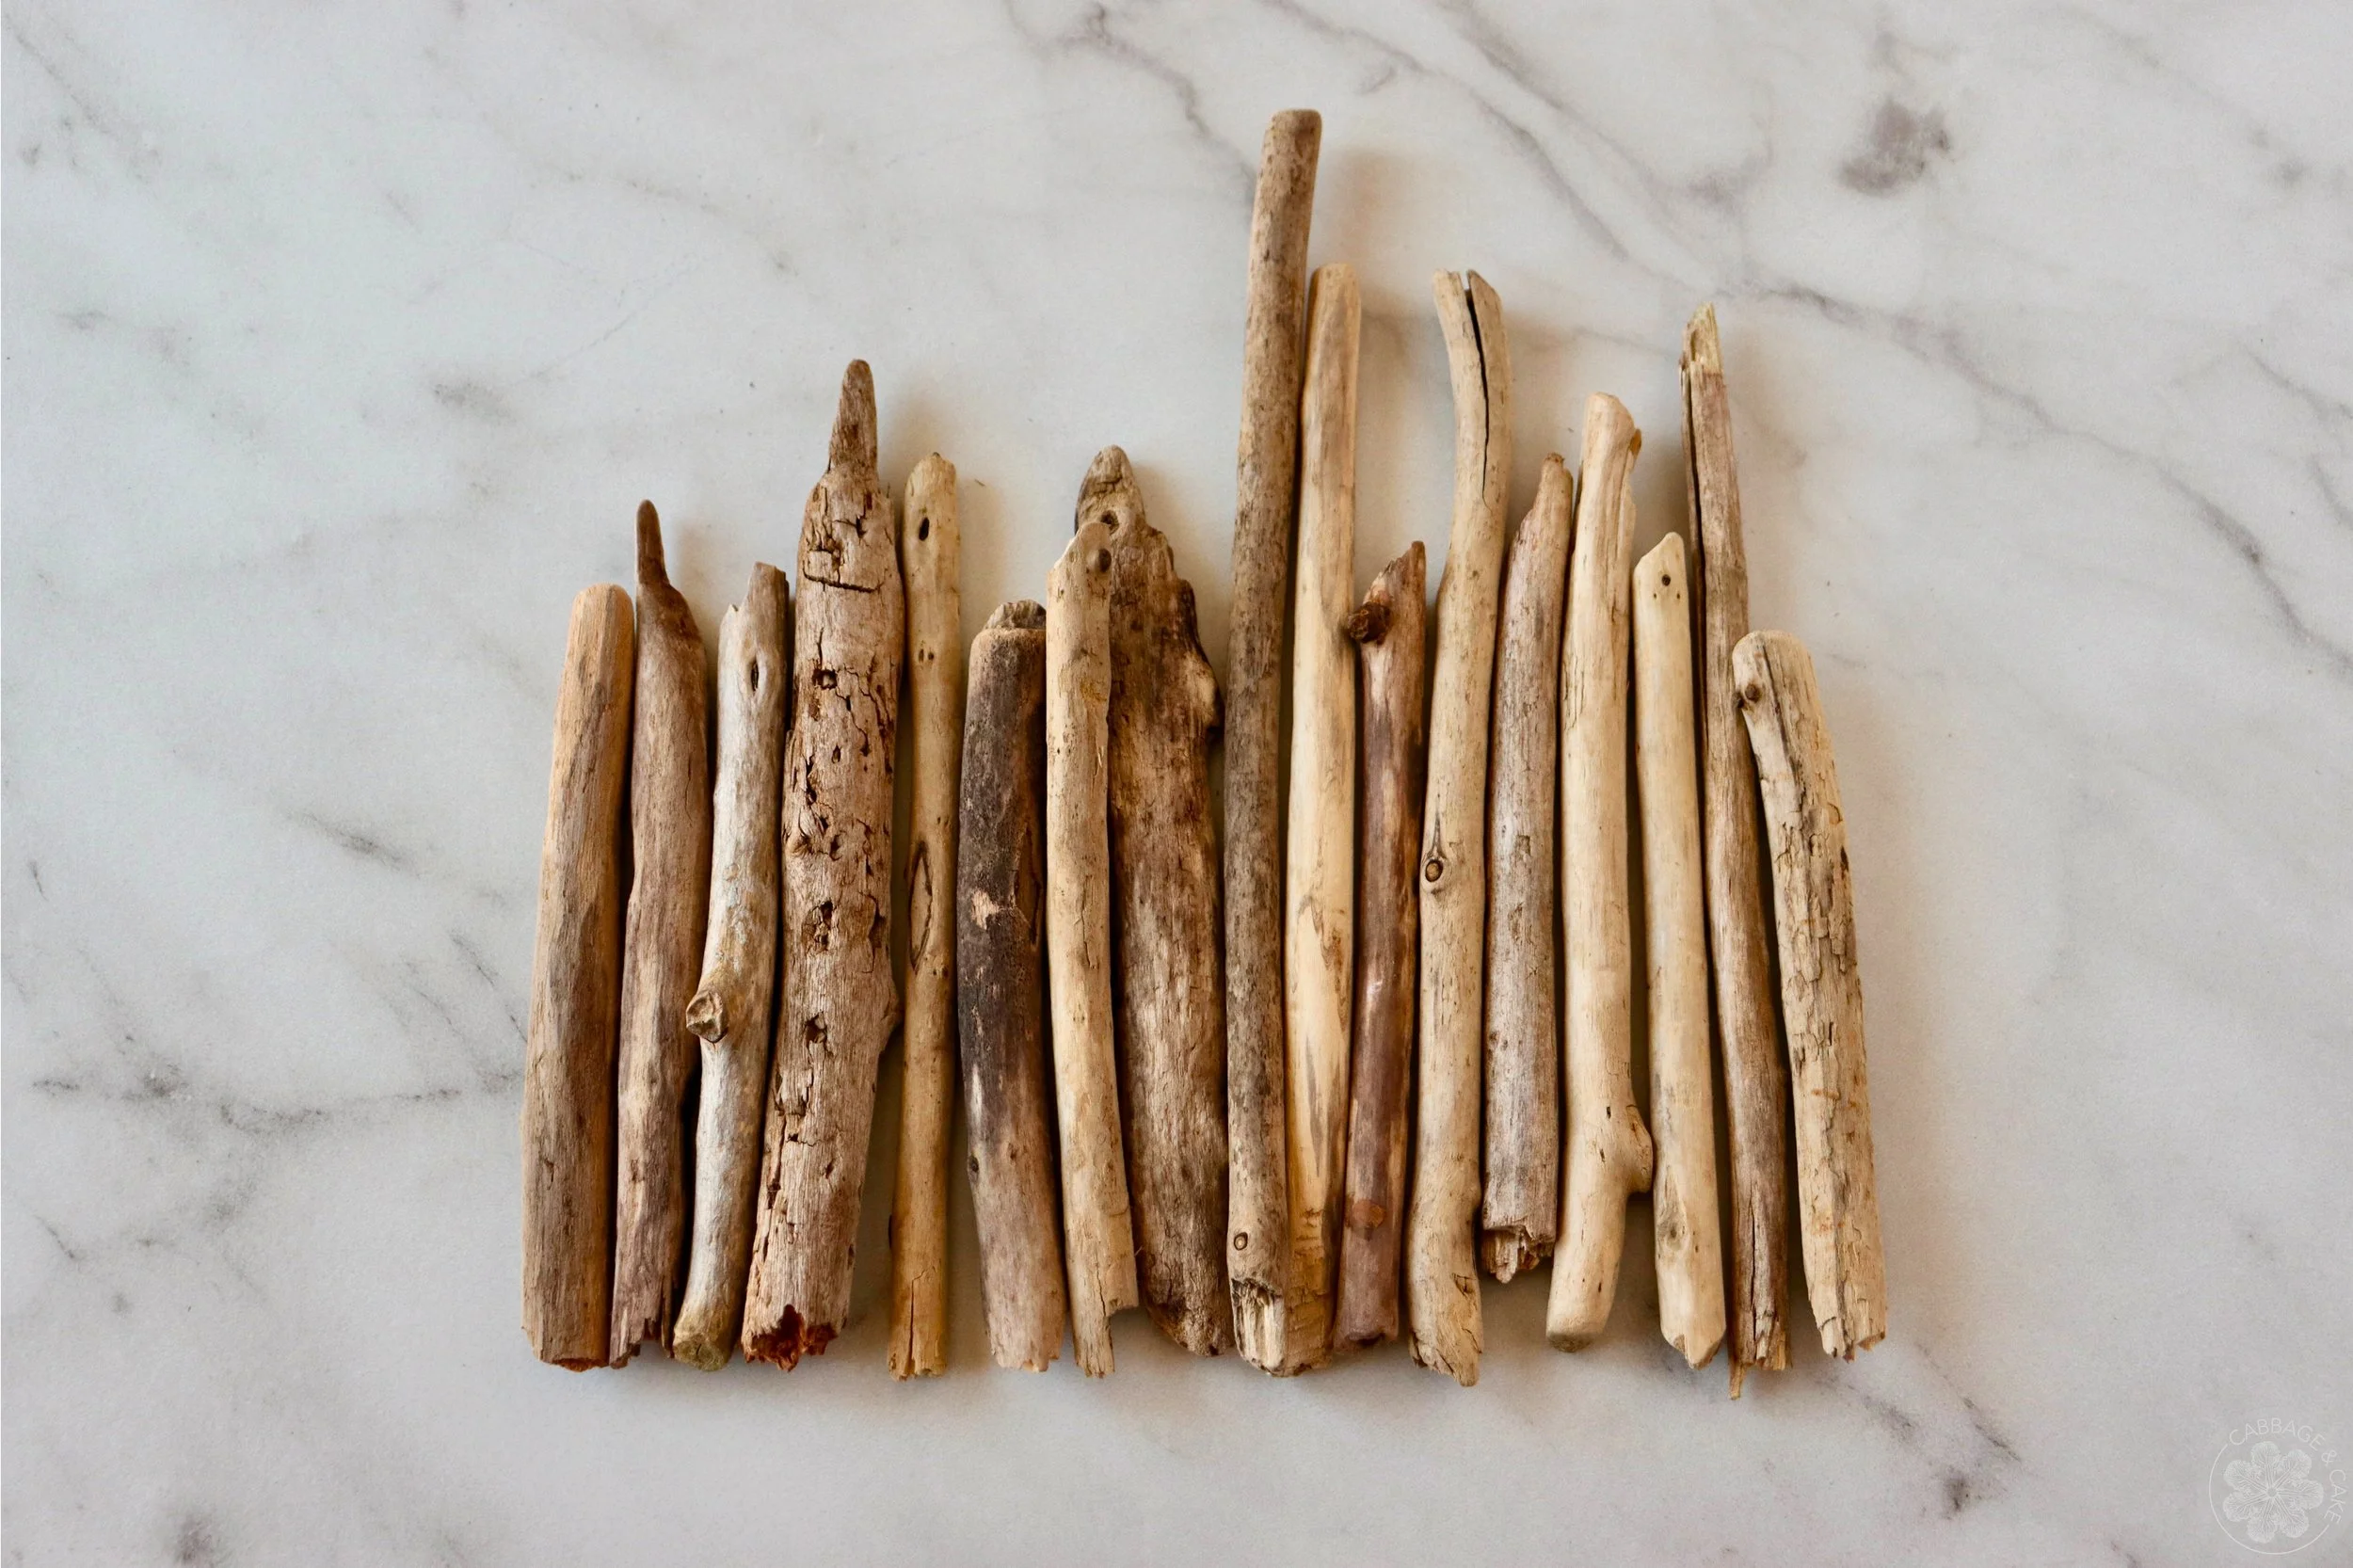
Look for rather straight, small to medium sized sticks for this project.
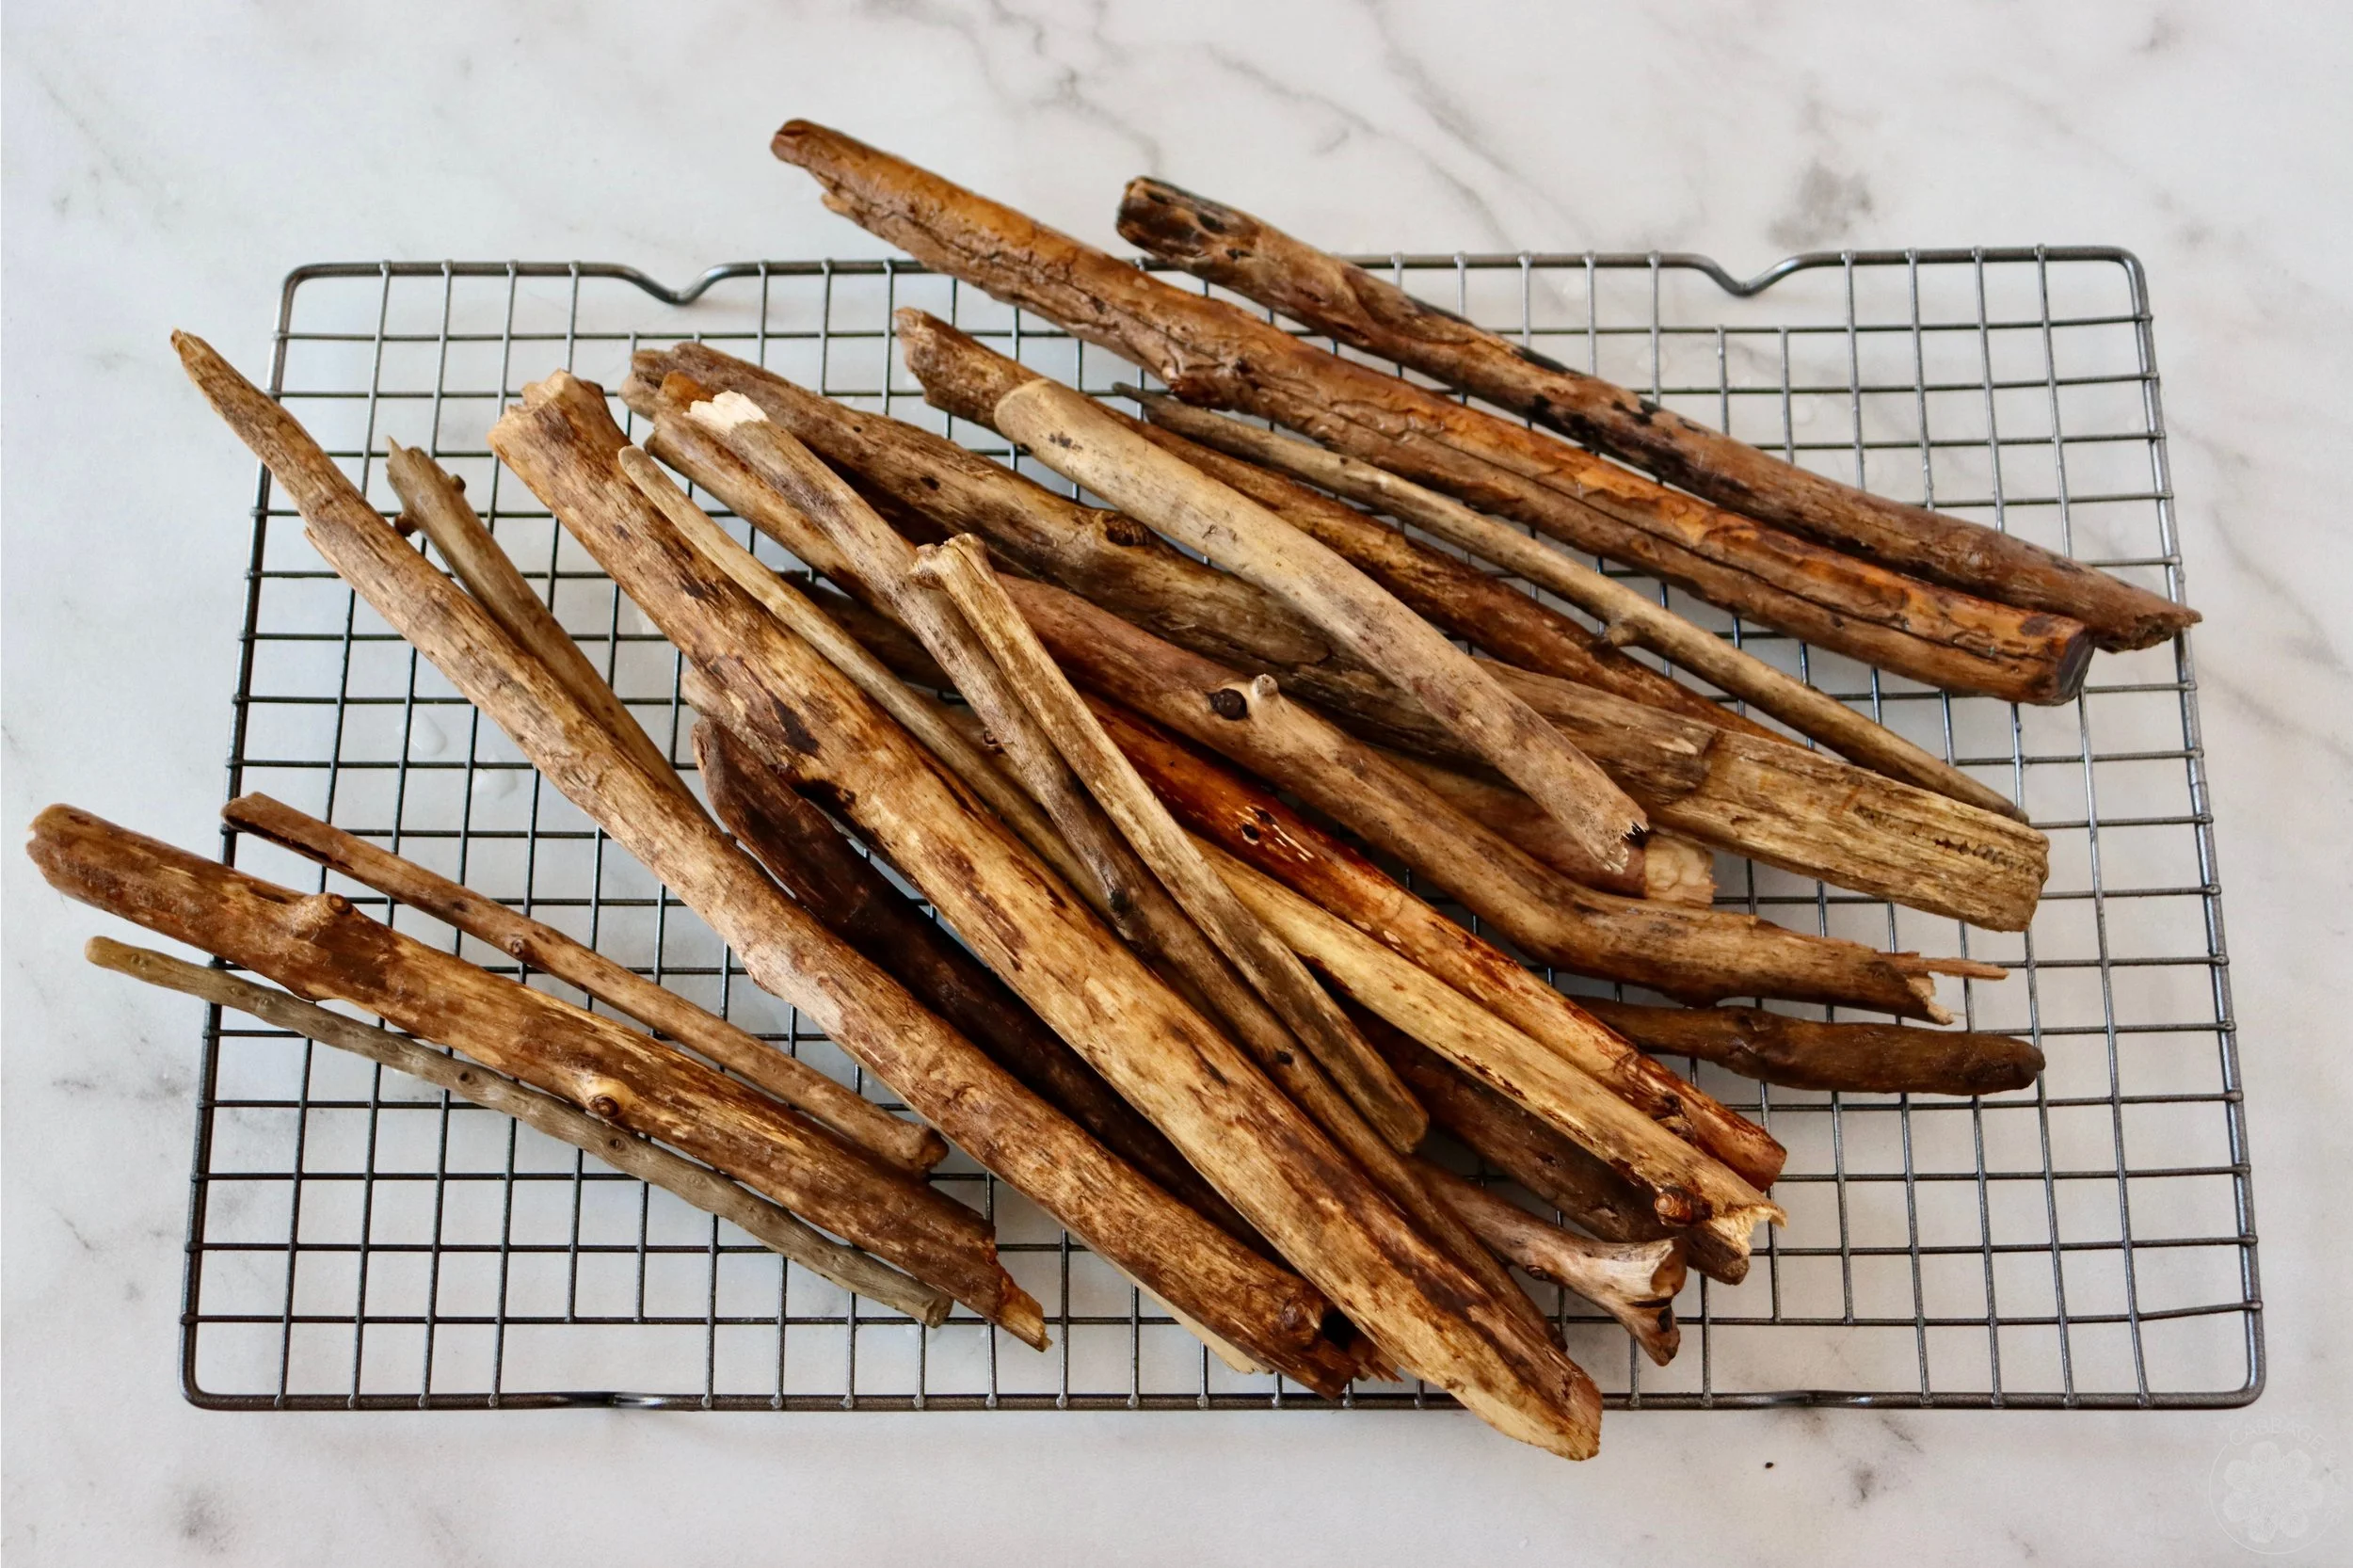
Make sure to let your driftwood pieces dry completely after you clean and wash them, before starting your project.
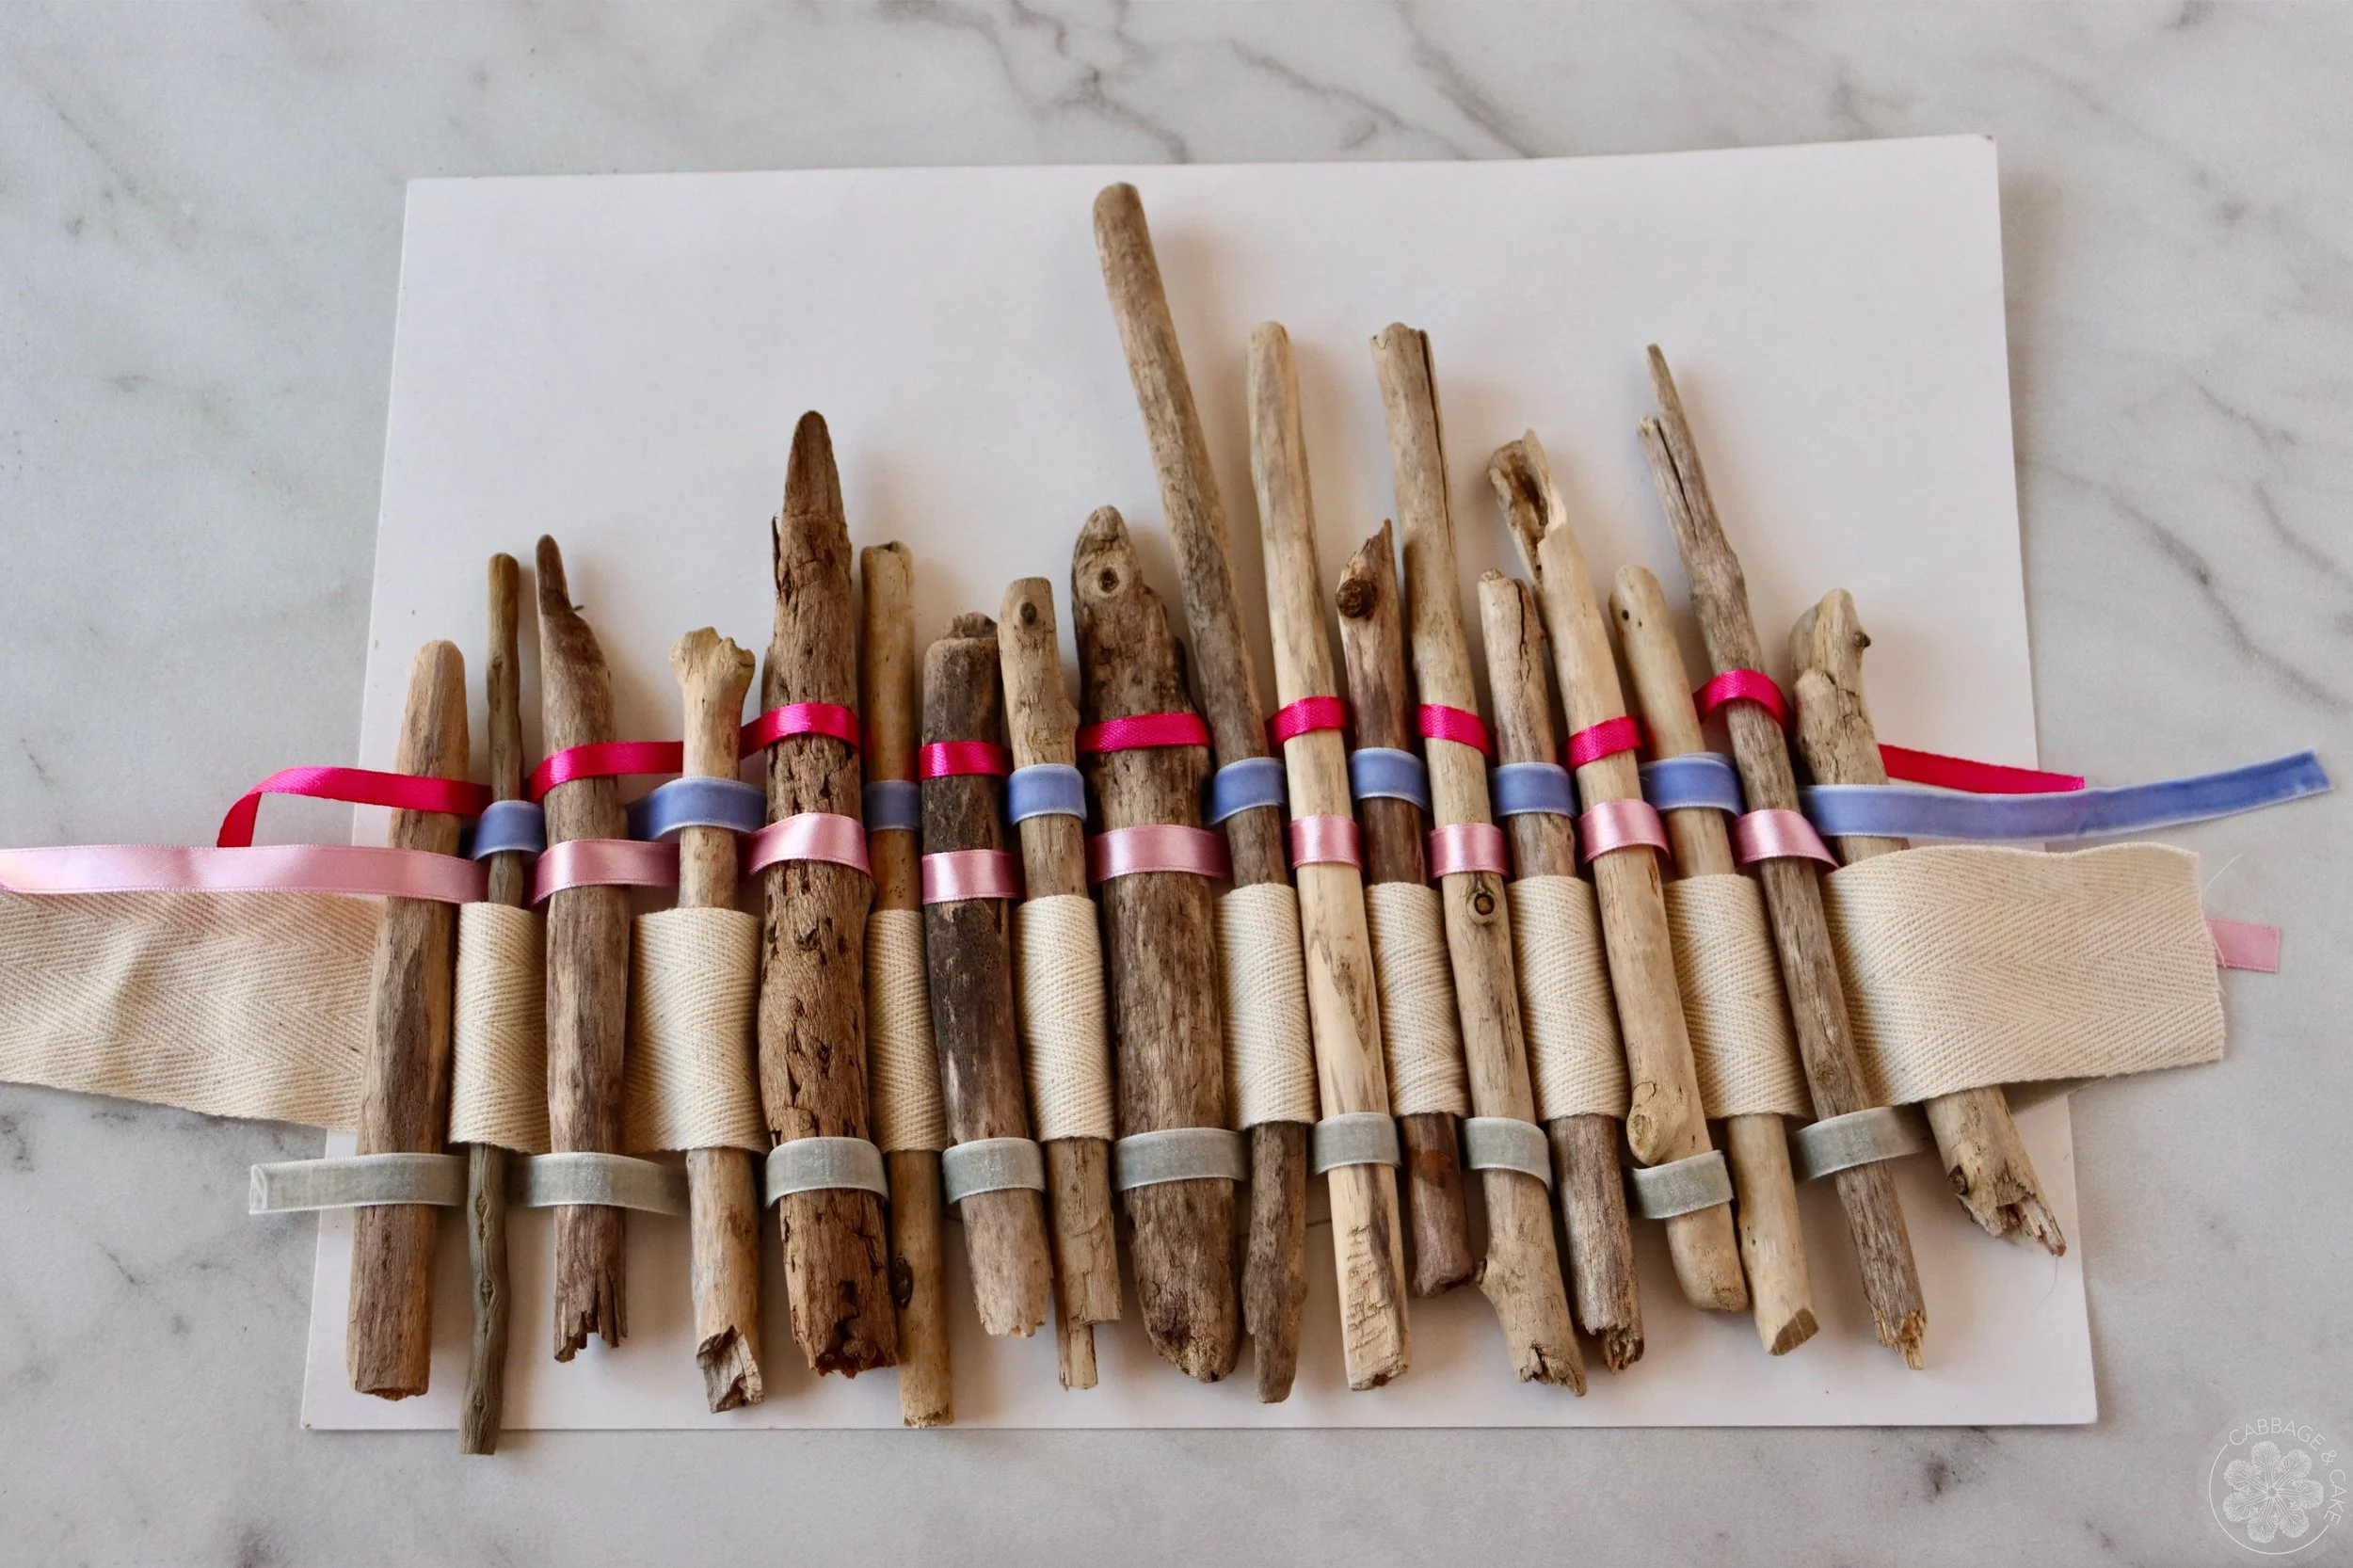
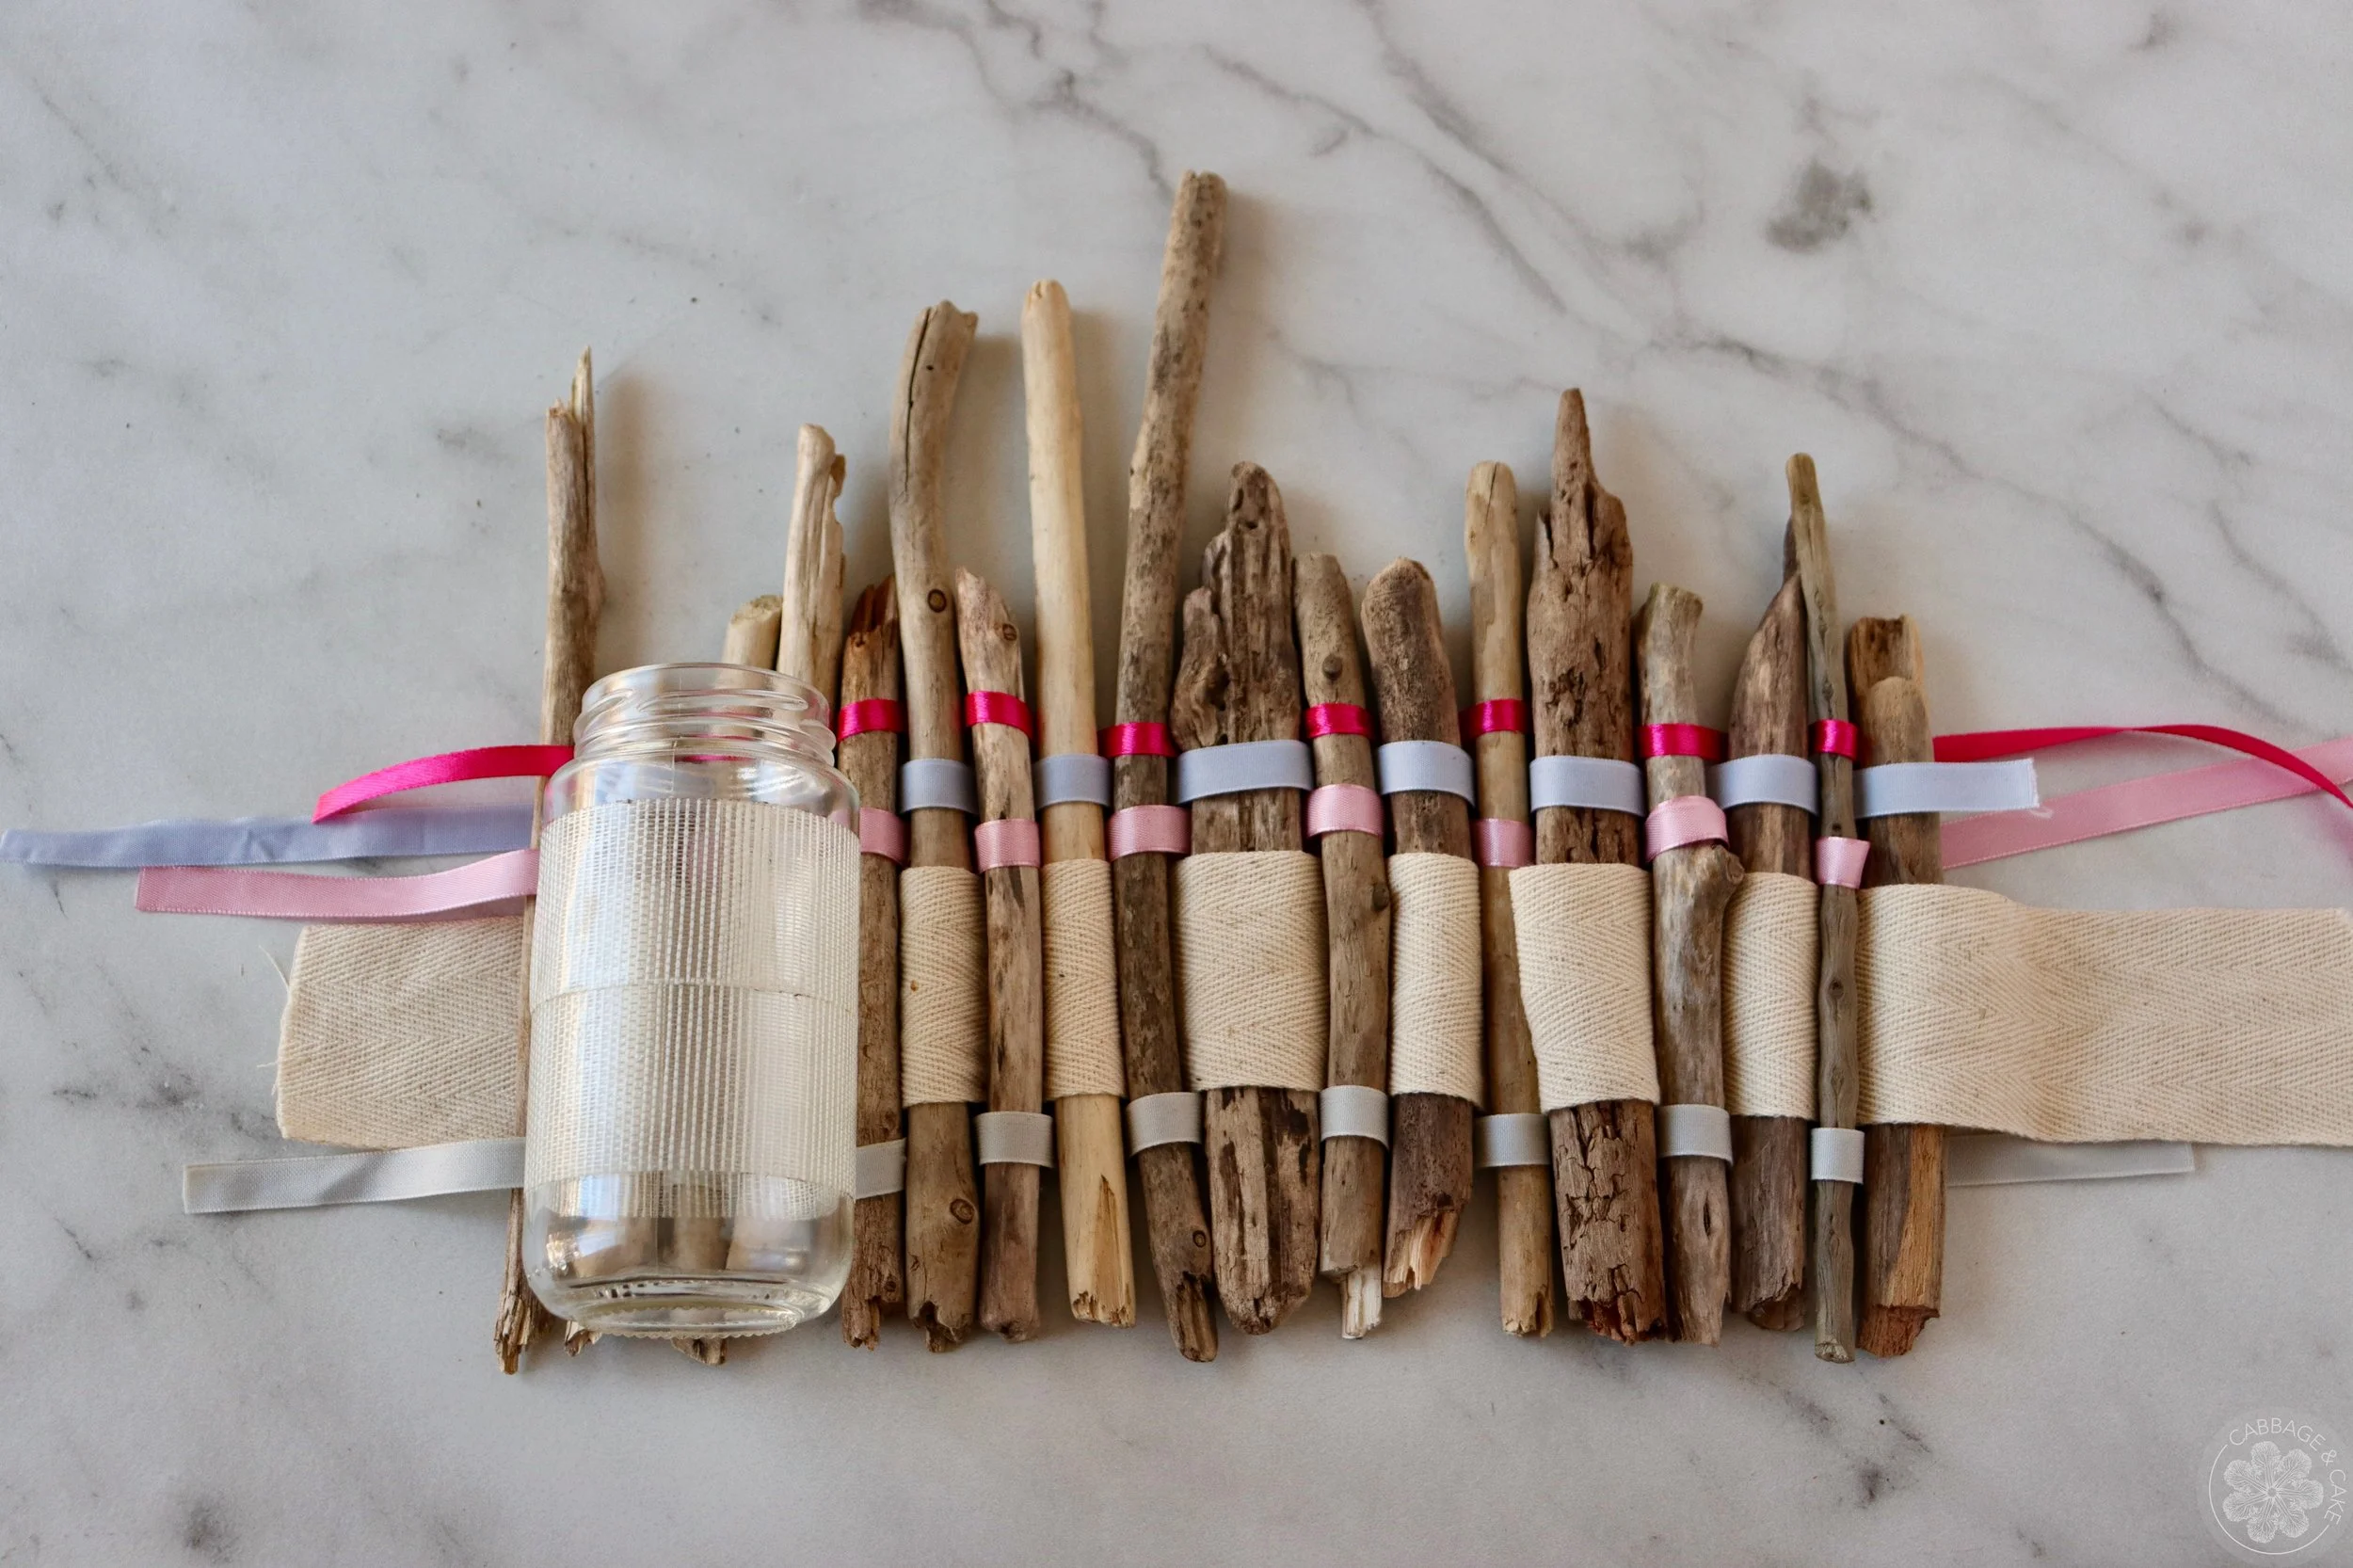
Lay out your design before you fasten the sticks together to get an idea about its size and shape.
Ensure the vase has a good even stand on the surface without wobbling.
Follow your artistic instincts, play around with different colours and materials and enjoy the creative process just as much as the end result.
MATERIALS AND TOOLS YOU WILL NEED
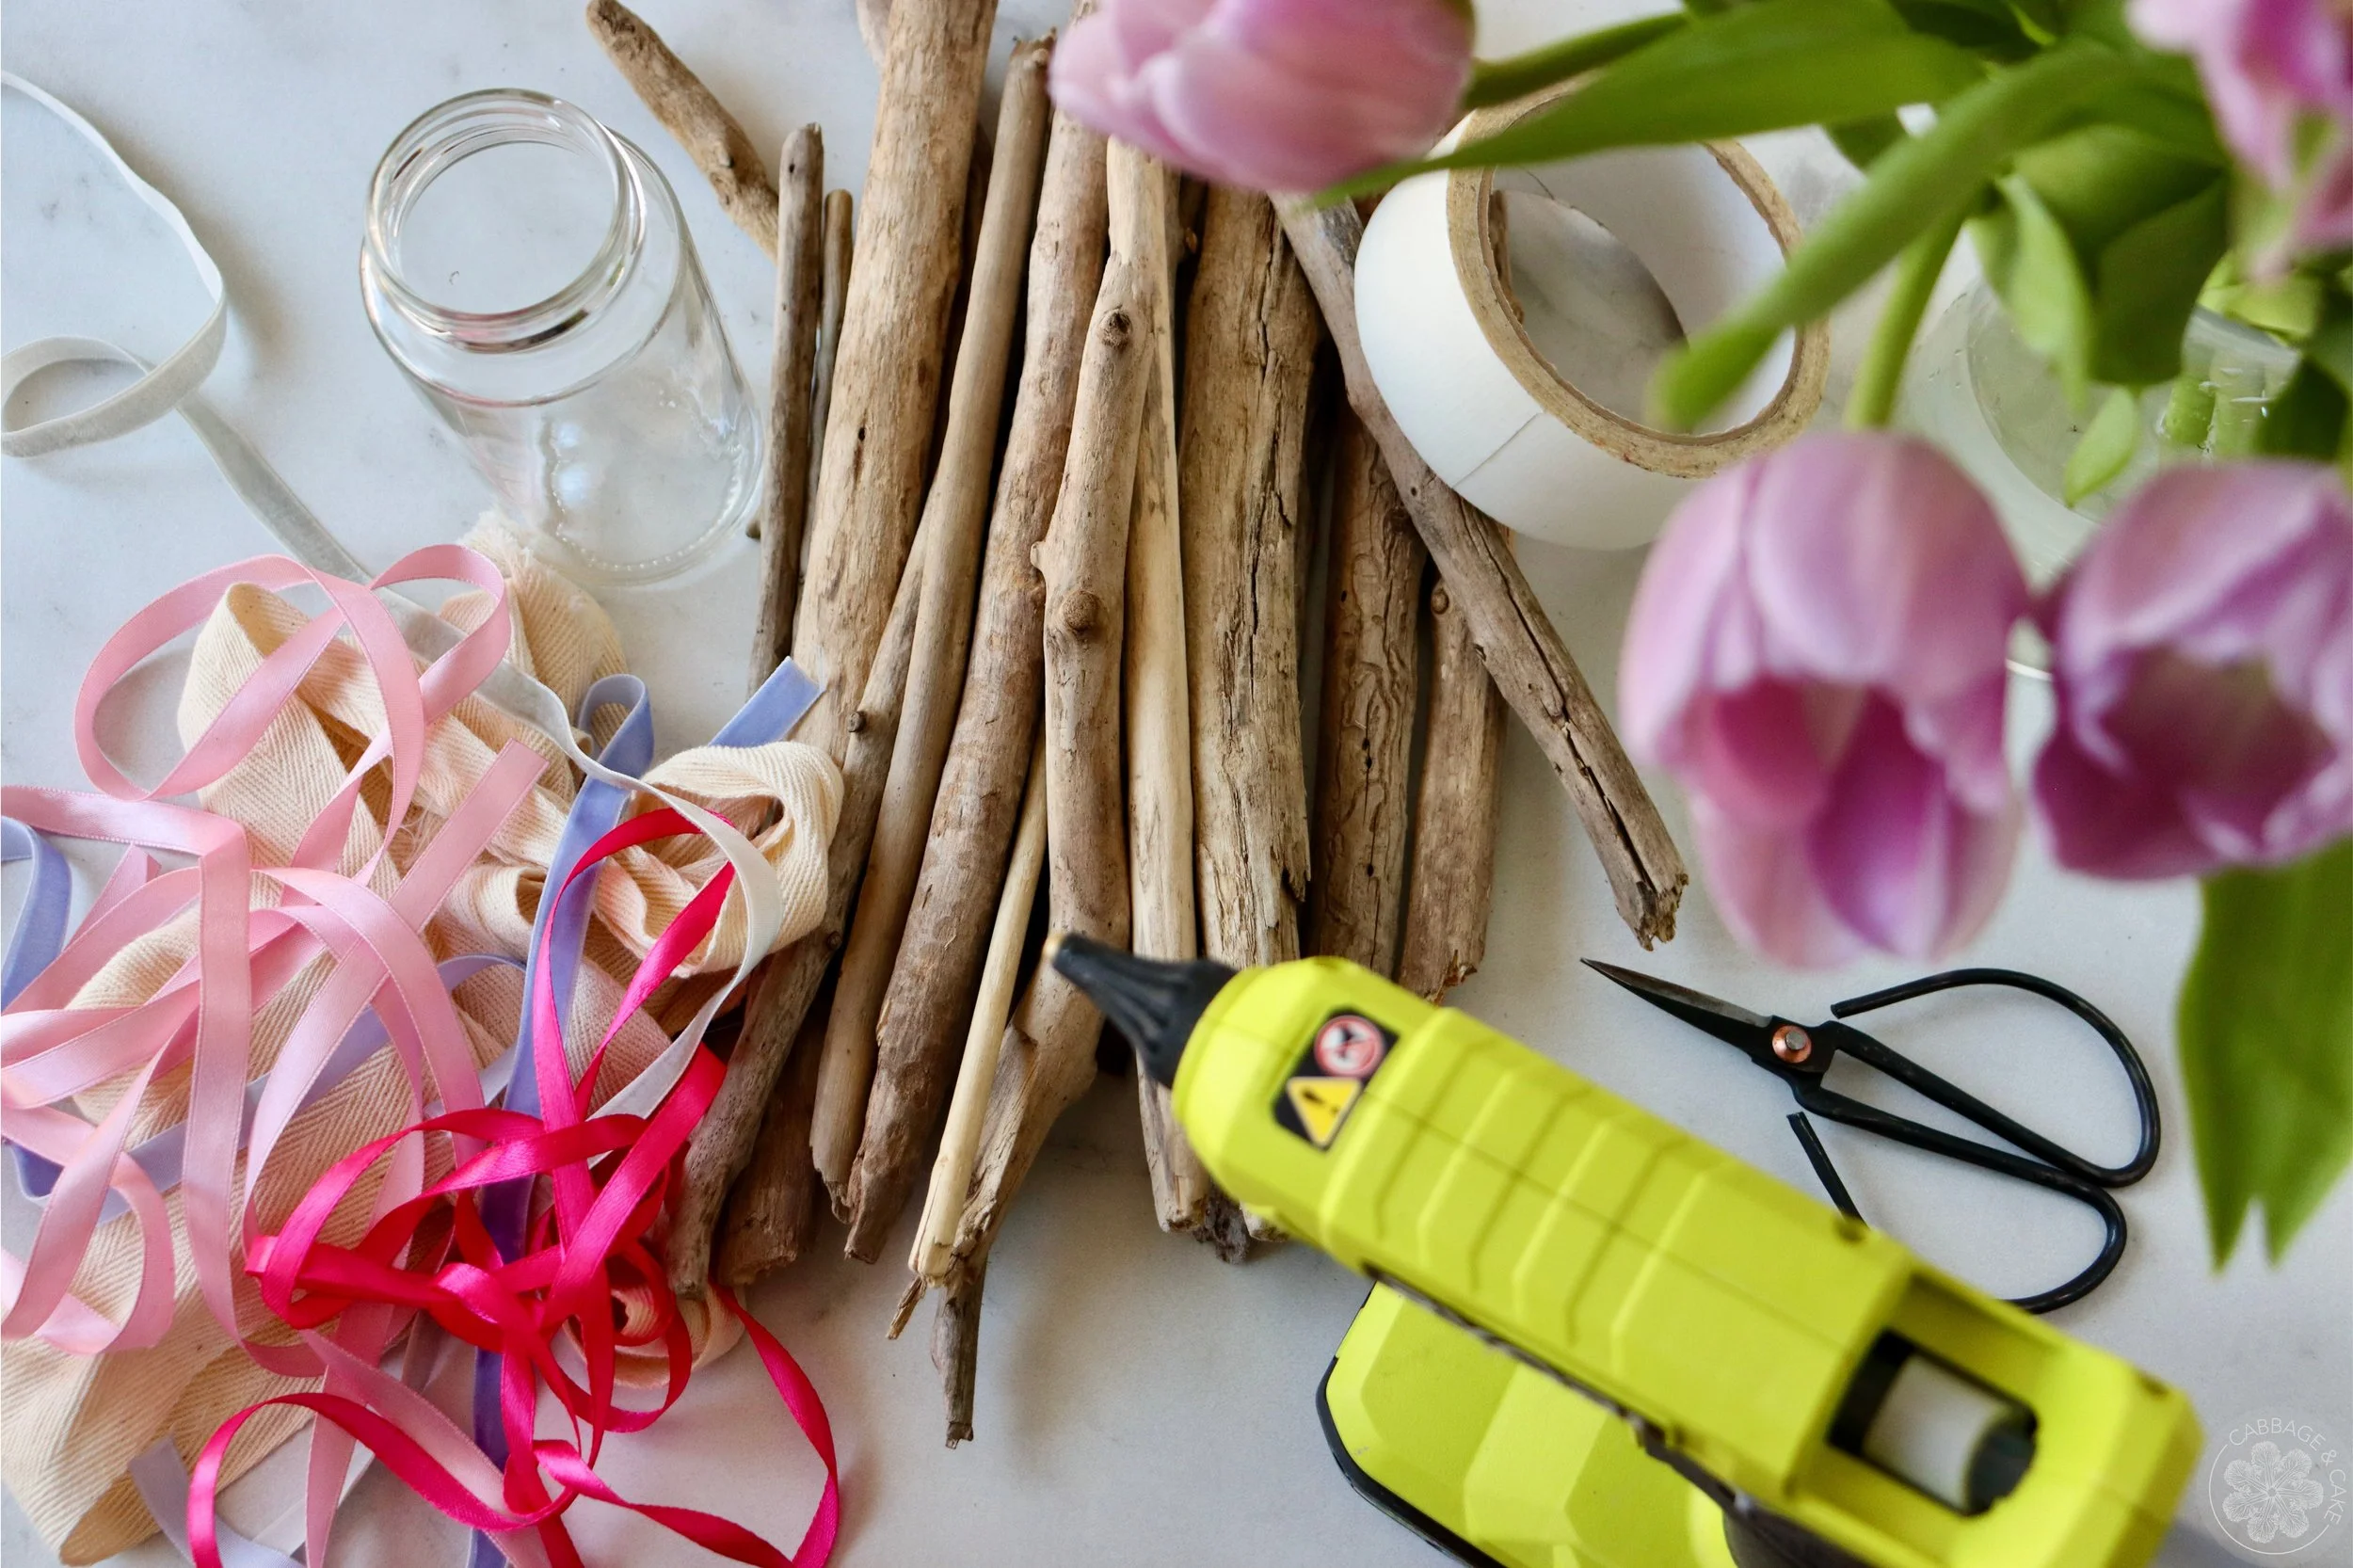
small to medium driftwood pieces
container big enough to fit your driftwood pieces + bleach (optional)
base container like jar, tin or glass vase
different coloured ribbons, twine or strings
scissors
double sided tape
hot glue gun with glue sticks
INSTRUCTIONS STEP BY STEP
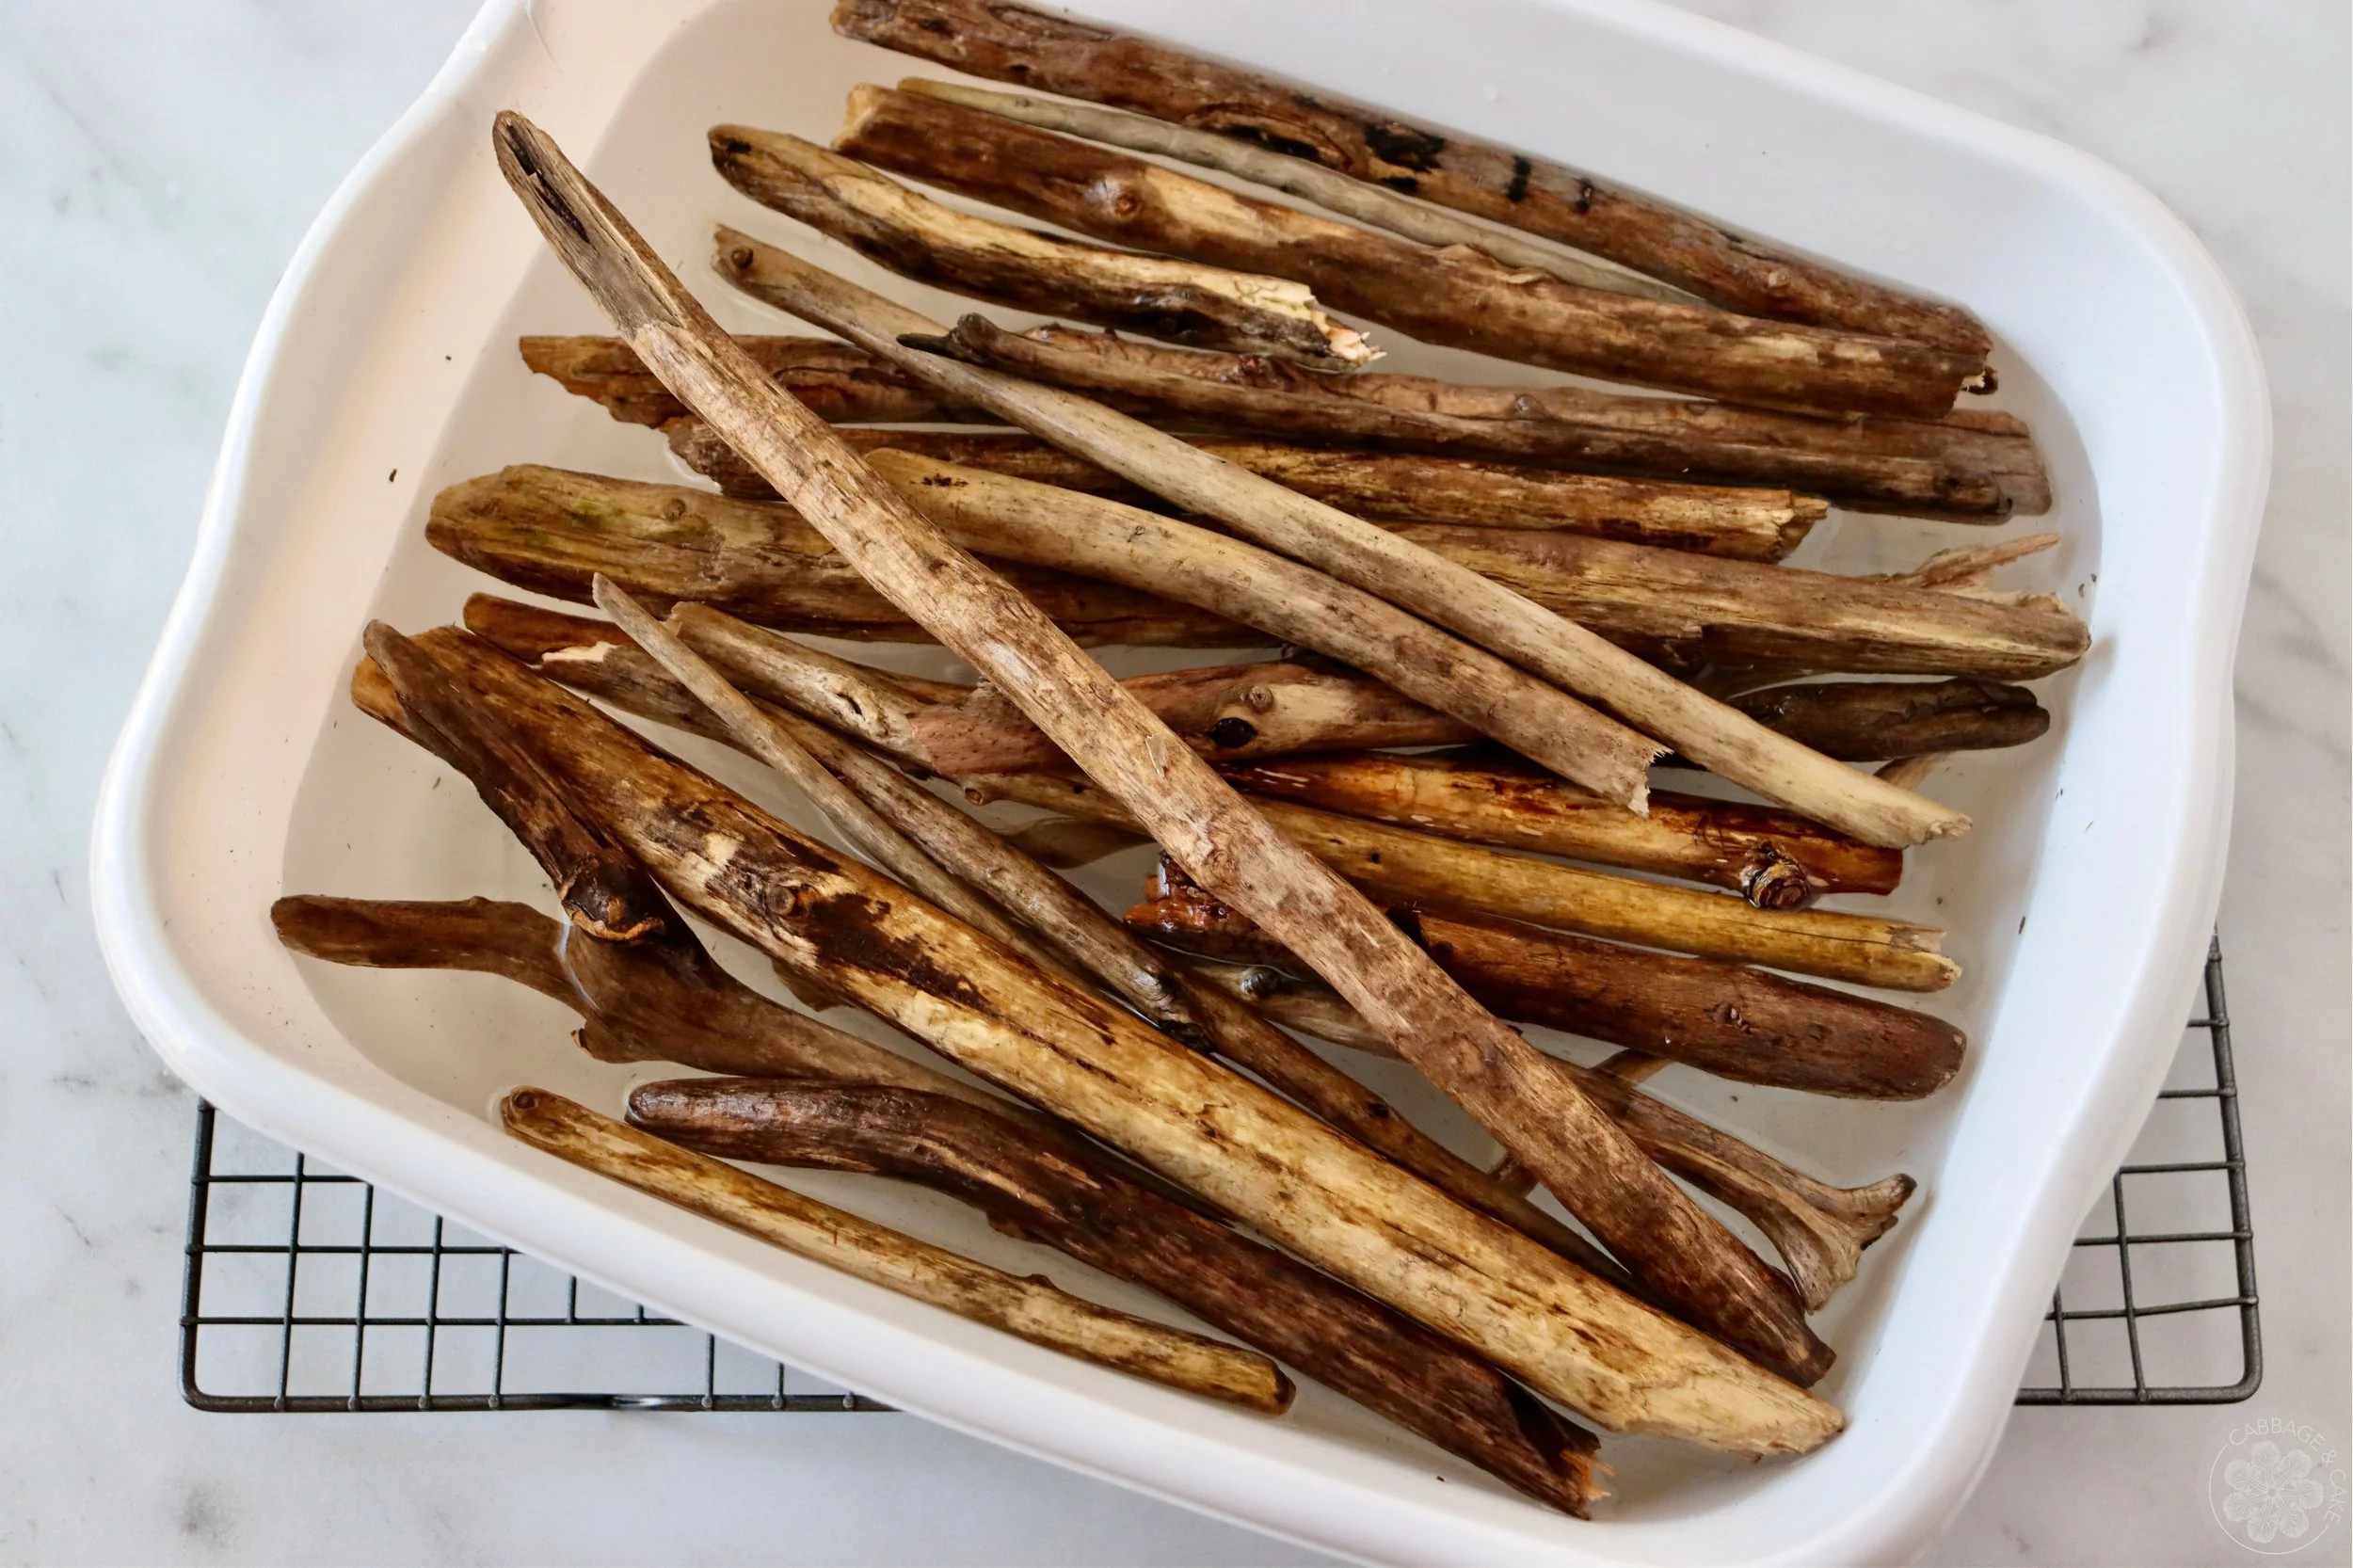
Prep your wood and clean it by brushing off any debris, boiling in water or soaking overnight in a bleach solution (1:10 one part bleach, ten parts water). Make sure to rinse and dry the wood completely before starting your project.
Paint, whitewash and dry or leave your driftwood sticks natural.
Lay out your design to make sure you like the look of it and you have enough material to cover your container.
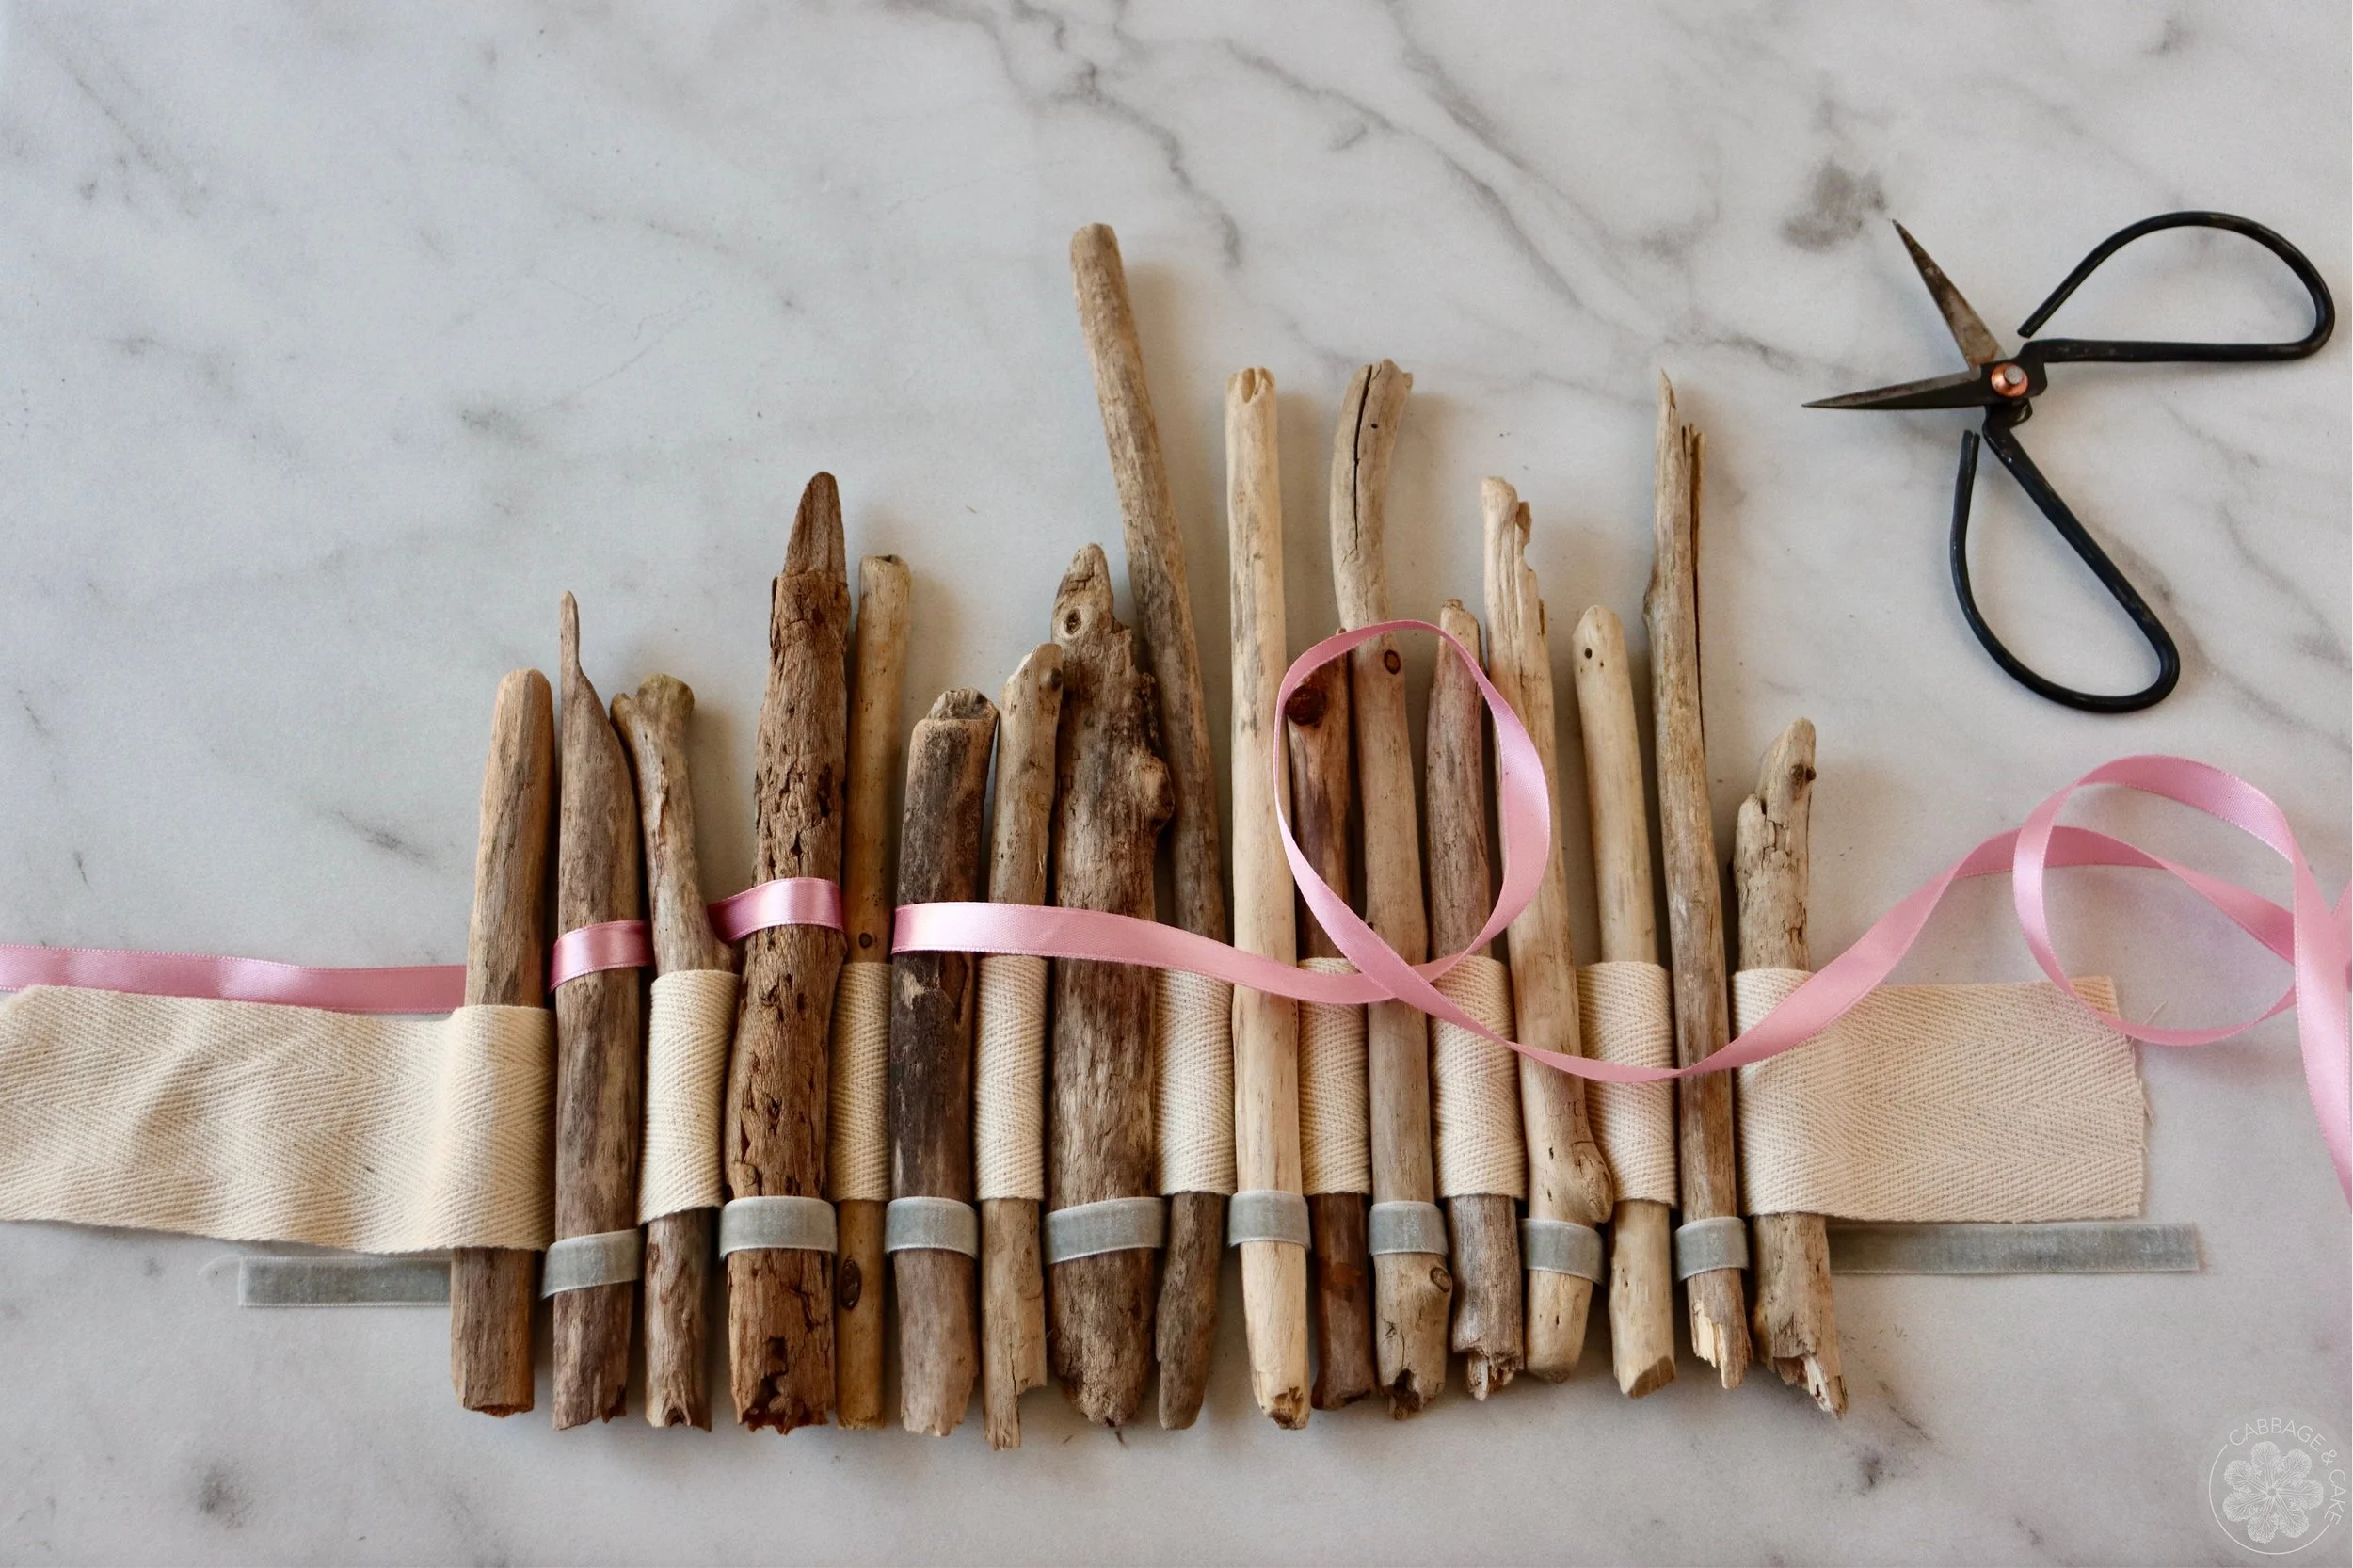
Weave your driftwood pieces together with your ribbons by alternating going up and down. Keep the sticks close together and straight on the bottom to ensure an even stand for your vase later.
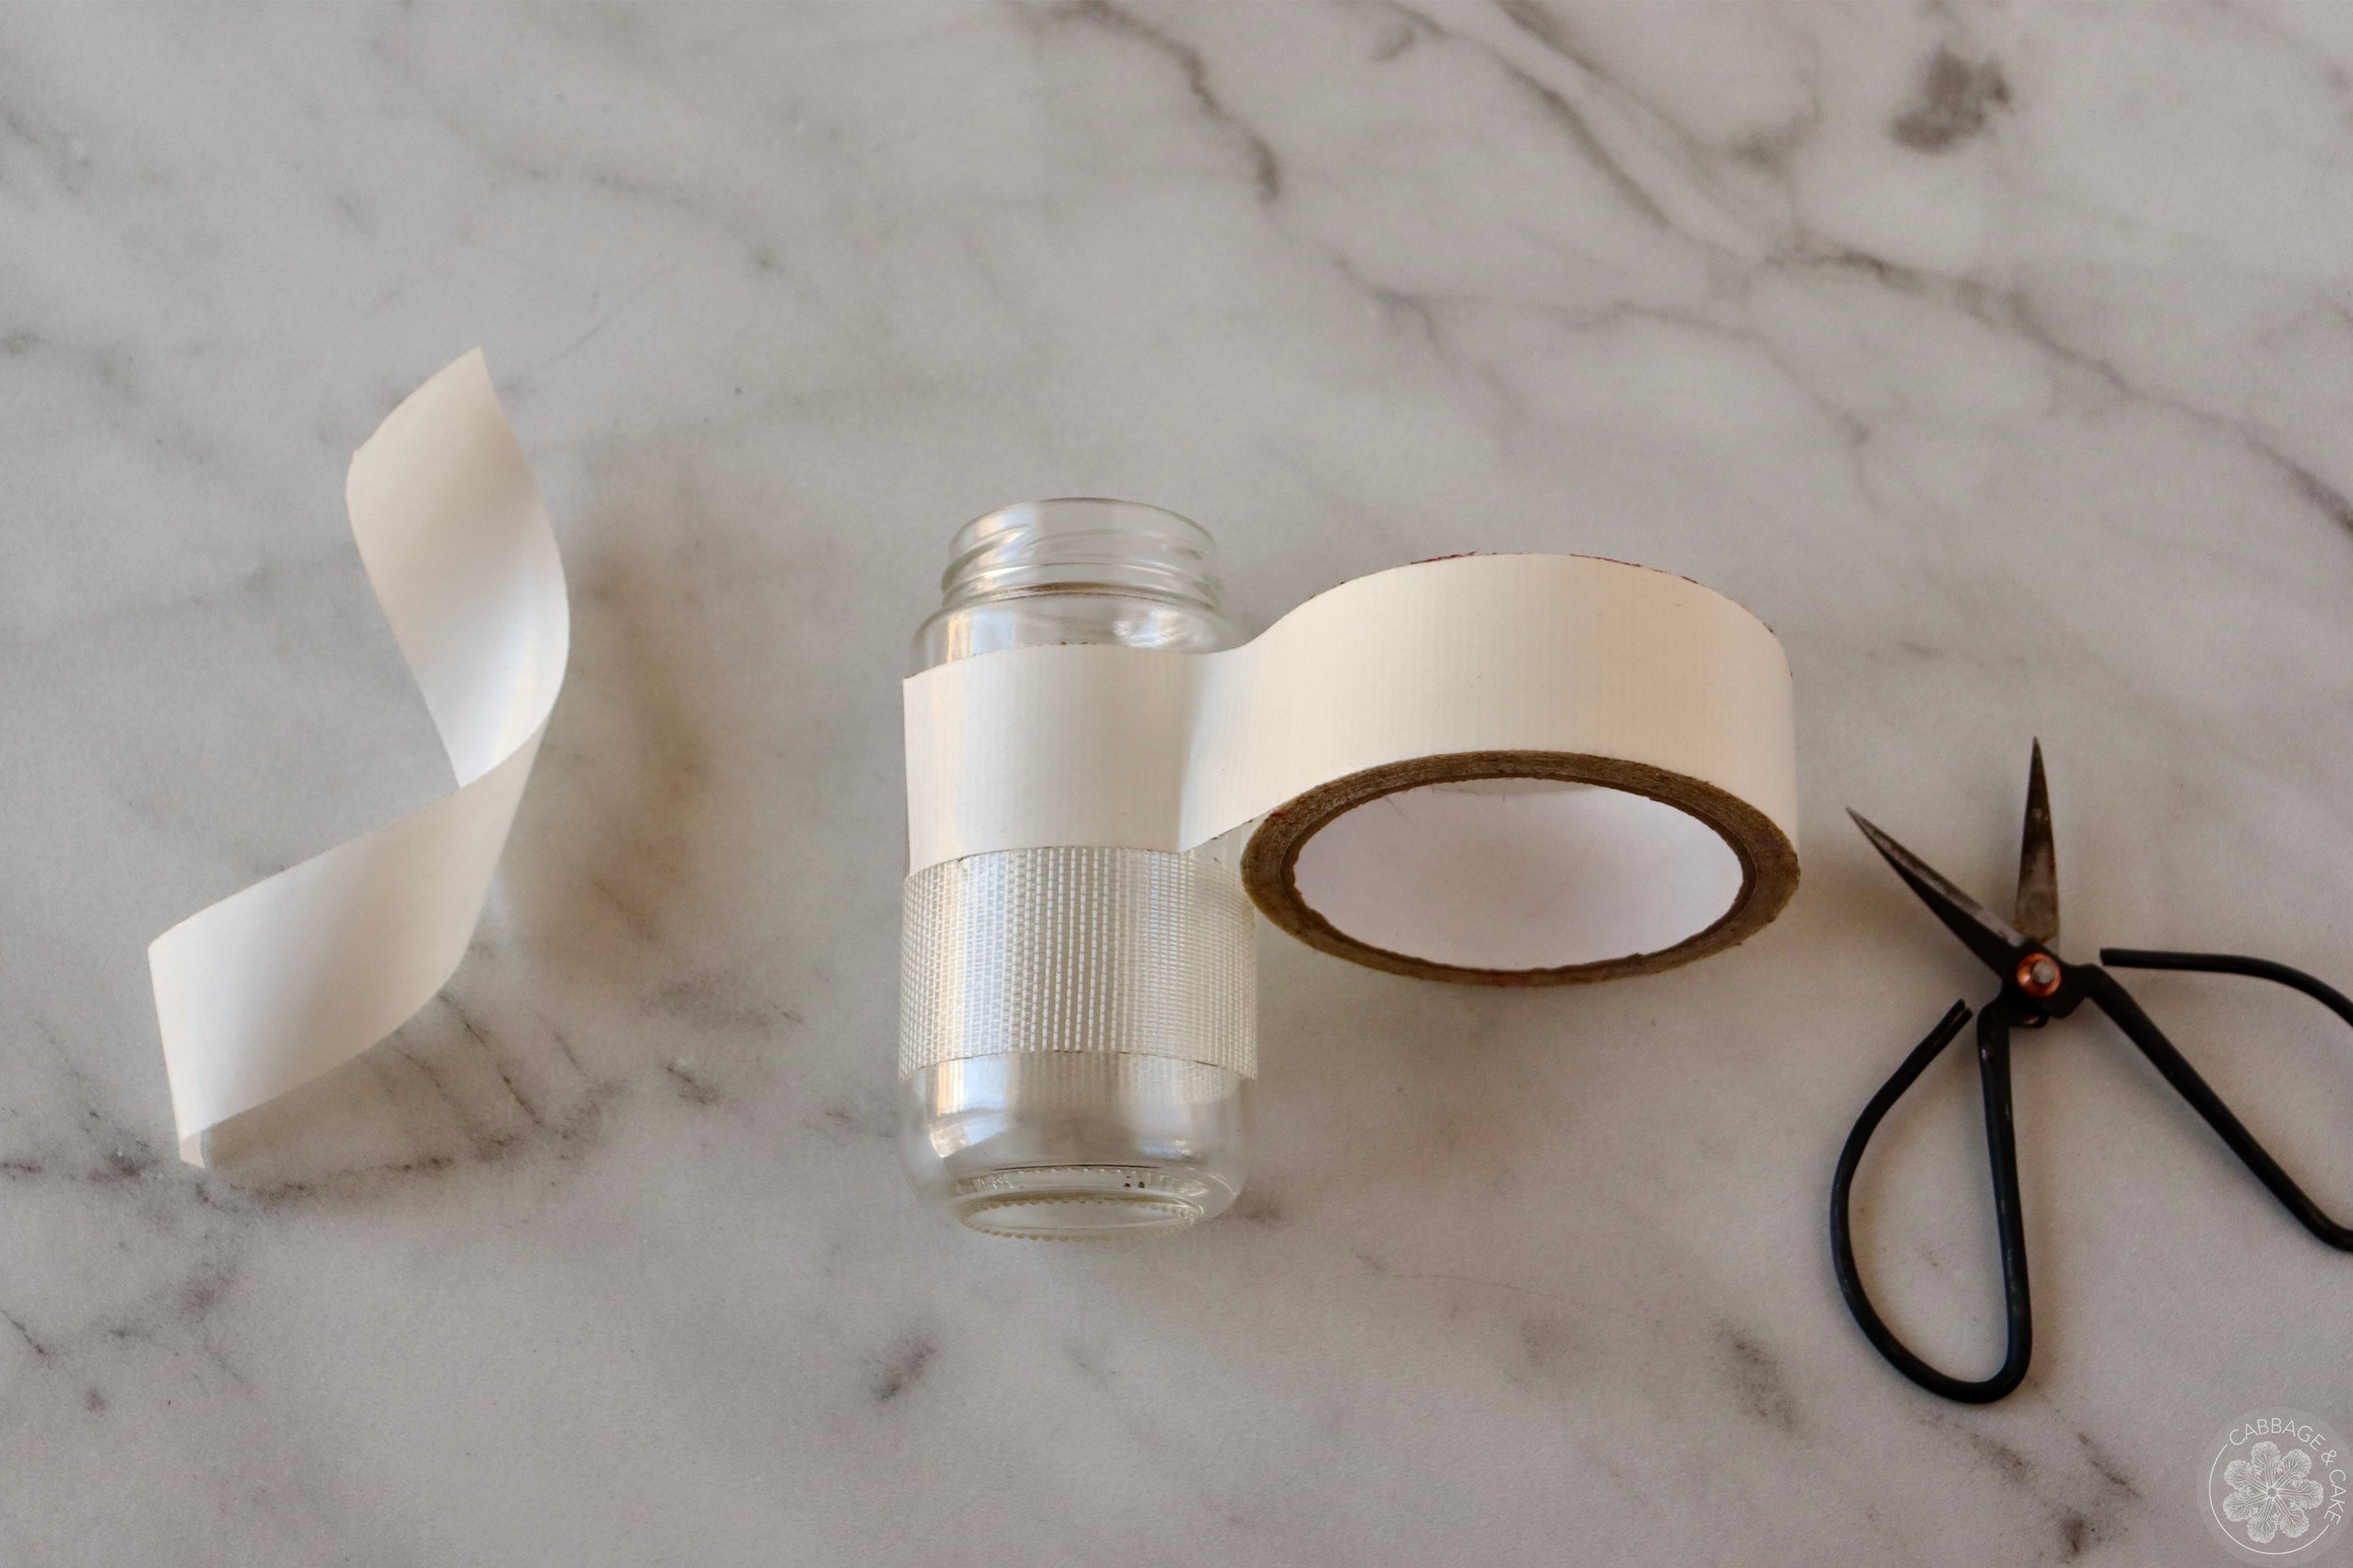
Cover your jar with double sided tape.
If you use one-sided ribbons, you might want to flip your woven sticks over. Just slide a piece of paper or cardboard underneath and another one on top to easily flip it on its back side.
Set your jar covered in double sided tape on your woven driftwood sticks and carefully roll it around.
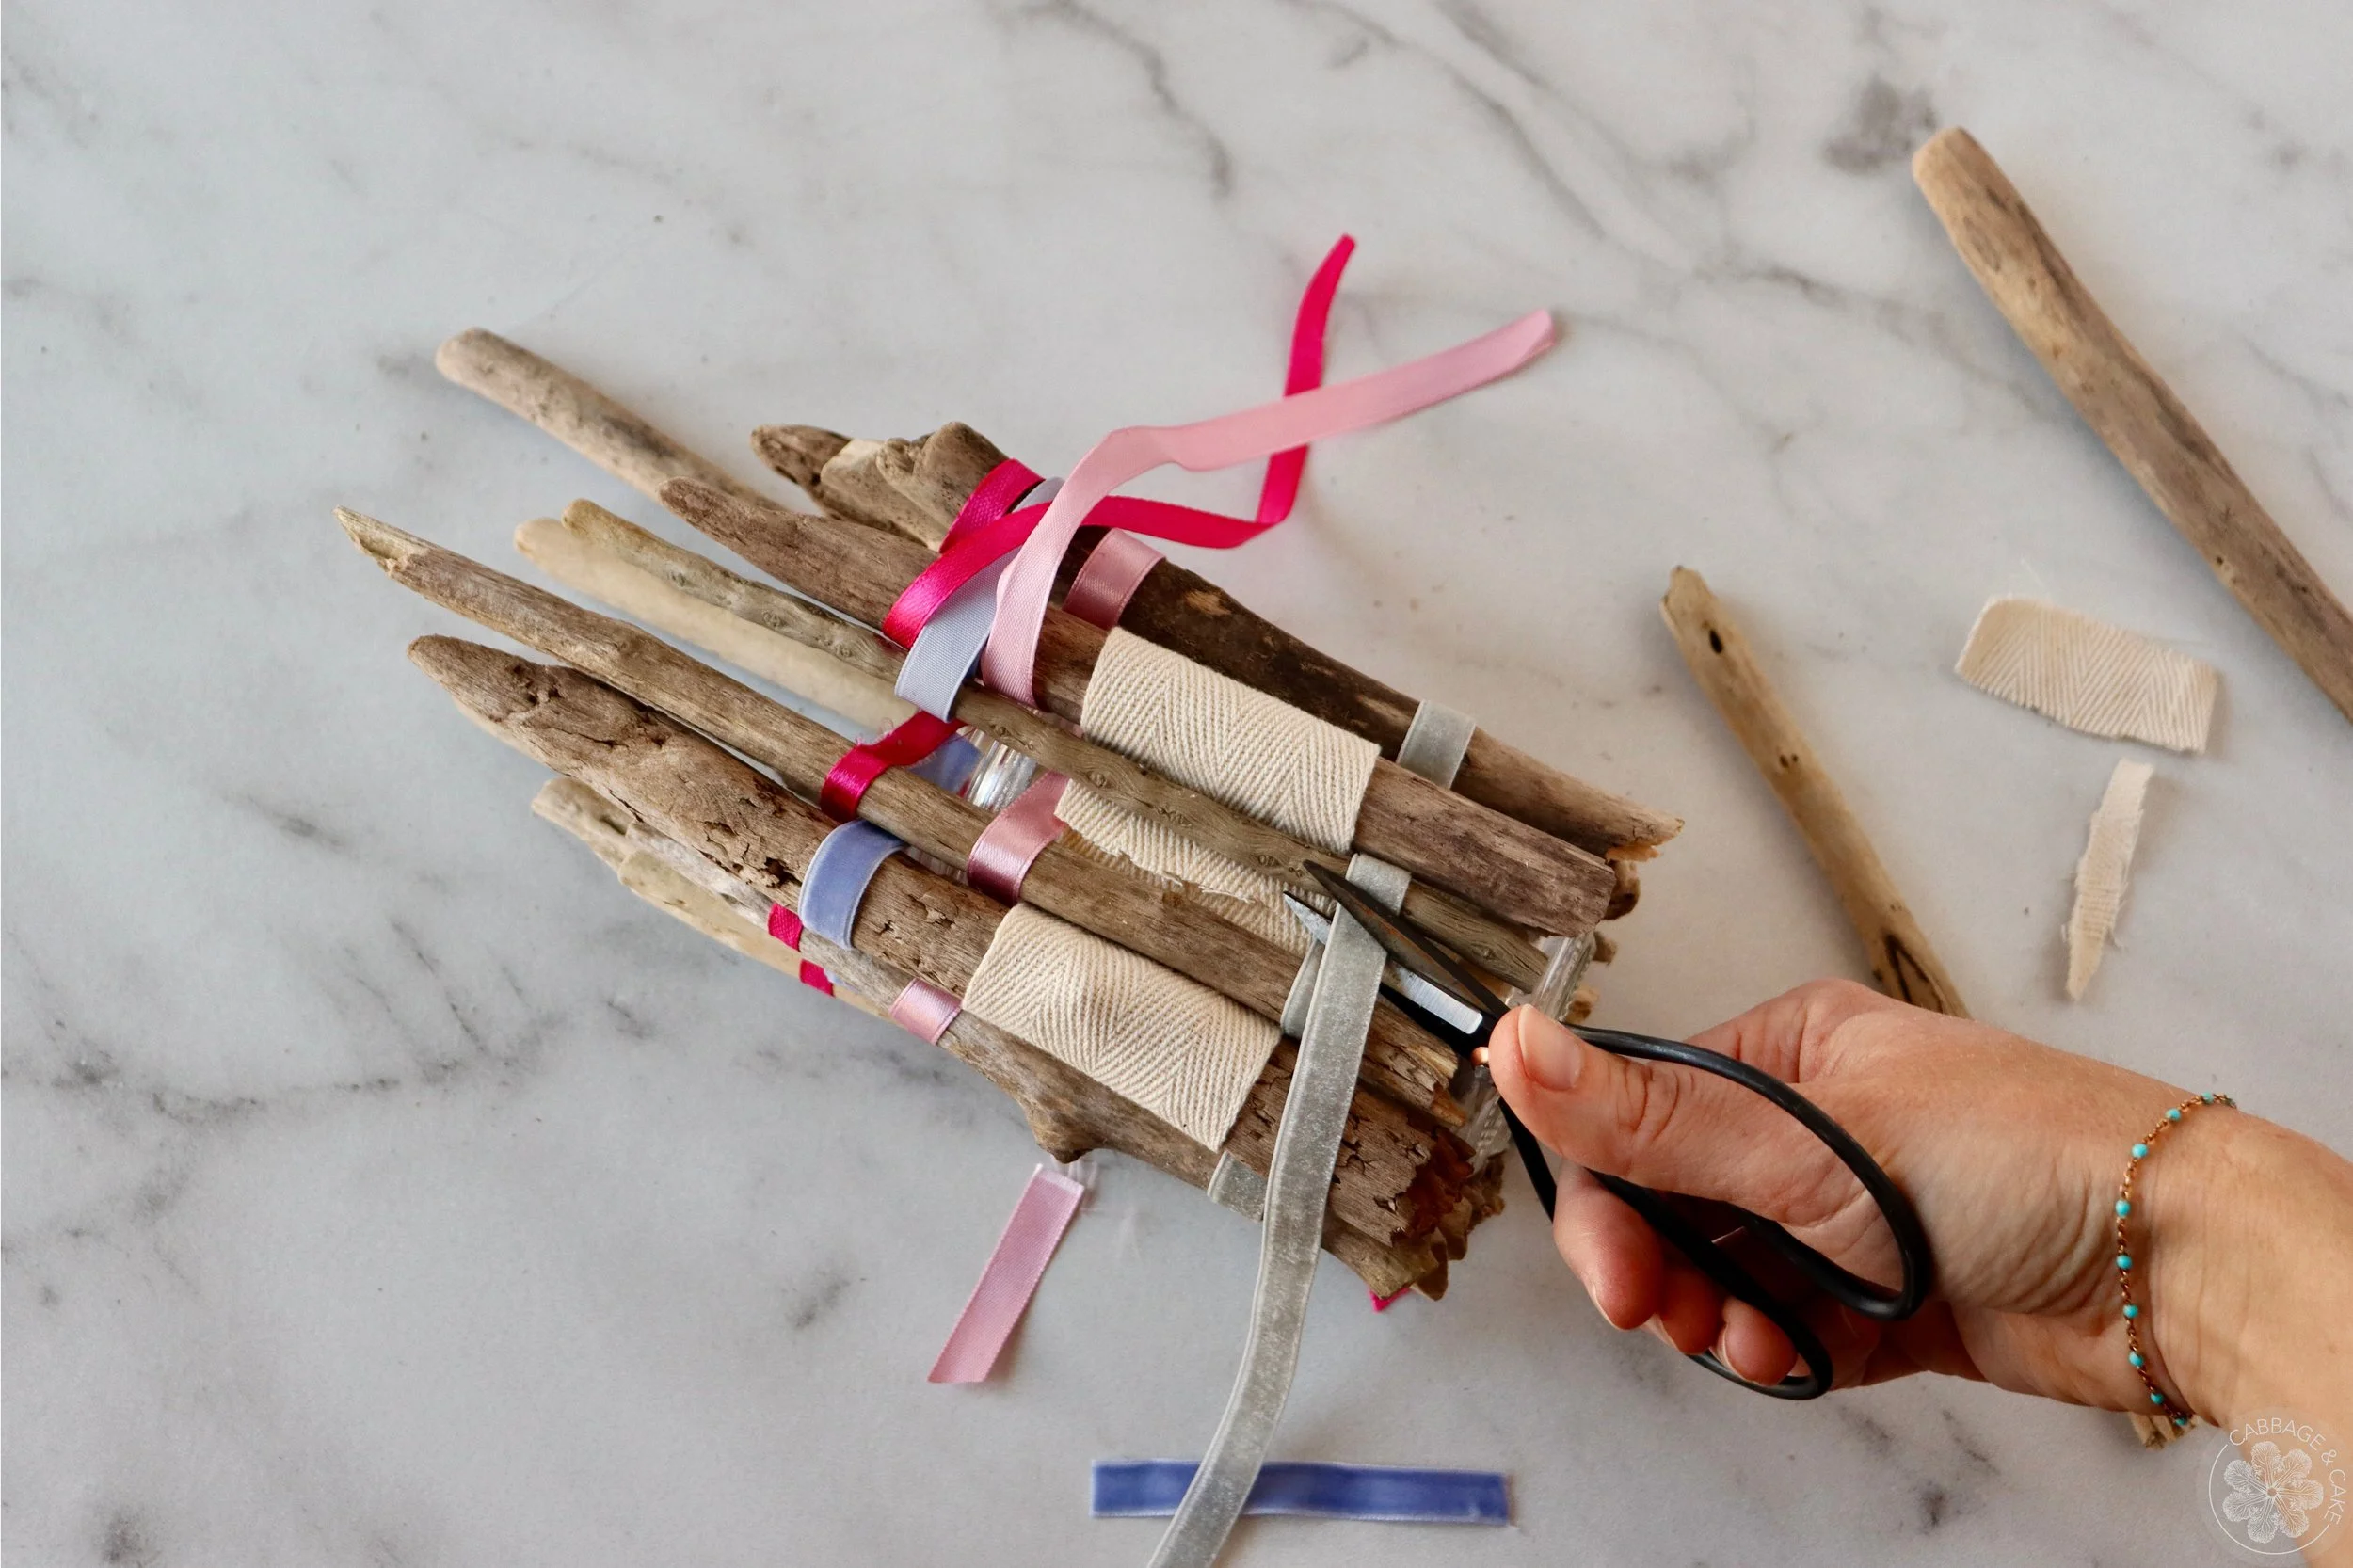
Cut off any long ribbon ends and leave enough to tuck it in later.
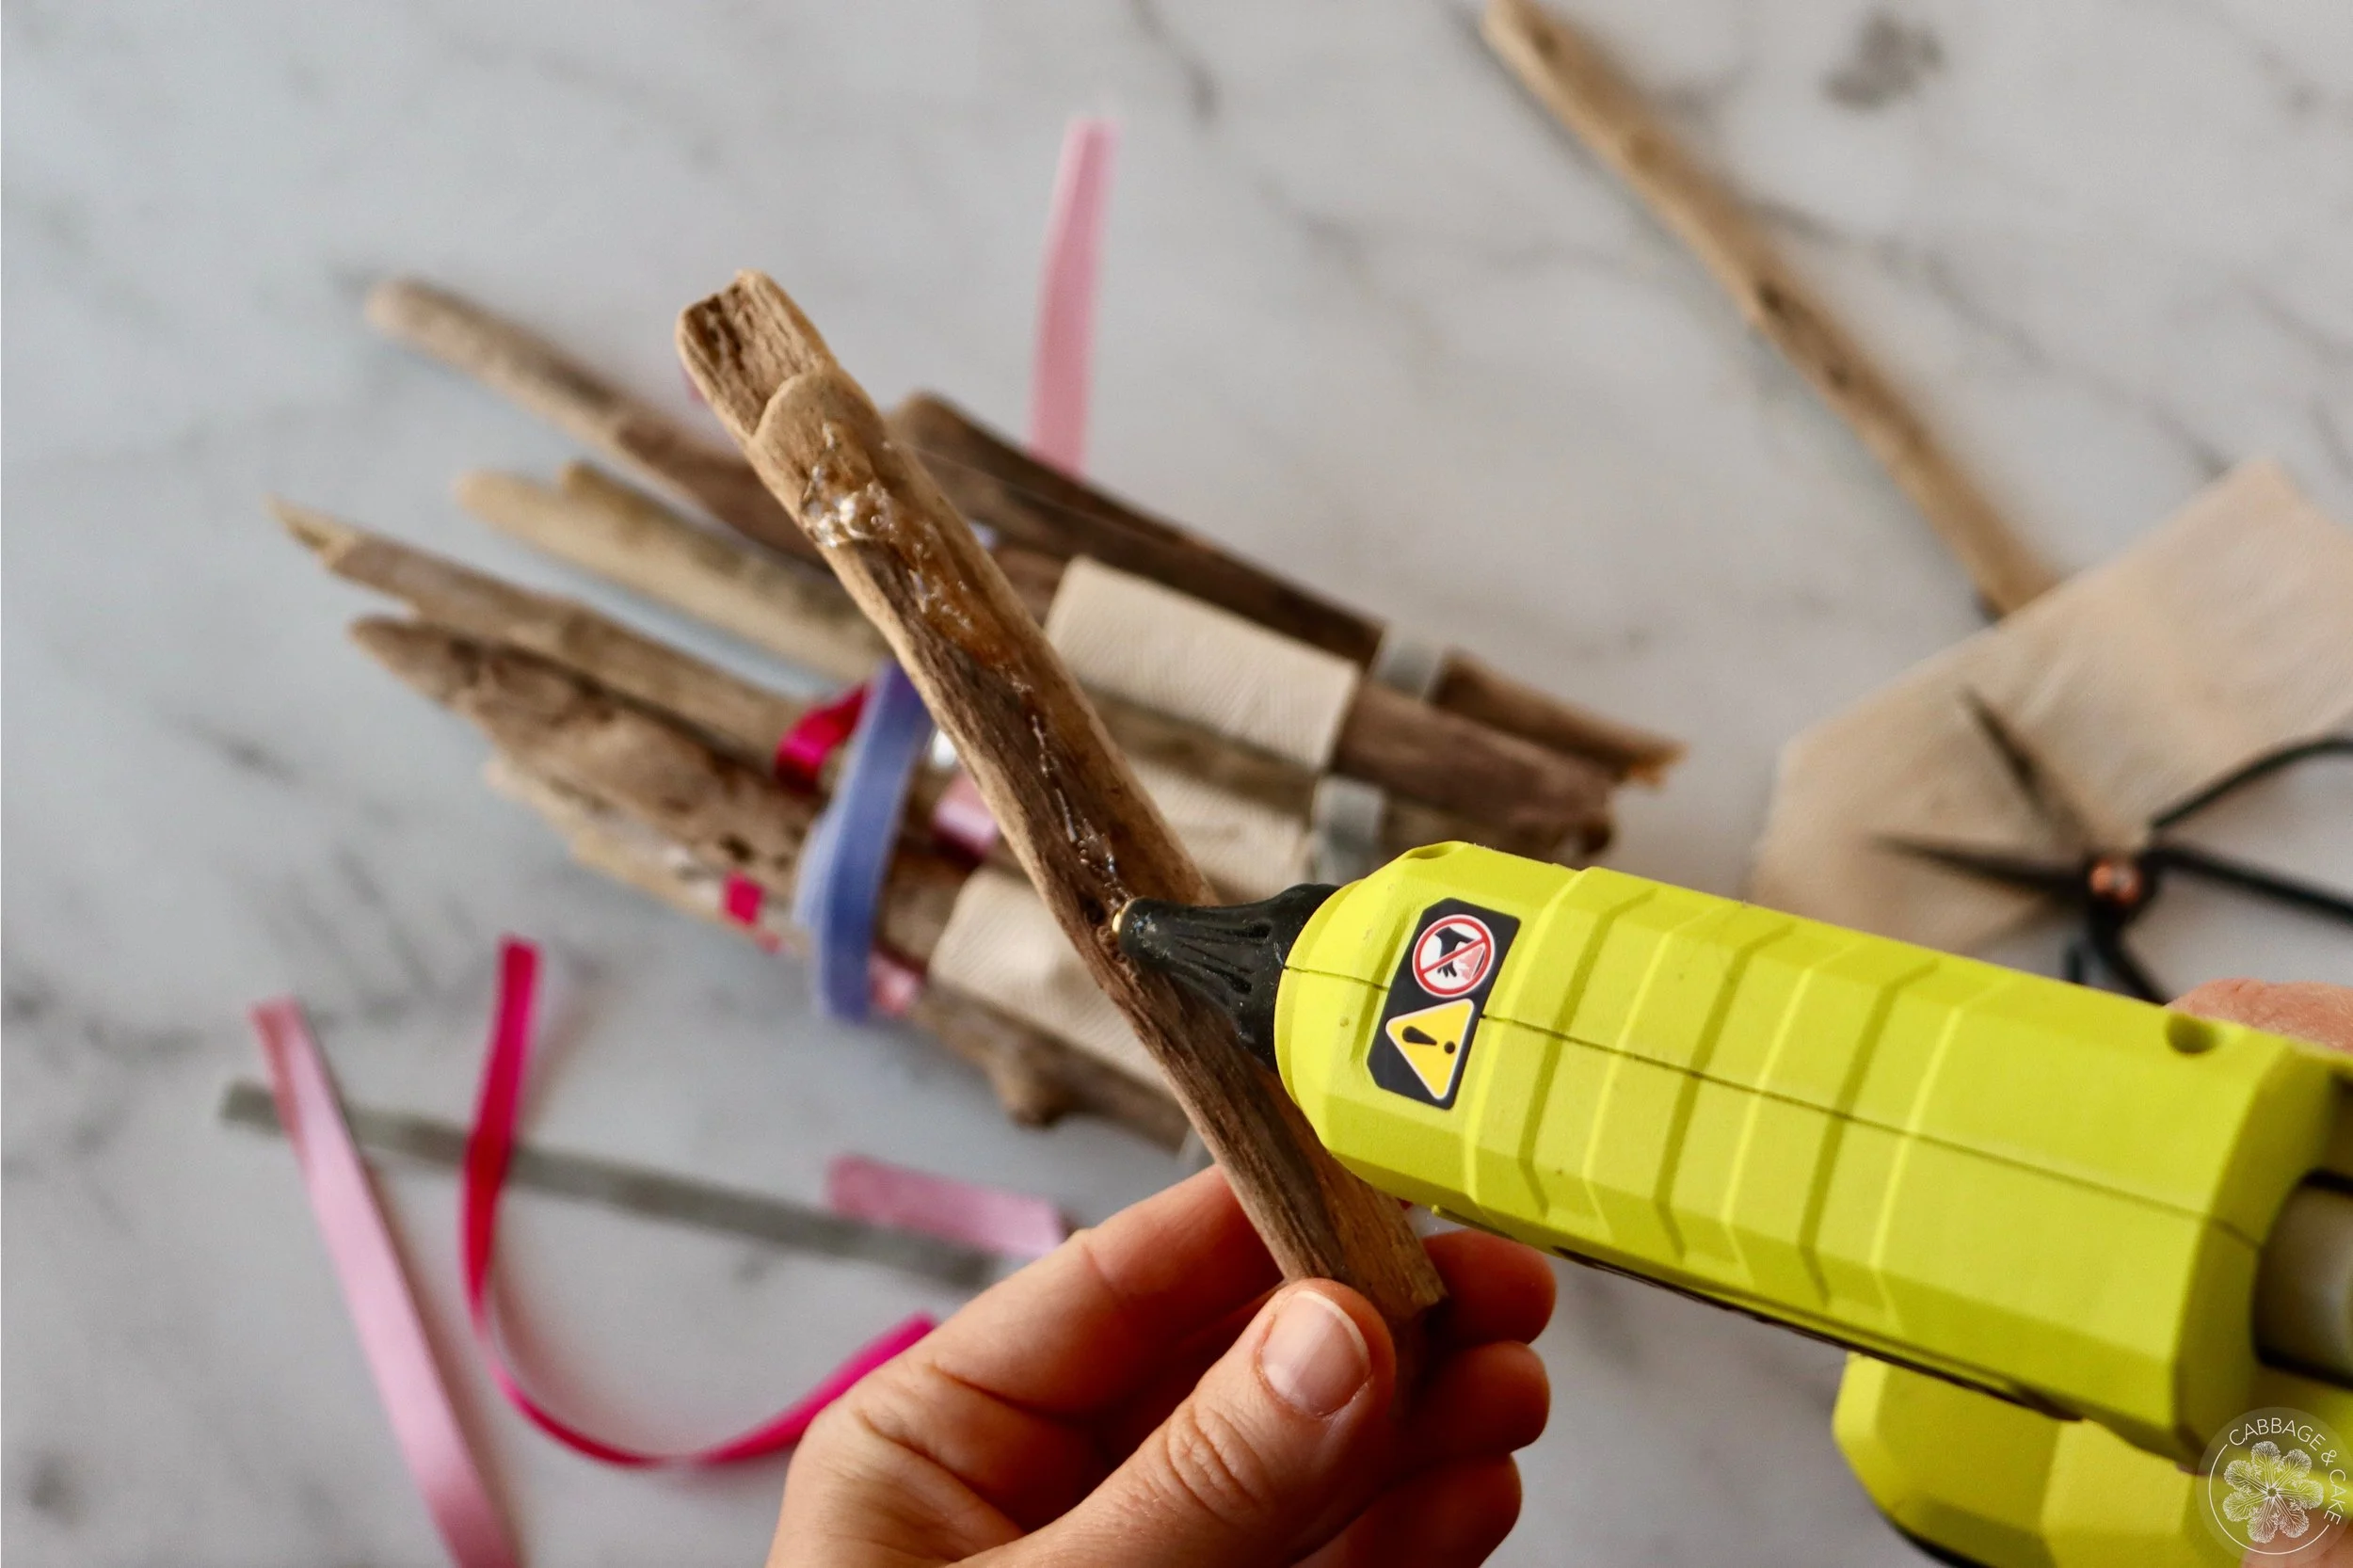
Use some hot glue or an extra piece of tape to fasten your last driftwood piece onto the jar.
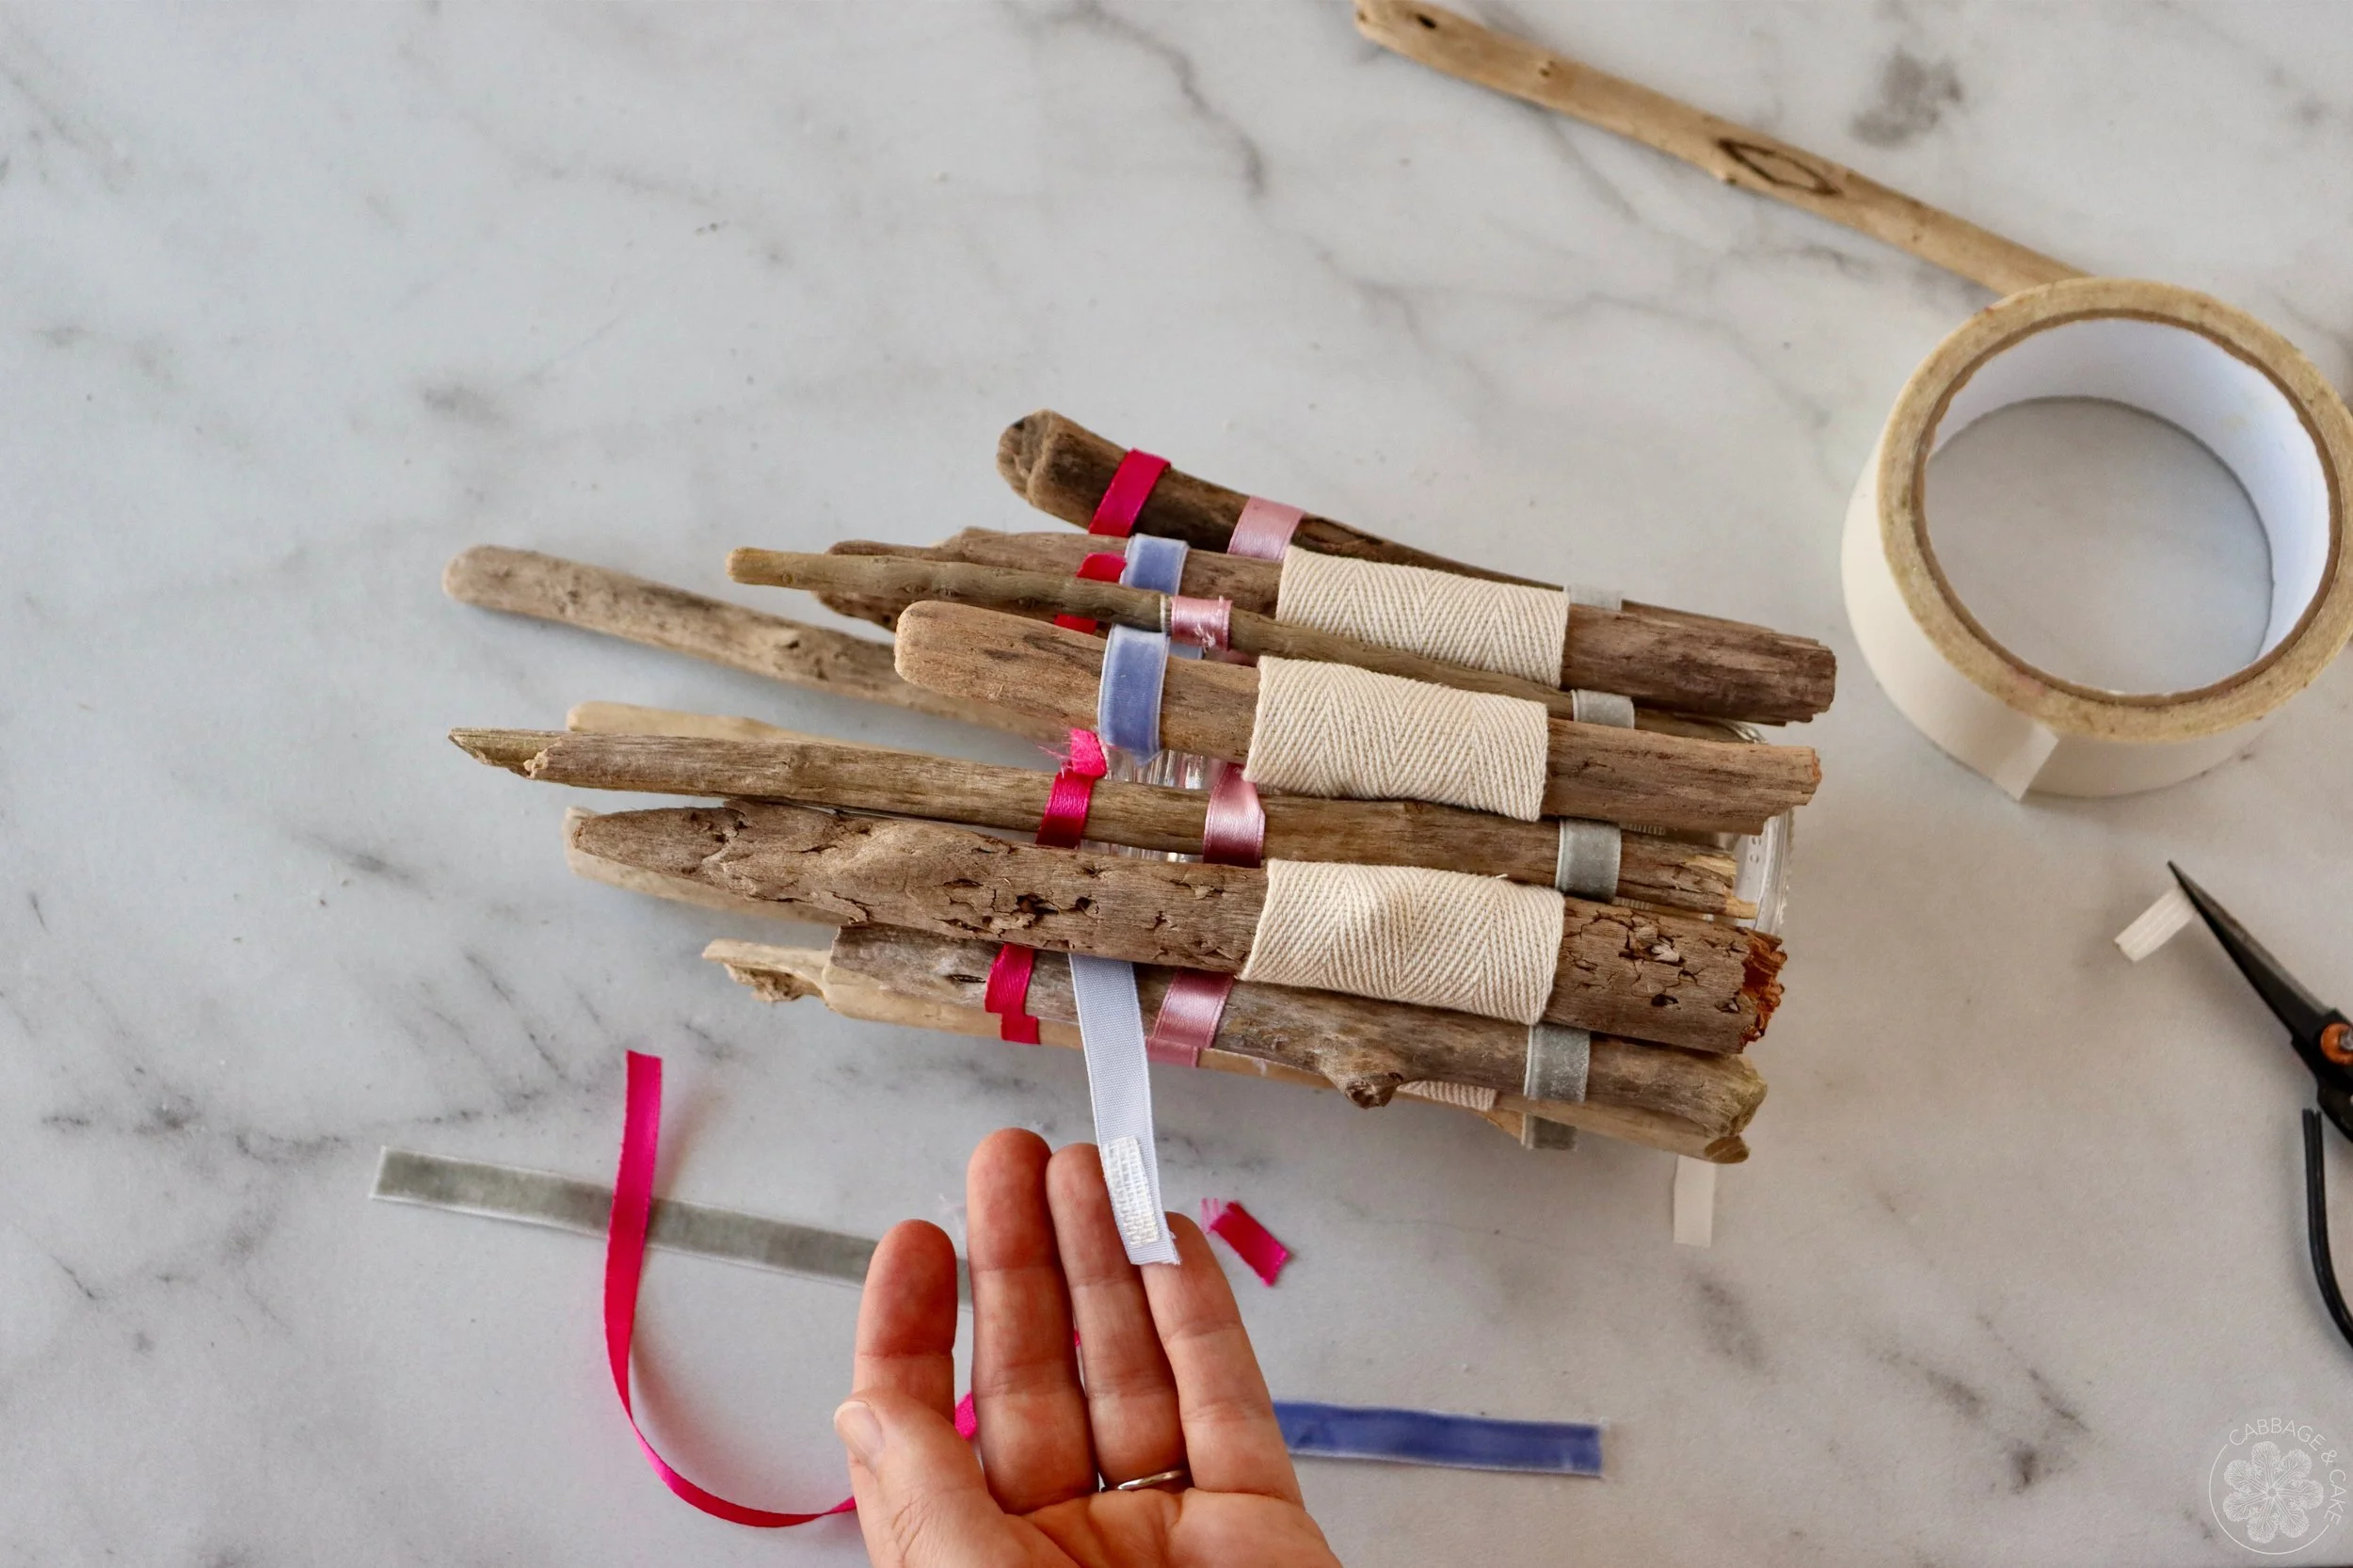
Tuck in the ends of your ribbons and fasten them with little pieces of tape or glue.
Fill your DIY driftwood vase with water and some pretty spring flowers and enjoy!
DIY DRIFTWOOD VASE
by Julia
Springtime is great for finding driftwood! Go to your favourite beach or
riverbank to collect some driftwood sticks, weave them together with some pretty colourful ribbons and strings, and turn a reused jar or tin into a happy vase for your favourite spring flowers.
MATERIALS
small to medium driftwood pieces
container big enough to fit driftwood + bleach (optional)
base container like jar, tin or glass vase
different coloured ribbons, twine or strings
scissors
double sided tape
hot glue gun with glue sticks
INSTRUCTIONS
Prep your wood and clean it by brushing off any debris, boiling in water or soaking overnight in a bleach solution (1:10 one part bleach, ten parts water). Make sure to rinse and dry the wood completely before starting your project.
Paint, whitewash and dry or leave your driftwood sticks natural.
Lay out your design to make sure you like the look of it and you have enough material to cover your container.
Weave your driftwood pieces together with your ribbons by alternating going up and down. Keep the sticks close together and straight on the bottom to ensure an even stand for your vase later.
Cover your jar with double sided tape.
If you use one-sided ribbons, you might want to flip your woven sticks over. Just slide a piece of paper or cardboard underneath and another one on top to easily flip it on its back side.
Set your jar covered in double sided tape on your woven driftwood sticks and carefully roll it around.
Cut off any long ribbon ends and leave enough to tuck it in later.
Use some hot glue or an extra piece of tape to fasten your last driftwood piece onto the jar.
Tuck in the ends of your ribbons and fasten them with little pieces of tape or glue.
Fill your DIY driftwood vase with water and some pretty spring flowers and enjoy!